A Fresh Take on a Hanging Gallery Wall
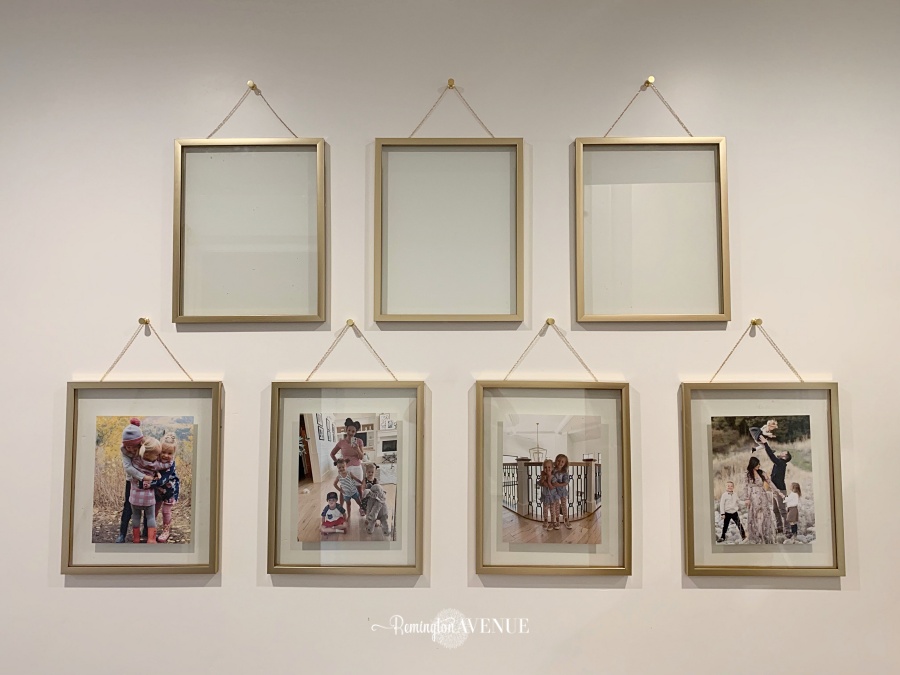
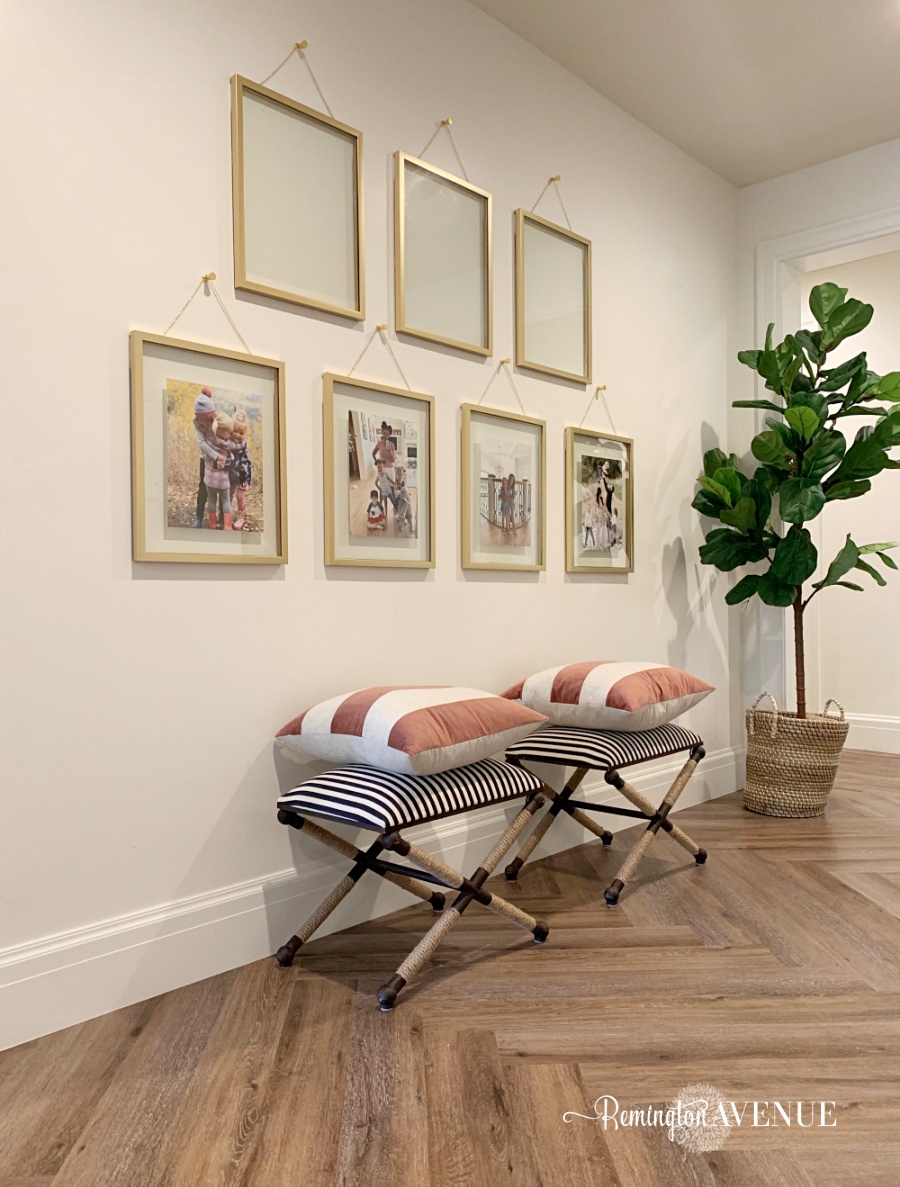
Today I’m sharing a fresh take on a hanging gallery wall. I’ve taken some floating brass frames, added some chain, and hung them from some modern brass cabinet knobs. What do you think?
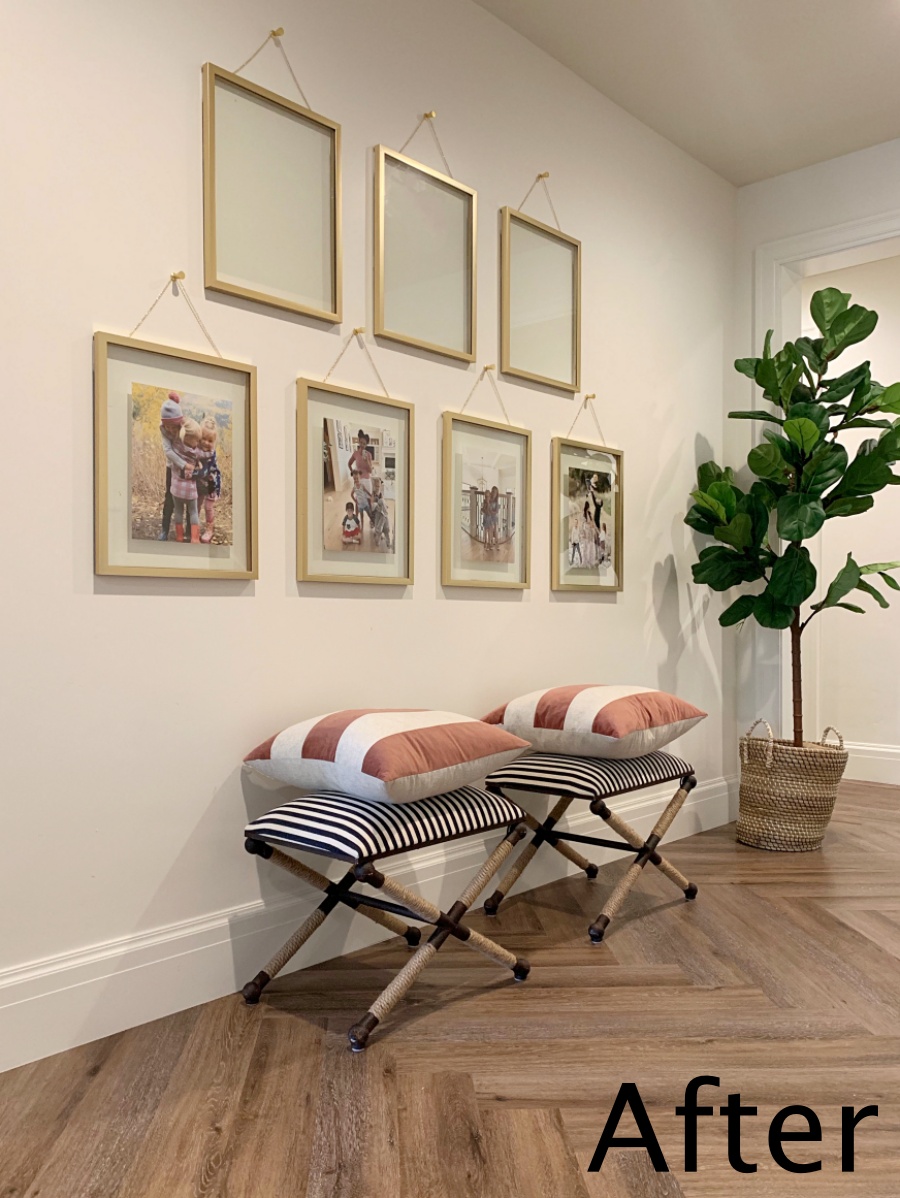
I gotta say this isn’t the end all be all for this wall. I have bigger plans (always right), but for now I’ve taken the opportunity to showcase my family in a fun way. You know I had to add my own spin on a traditional gallery wall right?!

So here’s the scoop! I bought these floating brass frames at the Athome Store a while back. I couldn’t resist the $14.99 price tag for a 16×20 size. In retrospect if I hadn’t already owned these frames, I might have just purchased some gold frames with the chain already attached LIKE THESE. Anyway with a quick trip to the craft store, I had some jewelry chain and then I went to work. I purchased my modern gold knobs HERE. I also went ahead and linked some similar picture frames below and some other options for knobs that I loved as well. If you want to recreate this exact hanging gallery wall in your own home just follow the instructions below. Also please tag me on Instagram @remingtonavenue will your gallery wall so I can share!


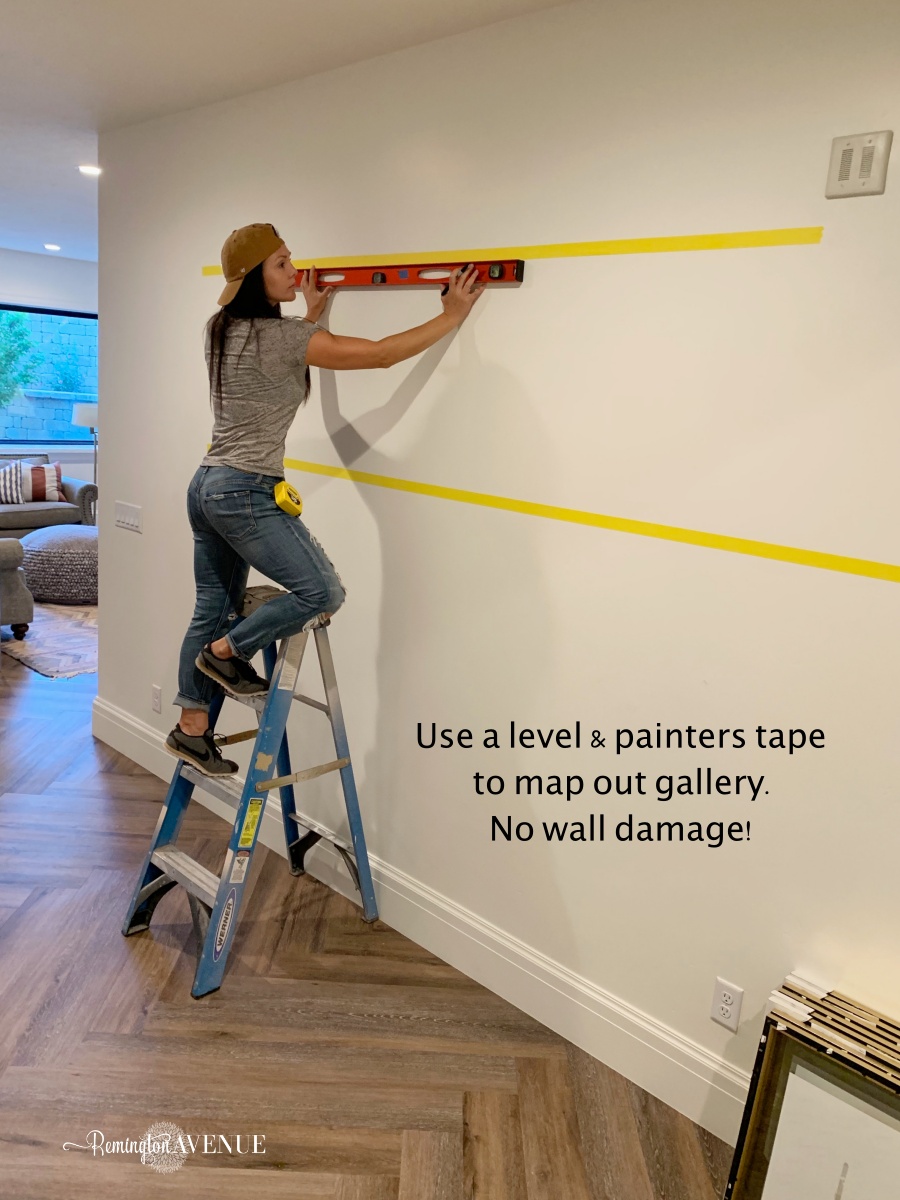
PS. I always use command Strips to hang all my gallery walls. This way there is no damage to my walls. Super easy.
How to create a hanging gallery wall
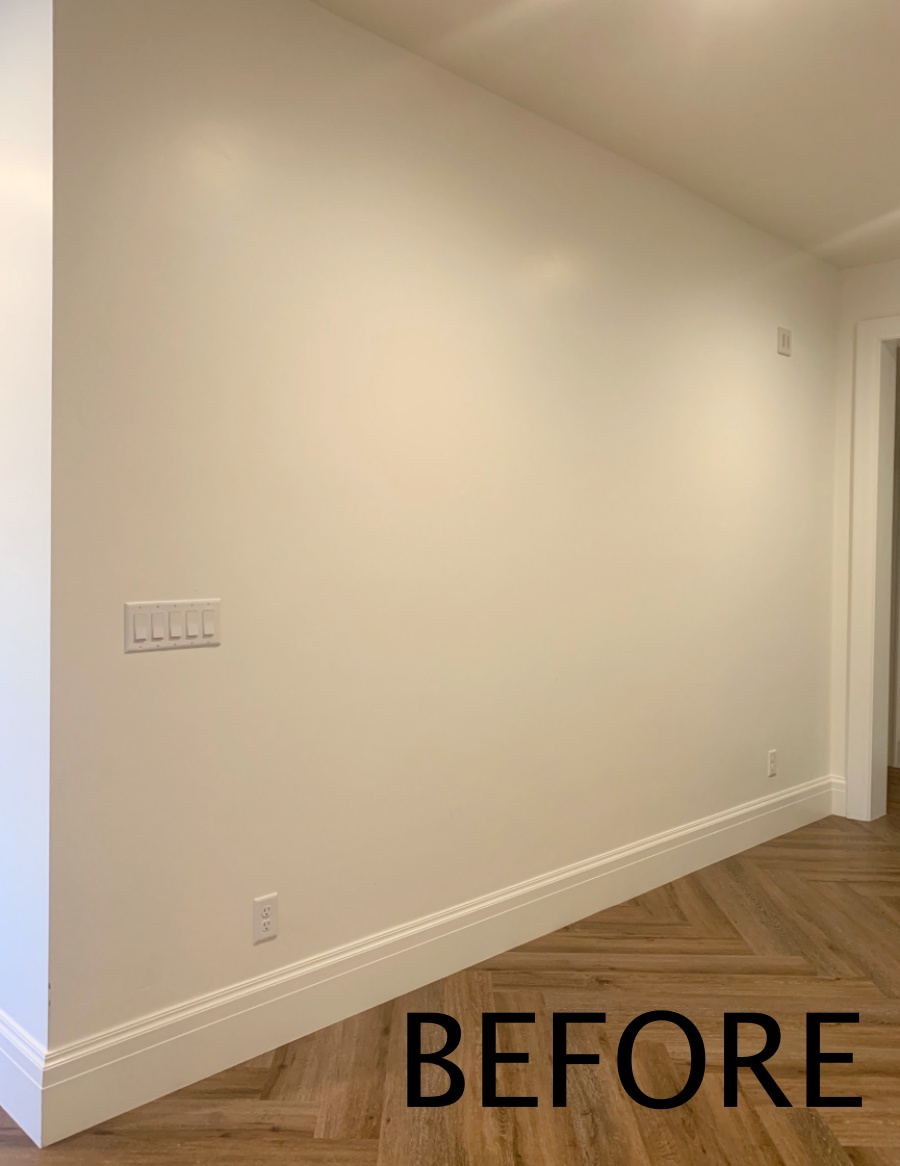
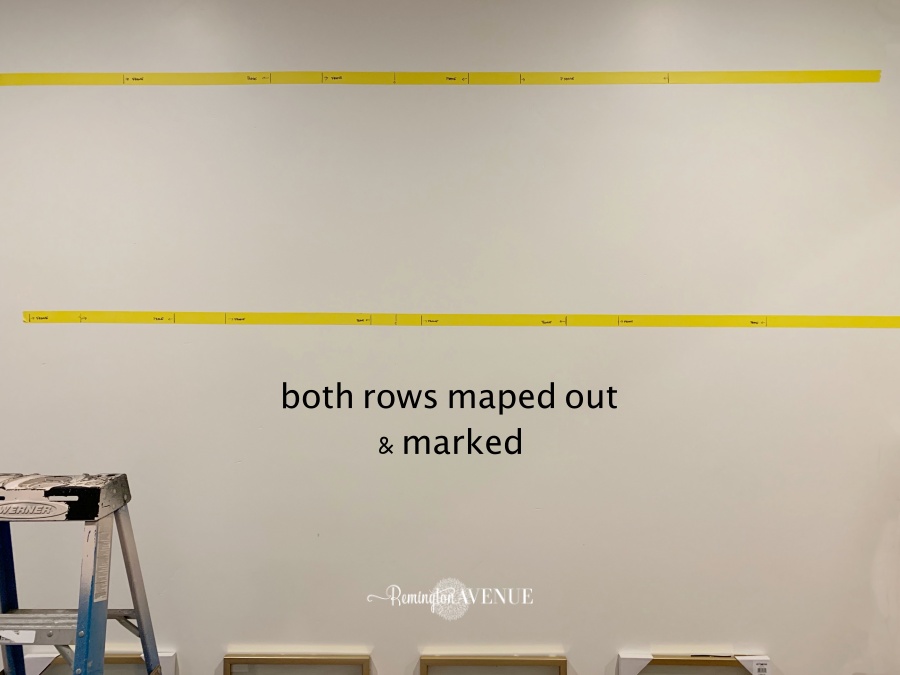
- Measure your wall and determine the size of frame appropriate for your space. I have 10ft ceilings in my basement so the larger frame size was ok. Using painters tap and a level, map out where you will hang the tops of each frame. My top and bottom rows are 27 inches apart (20″ to accommodate frame and an additional 7″ for the chain and knob.
- Find and mark the center of your wall with a sharpie (on the tape). I placed all my frames 6″ apart. Bottom row: measure & mark 3″ from the center on each side. Then measure your frame size and mark the distance from that 3″ mark. This will tell you where to hang your frame later (I like to draw and arrow that says “frame” so there is no confusion when I’m ready to hang). Then measure and mark another 6″ distance from the last marking. Using the same frame measurement, mark your next frame placement on the tape. Repeat this on both sides till you have 4 frame spots clearly marked.
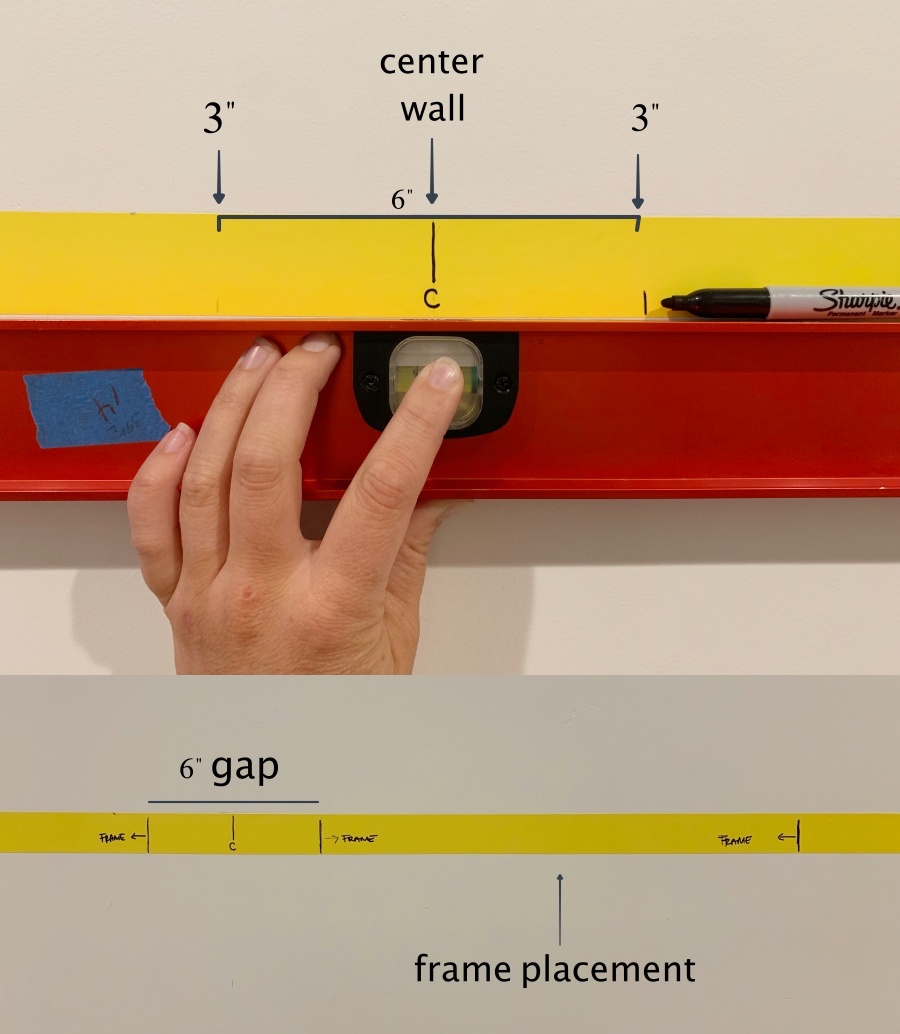
- Measure and mark your frame placement on the top row. Since I hung 3 frames I split the measurement of my frame from the center and marked. Then measured my 6″ gap on both sides and marked my other frame placements. See photos for reference.
- If you did not purchase hanging frames (like me) you will need to attach your jewelry chain now. Determine how long you want your chain length to be. I cut my chains to 18″. Measure and marked 3″ from each side the frame. Attach chain using jewelry wire to existing hangers on back of frame or attached chain using a stapler.
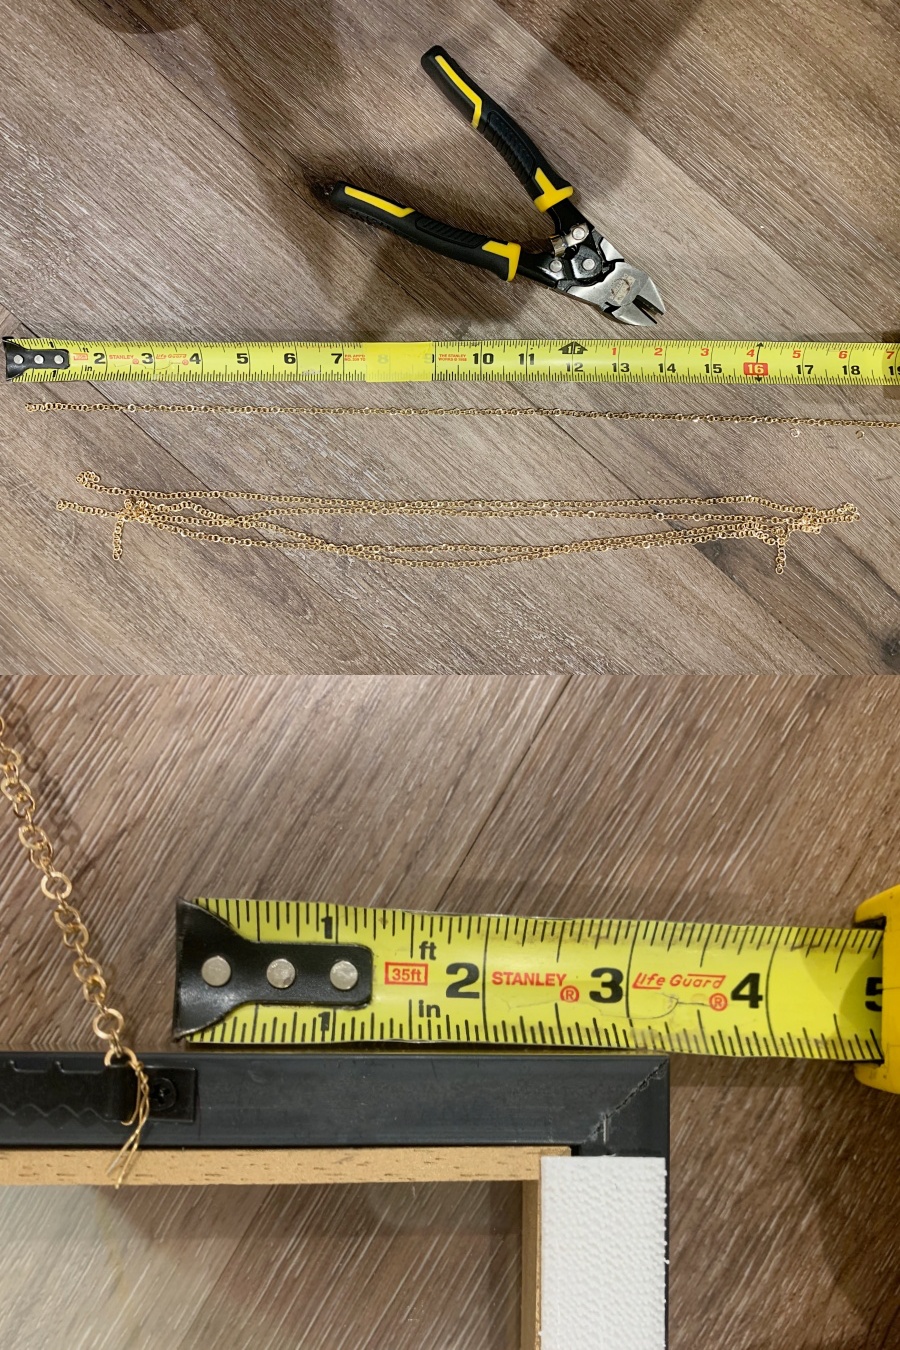
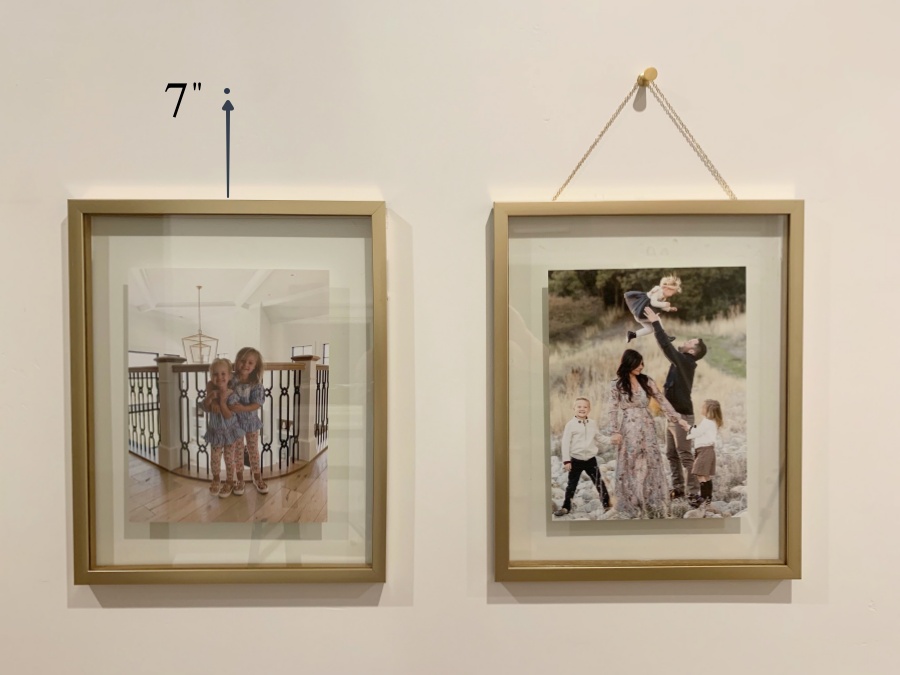
- From the center of each frame placement, measure up and mark 7″. This is where you will mount your knob. I simply cut the head off the screws that came with my knobs and inserted them into the knob. Then screw into the wall like a regular screw. Remember this isn’t holding the weight of my frames (command strips are). If you purchased hanging frames and would like to hang them using the knobs, make sure to use anchors.
- Using a razor blade, score the tape on the frame lines and peel away the area where you will hang your frame. Place the command strips vertically on each side of the frame. I sandwiched mine together and then hung them on the wall. Place the chain over the knob. (You will need to remove the frame from the wall, hang the chain over the knob, and then adhere the velcro command strip to the strip on the wall.
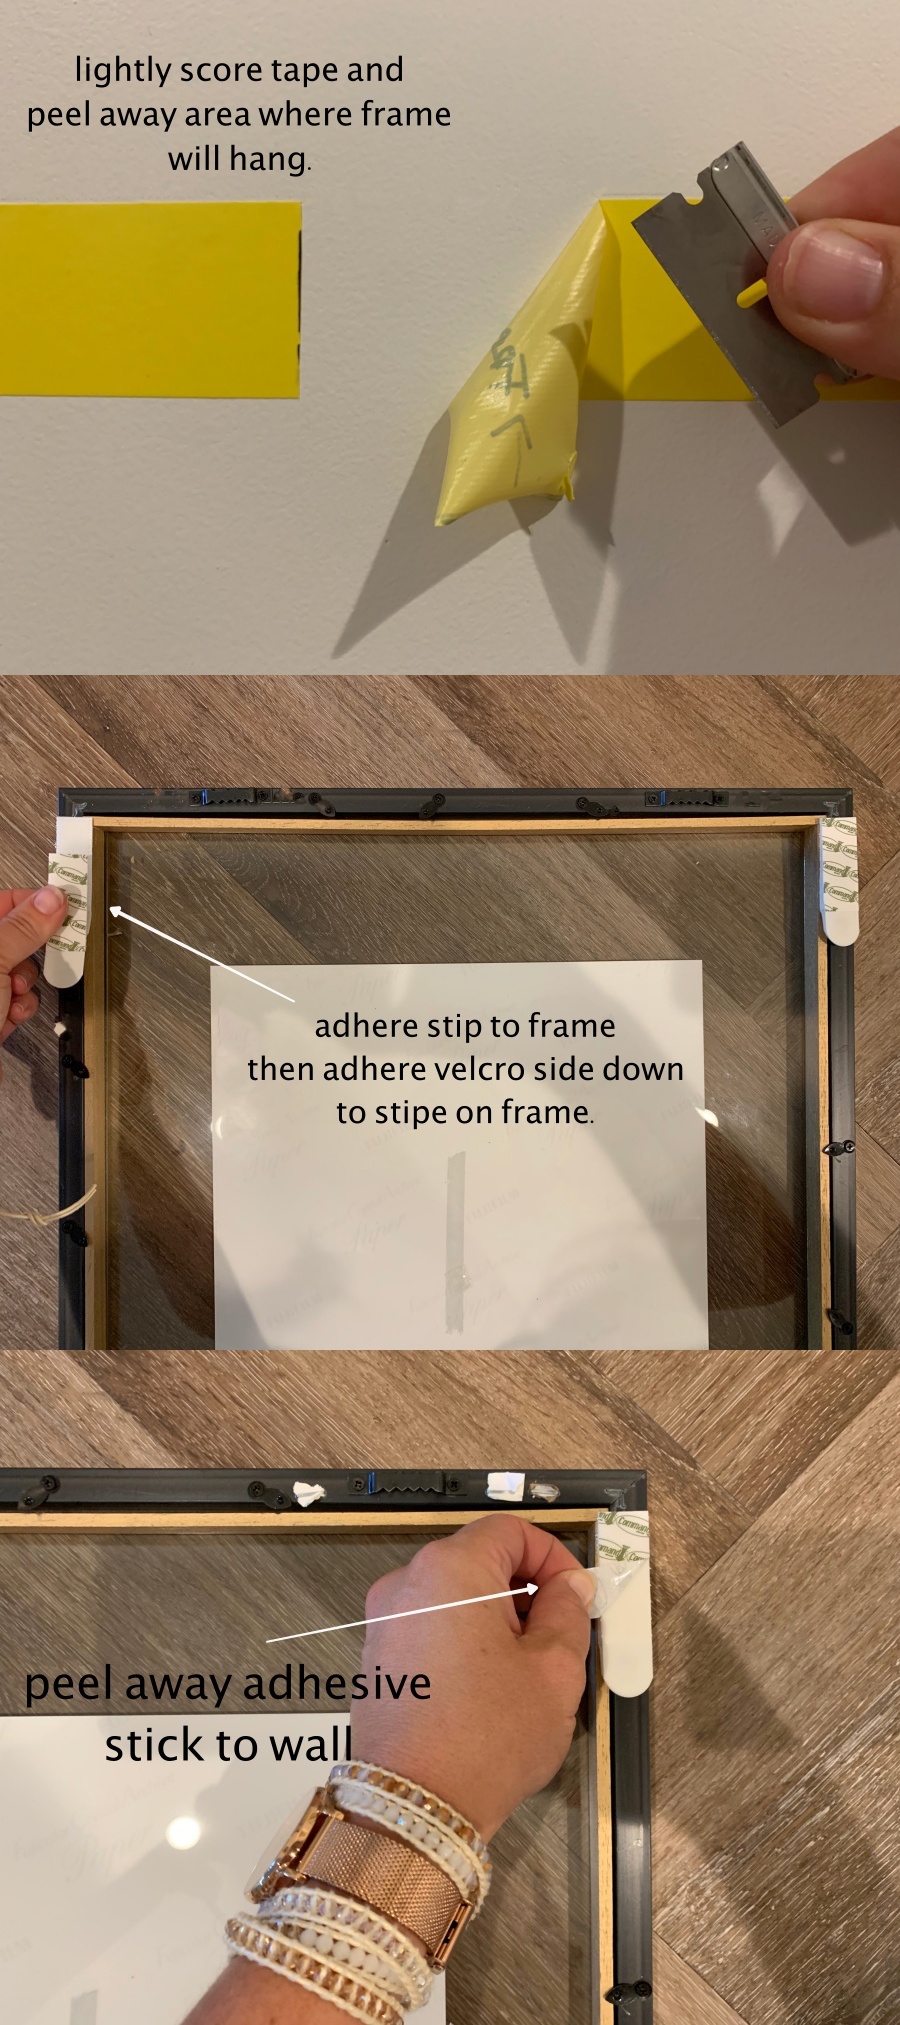
- Remove the excess tape from the wall and your done!
Reveal
Here is how mine turned out! You could totally do this with any color frame and hardware. You could even create this gallery wall centered over a console table or going up a staircase wall. Obviously the top 3 frames are still empty. The idea is to add photos as the time goes on. It’s super easy to take down the frames and rotate out new photos. Consider it a revolving gallery wall! For more of my DIY ideas click HERE. I recently painted my porch with a fun rug design and even added a lattice design to my driveway!
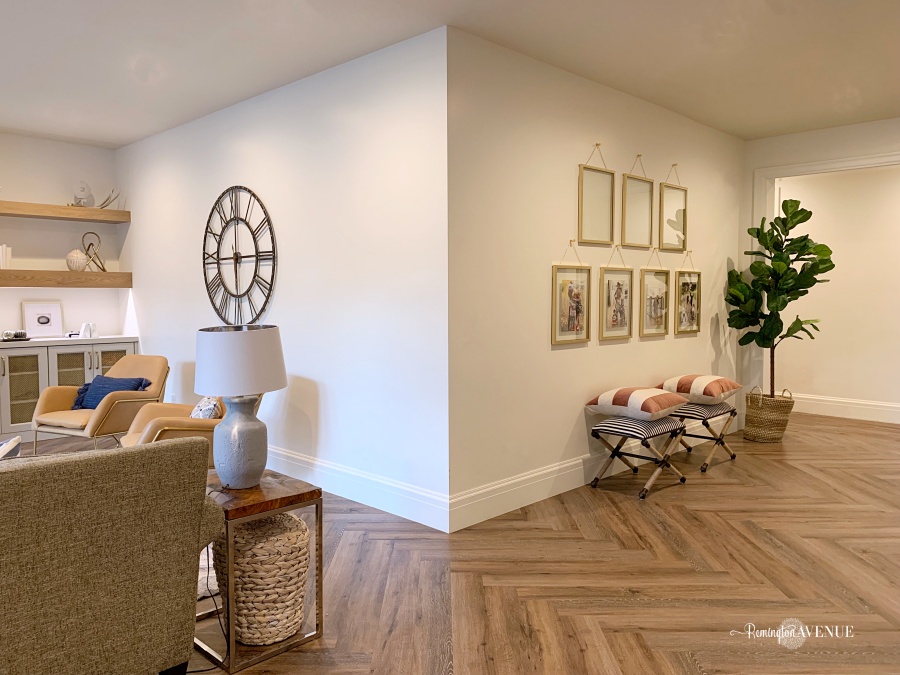
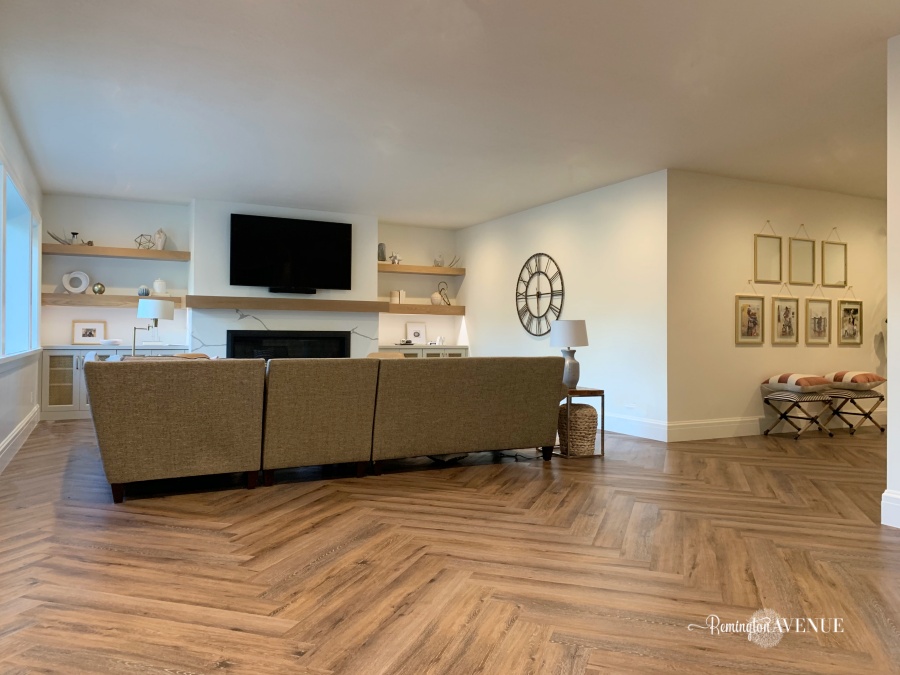
Please click HERE for more information on my basement flooring, paint colors, another sourcing.

 Add to favorites or read later
It’s perfect!!!!
Thank you
Always beautiful and detailed instructions!!! Thank you!!
Agree 100% with you, she is so detailed and, I love it!
This is so stunning Mysha! I’ve always loved the look of gallery walls hanging on knobs, but those gold frames and chains take it to another level! Great job! And thanks for the new inspo for my upstairs gallery wall.
Martina, thank you! Im so happy to provide inspo! Please tag me in stories or posts @remingtonavneue with projects inspired here.