Art Deco Wainscoting and Striped Wallpaper
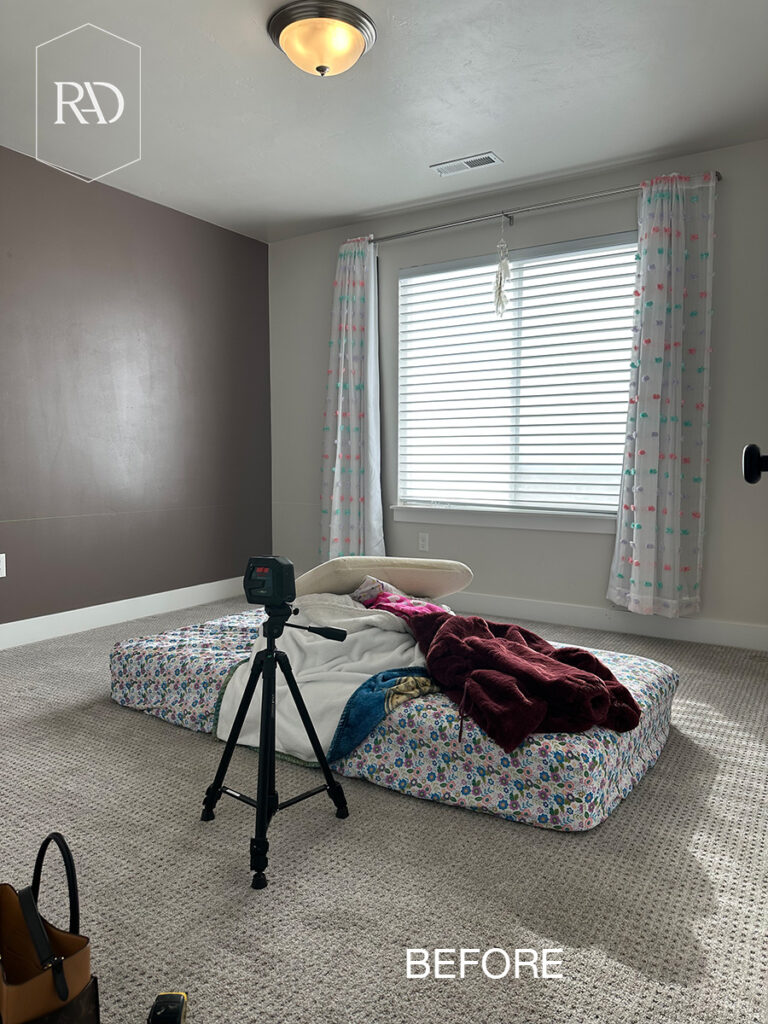
At this point I’ve had the pleasure of transforming nearly my sister’s whole home. It’s a craftsman style home with a modern, mid century style flair. So it’s a different style from my own, which always makes projects here that much more fun. The most recent room transformation here was the multipurpose loft renovation that I completed. It totally changed the look and functionality of the loft space. And this Art Deco Wainscoting and wallpaper project continues the upstairs transformation trend and takes my niece’s room to a whole new level.

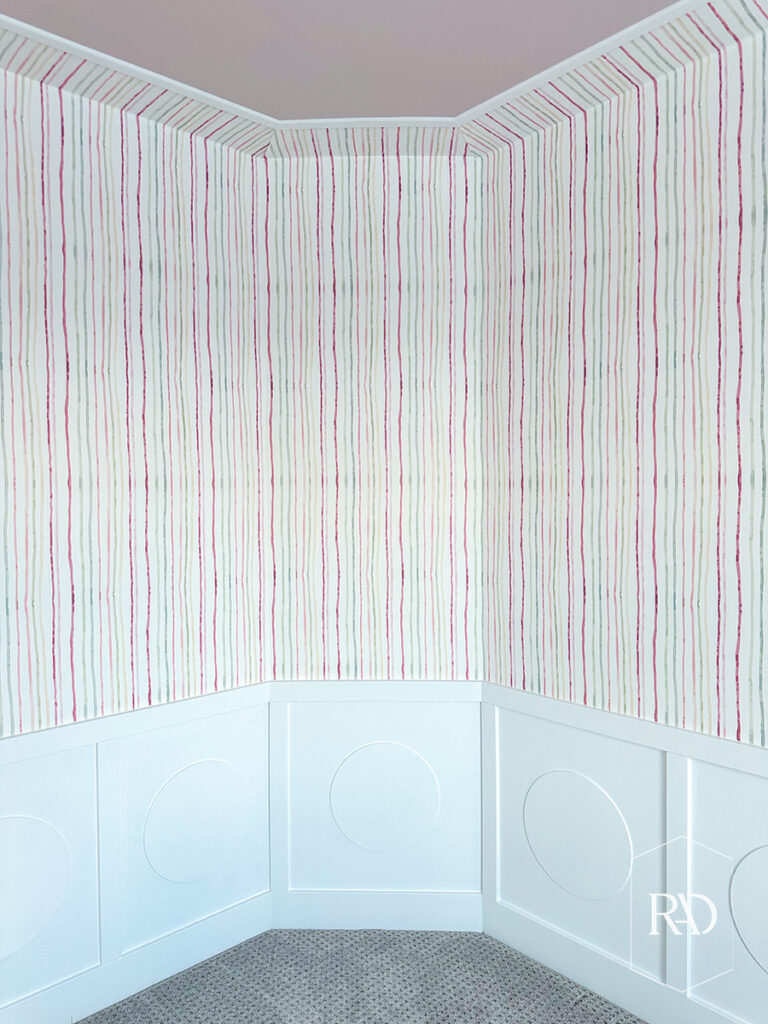
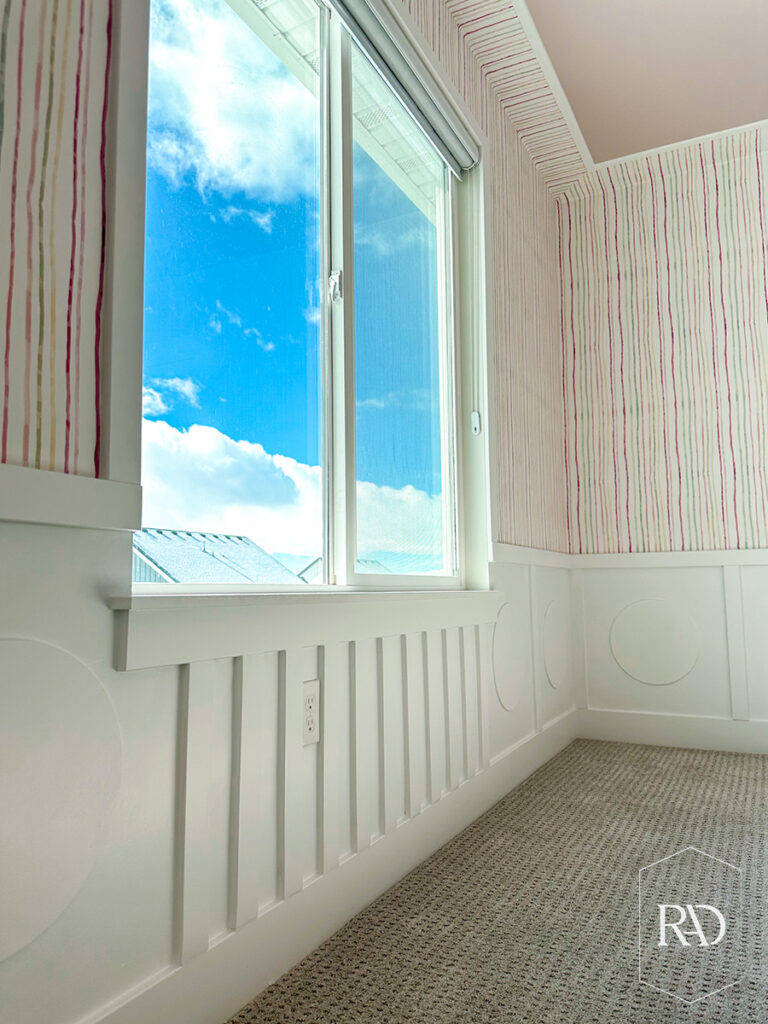
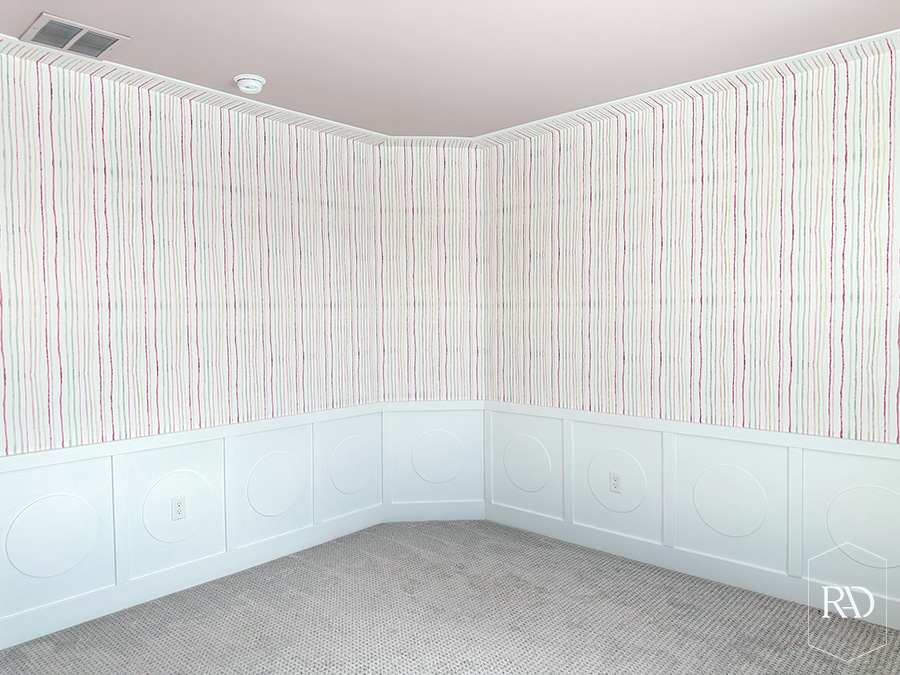
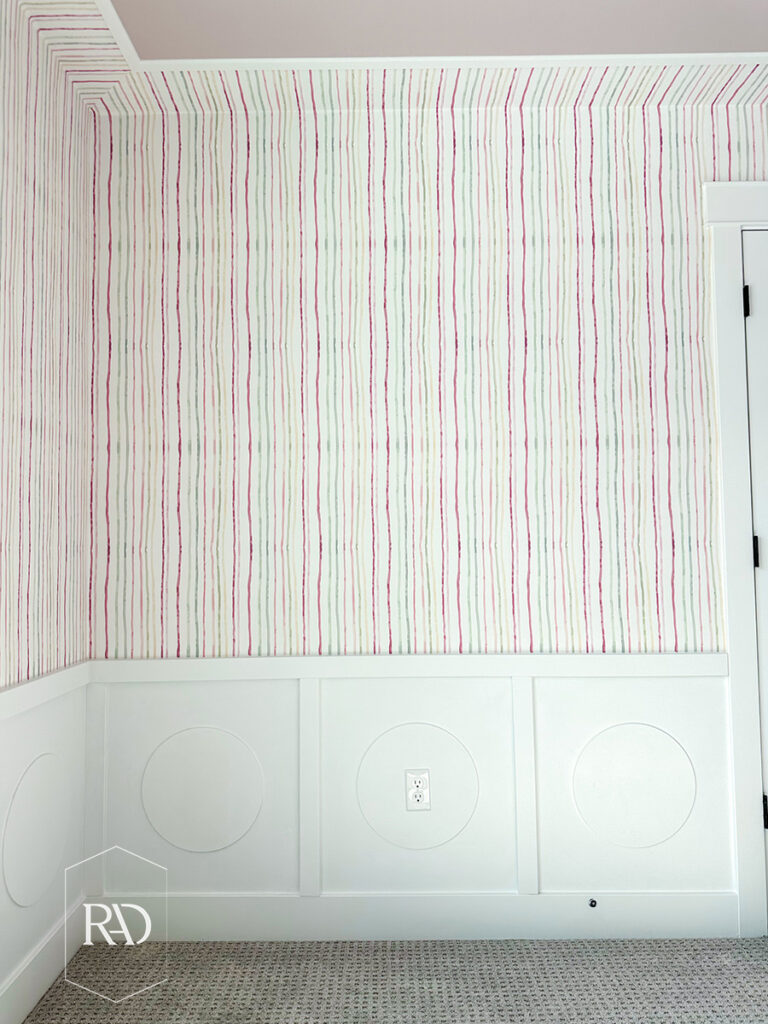
Y’all thought I was crazy when I added these plywood round medallions to a basic board and batten wainscoting treatment. But it turns out we all love it. And it works because I paired an architectural pattern of geometric shapes (circle wainscoting) alongside more organic patterns (fluid wallpaper stripes) with less defined structure for a sophisticated look. The imperfectly striped wallpaper pairs so nicely with the circles.
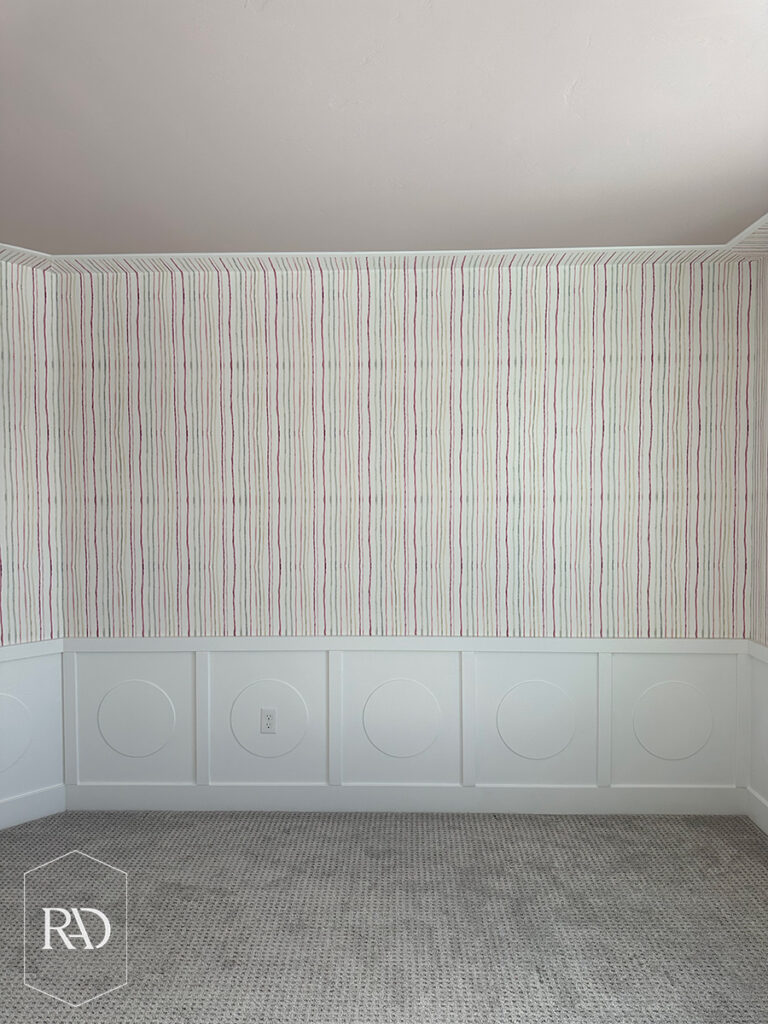
Now, yes, this is a fun treatment for a preteen girls room. But imagine it painted a dark moody color (think mocha or charcoal blue) paired with a sophisticated botanical wallpaper. Can you see how versatile this Art Deco wainscoting treatment could be?
I’ve included a full tutorial on the installation of the wainscoting and the wallpaper in this post, plus I’ve added a full Instagram highlight as well.
Supplies
Art Deco Wainscoting with Striped Wallpaper Tutorial
Install your board and batten.
I started by adding the chair rail going around the room at 31”. For reference, this room has 8 foot ceilings.
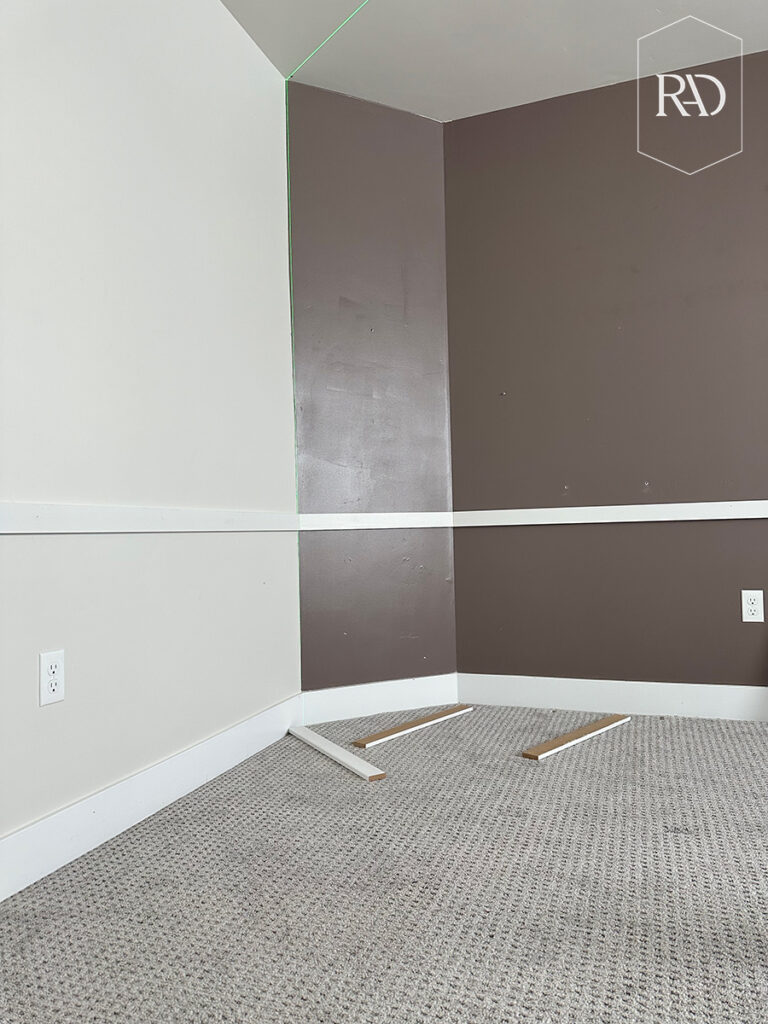
Next I installed the board and batten. To figure out your board and batten is actually pretty easy. There’s a calculator that I will link here. And then I recommend cutting a spacer board so that you don’t have to measure each space where your battens go.
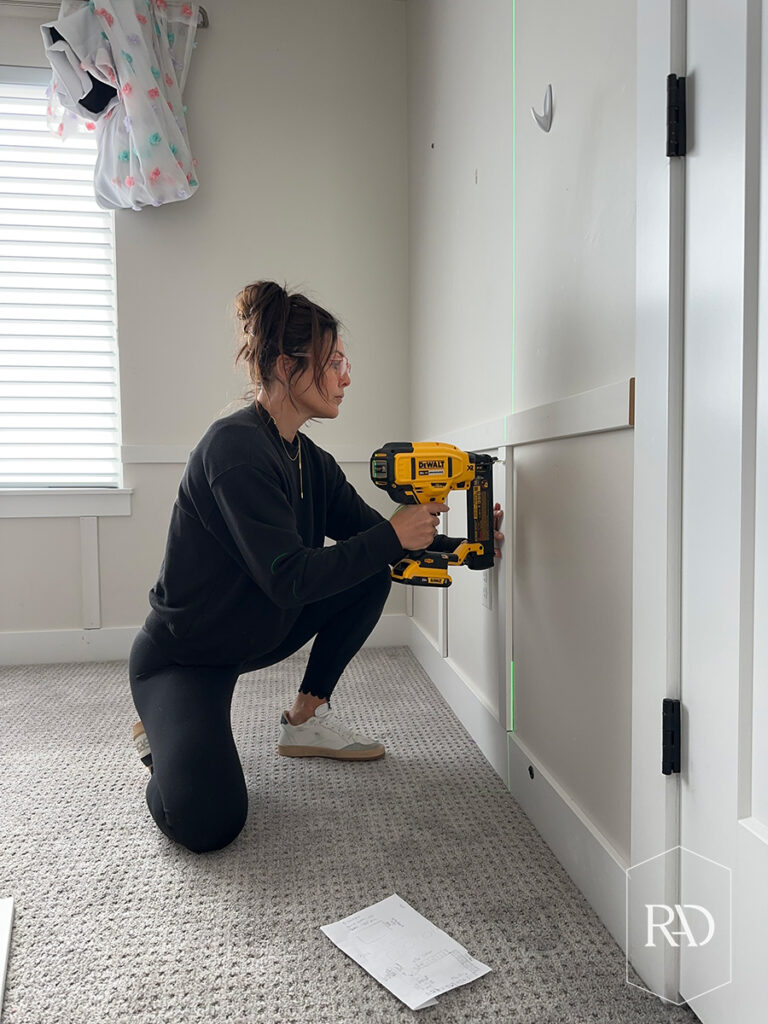
Tip: When you are not hitting a stud, angle your nails like a crisscross so it grabs the drywall and ensures everything stays in place.
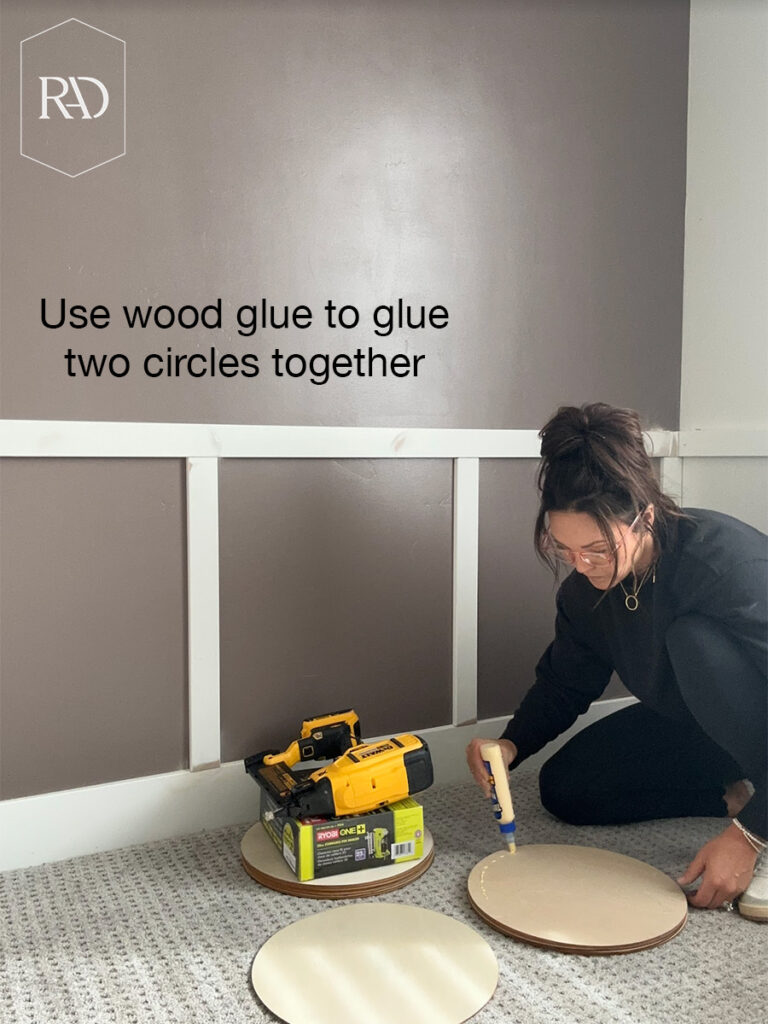
Install your circle medallions.
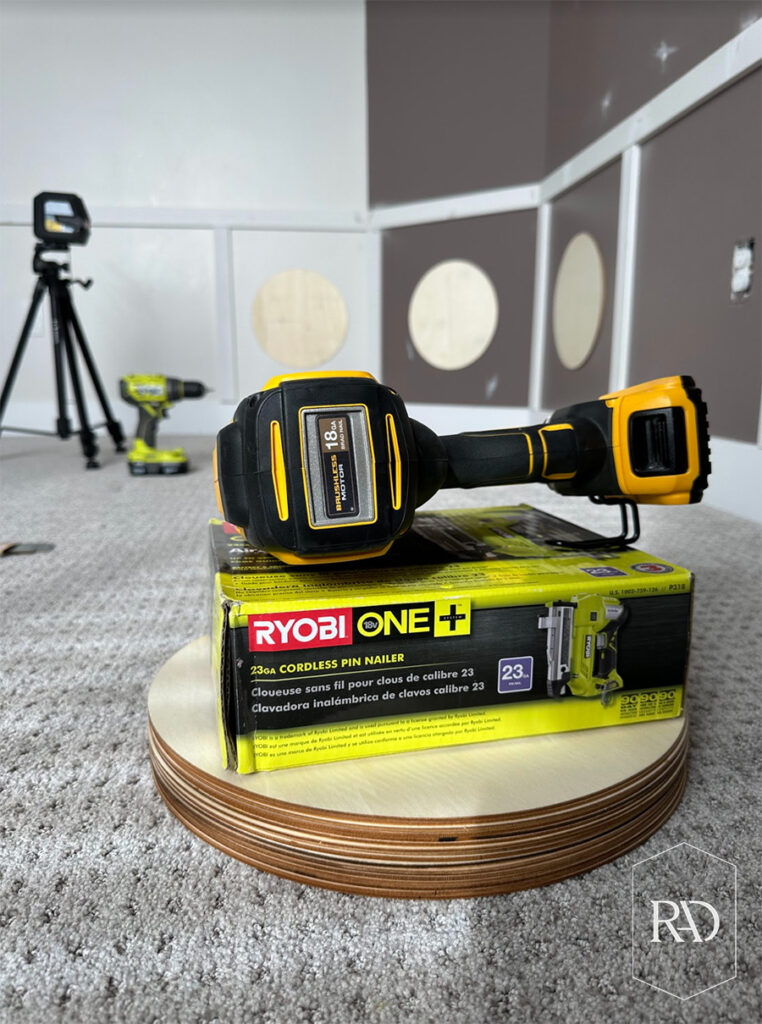
Originally I asked you guys on Instagram if I should add the circles. But then I just decided to go for it and do them all around the room. I ordered these wood medallions off of Amazon and doubled them up for thickness using wood glue. I used my nail gun to attach them to the wall.
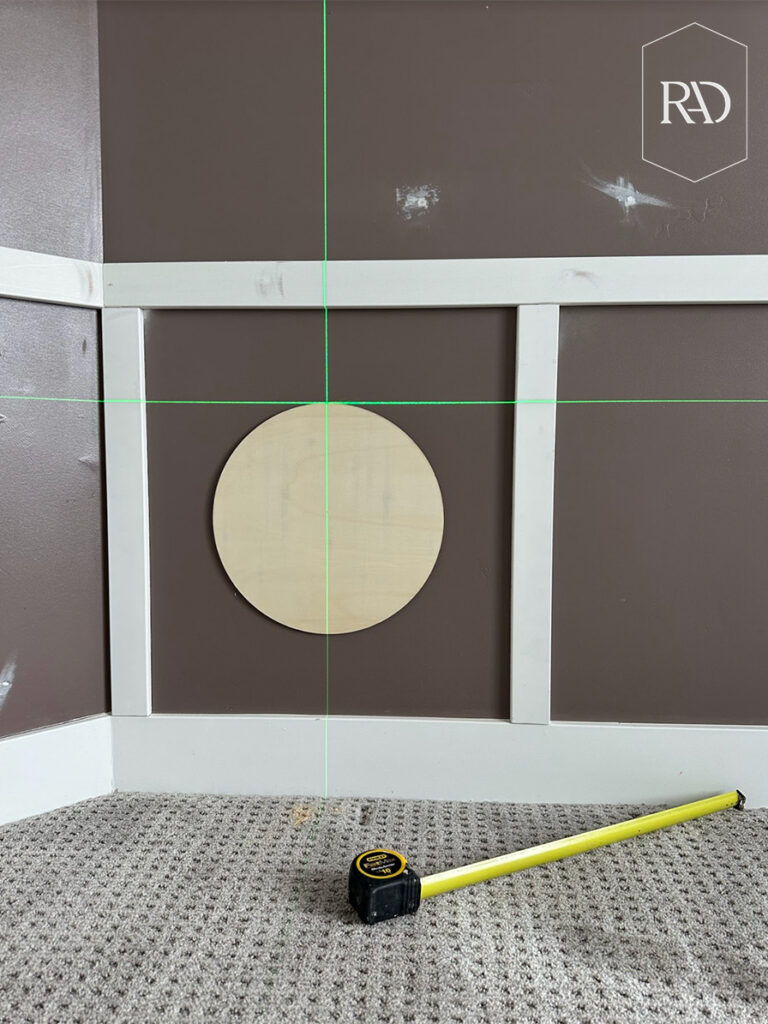
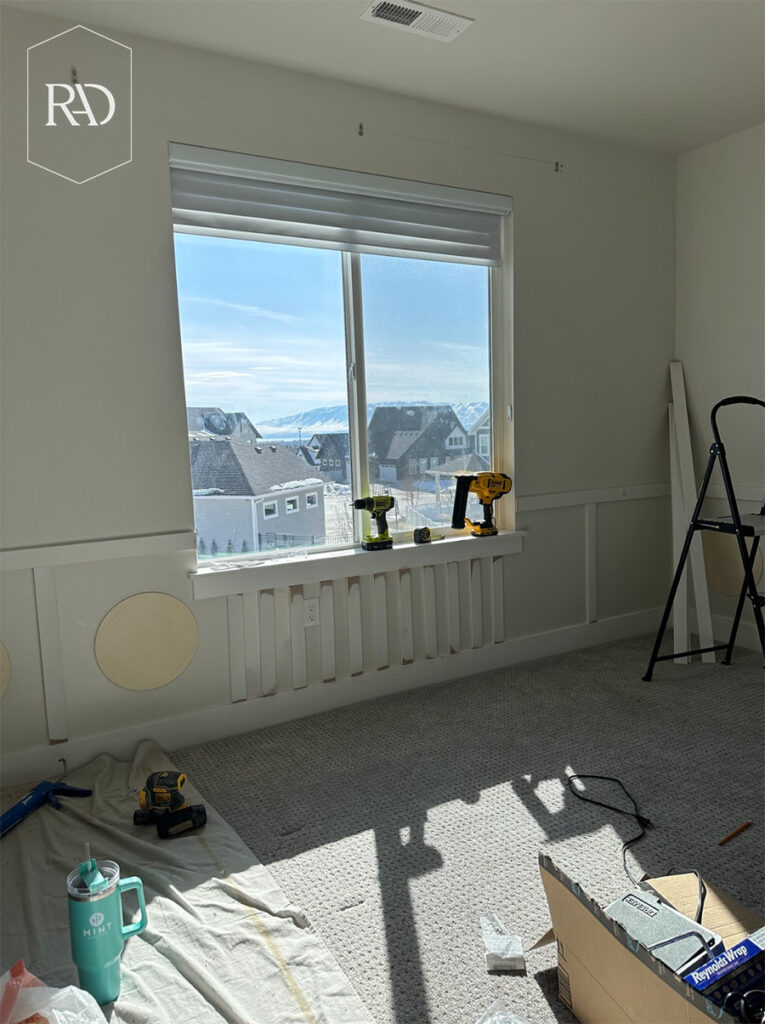
To handle the portion under the window, instead of installing partial circles, I just did no circles. And in their place I installed more vertical pieces of trim to fill the space.
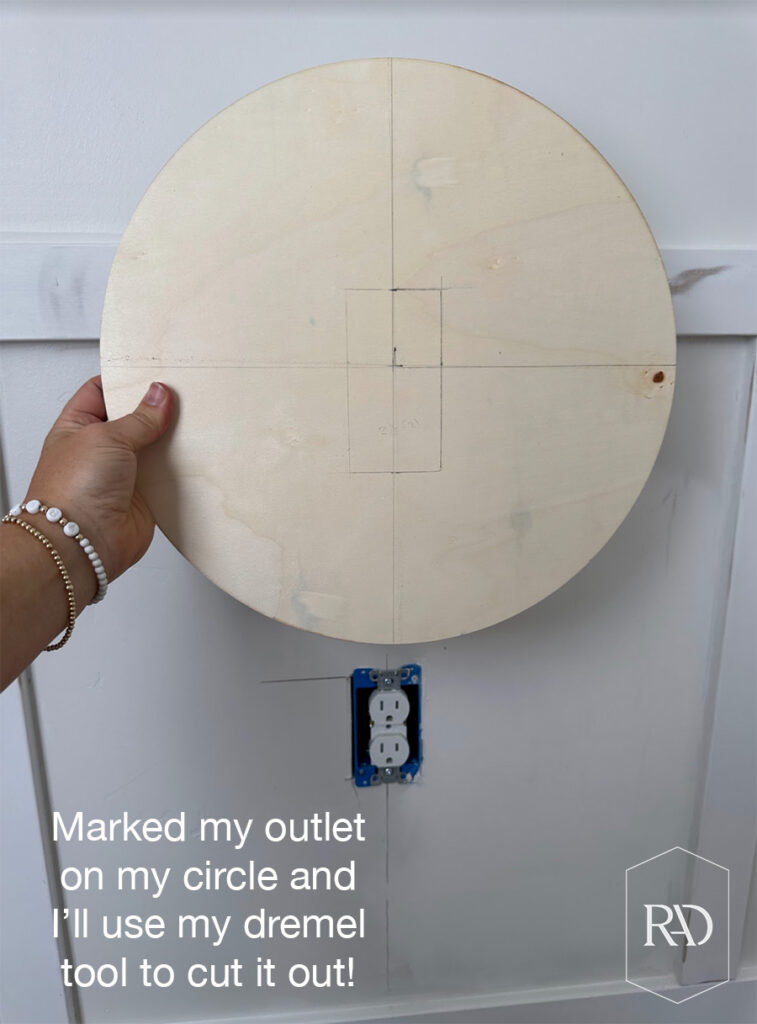
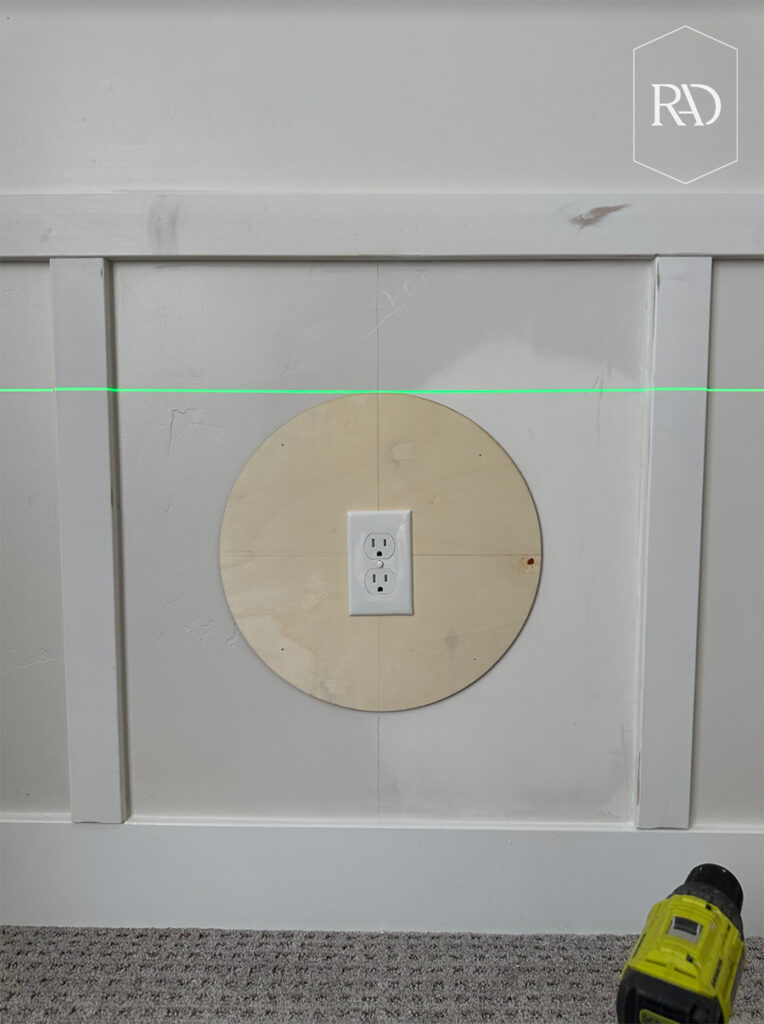
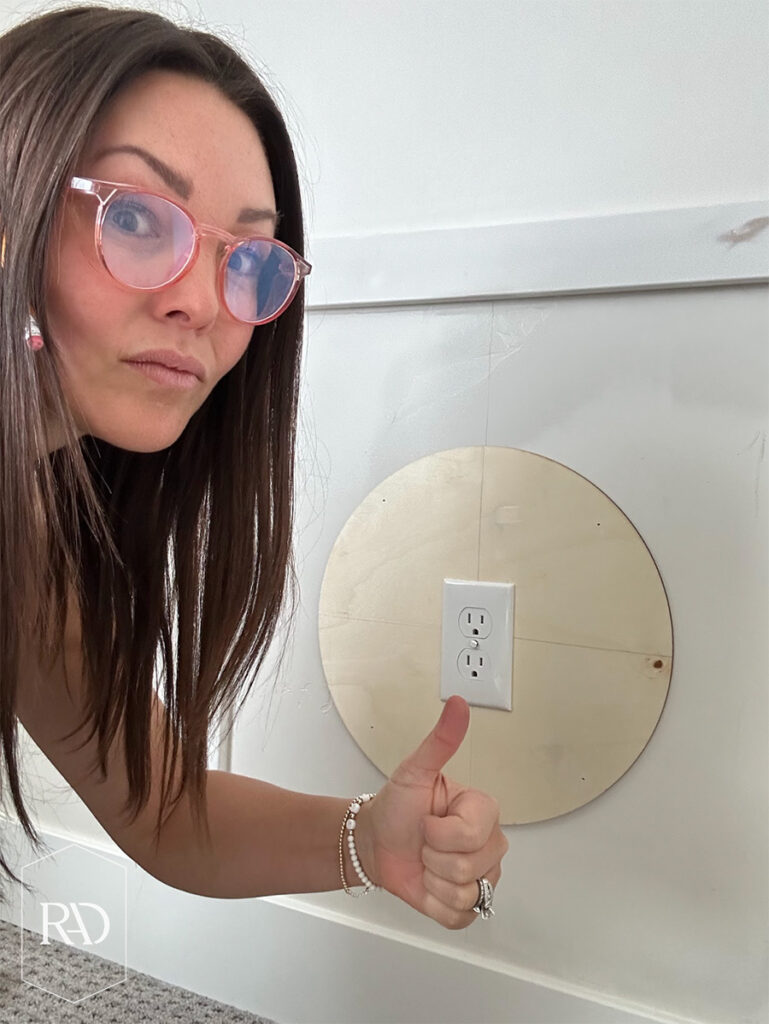
To finish off the circles, I just had to install the ones that would go around the outlets. I used my dremel tool to cut out the inner part of the circles, and it worked perfectly since they are so thin. Then I used outlet extenders to bump the outlets away from the wall a little more and make them flush with the circles. In total I had 5 of these outlets to cut out and extend.
Sand, paint and caulk.
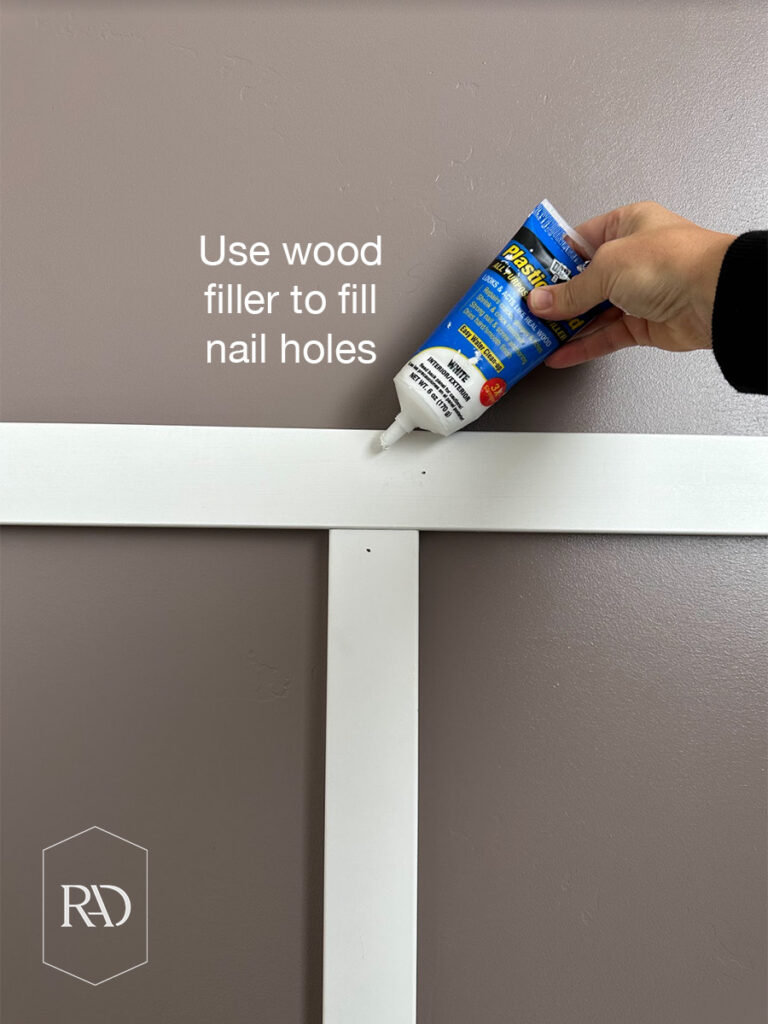
Fill any nail holes with wood filler, then once that is dry start sanding. I also sanded down the edges where the trim meets another piece of trim, just to make it as smooth of a transition as possible. I used my shop vac and sander duo for this.
Then, since this room had a dark wall, I knew it needed to be painted white before I added the wallpaper above the wainscoting. So I went ahead and did that.
Next was to caulk everything, which by the way, felt like it would take an eternity since I had to go around every circle.
Hanging the wallpaper.
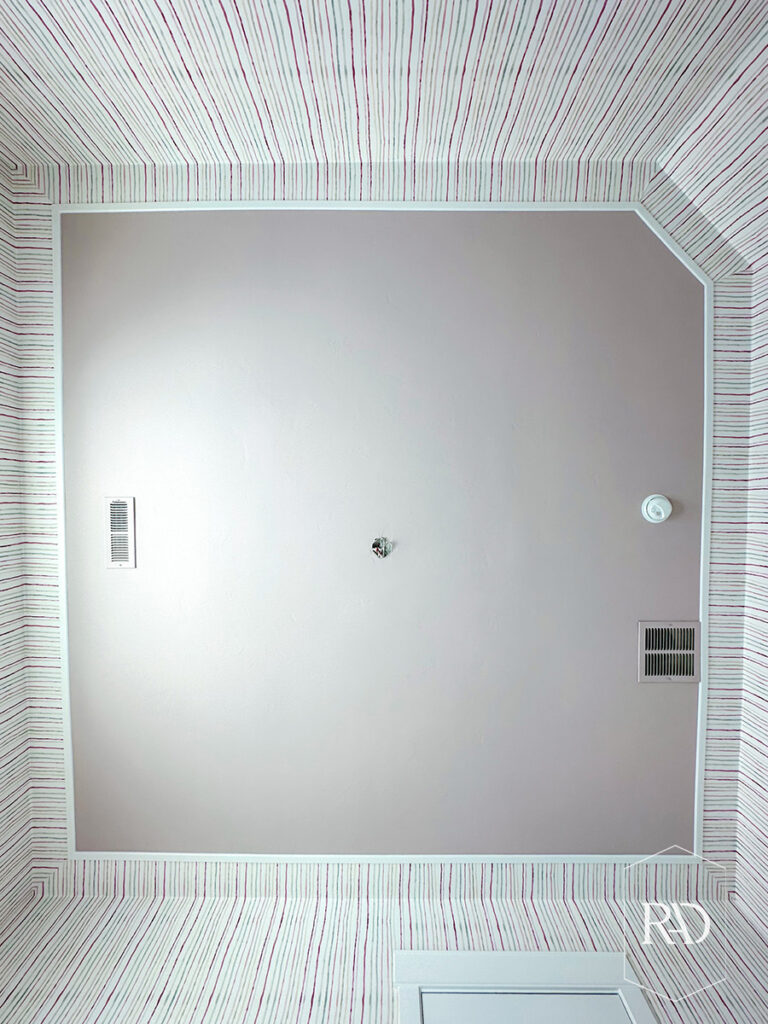
I knew I wanted to make a statement in here and visually change the architecture of the space. So I said, “what if I hang the wallpaper partially on the ceiling?” It will be easy, I thought. But, I was wrong.
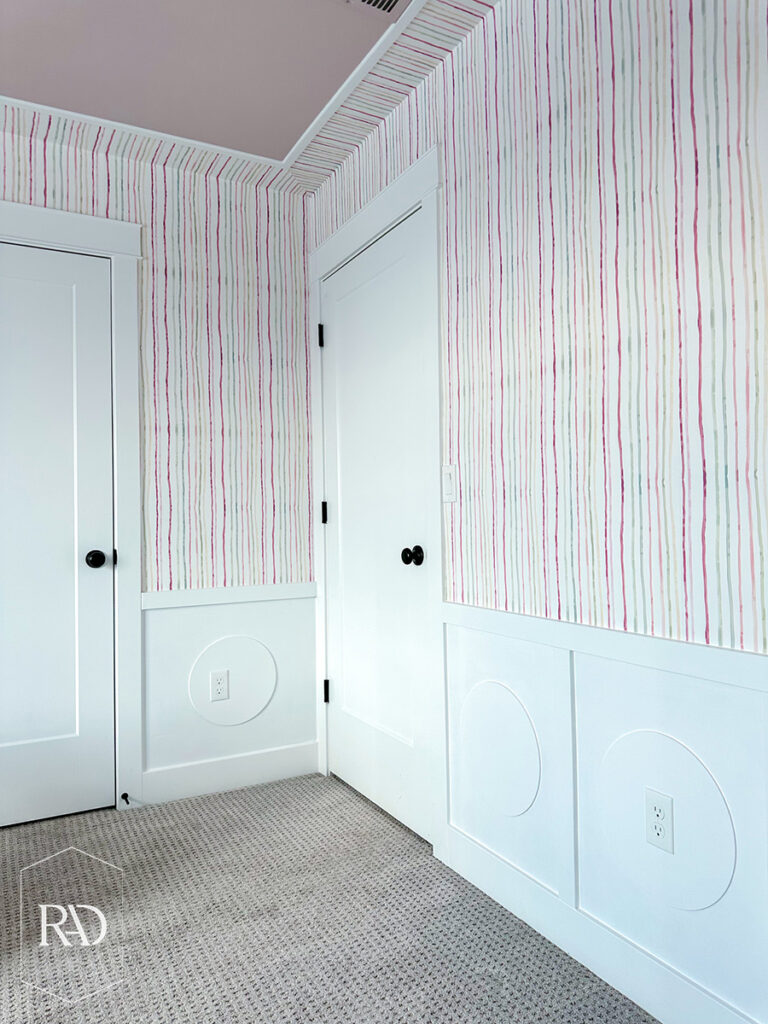
As I’ve said a million times before, your walls are not straight. Especially where the ceiling and the wall meet. So, me trying to wrap the wallpaper partial ceiling to wall did not go well at the start. But then panel number 3 went up nice and smooth and gave me the motivation to keep going. Extending the vertical striped wallpaper onto the ceiling actually elongated the 8 foot walls, making the ceilings appear taller.
Prepasted was definitely the way to go for this application. It made it easier to slide it into place and maneuver than peel and stick. Copper Corners has some of my favorite wallpapers in general and they are high quality and easy to install. I always get a little nervous with wallpaper when streaks appear through it, but I always know with Copper Corners, they will be gone by morning. This wallpaper in particular is the Animal Stripes design in the prepasted format. Use code REMINGTONAVE10 FOR 10% off this striped wallpaper and any wallpaper sitewide on Copper Corners.
Painting the wainscoting.
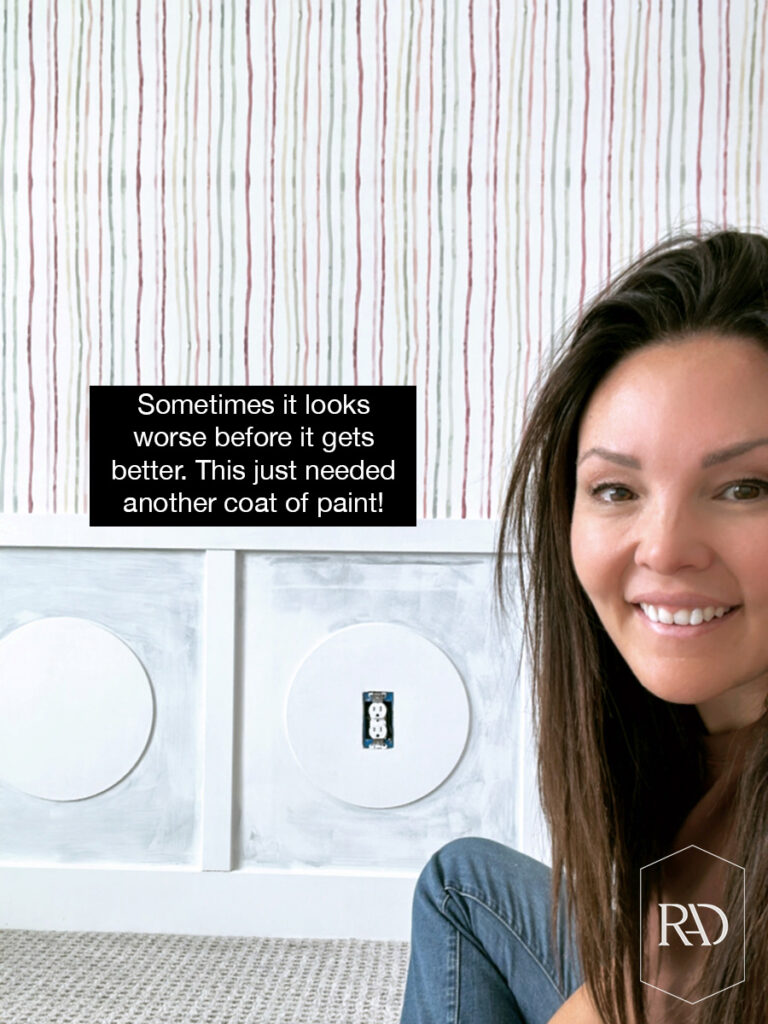
I went ahead and painted all of the trim and circles I installed. I used a medium gloss enamel paint. The higher the sheen, the more light is reflected. Also this is a kid space, so the gloss makes it more wipeable. Remember, things often look worse before they get better and you may need more than one coat of paint.
Finishing the ceiling.
Once all of the wallpaper was hung, it was time to paint it and hang the trim. And by hanging the trim I was able to create this faux coved ceiling effect.
Projects at my sister’s house are always such a joy to work on and my niece’s new preteen room is no exception. This Art Deco wainscoting and striped wallpaper combo pushed my creative limits and even took me outside of my comfort zone. But I am so glad it did because the results are phenomenal! Stay tuned for next week for the full room reveal!

 Add to favorites or read later