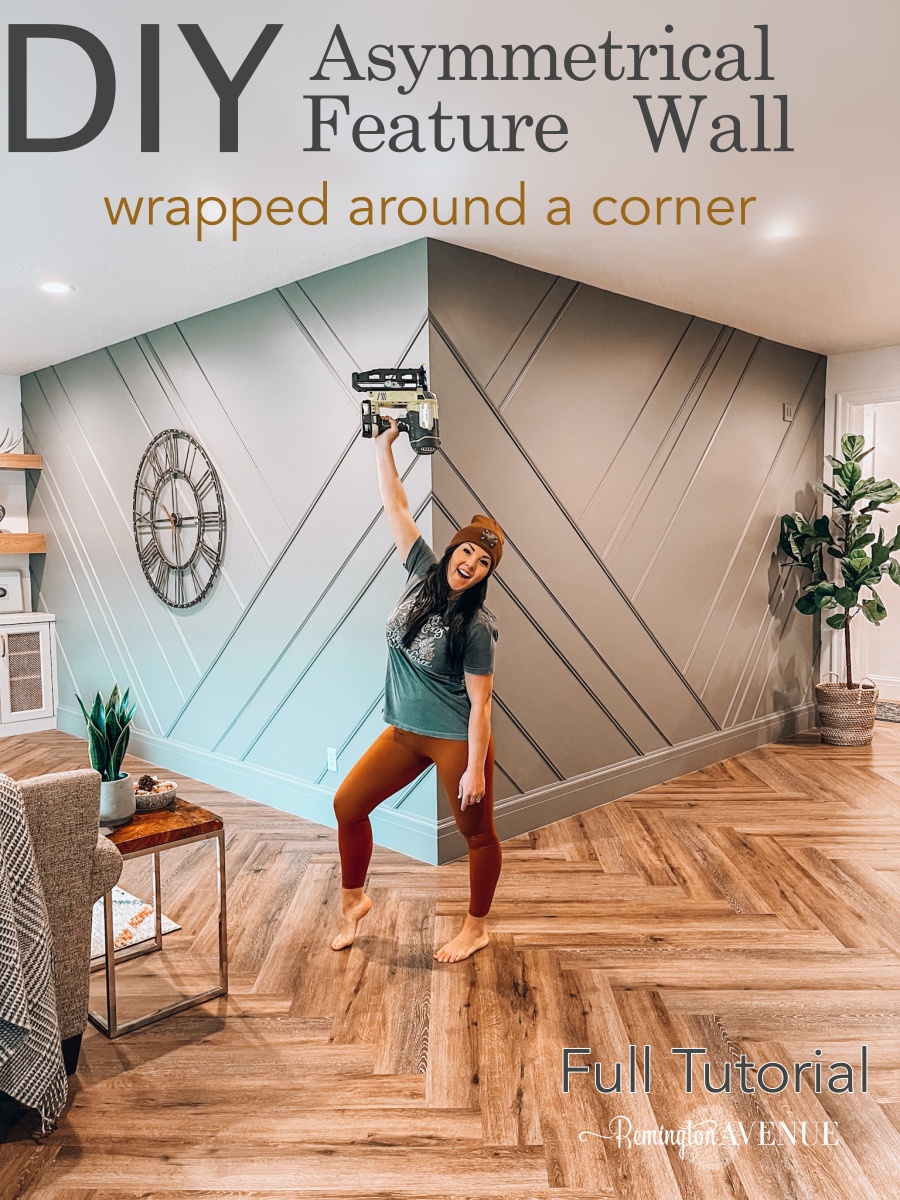
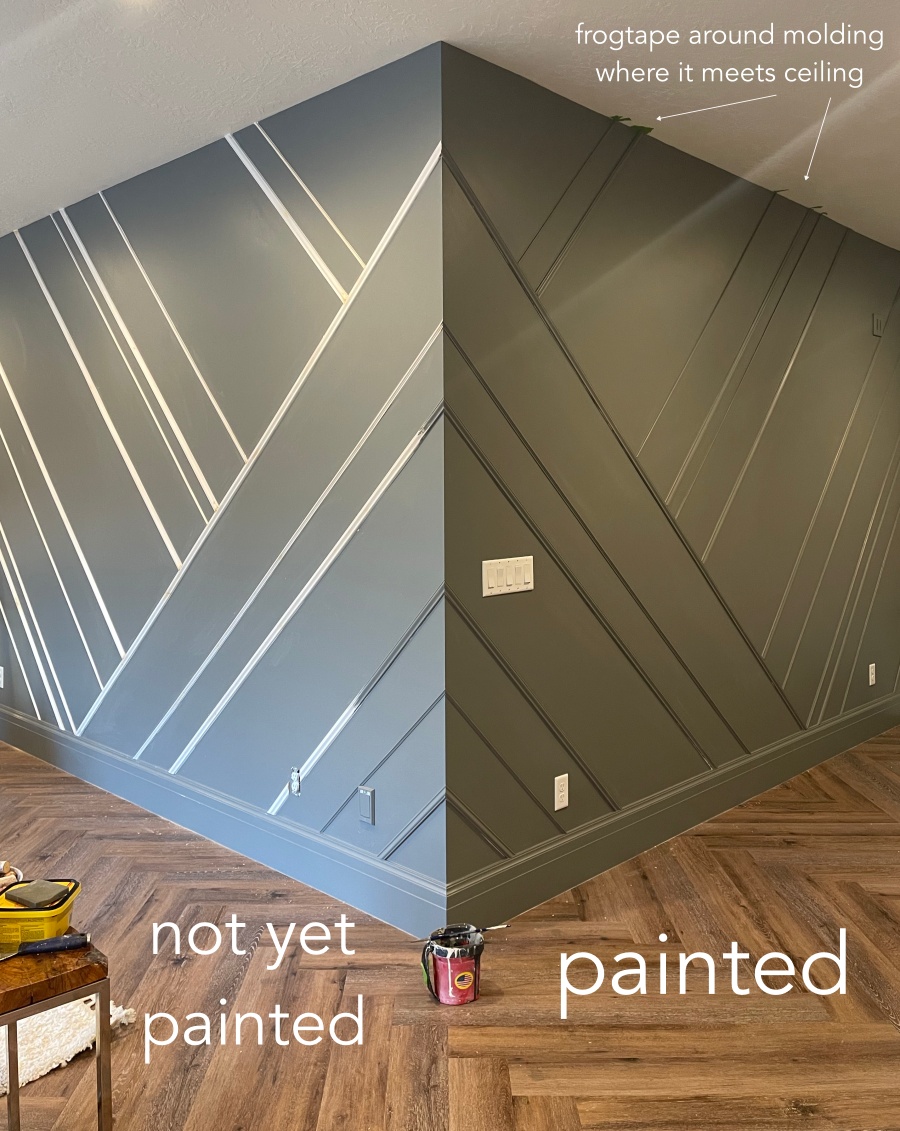
DIY Asymmetrical Accent Wall
I sought out to create something truly unique in my basement, and Im pretty sure I accomplished just that. Its no secret y’all loved this DIY Asymmetrical Accent Wall, but is it really asymmetrical or symmetrical? Well that depends on your vantage point? I wrapped the asymmetrical wall molding design around a corner and mirrored the design on adjoining wall. From the corner you see a symmetrical layout, but from the living room or stair hall alone, it appears asymmetrical Fun right?! I know tons of you are dying to replicate this fun modern design, so here are all the details.
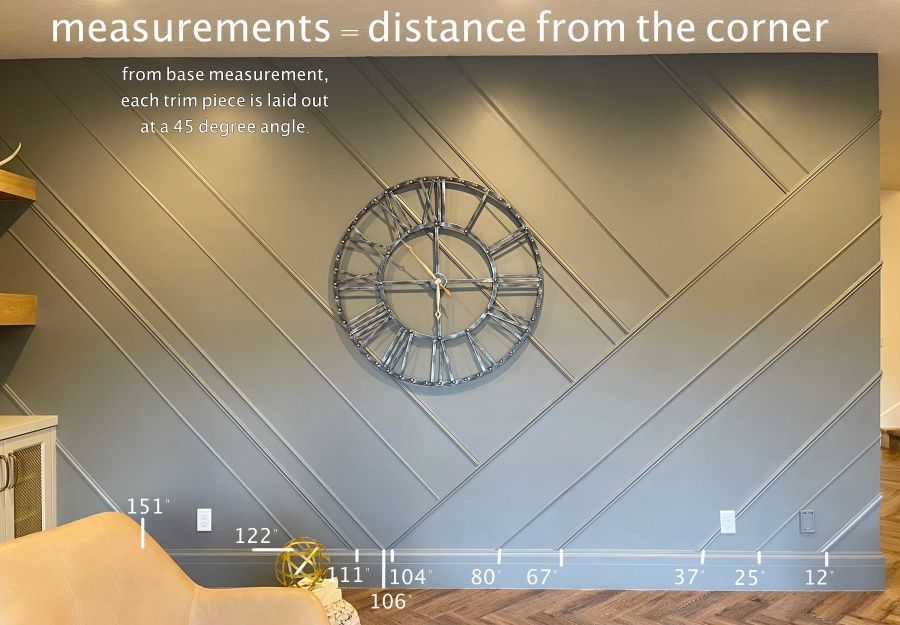
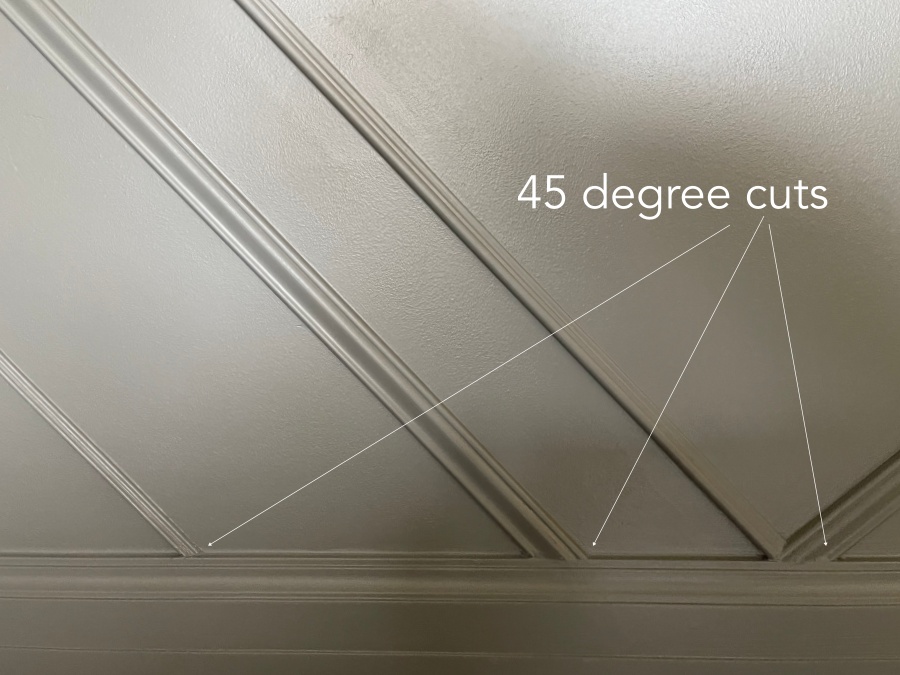
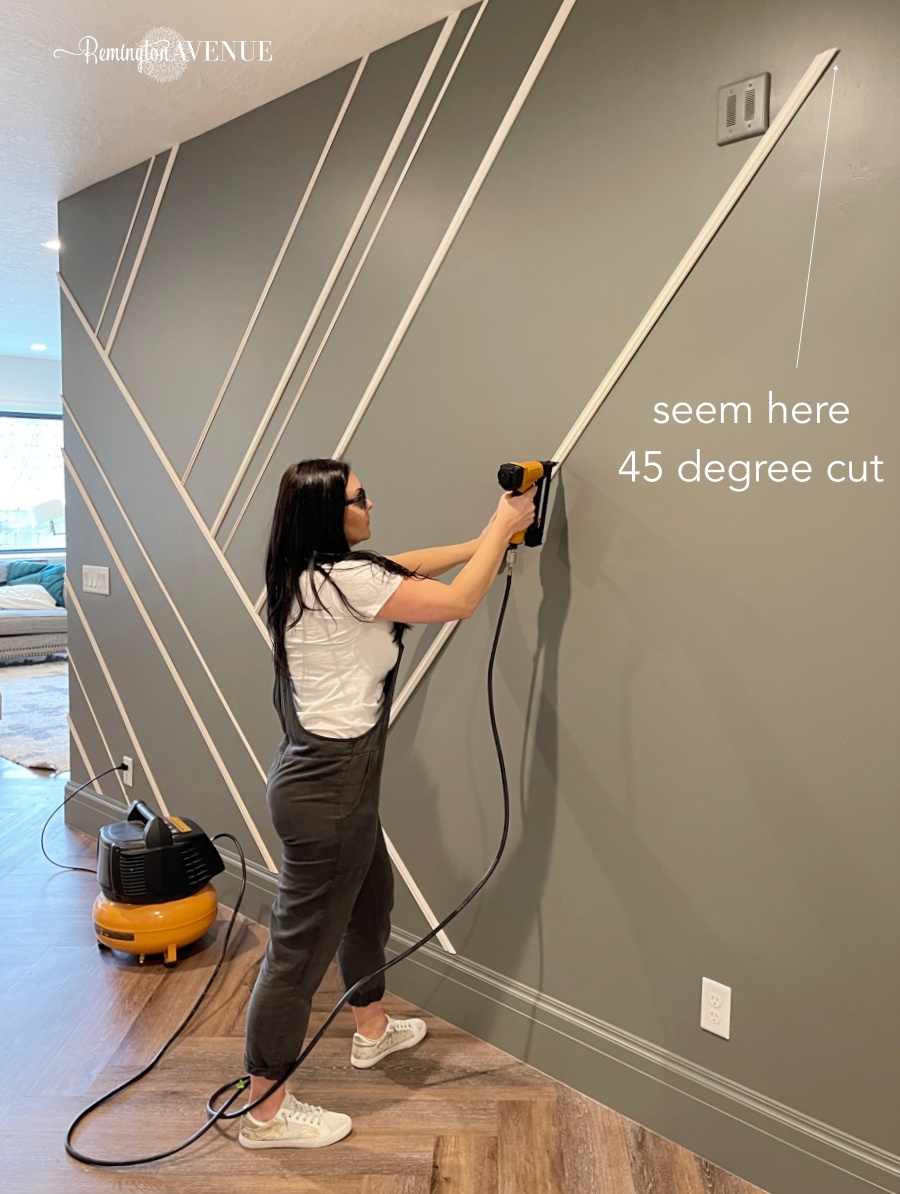
I know it looks like a lot of crazy angles, but the truth is its just a bunch of 45 degree angles. The most difficult part of this wall treatment is wrapping the corner with compound mitered cuts and getting each piece to join together seamlessly. once you get past that the rest is cake. If you have stretches of trim that reach past 8ft (like I did) you’ll want to cut those seems with a 45degree cut as well. Then let the wood filler/ patch do the rest of the heavy lifting so each of those joints disappear. Here is exactly how my asymmetrical wall design is laid out.
Materials/ tools Needed
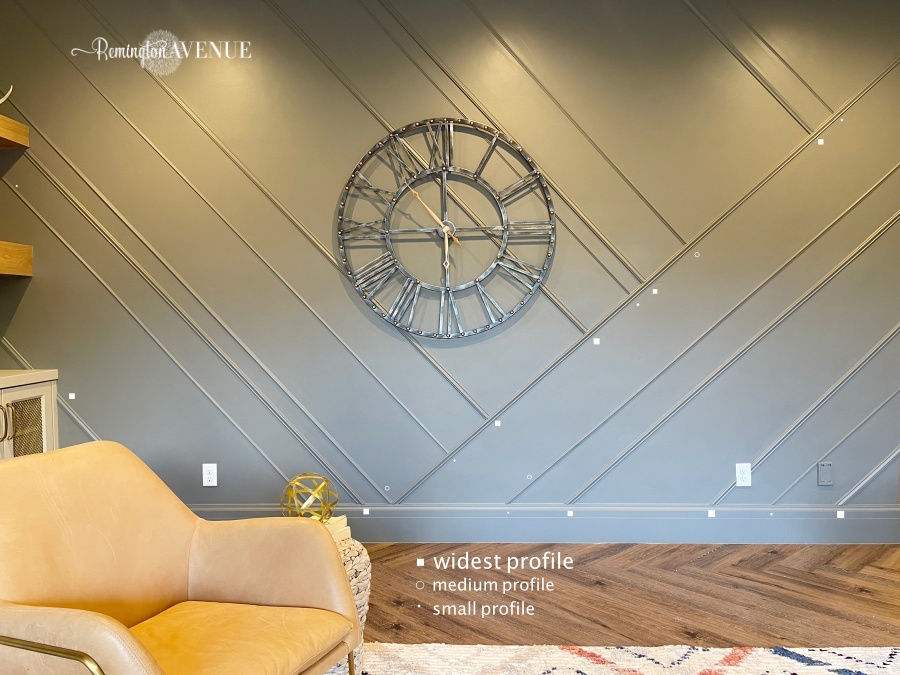
sources: 3 trim profiles linked here:

DIY asymmetrical feature wall tutorial
Start at the corner! If you are wrapping this design around a corner on to two walls. start at the corner first. I started with my smallest triangles at the bottom and worked my way up to the top of the wall. Remember these are all 45 degree cuts where the molding meets the baseboard. You will use a compound miter cut (both 45 degrees) to meet the two molding pieces at the corner to create a triangle. Following the measurements featured in the photo below, will determine your lengths and where they meet at the corner. Click here to see all my videos on this fun wall installation (saved to highlight Asymmetrical). Make sure you are following me on Instagram @remingtonavenue for all my daily DIY’s.
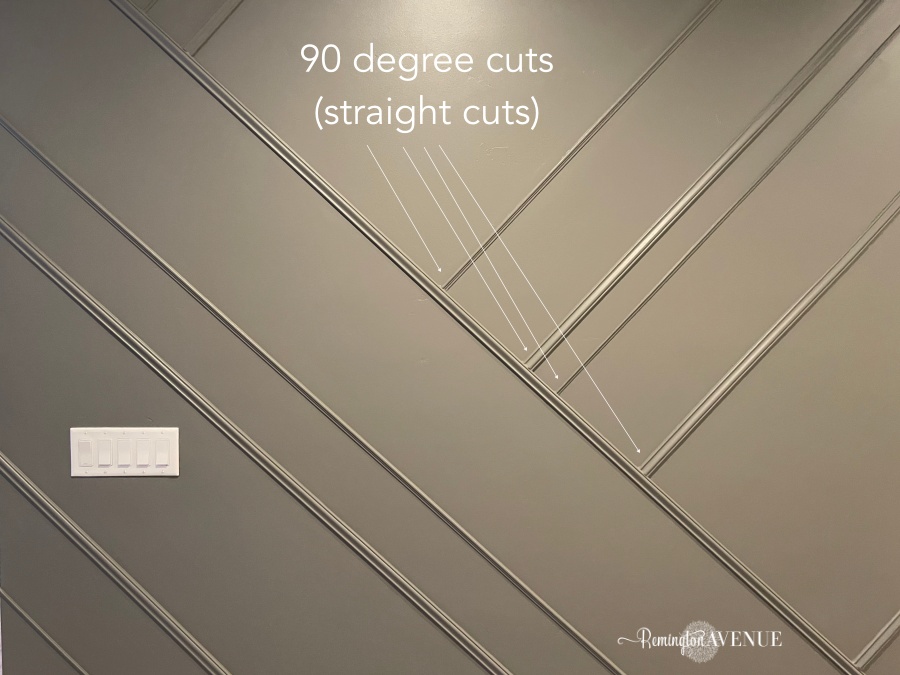
Use construction adhesive and nail gun to secure each piece into place. Once you have the corner design up, you can then start with the rest of the wall. These will all be straight cuts (90 degrees) where the molding meets the corner triangular design. Like shown below.
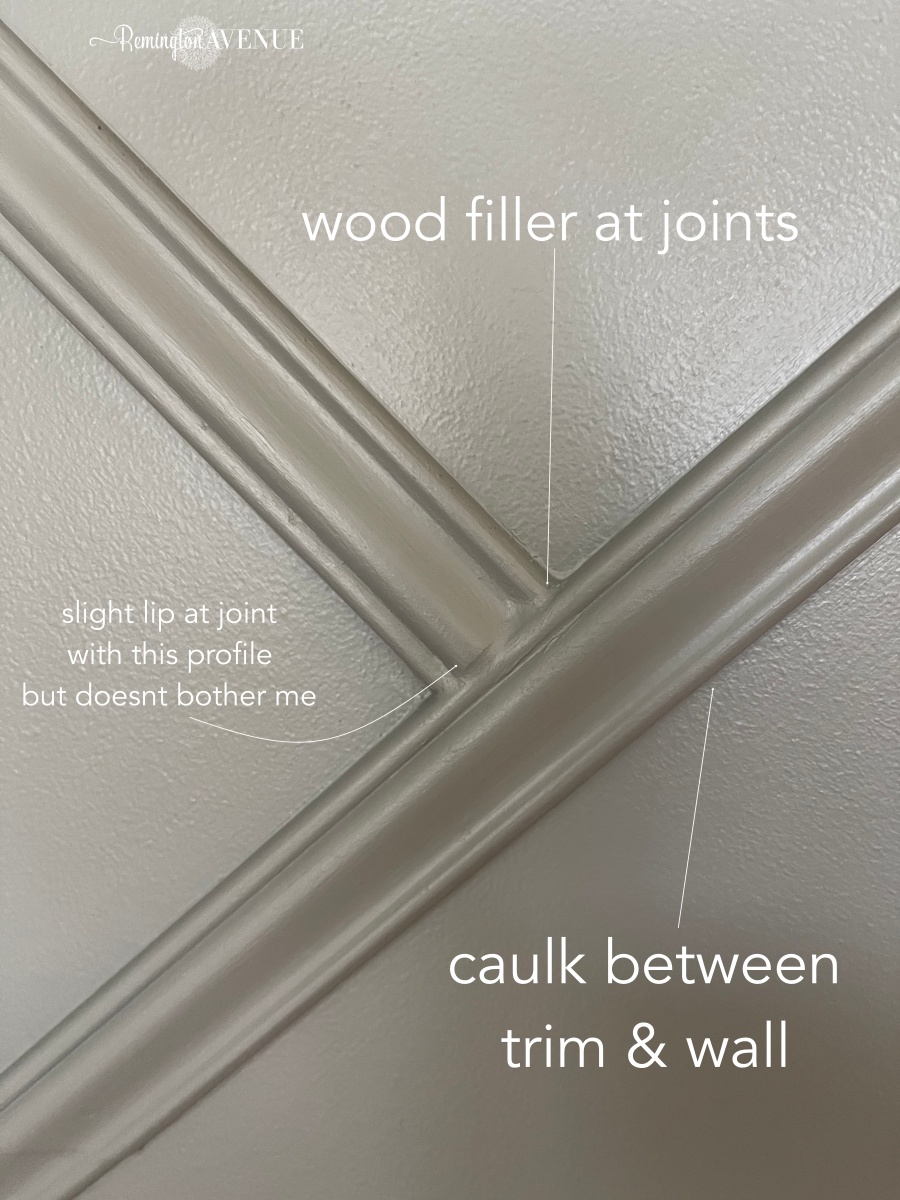
Now that your molding is all secured to the wall, grab your wood filler for nail holes and joints. You will need to sand or use a wet cloth to remove excess. You will use caulk between the wall and molding. Don’t skip these steps cause this is what makes your project look professional.
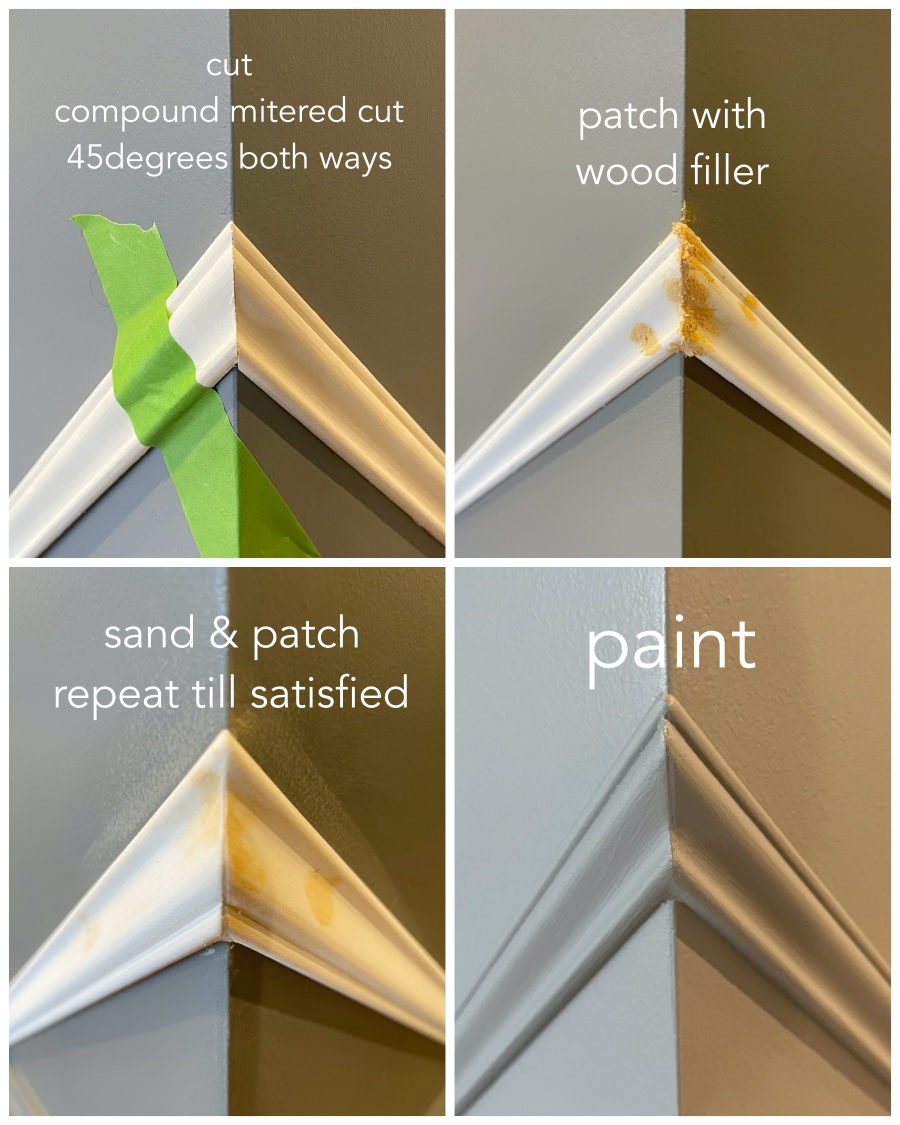
Last step fo this DIY Asymmetrical Accent Wall is to paint it. I rolled the entire wall before hanging molding. I did this to avoid brush strokes. Since my molding pieces are thin, it was easy to go back with my angled brush for the rest of the paint job.
In case you missed my latest accent wall, here is my DIY Bedroom Wall Molding Tutorial – it completely transformed our room, and I am so into it!

 Add to favorites or read later
I think this is absolutely beautiful!!!
All I can say Is WOW I LOVE IT.
thanks
What paint color did you use on the wall?
Hi its listed in the post!