DIY Bedroom Wall Molding
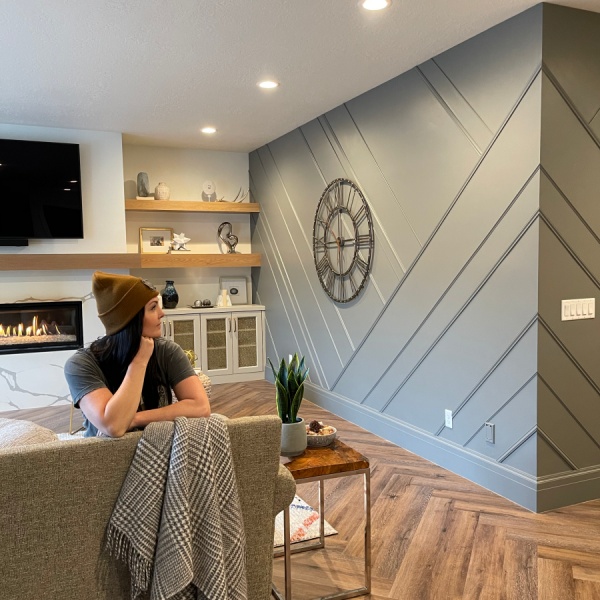
Ok guys! It’s time for a little bedroom refresh and I am doing it all with a simple DIY Bedroom Wall Molding!
You know my love for molding from here and here, and this is no different – it’s seriously the easiest way to make a room look exceptionally custom!
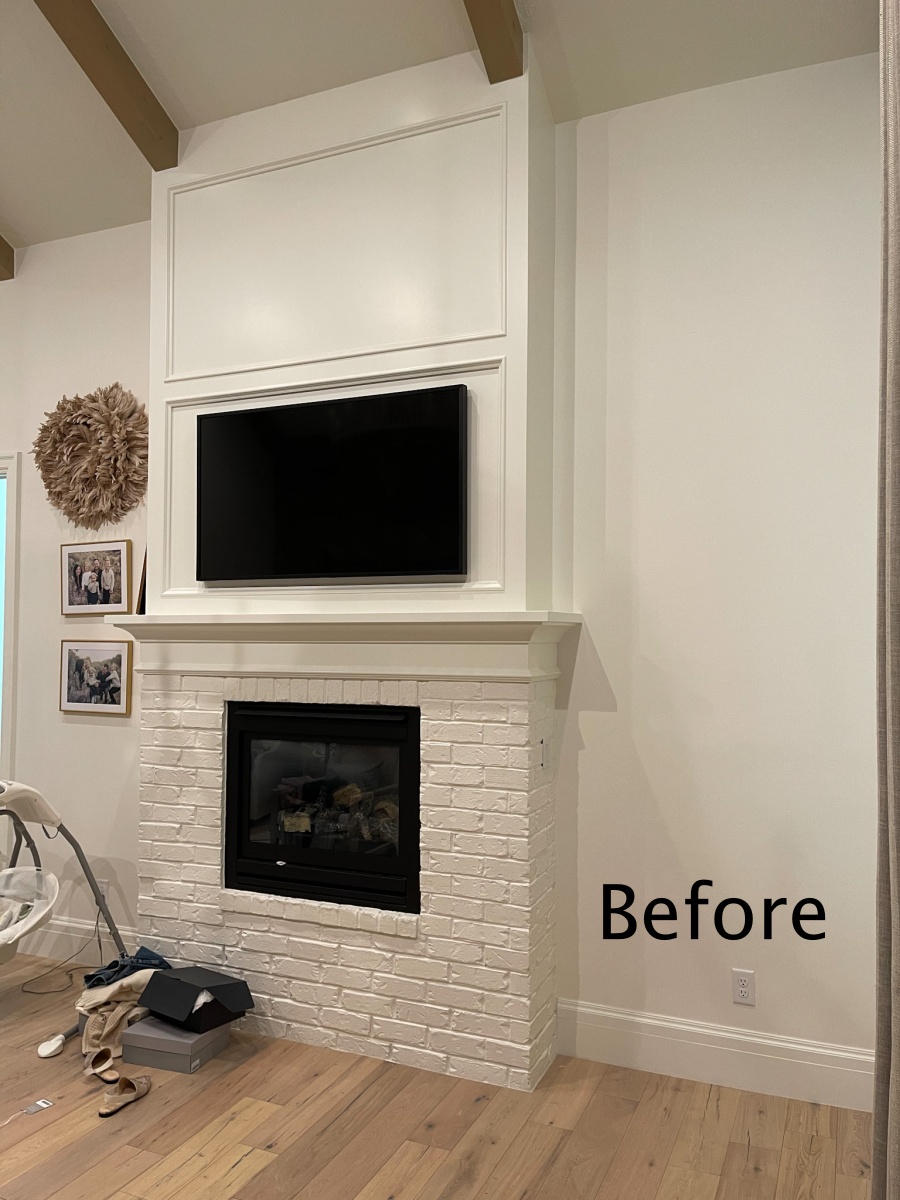
This is the one part of our room I haven’t really put a ton of effort into, until now. What is so funny, is it borders our TV, so we stare at it…a lot! I felt it was time to give a little love to this side of the room, and I am taking you along for the ride!
I’ve got my hair back in a ponytail, cap on, now let’s do this! Bring on the DIY Bedroom Wall Molding project!
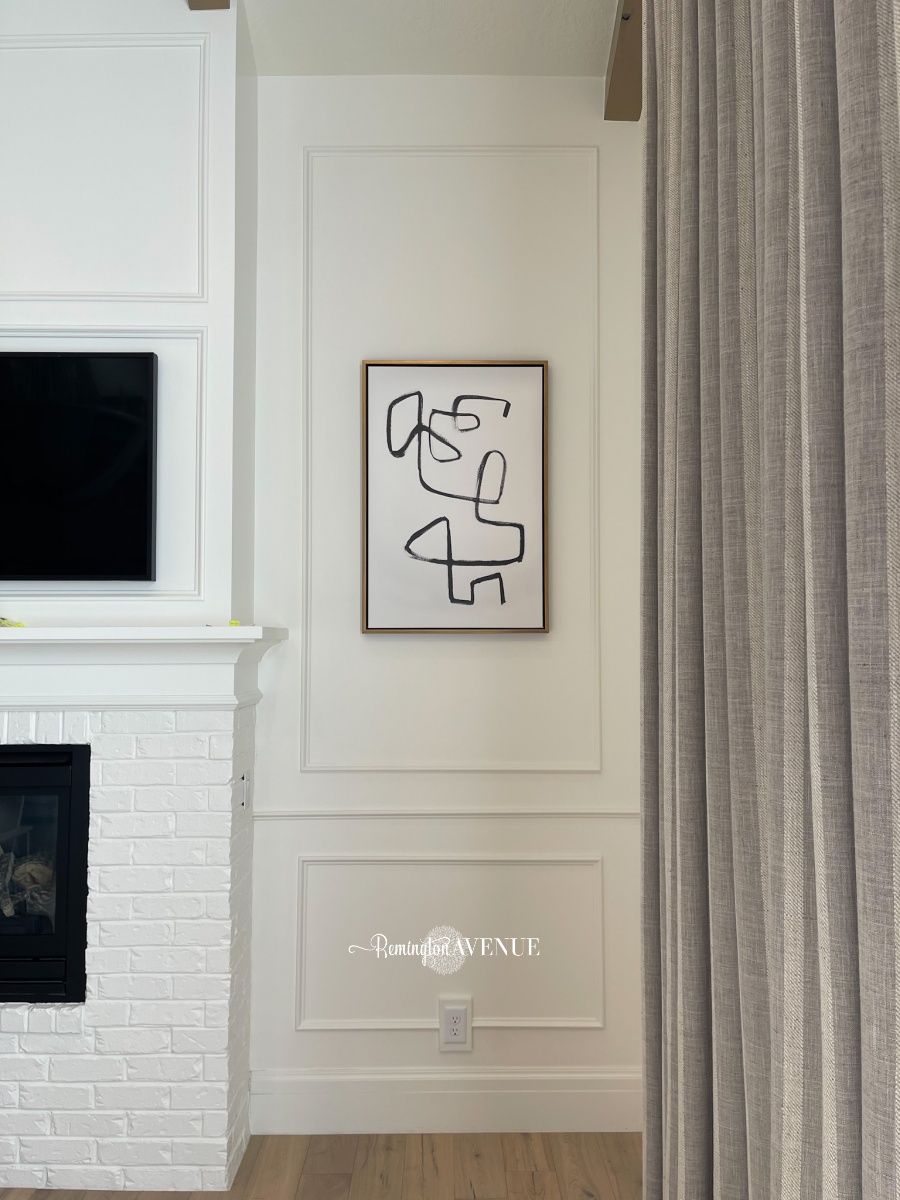
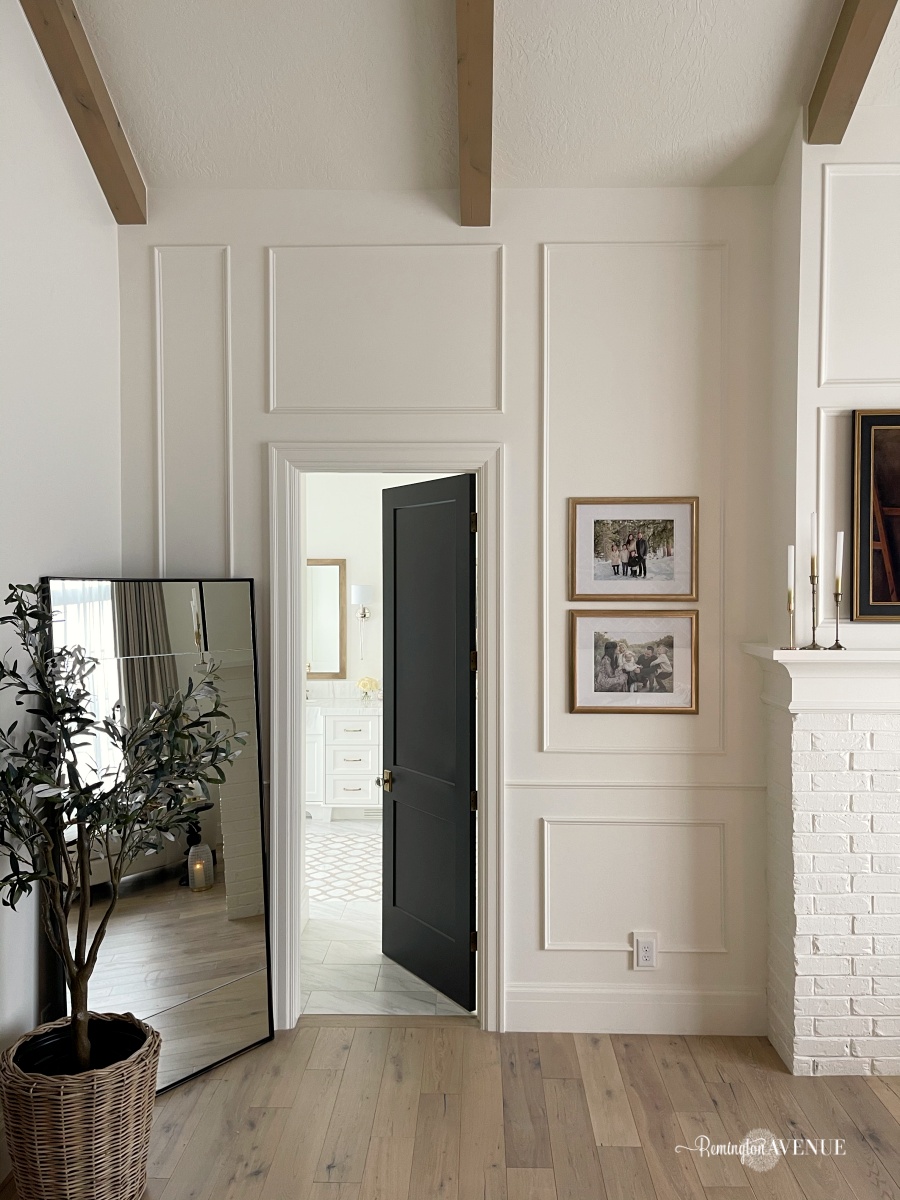
By just adding a simple chair rail piece, it now breaks up that blank wall and just adds interest. That’s really what adding molding does, it just makes it visually stimulating! See the difference below!
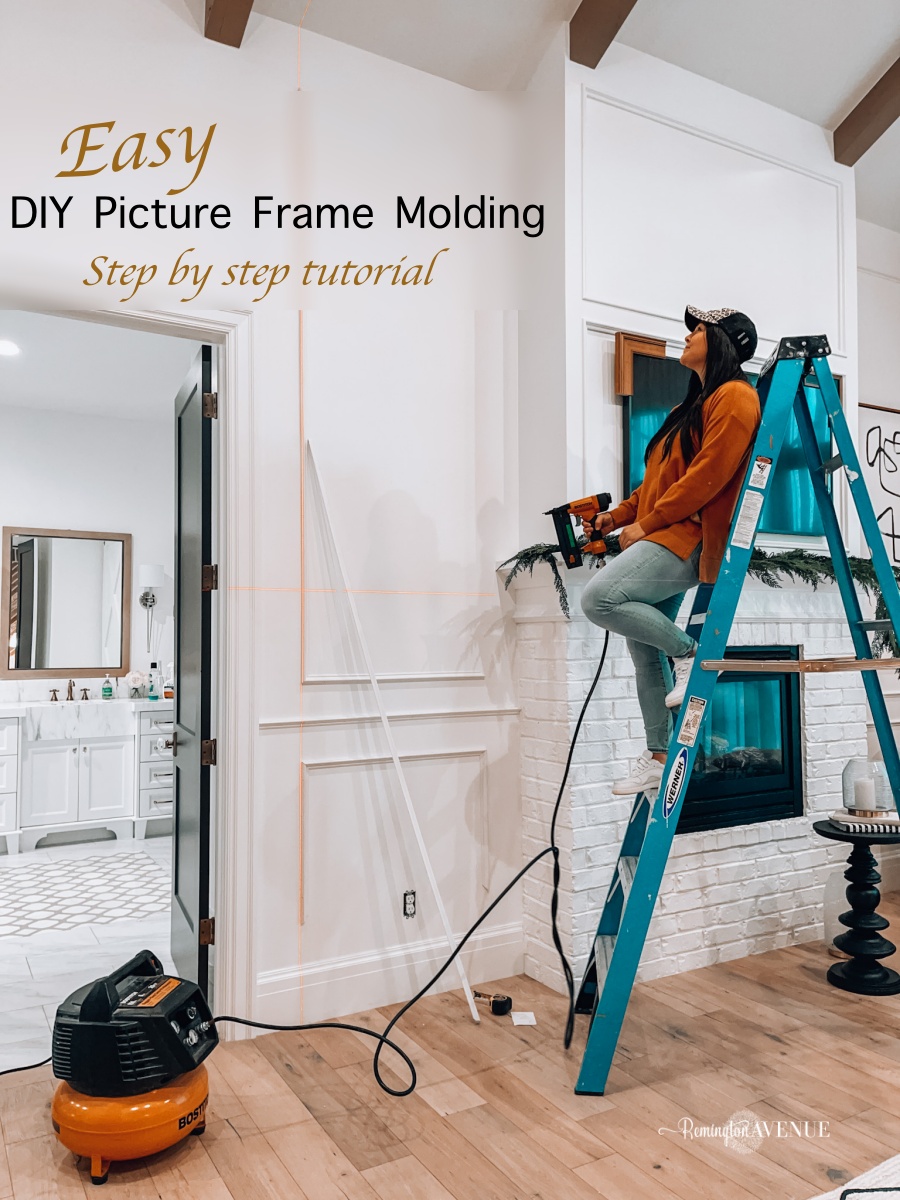
For this DIY Bedroom Wall Molding: You want to use a level and finish nailer to apply molding on the wall. My favorite laser level and nail gun are linked HERE & HERE.

molding profile I used for this entire project
Next, nail into studs or angle nails so they cross in the wall and hold the molding secure.
From here, use a level and right angle to measure and draw out your boxes. Mine are 5 inches below the chair rail and above the baseboard and 6 inches from each side wall. Box size will now be dictated by those measurements.
All my horizontal cuts for that wall are 41 inches. So I’m going to start with a 45 degree angle. You want to always start with a 45 degree cut and then measure from the longest point. I used a compound must saw. You can also do this with a hand saw or box saw too! Whatever you have on hand!
For this particular DIY Bedroom Wall Molding project, measure from the longest point to your specific measurement and mark – 4 cuts, 45 degree angles on both sides and 41 inches. And we’re ready to install!
Here’s how to deal with the outlets:
Before I install my molding, we have a slight issue. The molding would go right over a wall outlet. I can’t just chop off the side because you’ll have raw molding and nowhere to dissolve it. So I have to build a box around my outlet so the molding can dissolve into the frame. You can use MDF or real wood. I have a scrap piece of wood so I am going to build a frame so that the molding dissolves right into it.

(An example of me not doing this correctly is in my powder bathroom, where I didn’t do a box to dissolve it – on the list to fix this year!)
I used scrape wood from my DIY frame I made last week. I made little box frames with 45 degree angles and it’ll go right around the outlet – perfect fit. And now the molding has somewhere to dissolve into and you’re working through any issues for this Bedroom Wall Molding look!
Once the outlet frame is installed, you can fix any gaps with wood filler – wood filler is your friend!
Then, you’ll hang each molding piece! It’s coming along!
Next steps are caulking and filler paint. You’ll want to caulk between wall and molding and then use filler between molding cracks and holes. Next, fill your nail holes with wood filler. Once your filler is dry, I like to come back with a wet washcloth to wipe away the excess, especially when using PVC molding.
When you’re caulking, you’ll want to cut your tip at an angle. Even if your molding is super close to the wall, caulking really makes a huge difference. This is what gives it a seamless look.
I took my orbital sander to the new outlet frame that I built so that the molding would have a place to dissolve. Next, I sanded down the sides and made it all even. I am going to prime it, and paint it. I am going to actually fix the outlet so that it is flush with the box. I use these switch and receptacle spacers from Amazon. They kind of look like legos. But you fold them together to create the perfect amount of thickness to bring the outlet flush with the box you created.
The metal screw holes on the outlet should be lined up flush with the molding. I used this same technique in the nursery!
Final touches: Paint the trim the same color as the wall.
My walls are mostly flat and slightly textured. I’d say if you have a really textured walls, skim over it or add backer board before adding molding. That’s my personal opinion, but it’s your house so do what you want to do!
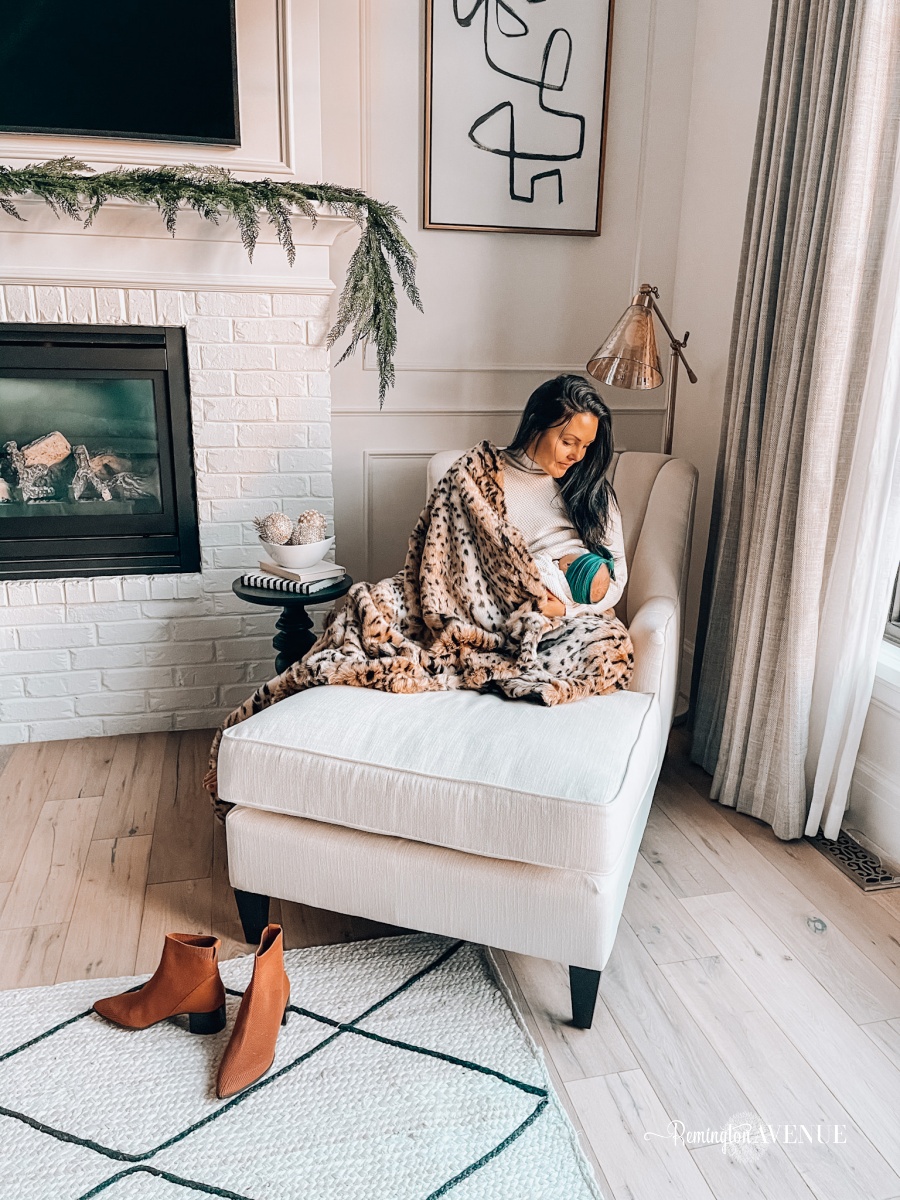
Next install your art within the boxes! We went with a mix of classic and modern and then of course our frame TV is the centerpiece. This is one of my very favorite purchases ever – it’s useful, but it looks pretty! Exactly what you want out of a TV!

Chair rail is at 41 inches high off the ground. My box is 5 inches from the chair railing and 6.5 inches from each wall. So off those measurements we’ll create the box to the left of the fireplace. Because the wall to the left and right of the fireplace are not the same. But the molding boxes are determined from the distance of the walls.
If you’re afraid of a saw, the best way to conquer that fear is to make your first cut – you’ve got this! Also, using a laser level makes it so you don’t have to use a hand held level while nailing.
Why PVC vs wood trim when doing this DIY Bedroom Wall Molding project?
There’s a couple reasons I went with PVC. One, my local home depot had the profile I wanted in PVC, not in wood or MDF.
The second reason is that it is water resistant if you want to use it in a bathroom, and it doesn’t expand or contract as much as wood. So with wood, you might see gaps start to form because of that. So with PVC you don’t have that issue. PVC is flexible, so it’s really easy to manipulate and work with.
The laser level makes using long pieces of molding easier because I can just follow the laser and nail!
Some frequently asked questions answered:
- The wall color is ‘Simply White’ by Benjamin Moore
- I will be using an outlet extender to pull electrical flush with the frame
I am so happy how this little corner turned out – it’s shaping up to be Juni and I’s fave spot to hang! And this whole cozy chair setup is just the perfect vibe for the new year! Click here for sources!

I cannot wait to see your transformations of your spaces using this simple DIY Bedroom Wall Molding! Next week on the blog we are talking all things frame TV and the sources for deco frames – who wants a boring old TV anyways? xx
shop my Tools & supplies
Shop my bedroom Furnishings

 Add to favorites or read later
Thank you so much for the explanation. What size of molding, and molding profiles are best?
It really is preference.
Hi Mysha! This looks absolutely gorgeous and so elegant! Do you mind sharing which chair rail you used? I’d love to know the name and dimensions. Was it the 5390 11/16 in. x 2-5/8 in. x 8 ft. PVC Composite White Chair Rail Moulding?
Baby Juni is beautiful. Blessings! <3
This is beautiful. I want to add molding to all my plain hollow core doors. Would liquid nails work for this?
Yes I would recommend loctite quick grab
Same question here about the chair rail molding! Is it the same as the picture frame molding?
In this design I did use the same molding for chair rail and picture molding