DIY Brick Backsplash with German Schmear
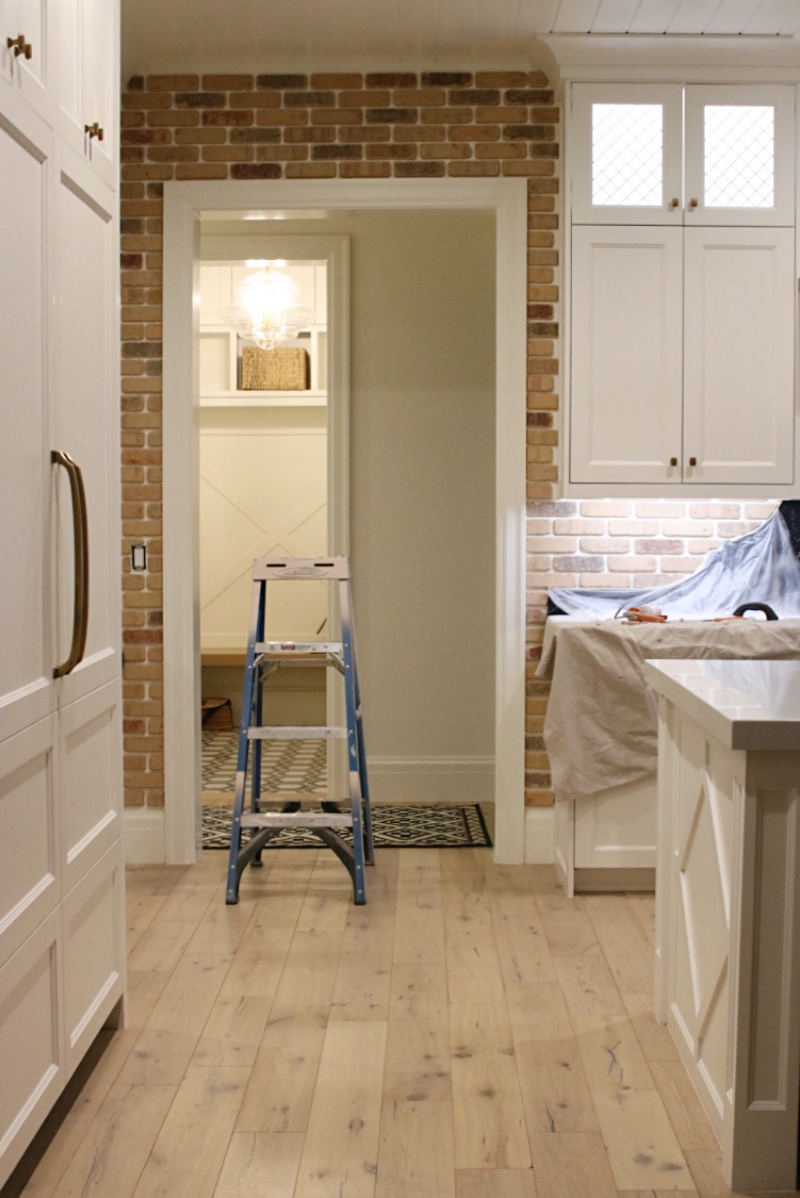
I’ve always loved brick, which is exactly why I designed an entirely brick home! Even the interior is dotted with brick accents and now my kitchen is no exception. Brick is classic and the texture gives off an amazing richness! Which is why I am breaking down this DIY brick backsplash with German Schmear!
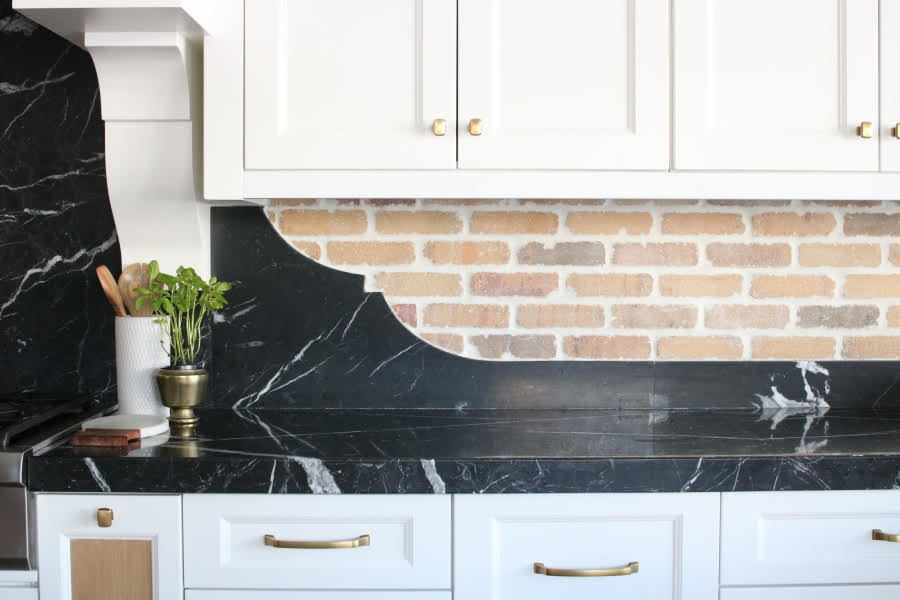
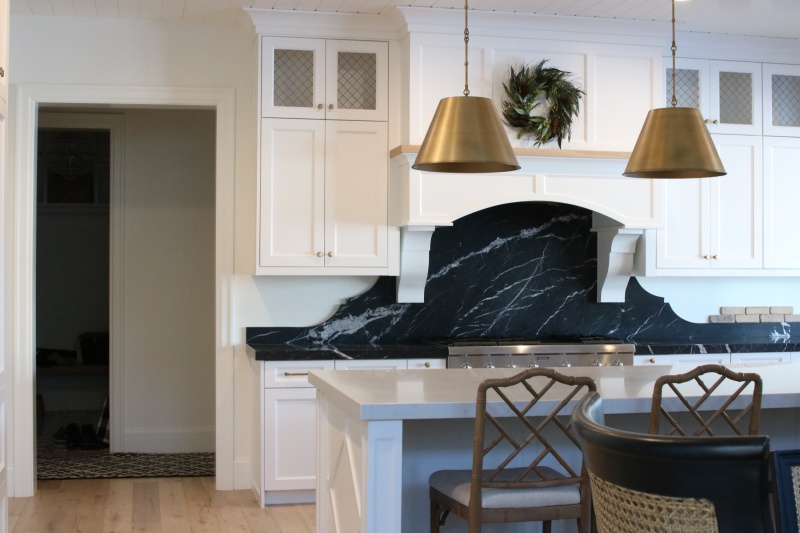
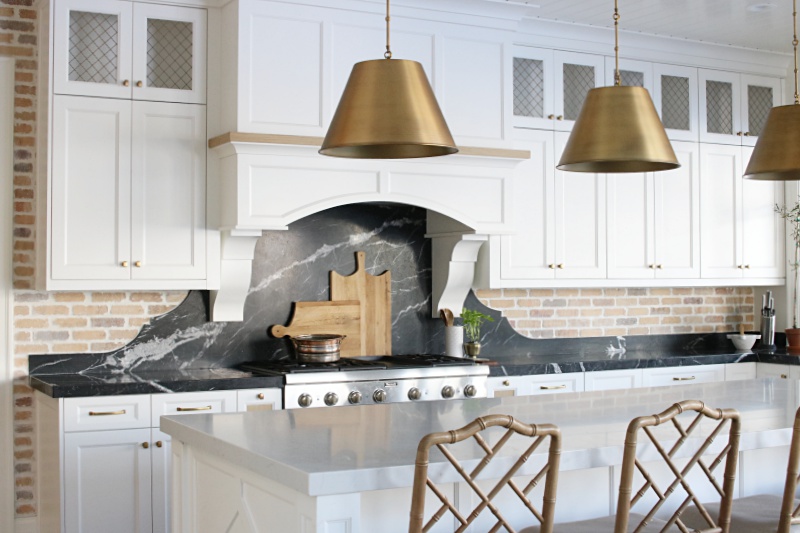
My kitchen was already equipped with a black marble backsplash but that didn’t stop me from adding yet another old world layer of masonry to my french country themed home.
Want to achieve this german “schmeary” look in your own home? Or do you just need to know the basics on how to install a brick backsplash? You’ve come to the right place!
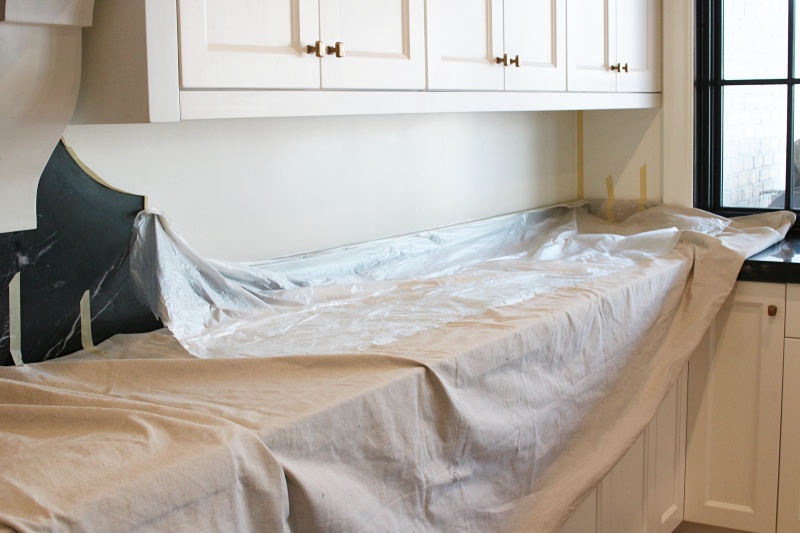
BEFORE
AFTER
DIY Brick Backsplash with German Schmear – Tools & Supply list
Thin brick or Brick veneer
Locktite Power Grab
Caulk gun
Sponge
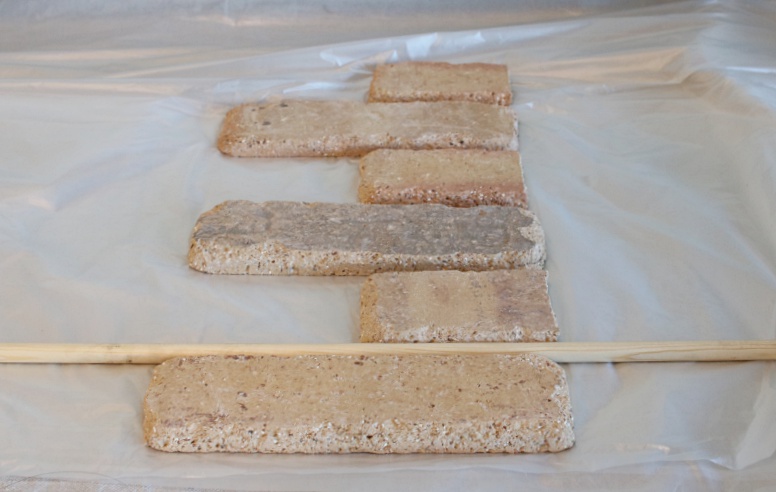
3/8″ dowel rod
Tile trowel
Sanded grout (I used bright white)
Plastic sheeting
Drop cloth
Blue painters tape
Rubber gloves
Drill + grout mixing paddle (or) trowel for hand mixing
Screwdriver
Outlet extenders
Hand tile cutter or tabletop tile saw
Plastic buckets (1 for grout, 1 for water)

Diy Brick Backsplash – How to install the bricks
Like most projects, prep work is key!
First mask off your counter tops and any backsplash areas that will remain intact. I used blue painters tape and plastic sheeting. Then remove any electrical plates from the area you will be installing the brick veneers. I also covered my floors with a drop cloth for extra protection.
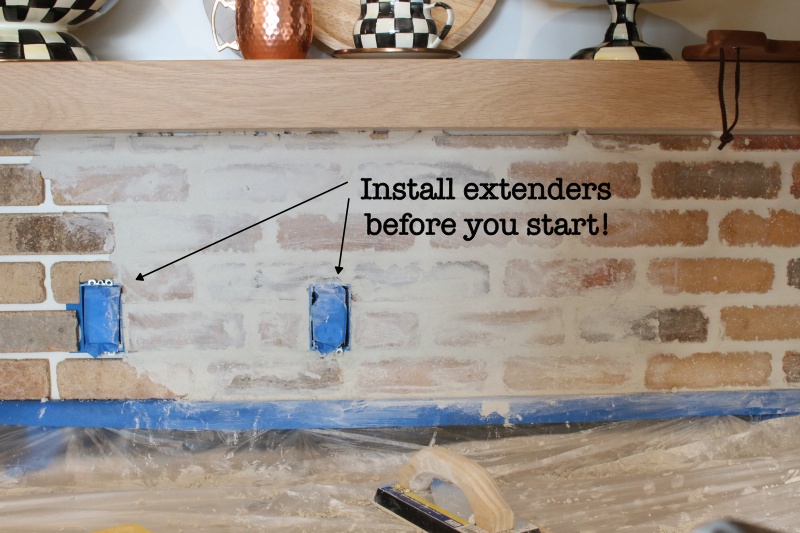
Because the veneers for this DIY brick backsplash with German Schmear are about 1/4 – 1/2 inch thick I had to add extenders to the outlets.
You can buy them HERE. Just follow the instructions on the back of packaging. Anytime I do anything with electrical wires I get a bit nervous, but this was pretty simple.
Make sure to switch the breaker off for all the outlets!
From here, using my Locktite Power Grab adhesive, I simply glued the back of the brick veneers to the wall starting at the counter and working my way to the top of the wall row by row. I used a 3/8″ dowel rod to keep my spacing consistent. I found this to be much easier than actual tile spacers. There is no need to leave space between the marble backsplash and the first row of veneers. The veneers are not perfect, so your spacing does’t have to be exact either – that’s the beauty of a somewhat rustic brick backsplash! Also, make sure to stagger the bricks lining them up so the center of the brick is just above the gap in a true brick lay pattern.

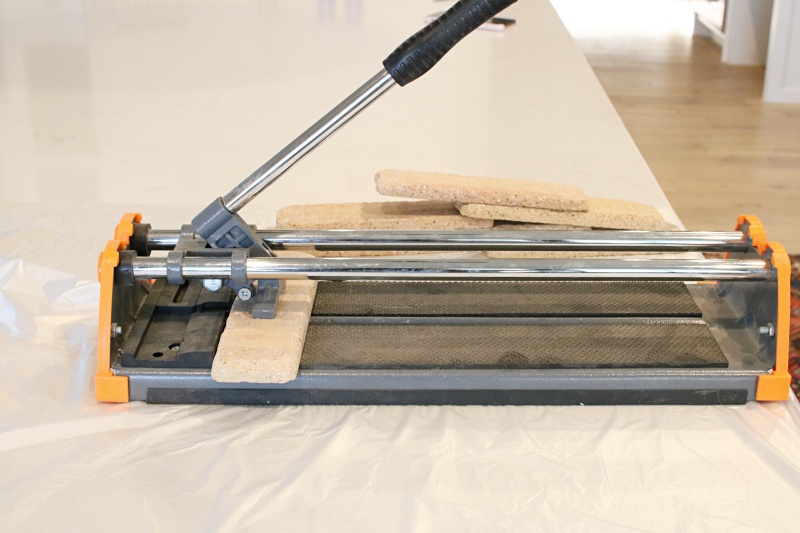
I used this Tile Cutter to score the brick to the size I wanted and pressed down to break the brick in that exact spot. It took me a couple practice rounds, but then I got the hang of it. Unless you have a curved stone backsplash (like mine – which is unlikely) most of the cuts will be right in half. Basically each corner will start with a full brick or a half brick to maintain the pattern. Pretty simple huh?!
I wrapped my brick backsplash along the main kitchen wall, up and over the entry way opening, and into my butlers pantry.
Just be aware that if you plan to wrap any outside corners you will need to order special corner brick veneers. I let my new brick backsplash dry overnight, but the Locktite only takes about 15 minutes to fully cure.
Brick Backsplash – Grouting & German Schmear technique
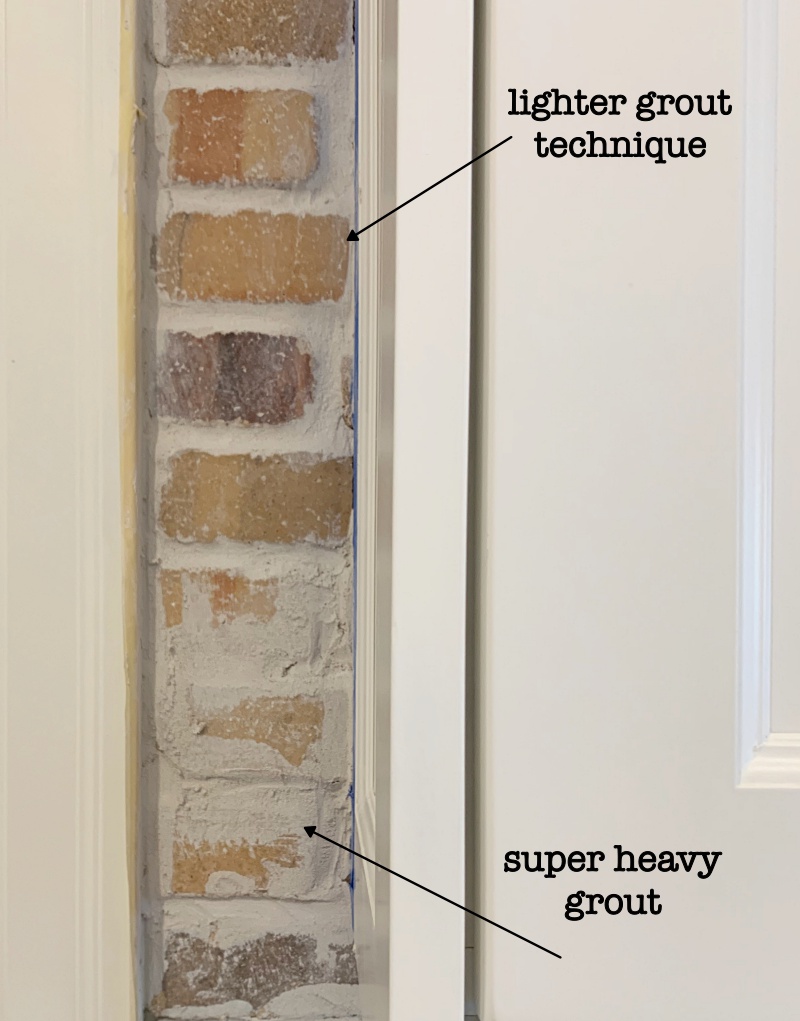
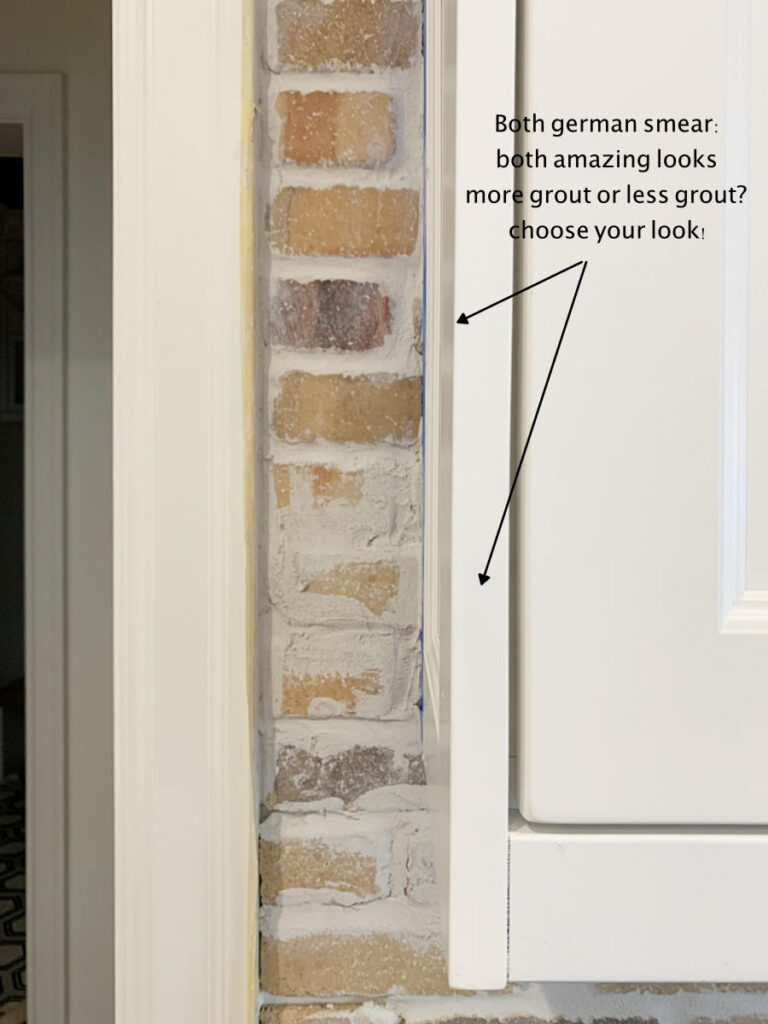
What is German Schmear and does my backsplash truly represent that style? Basically German Schmear is a technique of whitewashing brick by smearing lightly colored mortar over the surface and mortar joints. Does my backsplash truly represent this style?… Kind of! As I got going on the grouting and smearing, I felt that the more “schmeary” look was competing with my already existing marble backsplash. I chose to wash away more of the grout than I anticipated, but I will show you the differences below.
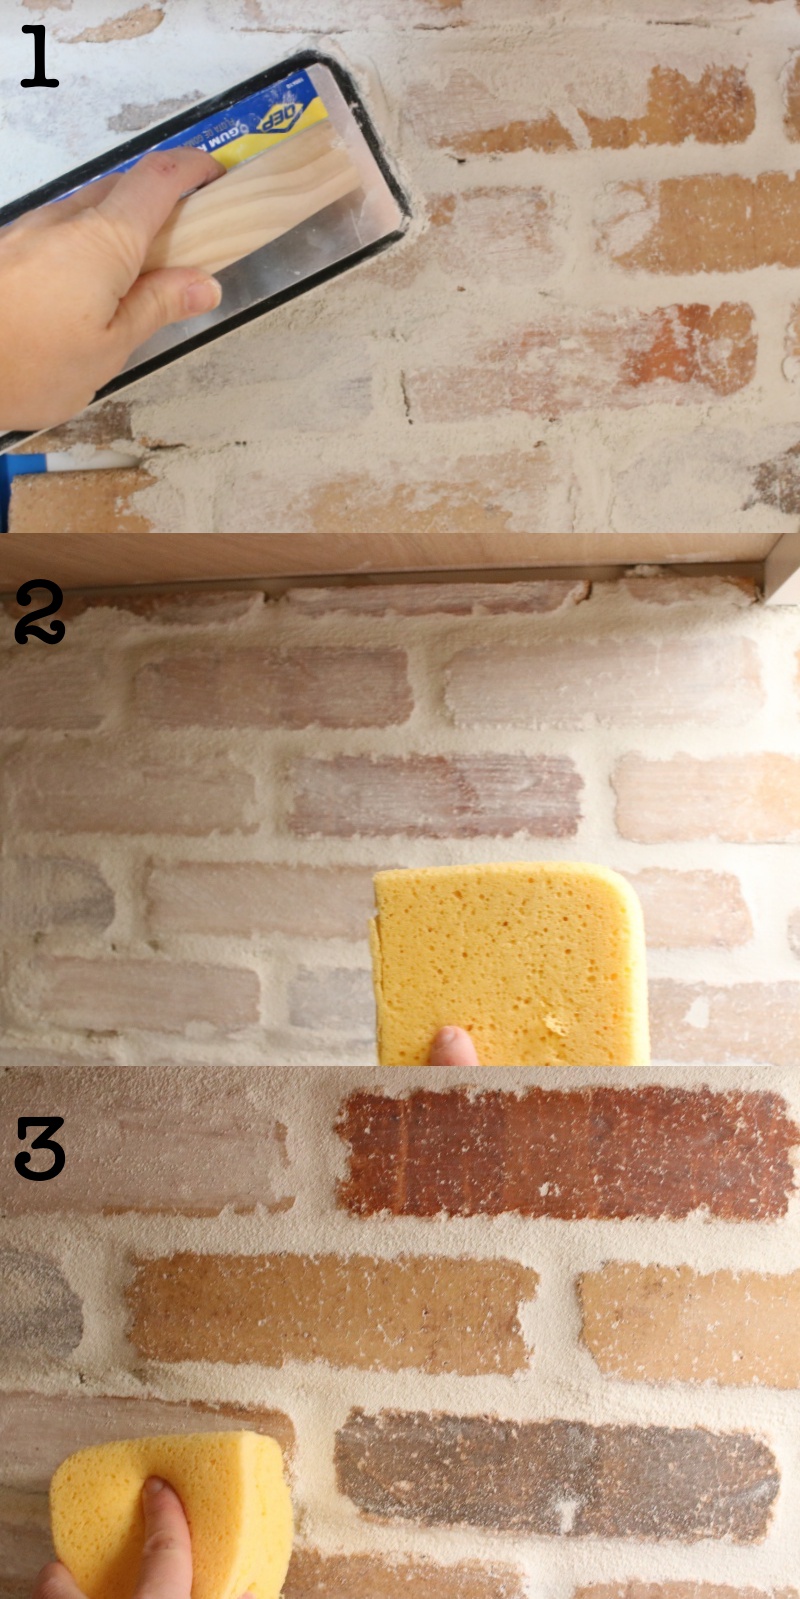
First combine the sanded grout with water and mix. The proportions are listed on the back of the bag. I used my Ryobi drill and mixing paddle to mix the grout. You can do it by hand, but it will take a bit longer.

Using a trowel, smear on the grout filling all the joints and going over all the brick faces.
There really is no such thing as over grouting when you’re after a German Schmear look. You can literally cover 95 percent of the brick faces or wipe away as you see fit. I used a wet sponge to wipe away the unwanted grout. Be prepared to get messy! Here are some of the different looks below.
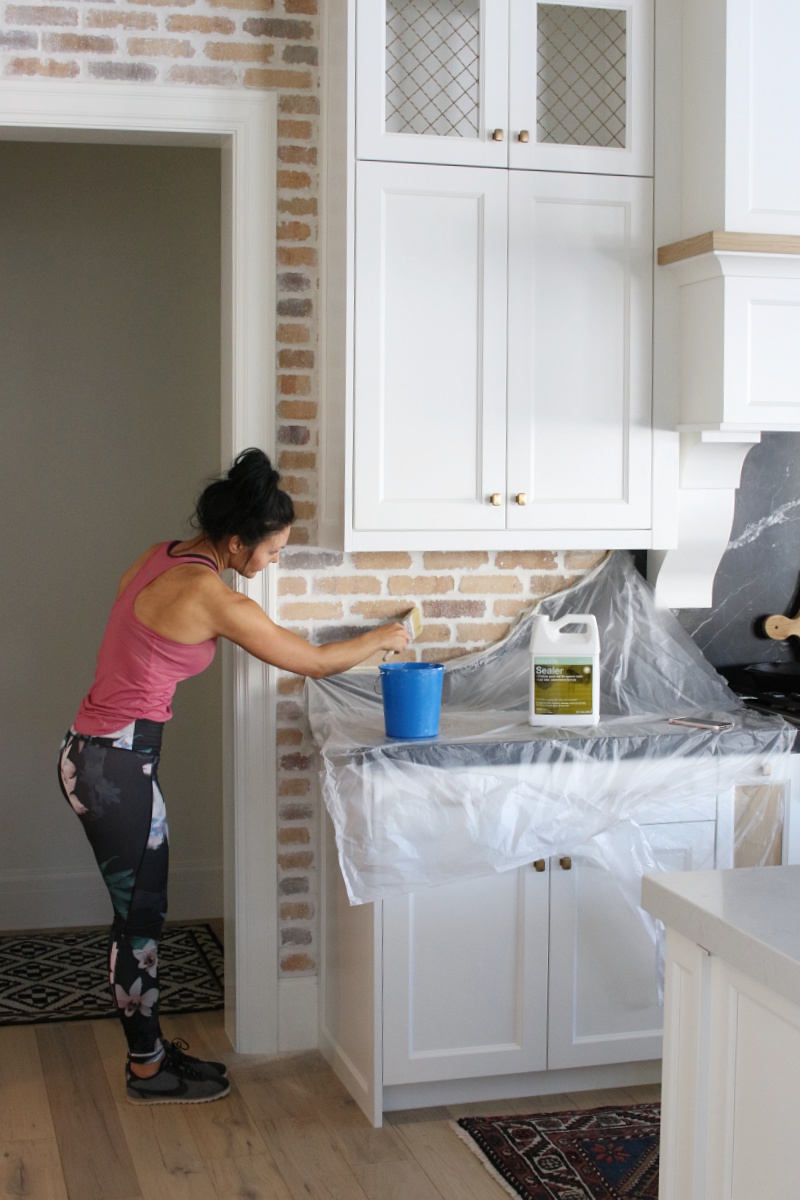
I let my mortar/grout dry for a few days before applying the sealer. I used this grout and tile sealer specially designed for brick. Basically the sealer protects the brick and grout from stains. Imagine that homemade spaghetti sauce splashing on the bricks and not being able to wipe it away! Don’t skip this step! I simply used a paint brush to brush on the sealer. It looks and feels like water and dries in 5 minutes. Apply a couple coats over the entire brick backsplash.
The grouting is really the most labor intensive part! Other than that, the process is really simple. I absolutely love how the brick warms the whole kitchen up and pulls the same tones from the wood flooring.
For more DIY projects like this DIY brick backsplash with German Schmear, be sure to follow me at remingtonavenue.com or remingtonavenue on Instagram.


 Add to favorites or read later


Love this tutorial! You have inspired me to do a brick backsplash in our lower level kitchen.
Absolutely stunning. Any tips on how to end a brick backsplash on an open wall?
Love it!!! What is the color of the brick you are using?
In loooove!! Quick question. How did you cut around the light fixtures ?