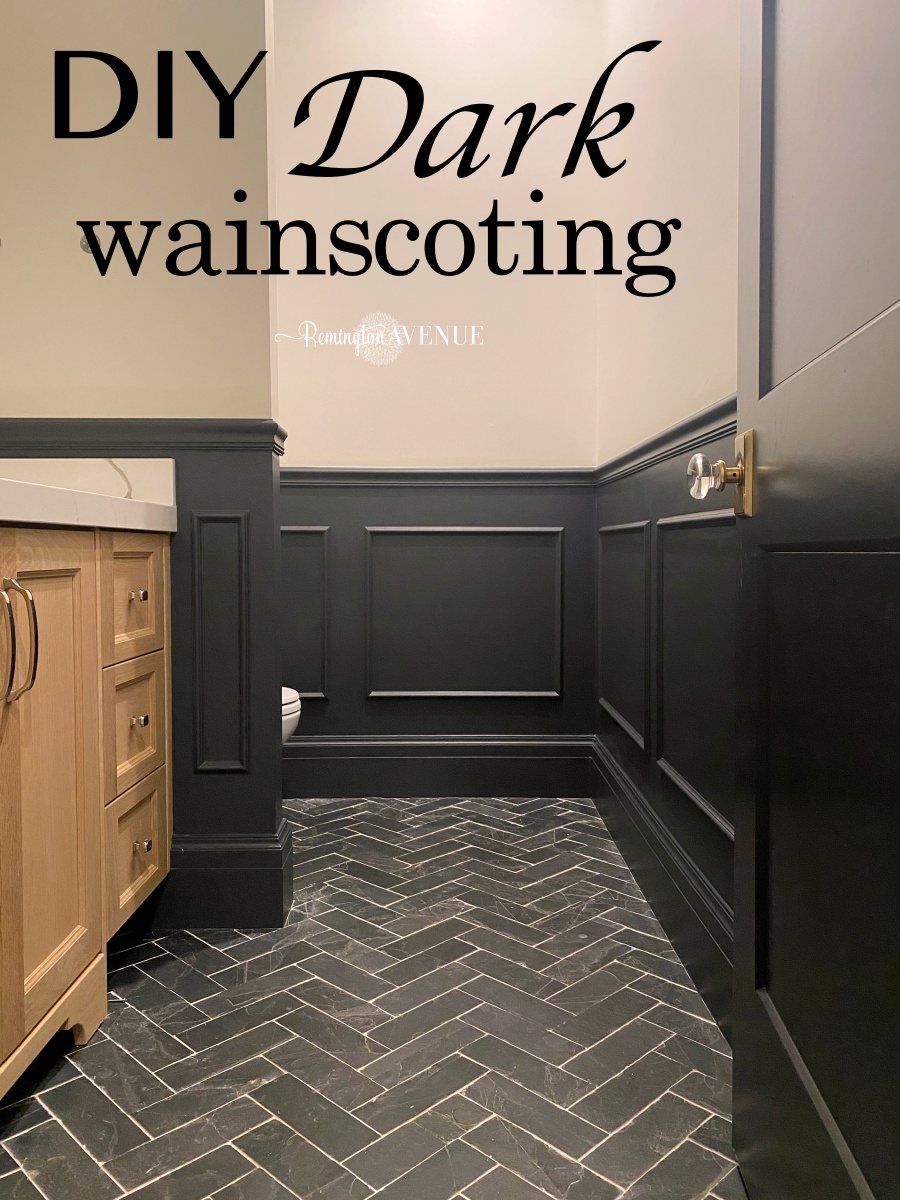
DIY wainscoting: Applied molding boxes
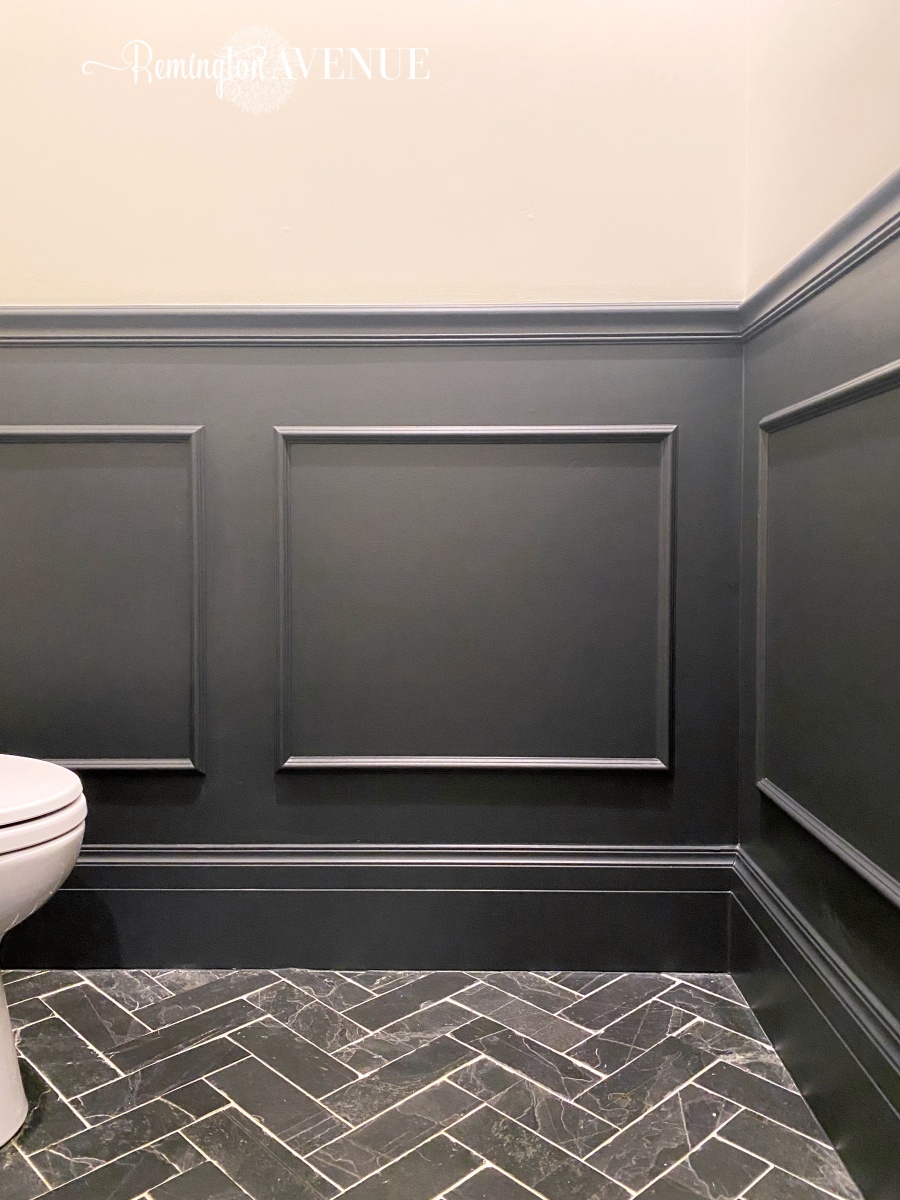
I recently shared my main level powder room. Although I am proud of the vanity design and love the sconces, that’s about all it had going for it! I have spent the last week installing chair railing and wainscoting and boy has it made a huge impact. I still have plans to install wallpaper above, but for now here is the tutorial on DIY wainscoting using simple applied molding boxes.
DRAW YOUR WAINSCOTING DESIGN ON THE WALL
Paint wall below chair rail your chosen color. I painted mine Cheating Heart by Benjamin Moore. Then draw out your design on paper before you purchase materials. This will help you visualize. You can adjust the height & sizing as needed. This will also help you see anything that may interrupt your design ie: vents, outlets, sink, backsplash, or doorway. For my powder room, I had to work around 3 outlets. I decided to carry the chair rail above the sink backsplash for one seamless design. Check the corners of your squares with a T-square or vertical level for perfect 90 degrees boxes.
And of course, measure twice before purchasing your materials!
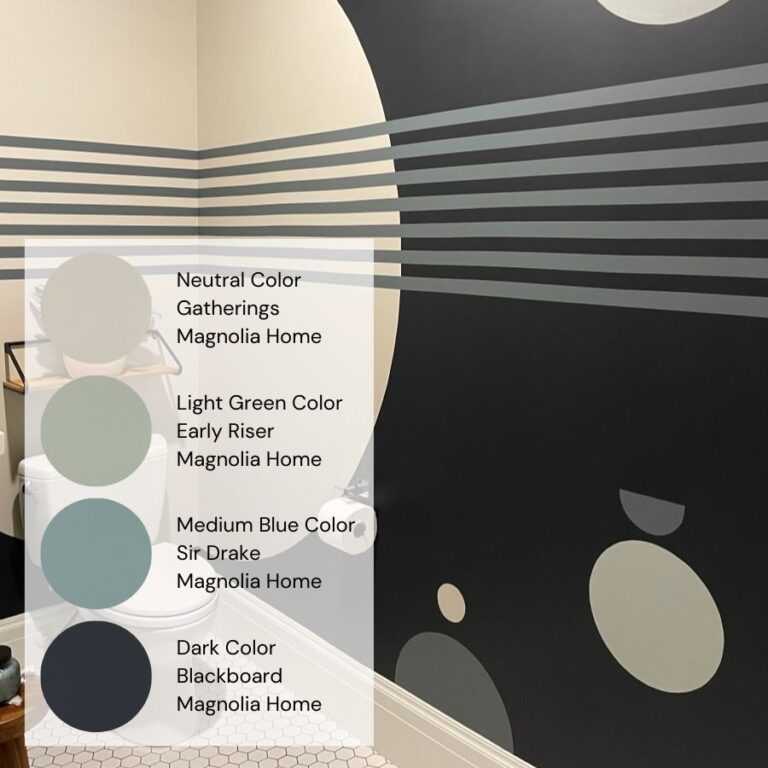
Here are the exact molding profiles I used to create this look:
I used this exact same molding profile throughout my home and in my sons DIY modern molding wall. Click here for that tutorial.
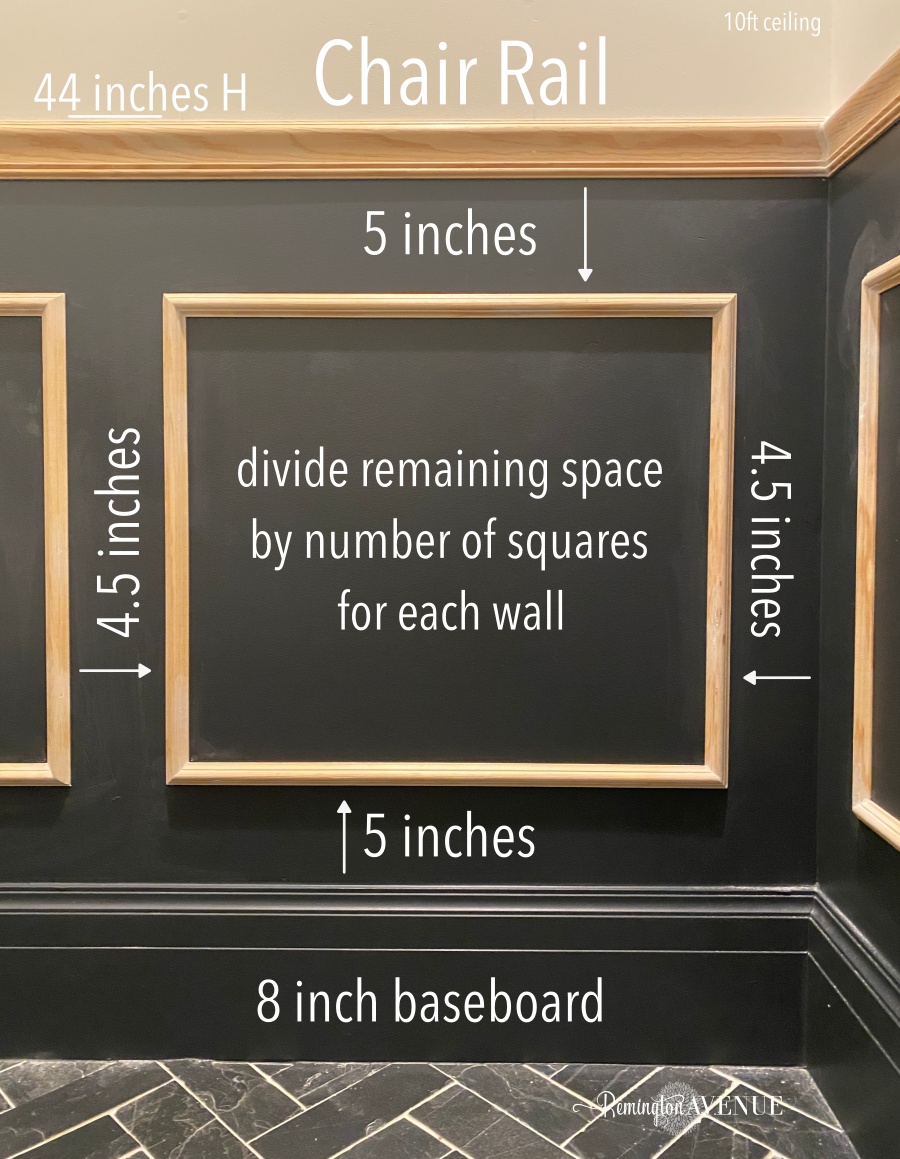
Quick Tip: I still recommend drawing out the squares on the wall once you have decided the sizing or at least marking corners of future boxes (which is what I did). Once you determine desired space between boxes and space above baseboard and below chair rail- box size is determined by what is left over. Below are my exact measurements.
INSTALLING DIY WAINSCOTING – CUT, GLUE, TACK
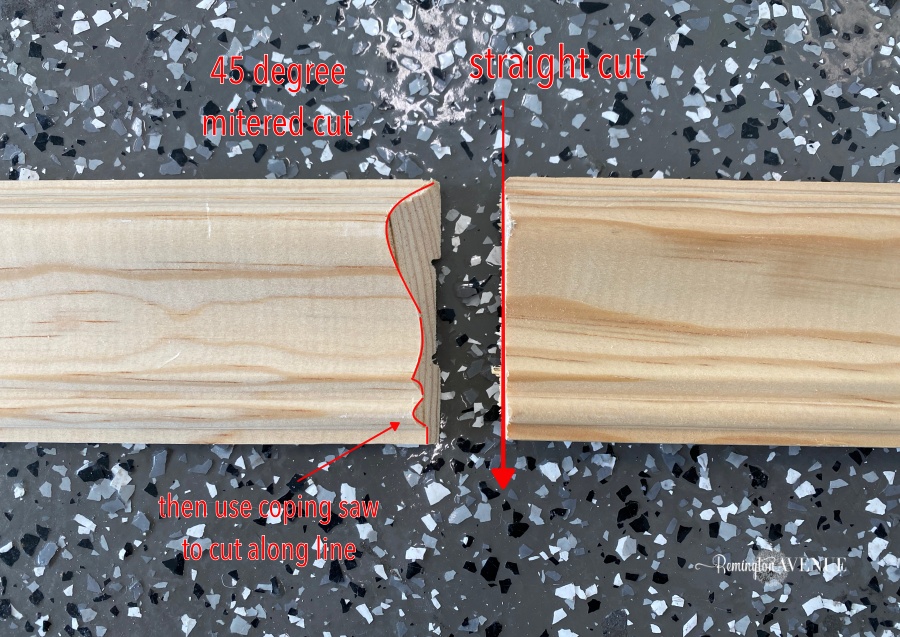
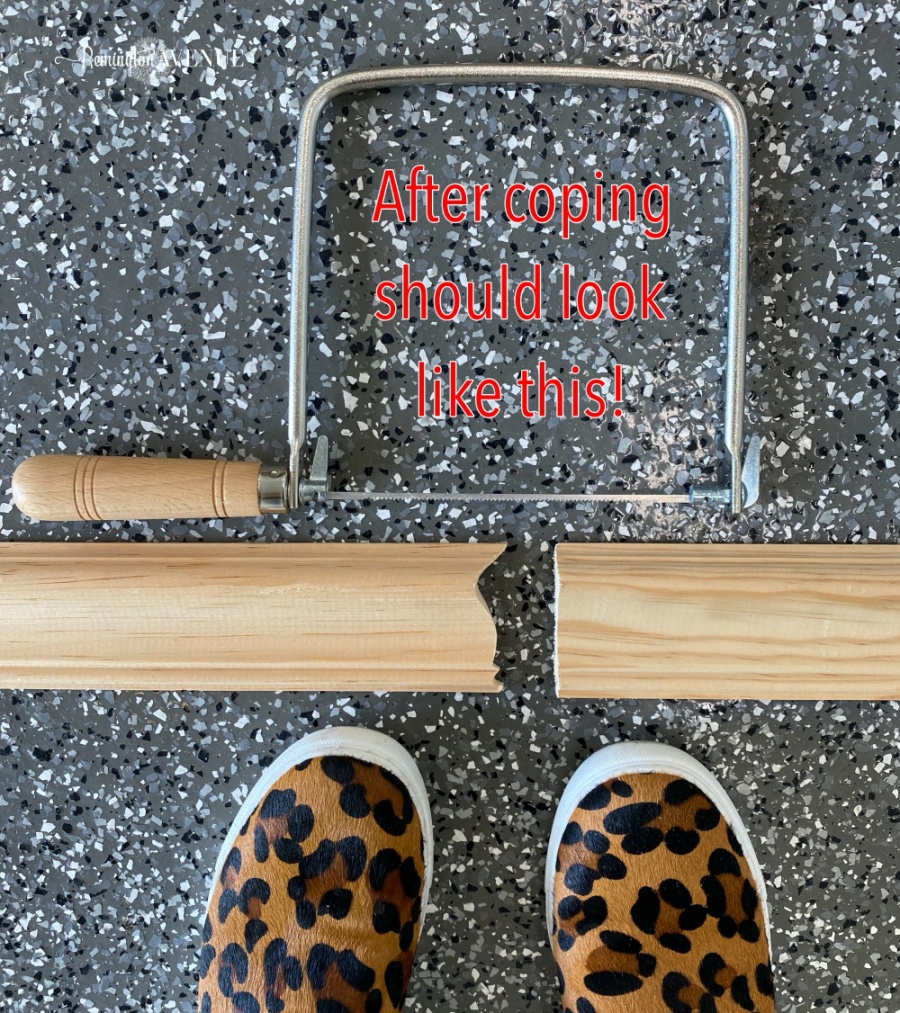
Now that the design is drawn out and measured, the pieces should come together pretty quick. Now let’s get cutting. Tip: label your pieces as you cut so you know exactly where they go when ready to install. For this project, a saw like this one is essential. I love my compound miter saw and it really isn’t hard to use. Mine is the 12″ size and accommodates larger boards too. All cuts are a 45 degree angle. I installed the chair rail first and used a coping saw for all inside corners. This is a cleaner finish than a simple 45 angle. Use the coping saw to cut out the extra angle following the outline like seen below. One side of each piece of chair rail should be cute straight while the other is cut at a 45 degree angle then coped. Be sure to use construction adhesive on back of chair rail and nail into studs.

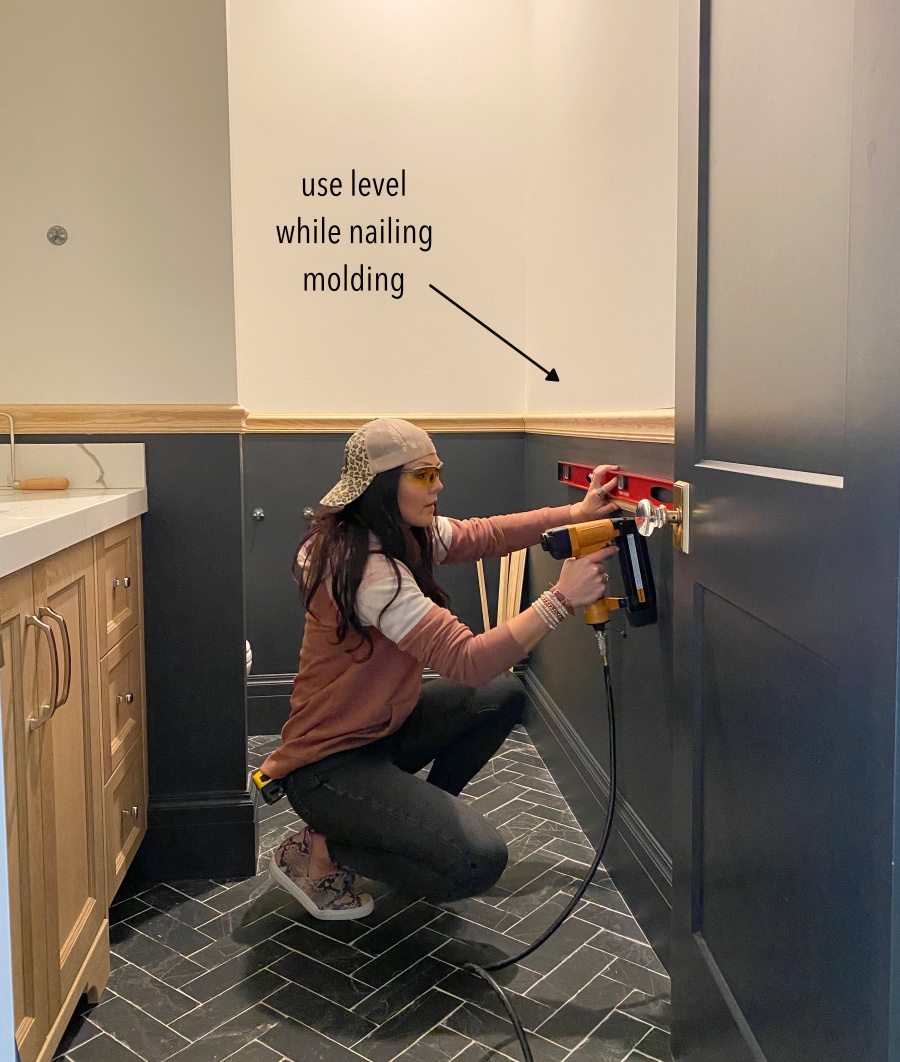
Install your molding boxes below following your map drawn on the wall. Use your level while nailing in each piece of molding. I highly recommend a brad nailer for this project. Its fast and rewires a lot less hole filling and mess. Use construction adhesive first, then nail (esp if no studs).
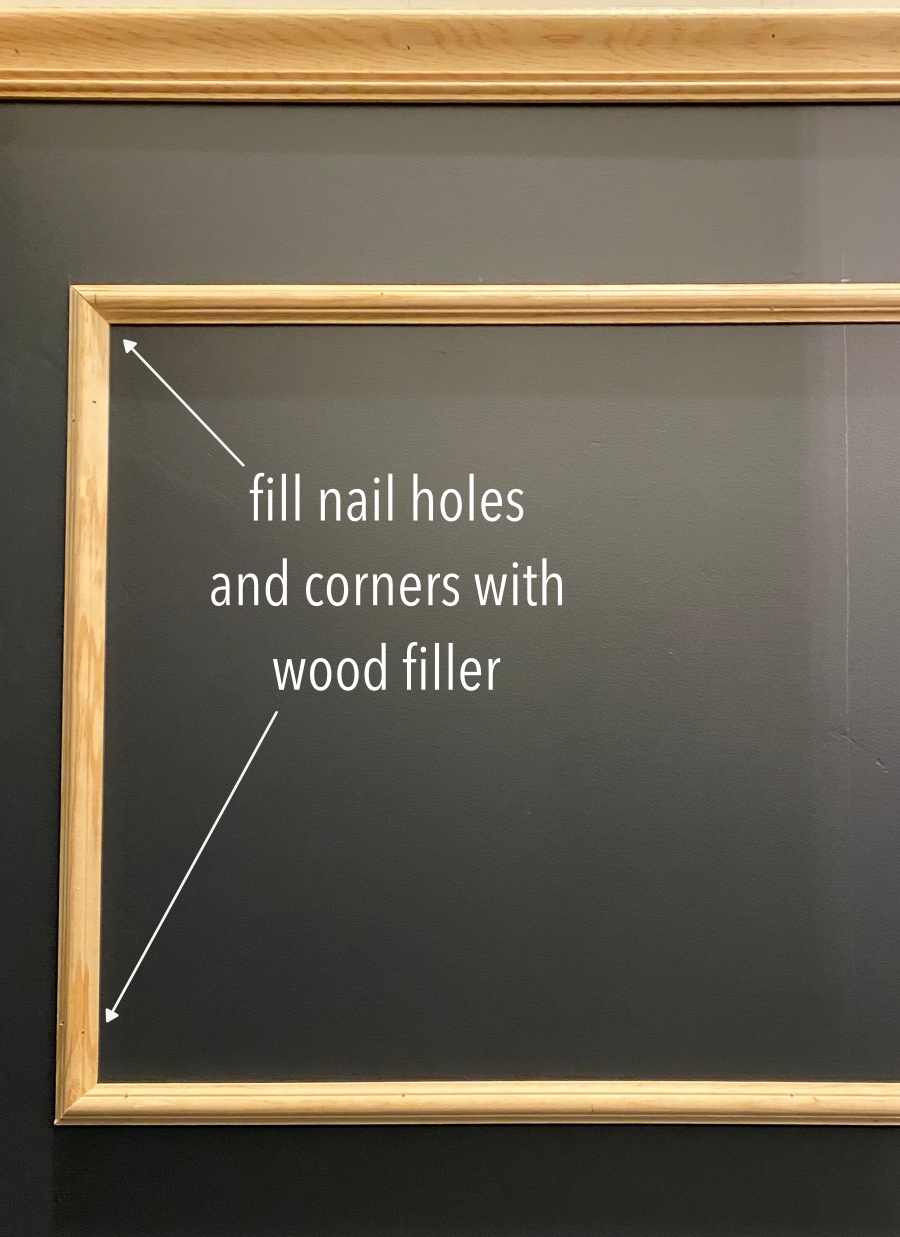
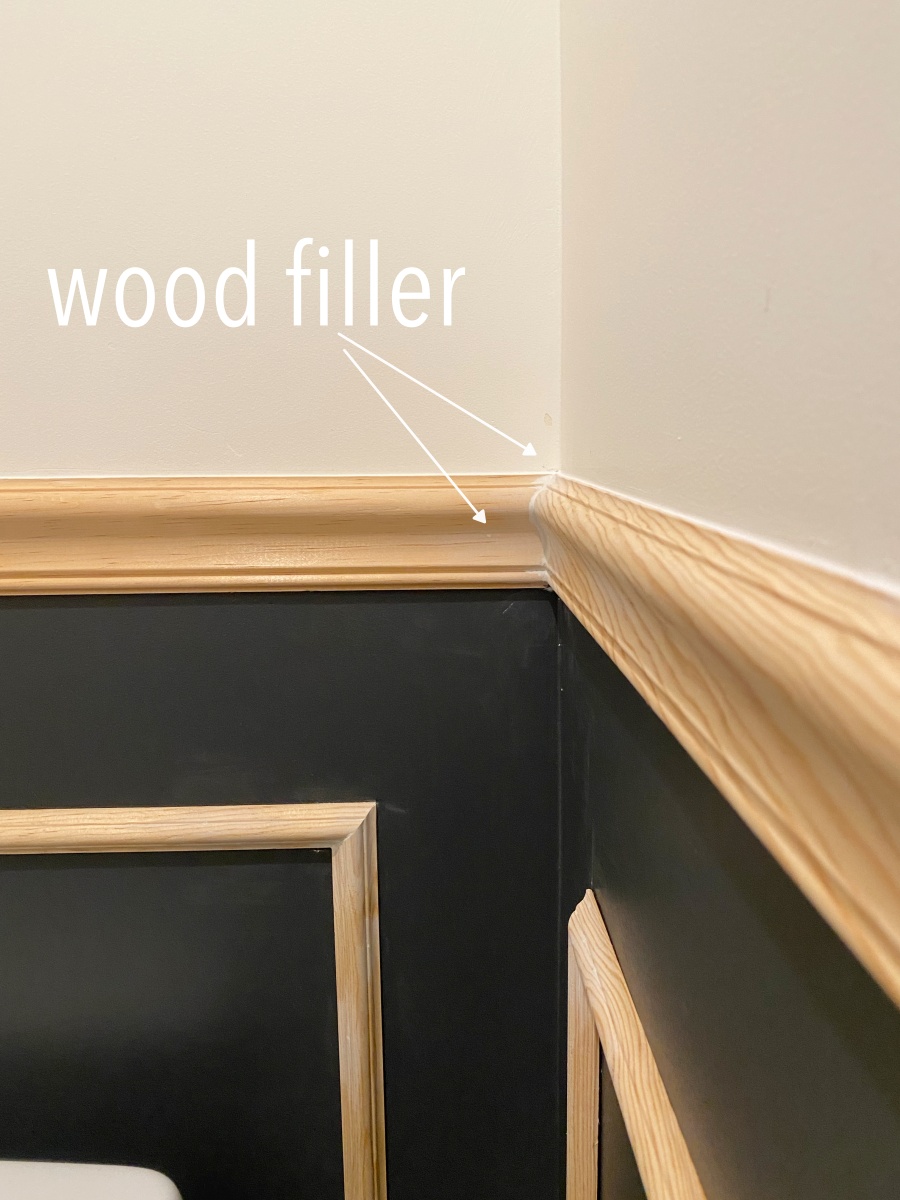
Fill in any nail holes and corner gaps with wood filler. Although nails and a hammer will work for this project, I highly recommend a brad nailer. It’s fast and requires a lot less hole filling. You will have to fill , sand or wipe off excess, then apply another coat and sand again.
CAULKING AROUND THE MOLDING BOXES
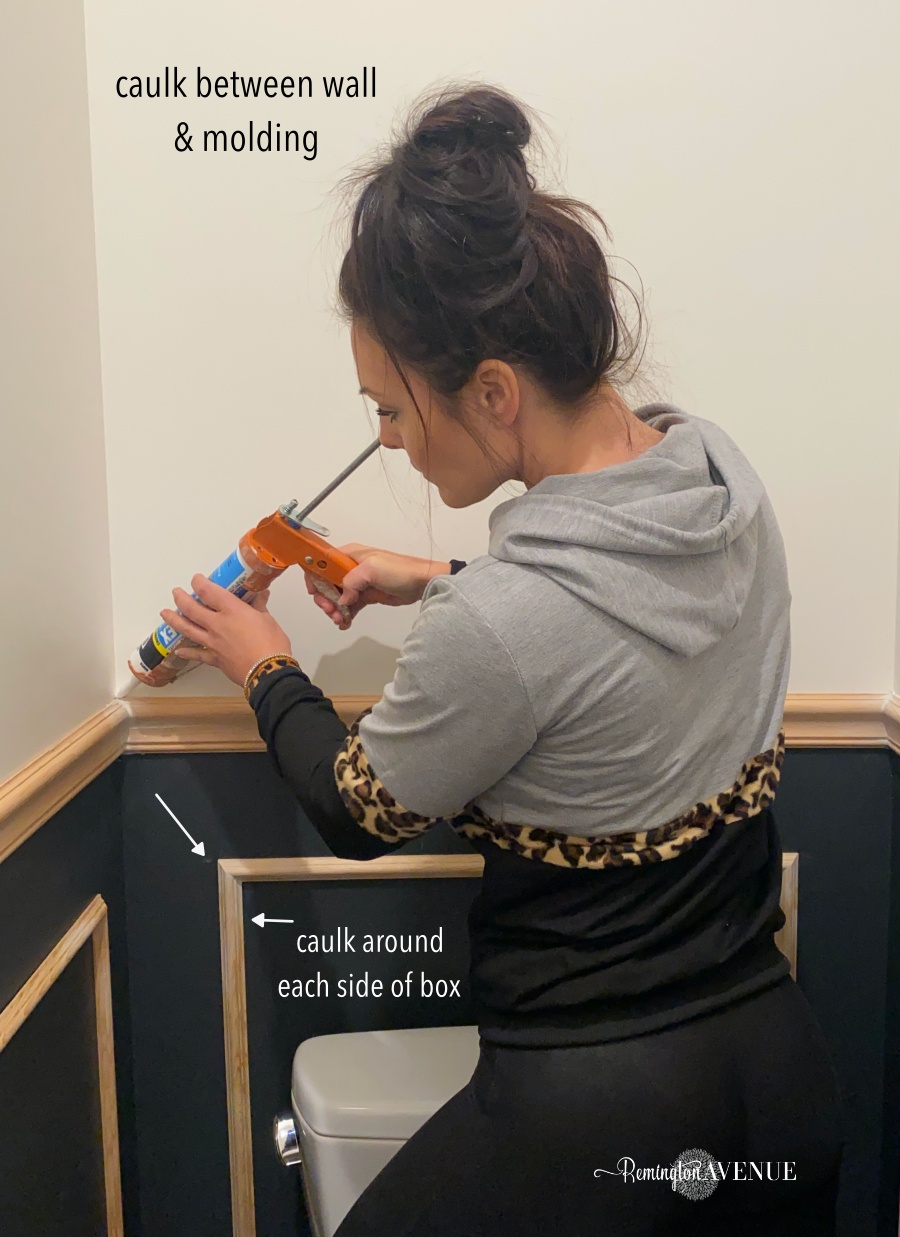
So here’s the thing, your walls aren’t perfectly level and flat. Even brand new ones like mine. To get professional looking results, use a thin bead of caulk around every molding edge that touches the wall. Make sure to use paintable, interior caulk. this makes a huge difference in the final result.
Final THOUGHTS on my DIY Wainscoting: applied molding boxes
I painted the wainscoting with Cheating Heart by Benjamin Moore. I applied one coat of paint prior to installing the molding and 2 coats of paint after. Im OBSESSED with how it turned out! Installing wainscoting is a tedious process, but it REALLY elevates any space to the NEXT LEVEL. In total, I spent just under $200 on all of the wainscoting and supplies. If you found my DIY wainscoting: applied molding boxes tutorial helpful you might also enjoy my projects below. I have also linked all the supplies and tools needed below.


WANT TO SEE MORE SIMPLE HOME IMPROVEMENT PROJECTS? CHECK OUT THESE ARTICLES:
Ikea bookcase hack: How to create a custom built in shelving unit
Adding curb appeal with a Painted Driveway
DIY Inexpensive board and batten

 Add to favorites or read later
I’m loving the dark molding so much Mysha! Great design plan on this one! I agree with you on drawing out the molding boxes. We did the same thing with painters tape on our powder room molding. It definitely helps you visulaize the outcome better.
Thank you Mysha for the tutorial. This is beautiful. Also thank you for giving the link to the exact molding. I would like to try this in my entryway. I already have a board and batten as an accent wall in the adjacent room. Do you think I can still do applied molding to the entryway? What are your thoughts on mix and matching various types of wainscoting?
It’s hard for me to say without seeing the overall design plan for the entire house.
Hello- looks great! Really enjoy watching your content.
Quick question did you use the same sheen paint on the walls and the moldings?
Thanks
I painted the molding with eggshell- the walls are getting wallpapered.
Wow!! What a difference moulding makes. Talk about stepping it up a notch! And the color is fab:)
Thanks for sharing!
This is gorgeous. And I now want this in my house. Thank you for providing cost. If you were to hire it out, how much do you think it would have cost you?