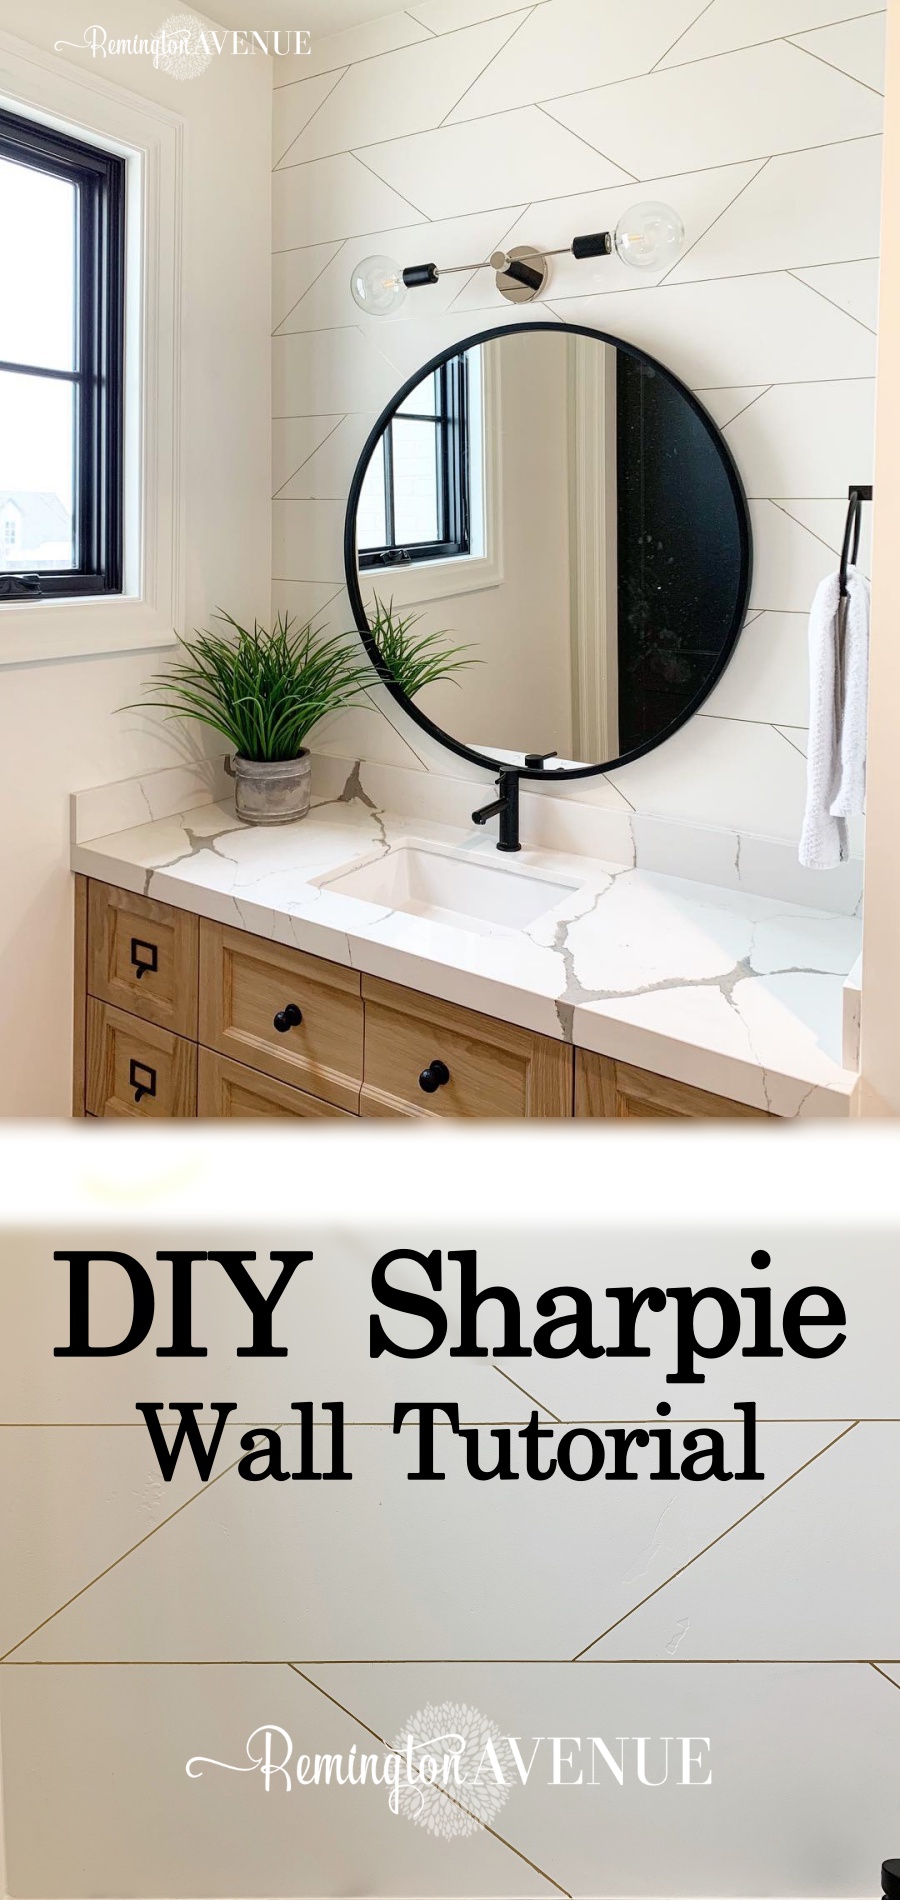
Easy Geometric Sharpie Wall Tutorial
You know what I did instead of taking process photos? I made a speedy video of the whole darn thing! You can watch the video on my Instagram feed Click here to see my laundry room sharpie wall. The good news is that this wall is super easy to recreate and I can break it down for ya in a few steps. Get your markers ready cause you are about to make this easy geometric sharpie wall at home!
Materials:
- Sharpie Paint Pen (I used gold in medium tip)
- Level
- Pencil
- Ladder or step-stool (depending on ceiling height

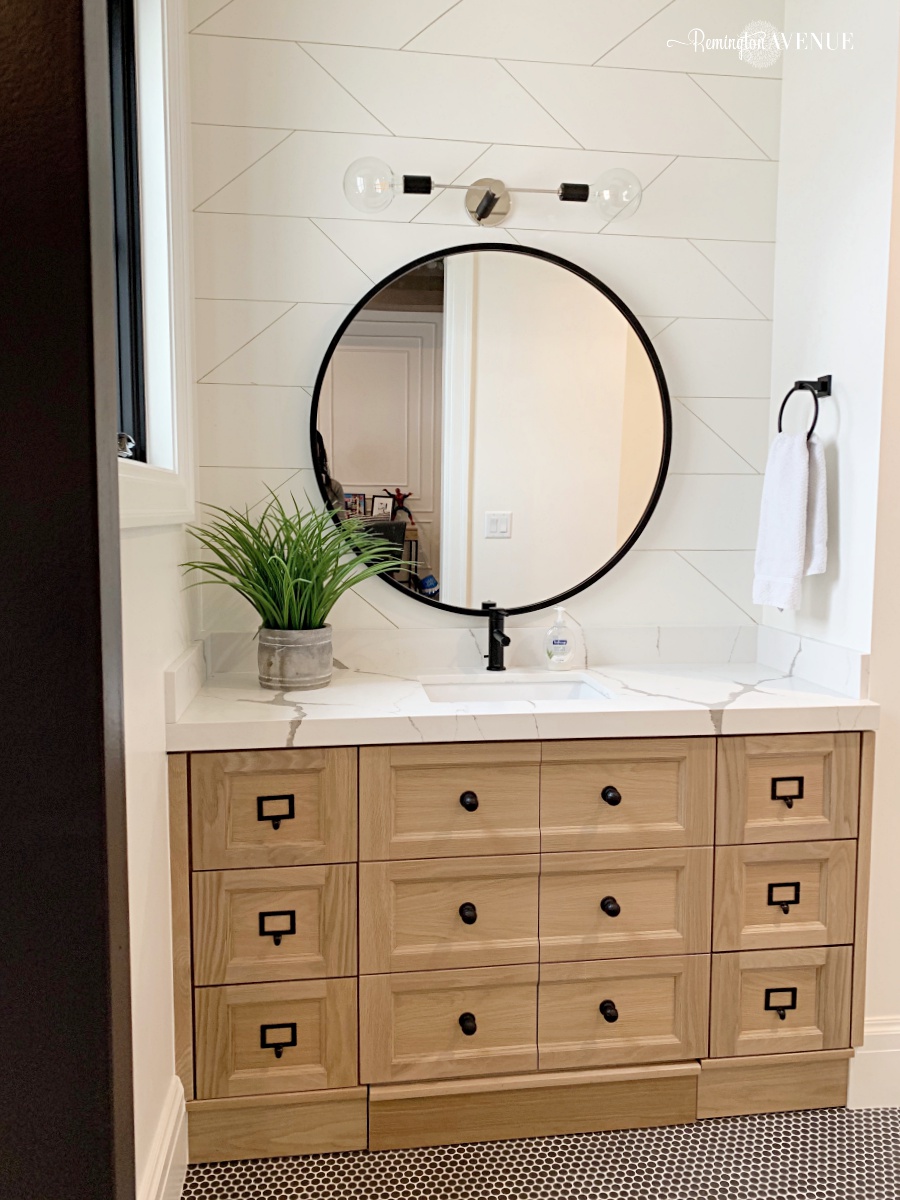
I almost ordered a geometric wallpaper for my sons bathroom when it dawned on me that I could totally draw this. One hour later I had myself a wallpaper look alike with the help of my little paint sharpie. I used the gold one, but black or silver would look amazing also. I actually created a sharpie wall in my last home as well. Click here to see my laundry room sharpie wall.
Easy Geometric Sharpie Wall Tutorial
Starting from the counter top (bottom) I measured and marked the wall every 12″ vertically. Mark with a pencil very lightly.
Using the straight edge of my level I drew Horizontal lines from wall to wall at each 12″ marking. After completing this step it should look like horizontal stripes. *If you are hesitant you can draw the lines lightly with a pencil first and then go back over it with the Sharpie paint pen. I just went straight for the pen though!
Next, use a straight edge (or your level) to go over your grid with a Sharpie paint pen. Make SURE it’s a paint pen, not a permanent marker because permanent marker is a nightmare to paint over.
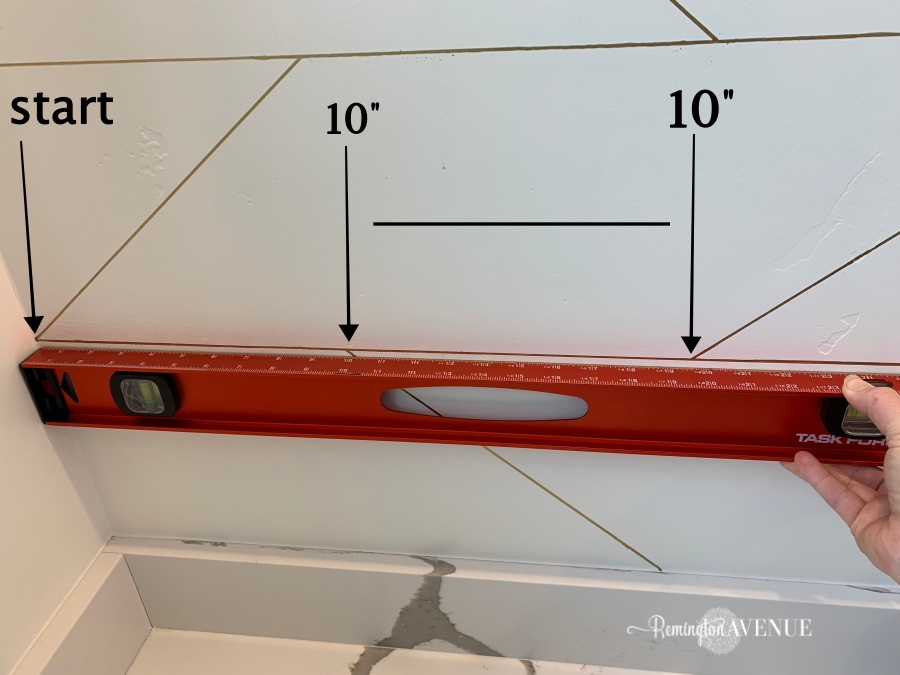
Starting at the bottom line measure and mark every 20″ across with a pencil. Start from left side and work your way to the right side.
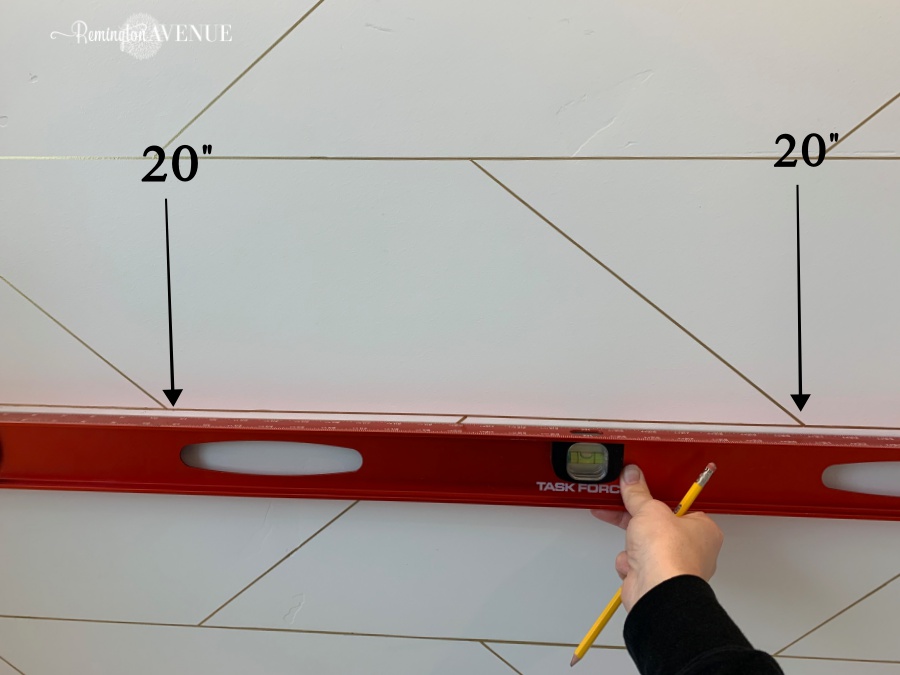
On the second line measure and mark every 10″ with a pencil. Start again at the left side and work your way to the right.
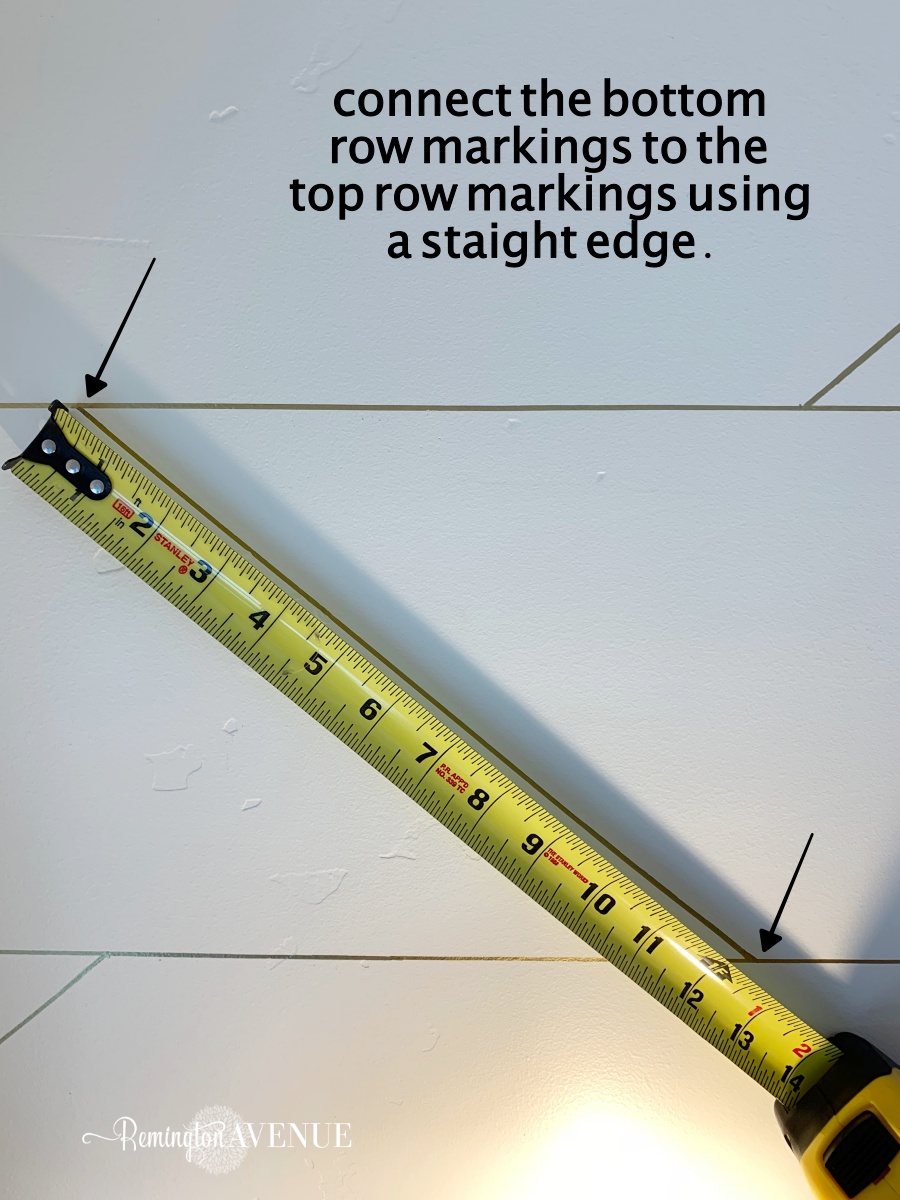
Connect the 20″ marking on the bottom line to the top 10″ marking creating a diagonal line. Use your level or straight edge to create the line with your sharpie pen.
Once you have your first row done, measure and mark the 3rd line from the corner at 10″. Mark the 10″ measurement with a pencil. Then moving from the 10″ mark, measure and mark every 20″ from left and working your way right.
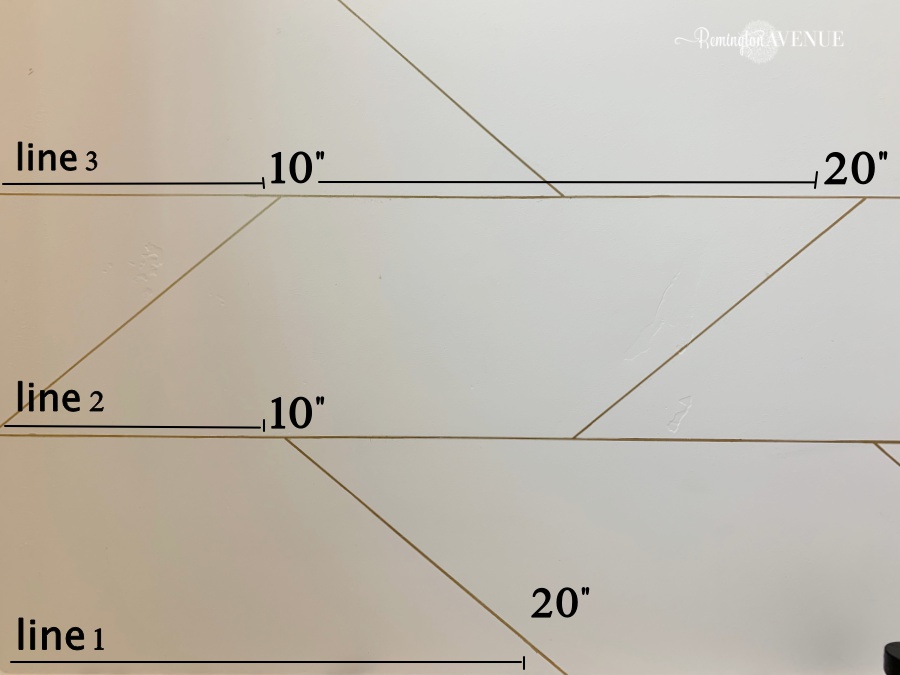
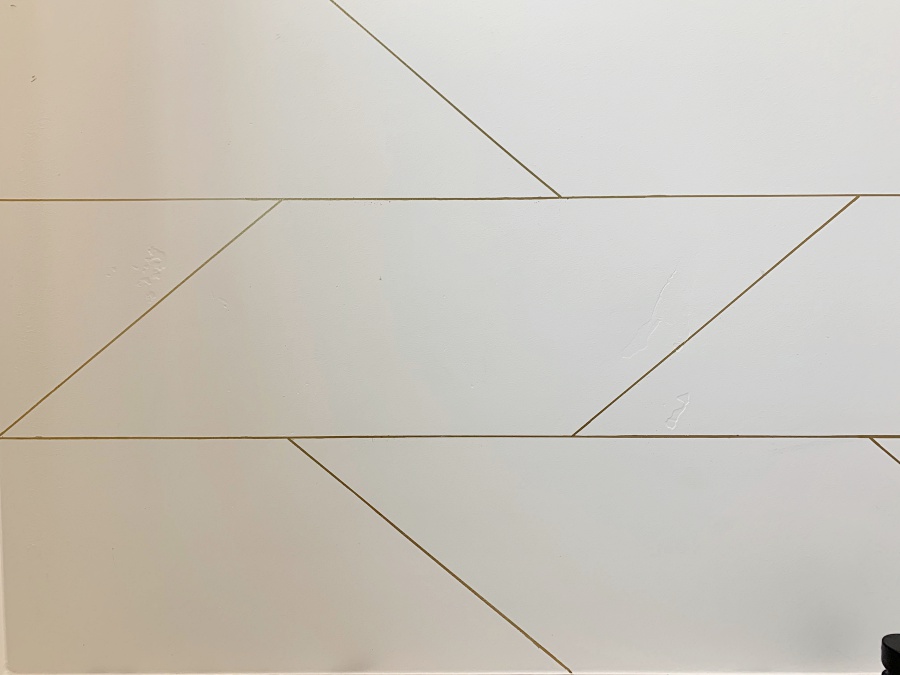
Using your straight edge or level connect the diagonal line moving the opposite direction from line 2 to line 3. Basically each line should be half way between the line below it. Now you have established your pattern. Repeat these steps until your wall is complete.
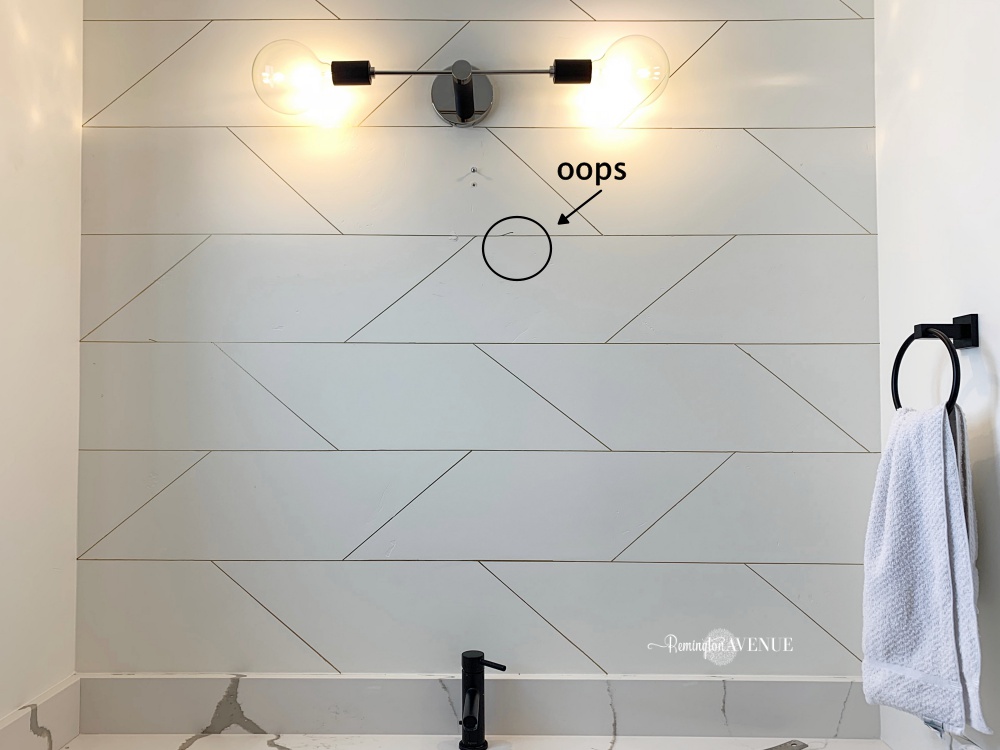
I messed up once, but my mirror covers it so I wasn’t too worried about it. You can always go back over with your wall color and paint over any mess ups. Dont ve afraid… Go for it!
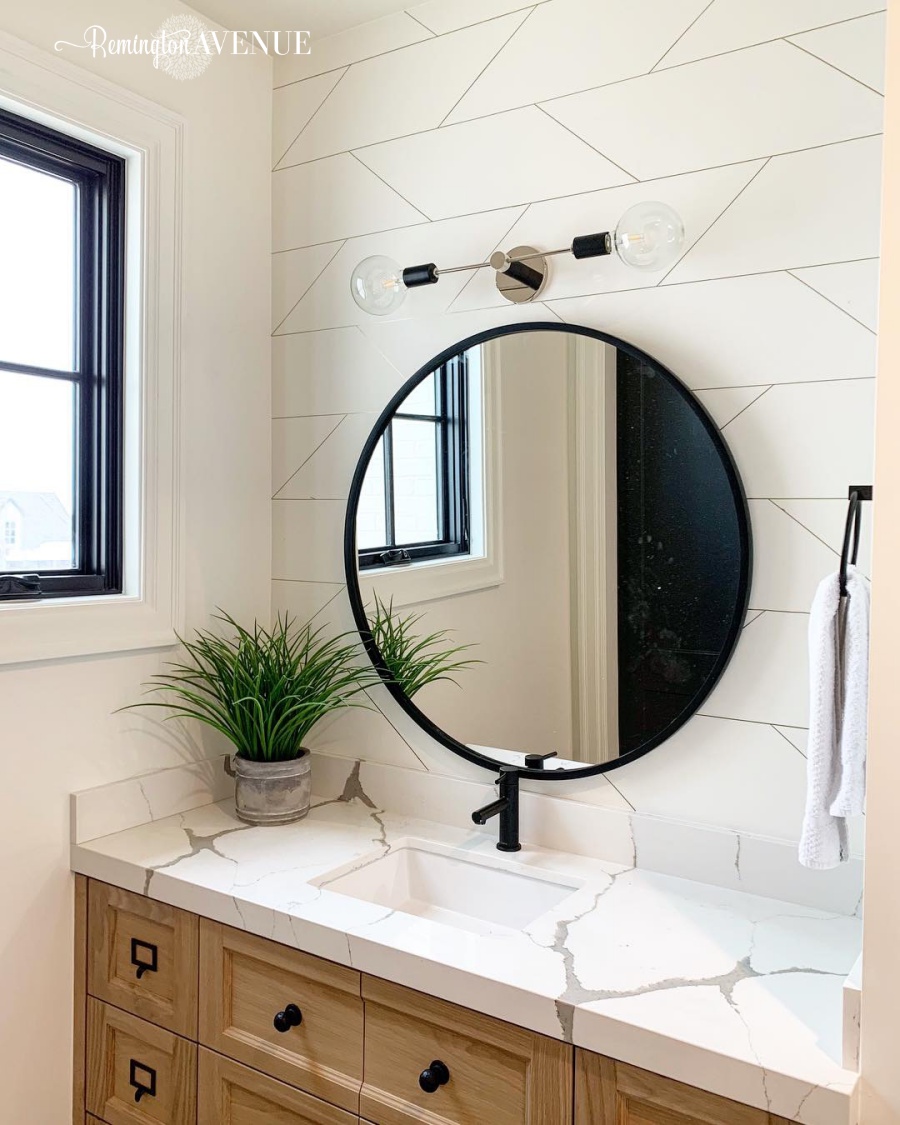
I absolutely love how this geometric sharpie wall turned out! It was just the touch my son’s bathroom needed to be complete. Next week I’ll be sharing the full reveal of his bathroom as well as all the sources so stay tuned!

 Add to favorites or read later
Love this bathroom and the sharpie wall is perfect. Great tutorial
Beautiful-can’t wait to see the reveal!
Love! Question, are your walls textured?