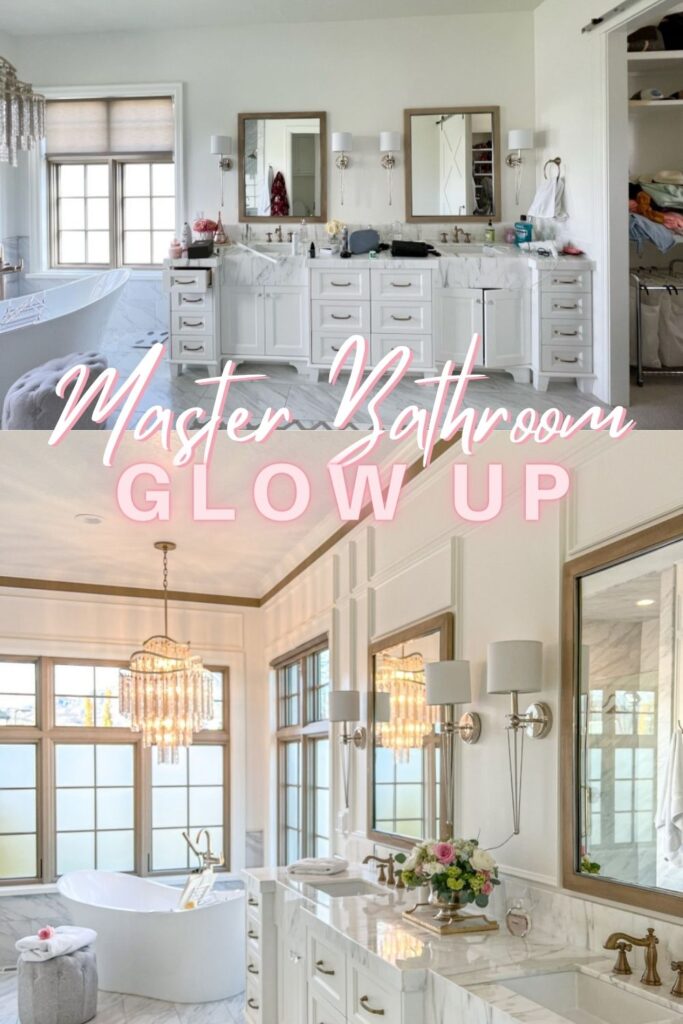
Master Bathroom Glow Up – Part 1
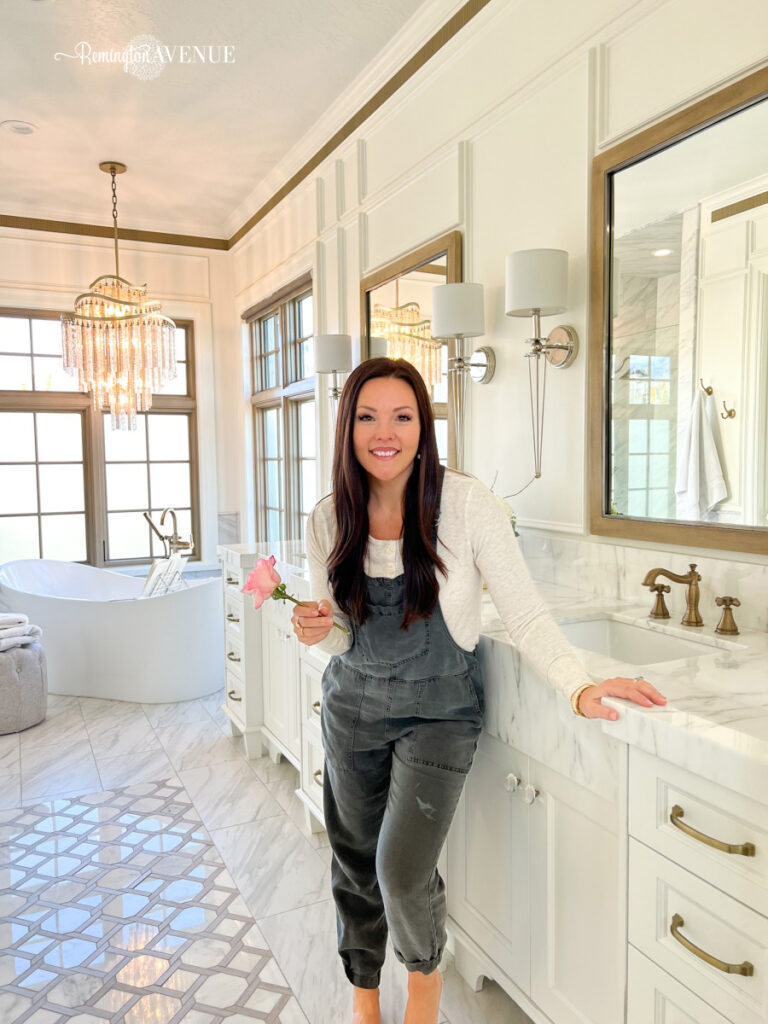
I started this whole master bathroom glow up with and idea and a simple sketch of what I had in mind and I am so happy with how it came to life.
I began with getting crown molding installed! If you remember from when I did the guest bedroom, I installed the crown molding myself and while I was doing it I thought, “there has to be an easier way of doing this to make it go as smooth as I want it to.” So this time my brother-in-law came in and installed it, and he taught me some really great tips and tricks that I will show you the next time install crown molding. But you can see my original way of doing it and more of my coastal guest bedroom transformation HERE.
Before
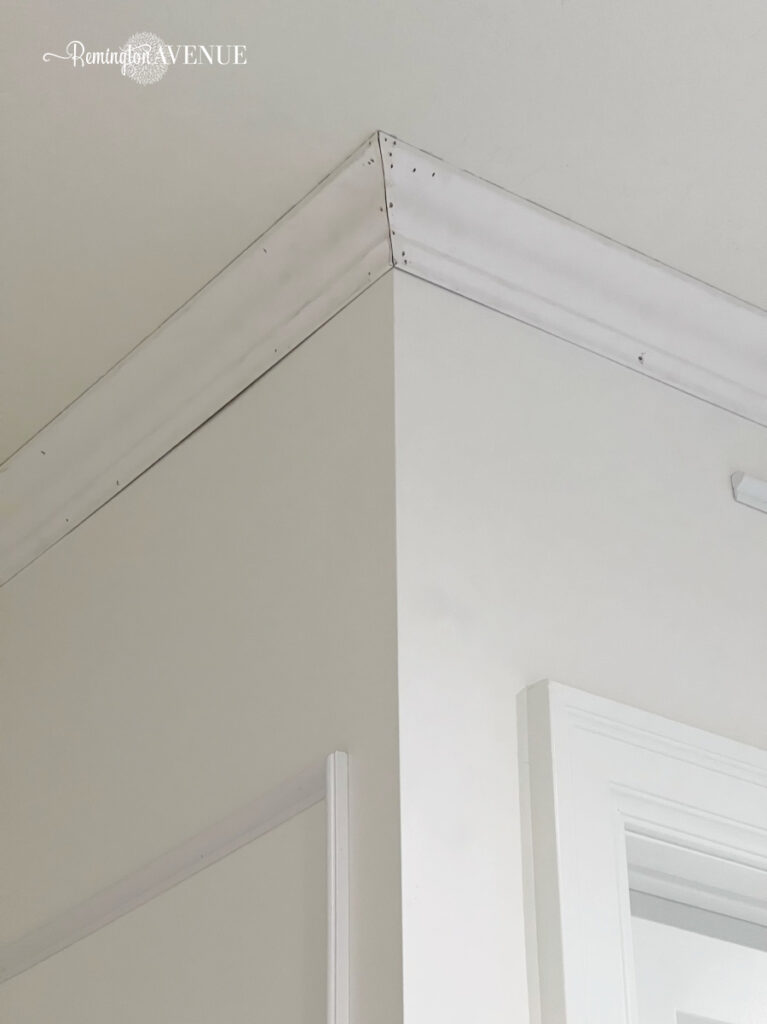
After he installed all the crown, I went to work filling all the holes and caulking the seams. Then I went through and painted over them. SO! After painting the trim and letting it dry, I realized my ceiling color didn’t match, which meant my ceiling color was wrong. Hey, it happens to the best of us! So my solution was to repaint the ceiling, crown, and walls – oof.

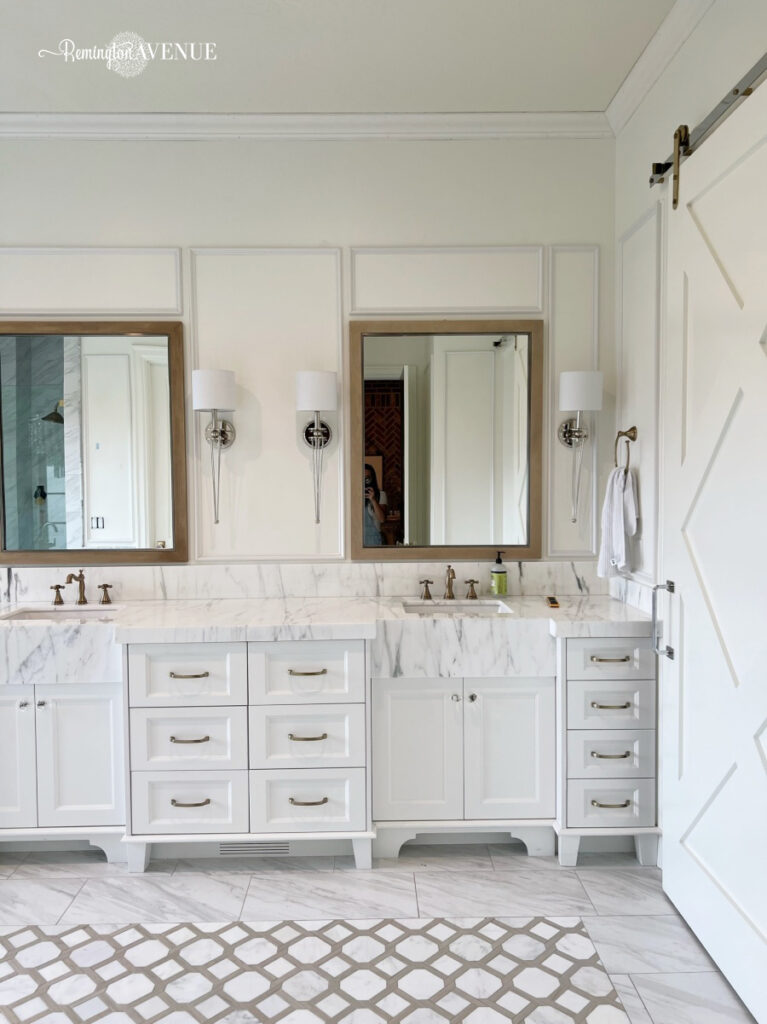
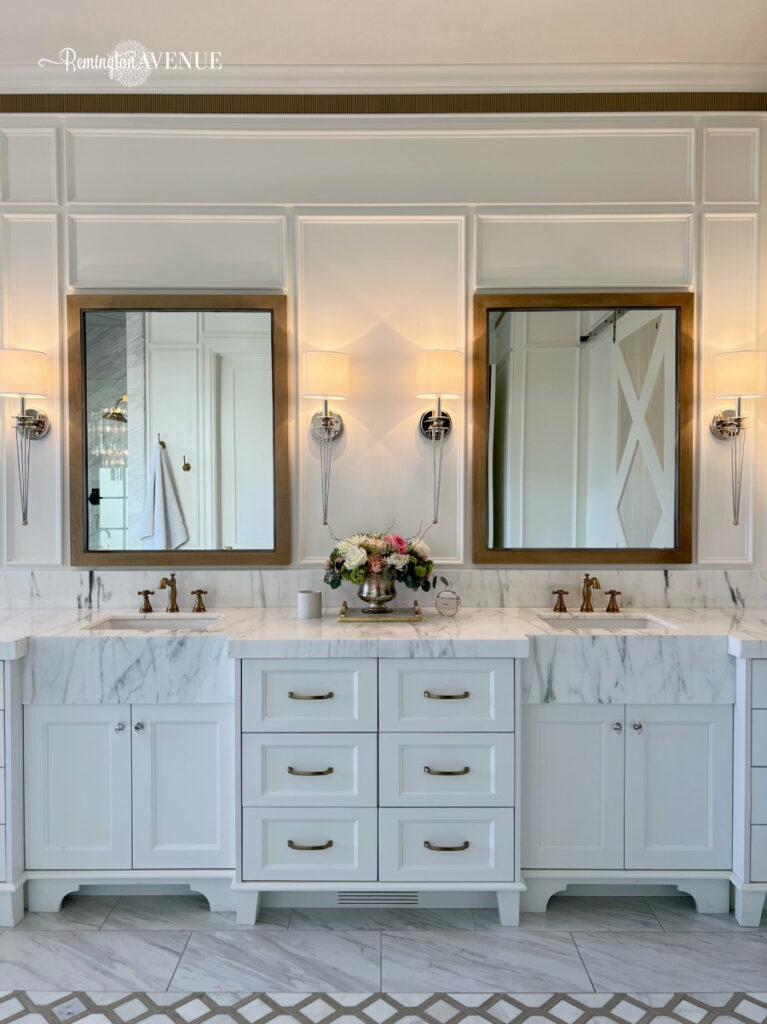
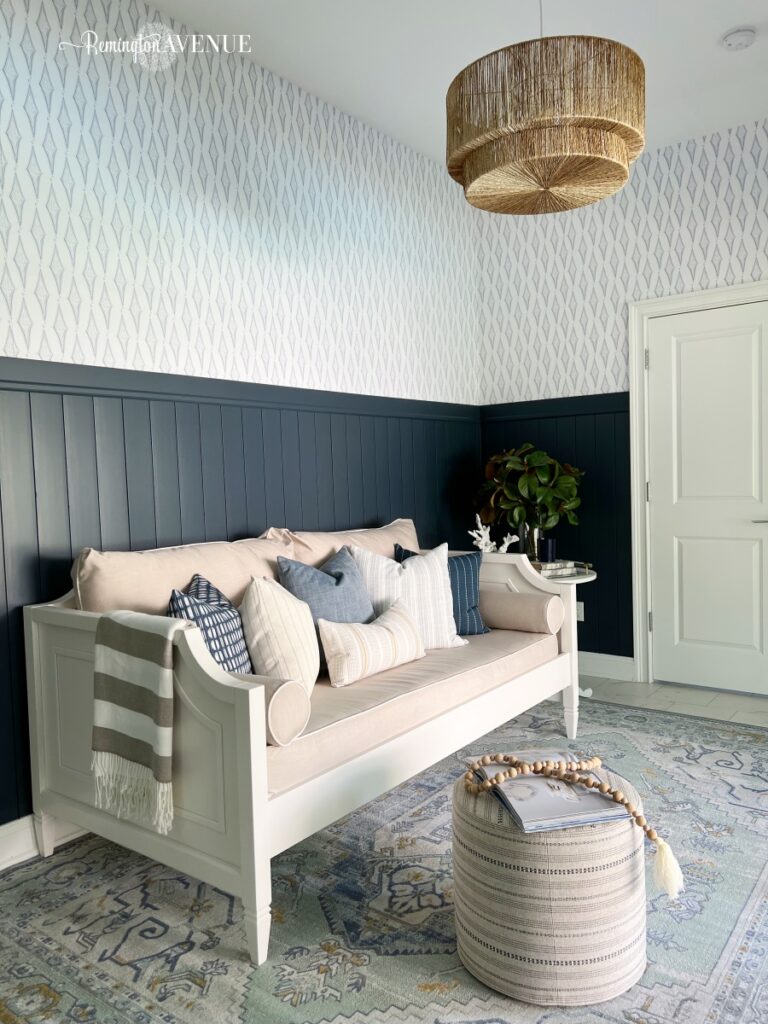
A commonly asked question: What color is the white paint all over my walls? It is Simply White by Benjamin Moore, which is funny because it’s not simply white, it’s actually a creamy white. My walls are an eggshell finish, and I painted all the trim in eggshell as well.

Tip: When you are filling holes, you always want to overfill the hole. Then you’ll let it dry, sand it, and then fill again if needed. If it’s not smooth before you paint, you will see it more once it’s painted! This allows you to it right the first time!
Things happen and you have setbacks, but it’s what you do after the upset that matters! After the new coat of paint dried, I started on the next step.
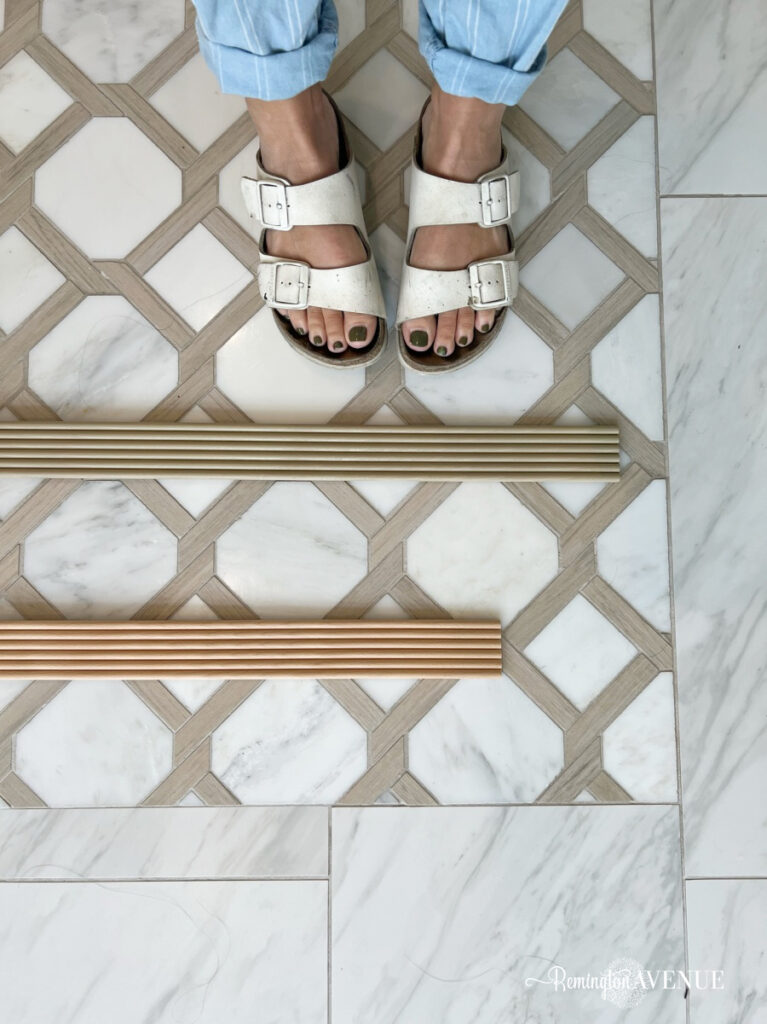
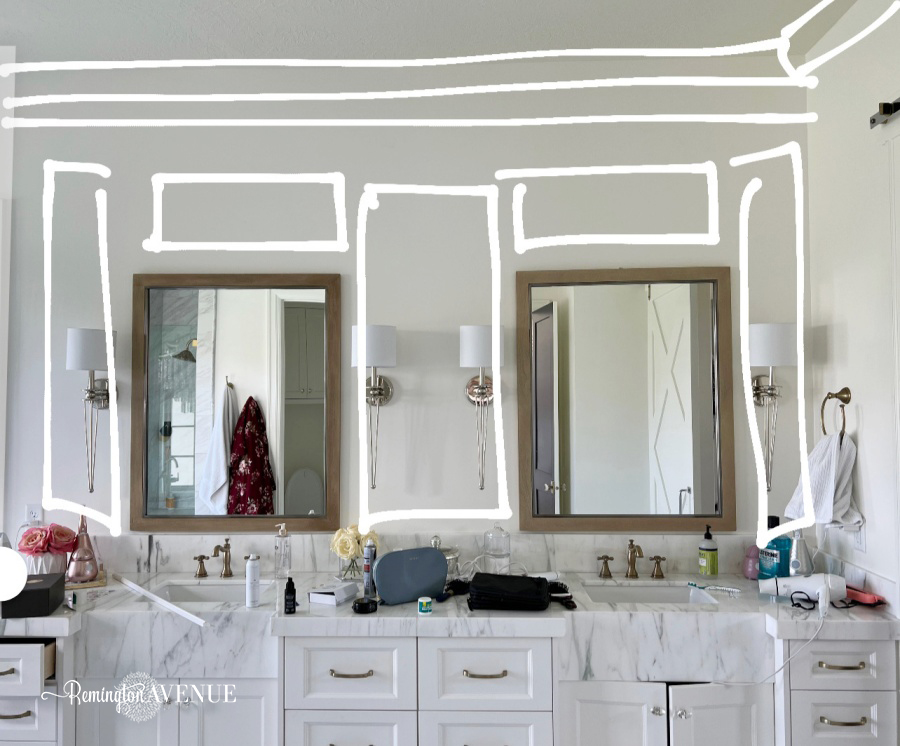
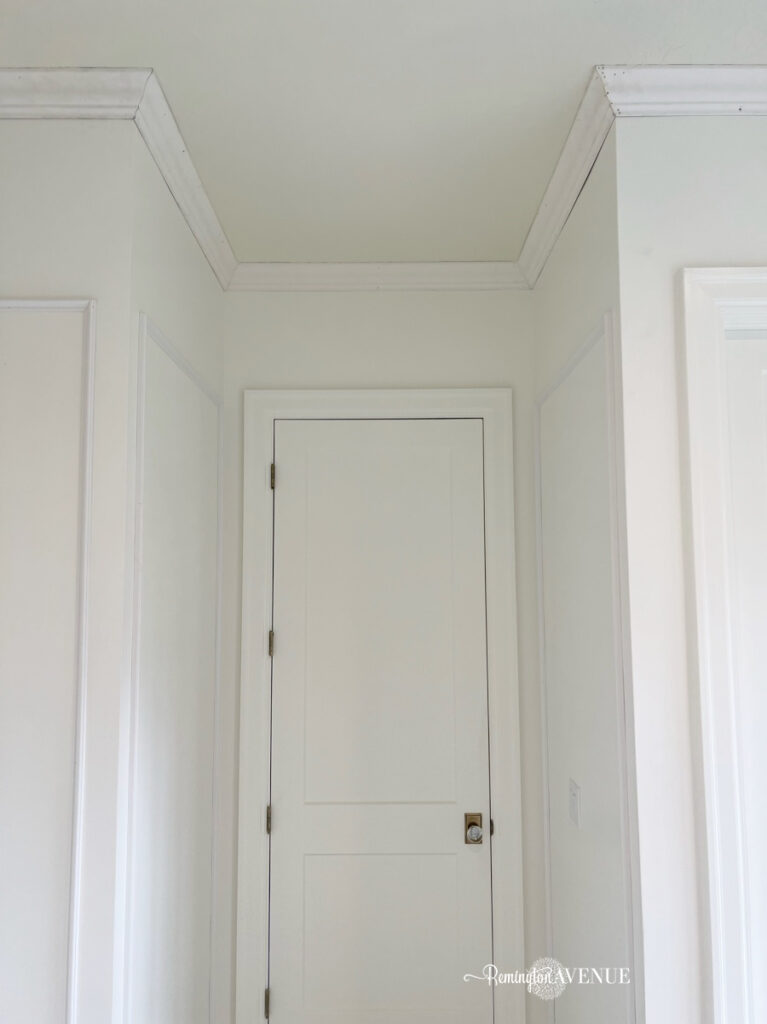
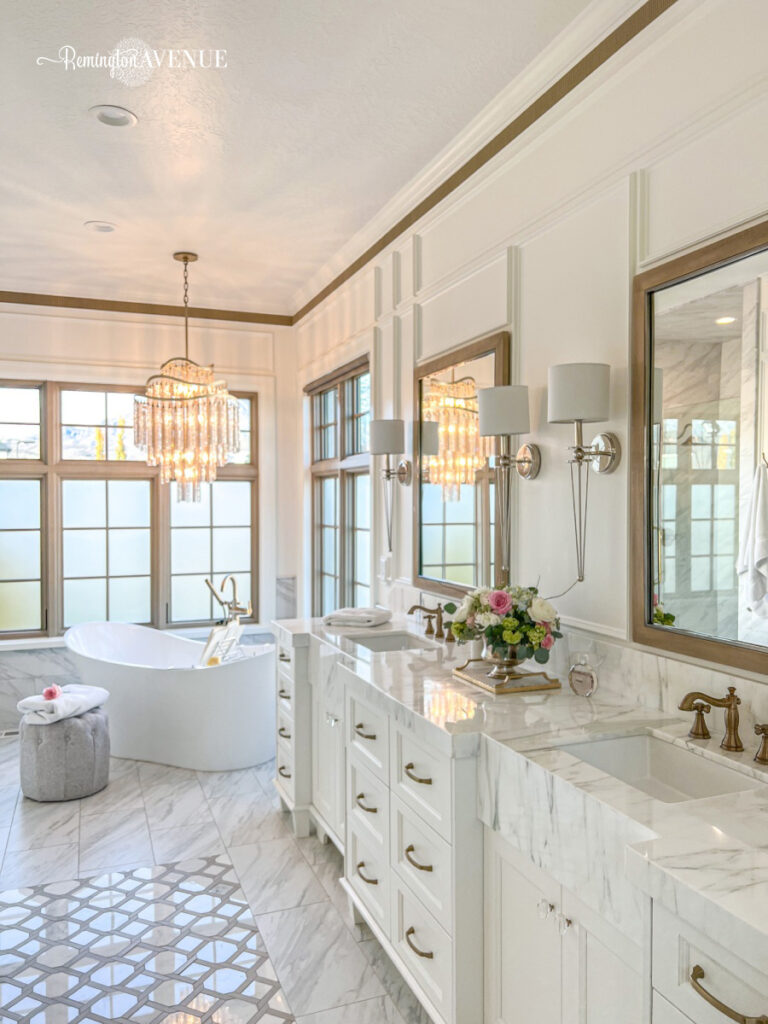
For this master bathroom glow up, I chose a fluted trim to have sandwiched in between the crown molding and a thin piece of PVC trim. Fluted trim can be hard to find, but HERE IS MY SOURCE! If you looked at my fluted trim against my floor inlay, you could see that the trim had a lot more orange in it. And I wanted the trim to match the inlay. So you know I had the perfect solution: my custom stain mix, which you can find in this post. My stain mix has green tones in it that counteracts the red in a lot of wood varieties. Once the trim was all stained, the color match was exactly what I wanted it to be! You can see more of my marble and wood lattice floor inlay HERE.
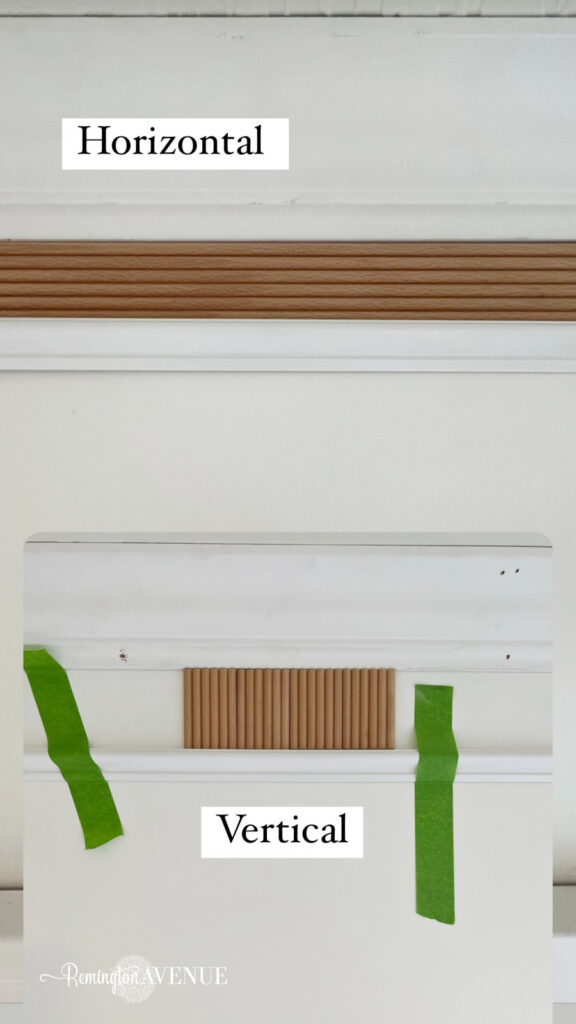
When it came time to install my fluted trim I had two options of doing it. Either run the trim so the lines are horizontal or chop it up so the lines run vertically. I tested them both to see which one I liked better. And I must like torturing myself because I went with vertical, which meant I had a TON of small cuts to make. But hey, you live and you learn!
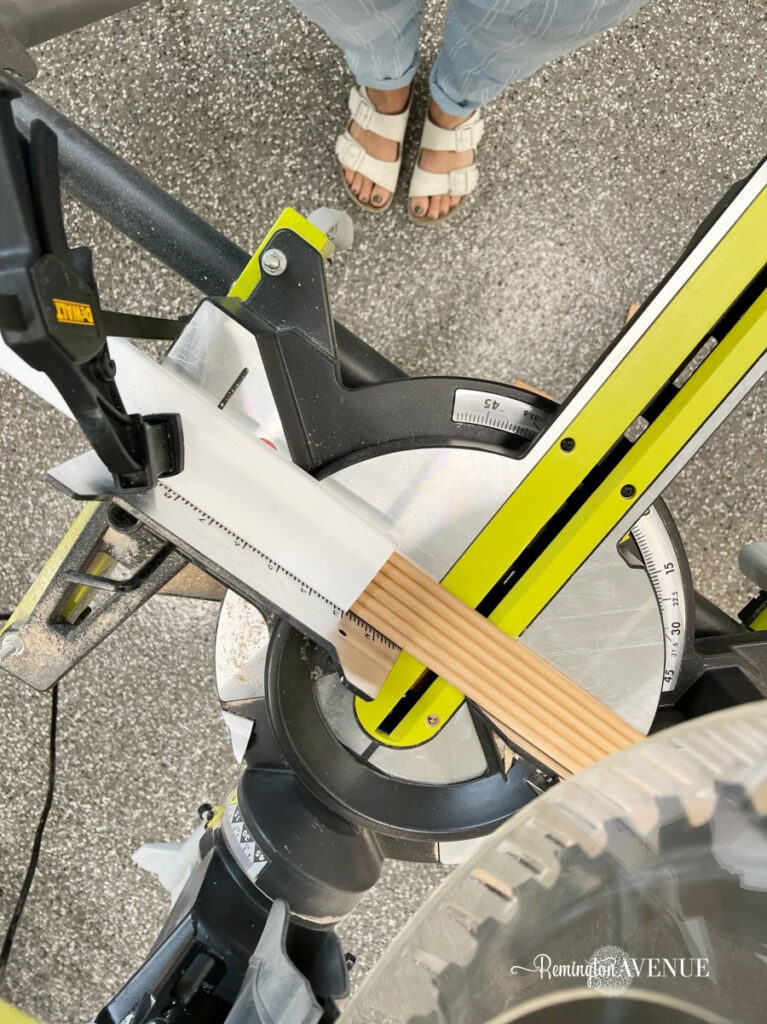
How to use a jig: I used a scrap piece of wood and a clamp to create a stopping block for quick cuts of the same size.
I also decided to chop all of the wood before staining it, because I thought the edges would splinter a lot more and then I’d have to stain all of the edges. But in retrospect, I would definitely stain all of the big trim pieces first and then chop it.
I took all of my little pieces and my adhesive and just went to town installing them all. All you need is a little dot of adhesive on the back of all of the pieces. Afterwards, I lined the tops of them up with the crown molding, which made it really easy to keep a straight line. For any corners and ends, I used my dremel tool to cut the pieces to perfect size.

It took me HOURS to install all of them. But, I am in love with how it looks. Then to make it even better, I added PVC molding along the button of the fluted molding.
A trick: When you have a seam between two pieces of trim, use a mitered seam to disguise the joint.
For corners, you’ll need to cope them. In order to cope a corner you make an open face mitered cut and then take your coping saw to cut along the little border. But last time I did this, I had a few of you in my DMs tell me to use a dremel with a sander attachment and it worked great! If you don’t have a dremel, I explain more about coping with a hand saw HERE.

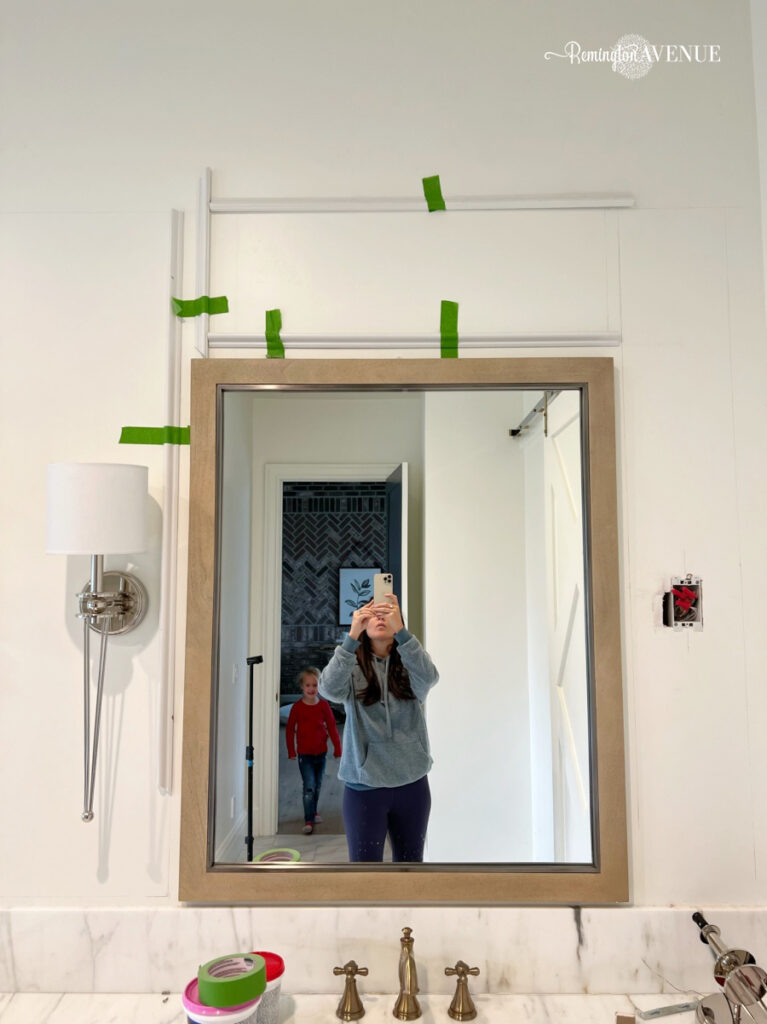
I installed my first layer of boxes that would go around the mirrors, and then I waited to install the second layer of boxes. I wanted to see the visual weight of the crown first.
I decided that without another row, the wall looked short and squatty.
So, I then added another long box on top of the first row of boxes and it made the wall look so much taller. I’ve found that adding adhesive to the wall instead of the molding was easier with the really long pieces. I also wanted to note that I used adhesive and short nails because I didn’t want to hit any plumbing in my walls.
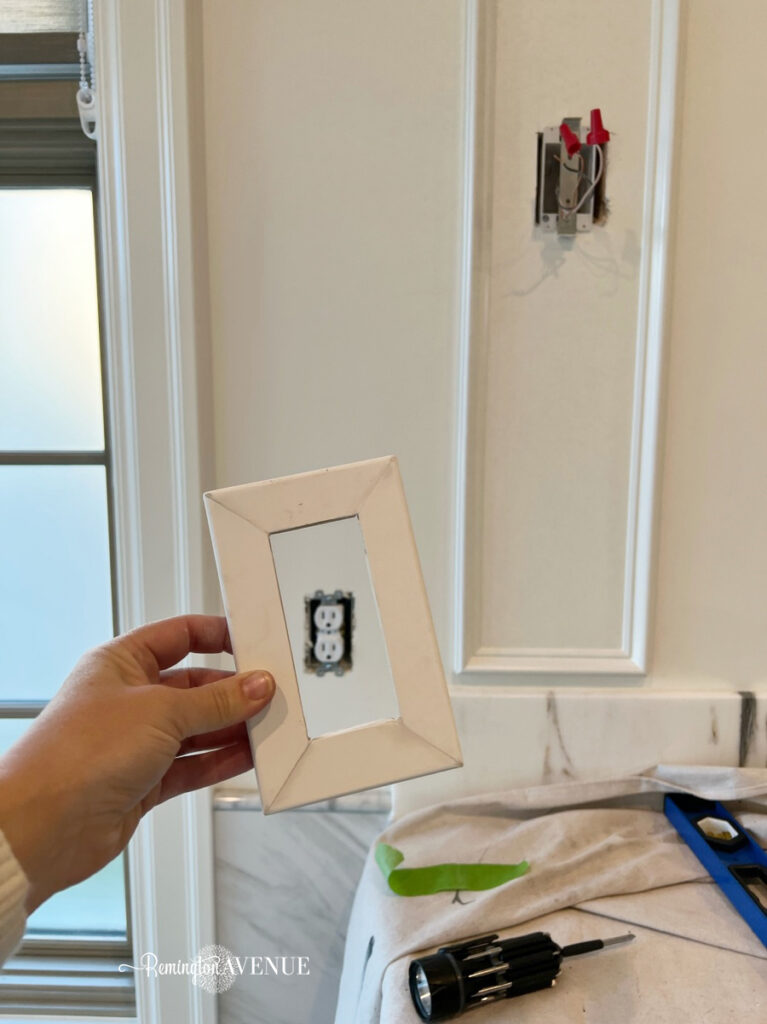
For the master bathroom outlets, I have a reel linked HERE that shares how I bump the outlet out away from the wall.
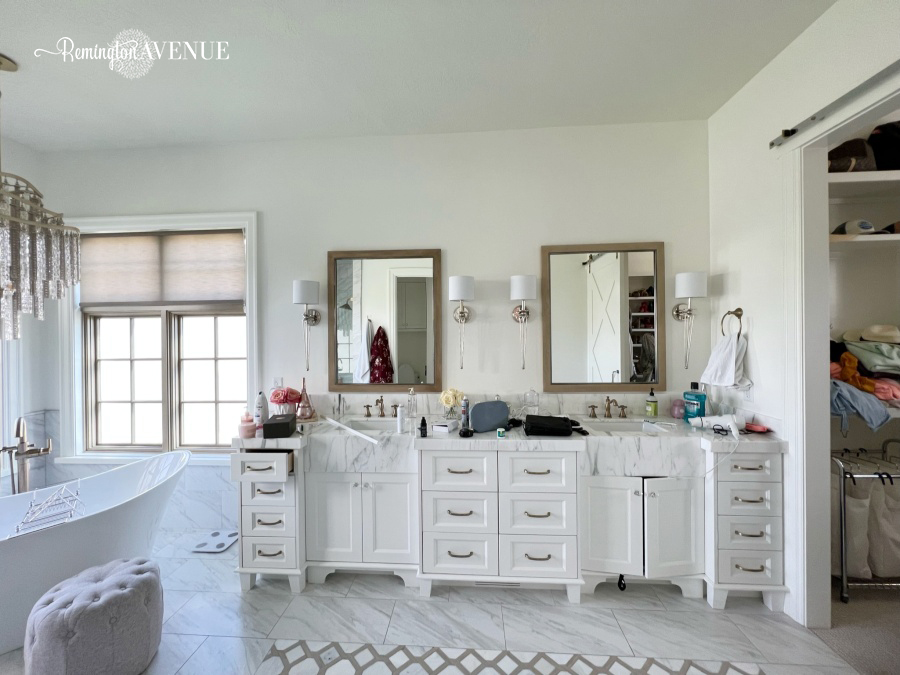
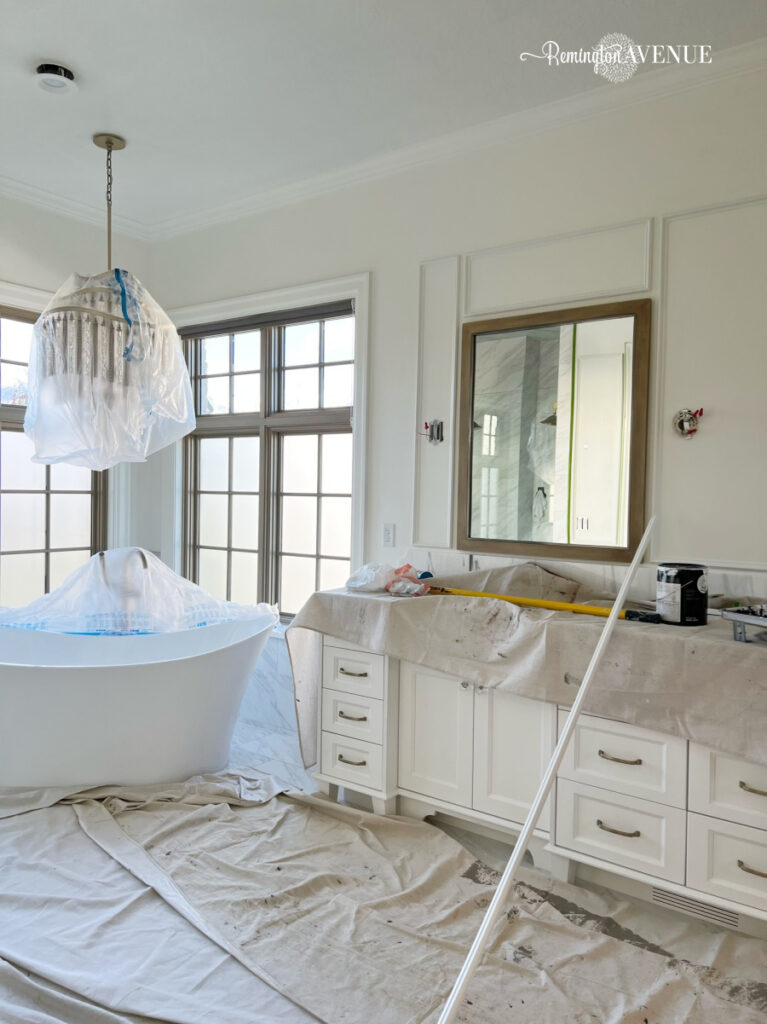
Once all the patching, caulking, and the 1st coat of paint was done. We were pretty much done. All I needed to do was a second coat of paint, and put my bathroom back together.
Before reinstalling the lights, always remember to turn the breaker off and turn the light switch off. Remember, black to black, white to white, and ground to ground. Turn the breaker back on. From here, make sure it works before putting everything back together. Then, I rehung the mirrors. Since I just updated the whole bathroom I felt like I needed to re-caulk the counter top and the backsplash. It was looking dingy in comparison to all of the new updates. Re-caulking is easy, you just scrape out the old, and then apply your new. I used a white mold guard caulk specific for kitchens and bathrooms.
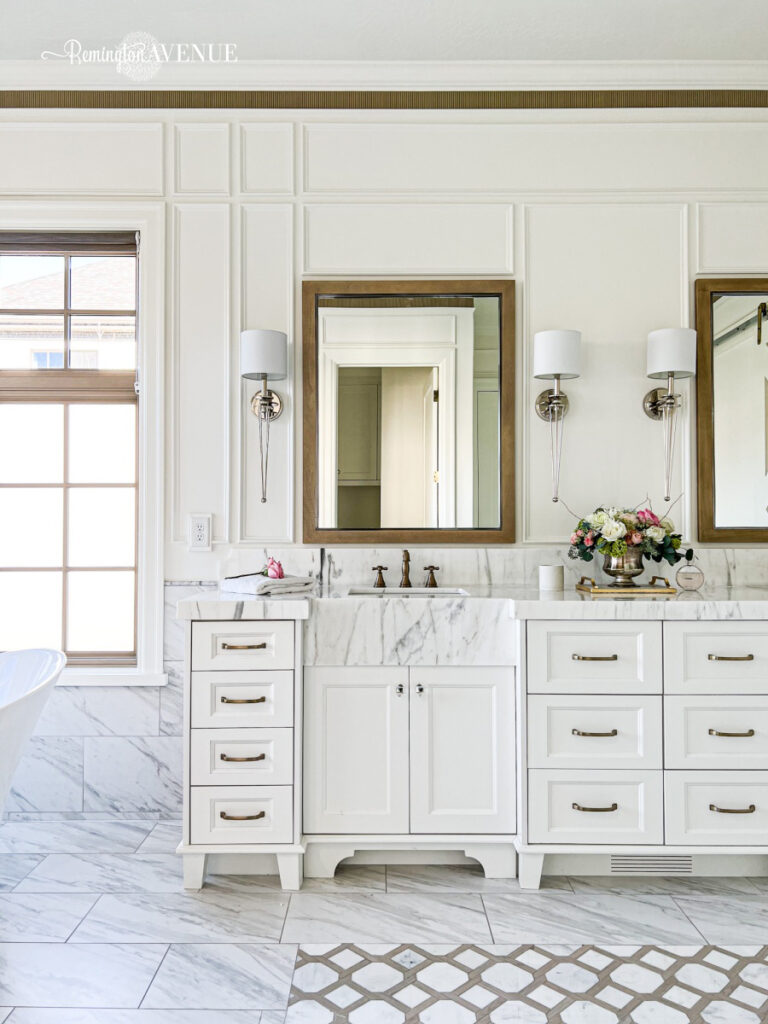
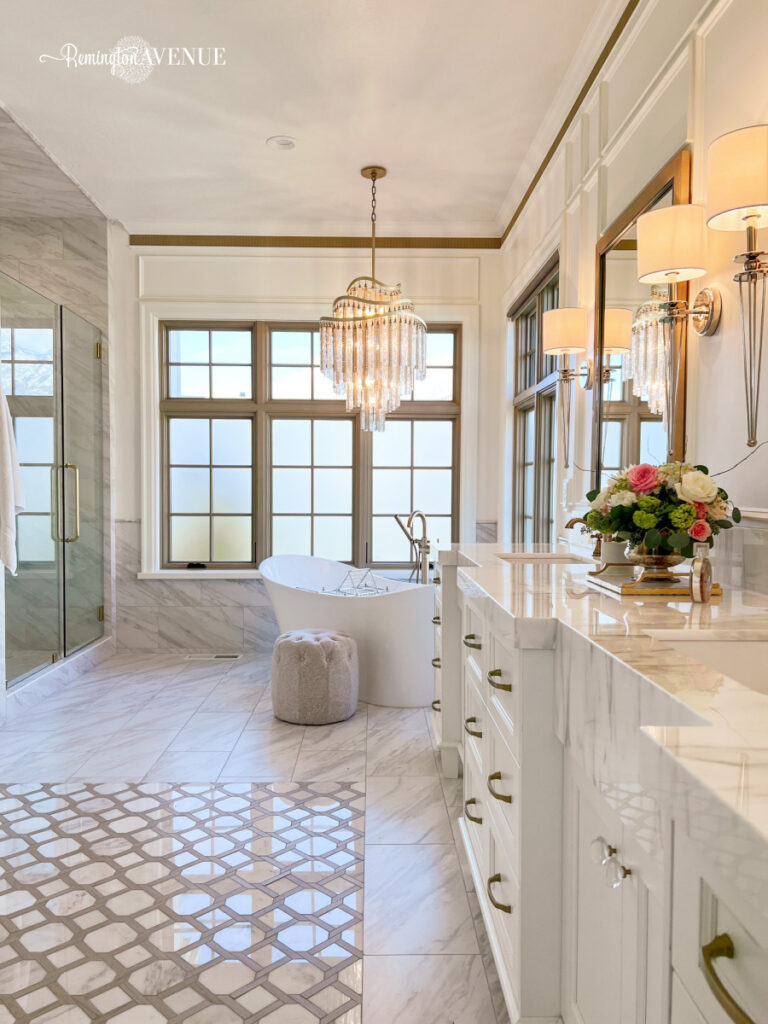
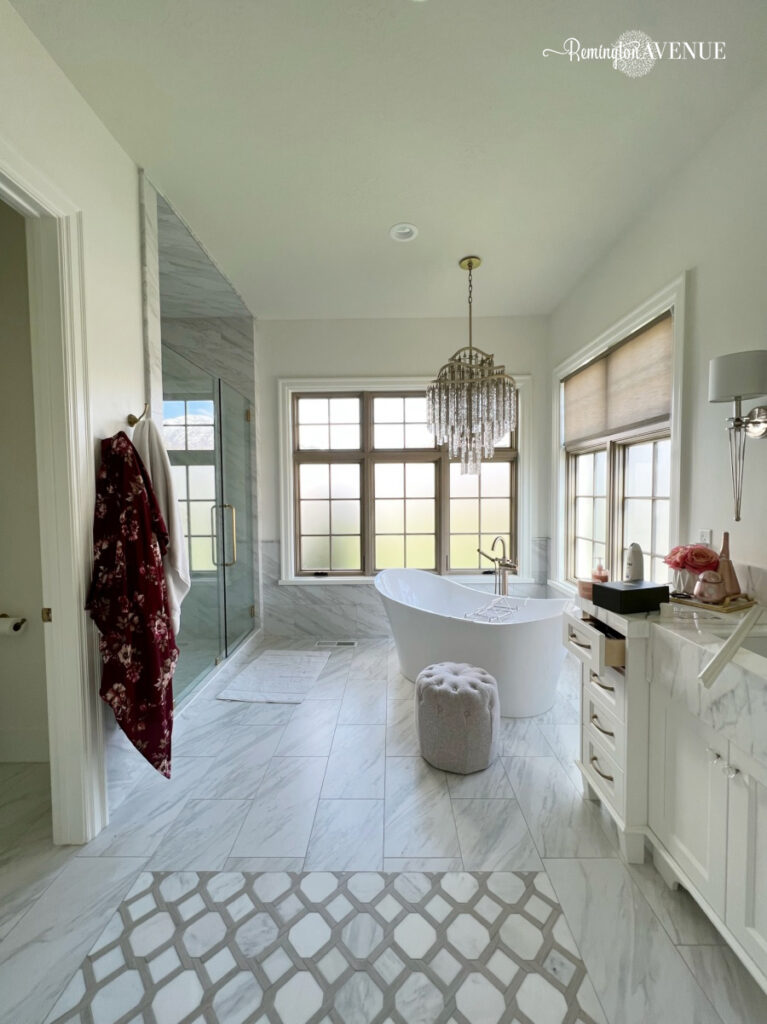
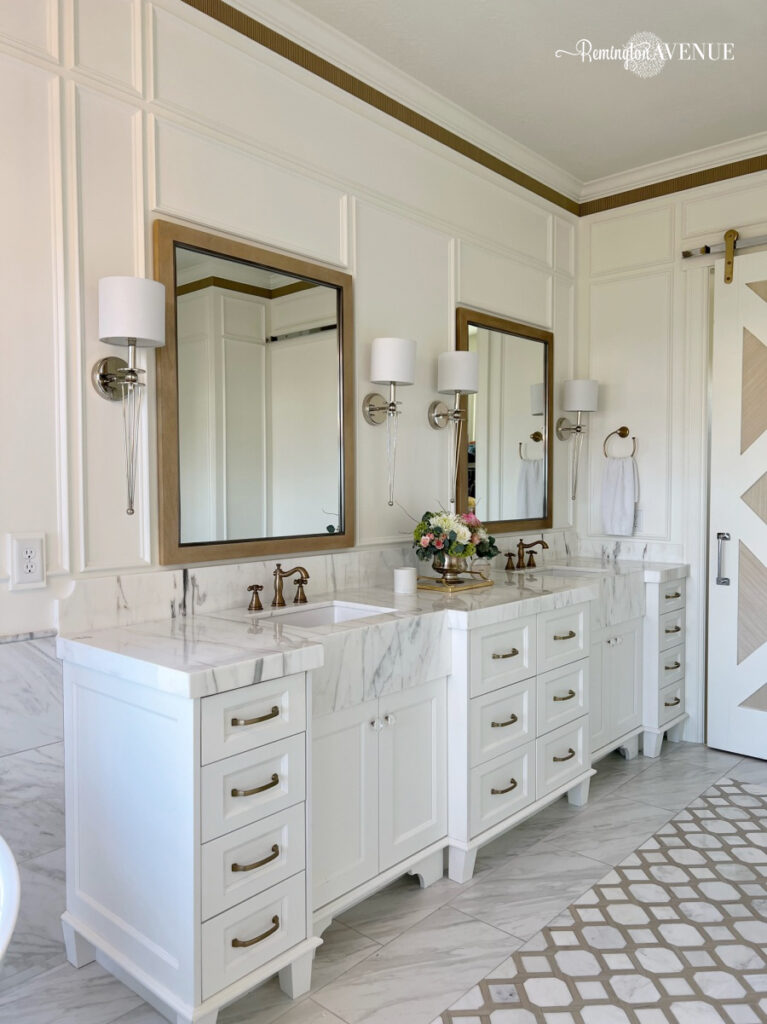
The overall look seems more custom and sophisticated. The contrast of textures and finishes is like art in and of itself! So in love with this serene space…now, for a really long bath!

 Add to favorites or read later

You are one talented lady.
Now, rest and take that long bath in luxury. It is absolutely beautiful.
The Hampton’s in the Mountains bathroom! Beyond beautiful, taking it to a new level of beautiful and high end.
Wow, you have such talent and vision. This is gorgeous!
Interested to know what your bathroom flooring is…what product? I love the gray/white rectangular look.