Staircase Gallery Wall Tutorial
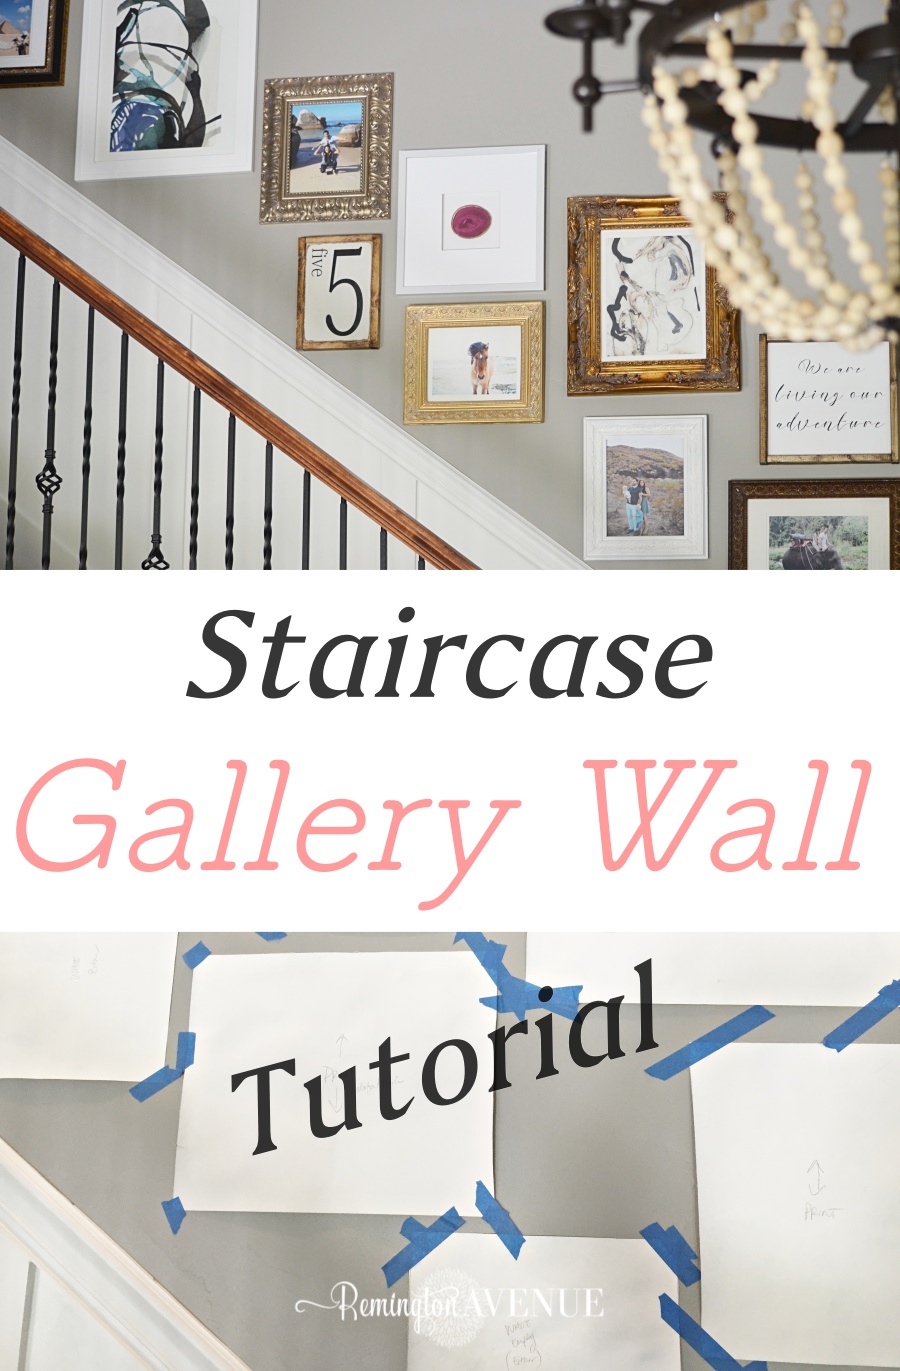
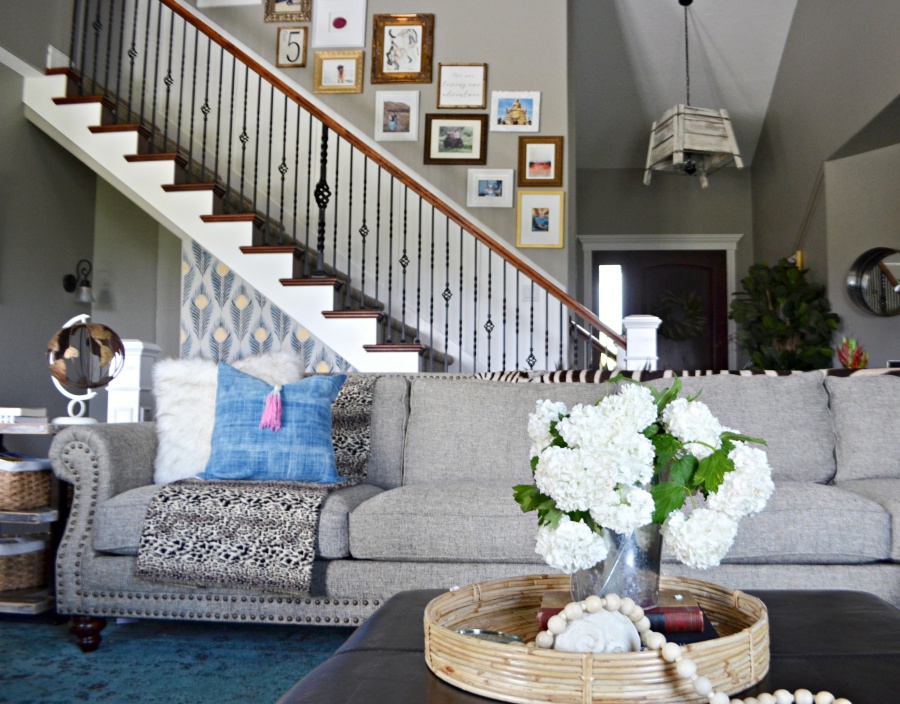
Growing up my mother had a gallery of photos escalating up the stairs in every one of our homes. I grew up in a family of 8 children so you can imagine that staircase wall was filled to the brim. I remember stopping to look at those photos often. In fact, I can still remember several of the pictures that were on display. This is my first home with a staircase so I’m excited to create a staircase gallery wall of my own. My children have already asked so many questions about the photos on display. I included lots of photos from travels my husband and I took before we started our family. My son is particularly interested in the photos of us riding an elephant in Thailand, and a camel in Egypt. It has already sparked lots of educational conversations with the kiddos. I also find myself staring at the wall and getting lost in the memories. These are the things that really turn a house into a home. I can’t believe its taken me this long to complete this project, but I had to install the molding first. Just in case you missed my post on installing affordable staircase molding, click HERE for the full tutorial.
I created a small gallery wall in my last home. I really liked the end result, but I poked a few more holes in my wall then I care to admit. Lets just say there was a lot of patching that had to be done on that wall when we moved…oops! This time around I came up with a better solution then getting nail happy with the hammer! Read on as I break down each step I took to create this staircase gallery wall.
Tutorial:
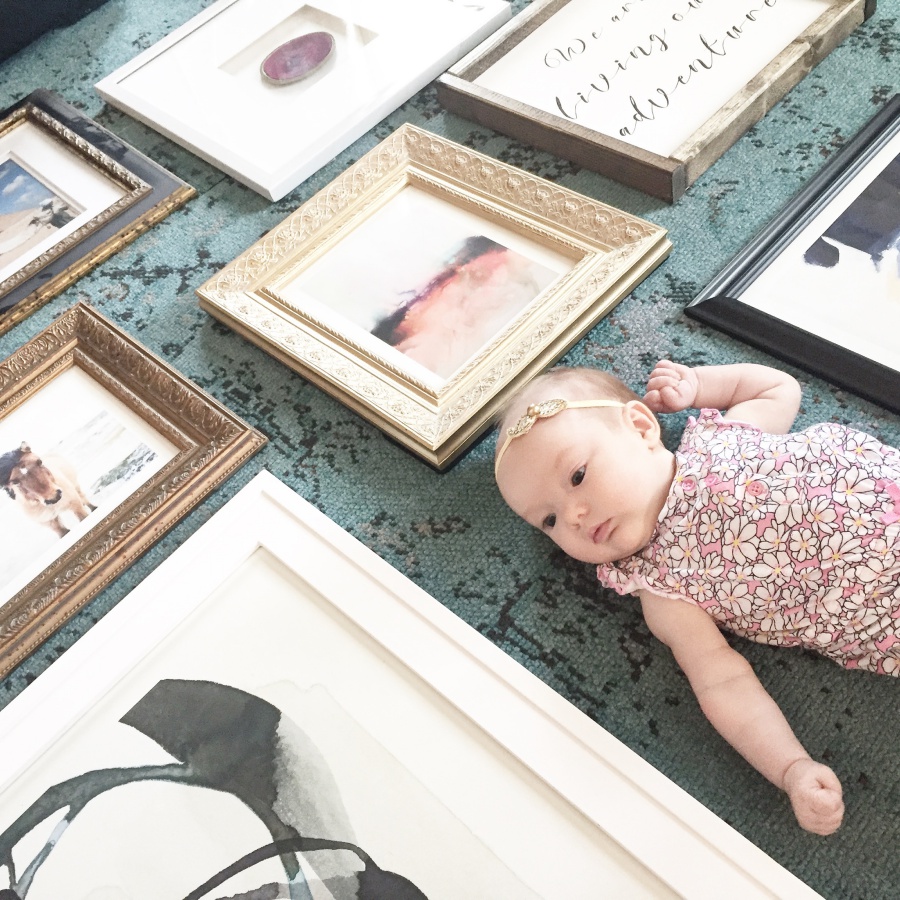
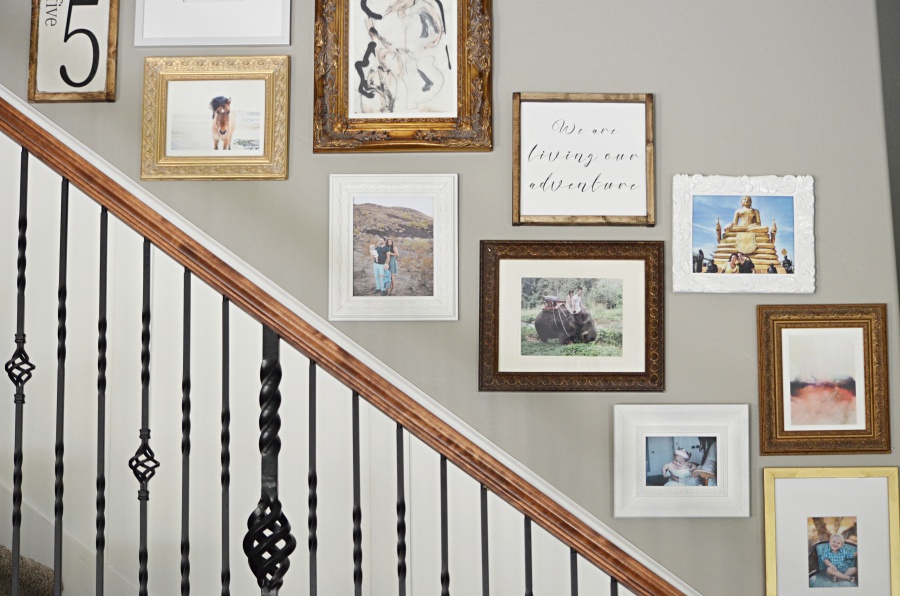
First, choose the photos and/or artwork you want to display on your gallery wall. I won a Minted giveaway a few months back and ordered several art prints just for this purpose. I like the mix of art and personal photos to create a very interesting gallery. Minted has an amazing selection of art to choose from. It sure didn’t take me long to spend all the prize money plus some of my own…shhh! Baby girl almost made the cut but I didn’t have a frame her size 😉

Make sure you have frames for each of your selected art pieces. You can stay with one frame style and color, or you can mix it up like me. I used frames I already had. Some gold, some brown, and some I painted white.
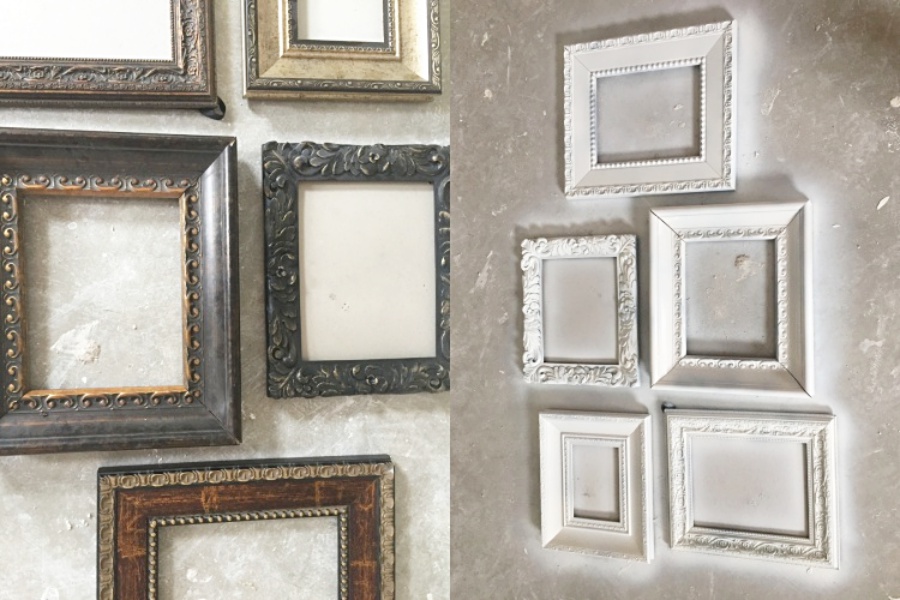
| Ps I sprayed these on the floor of my unfinished basement…but it won’t be unfinished for long! |
Get the Look
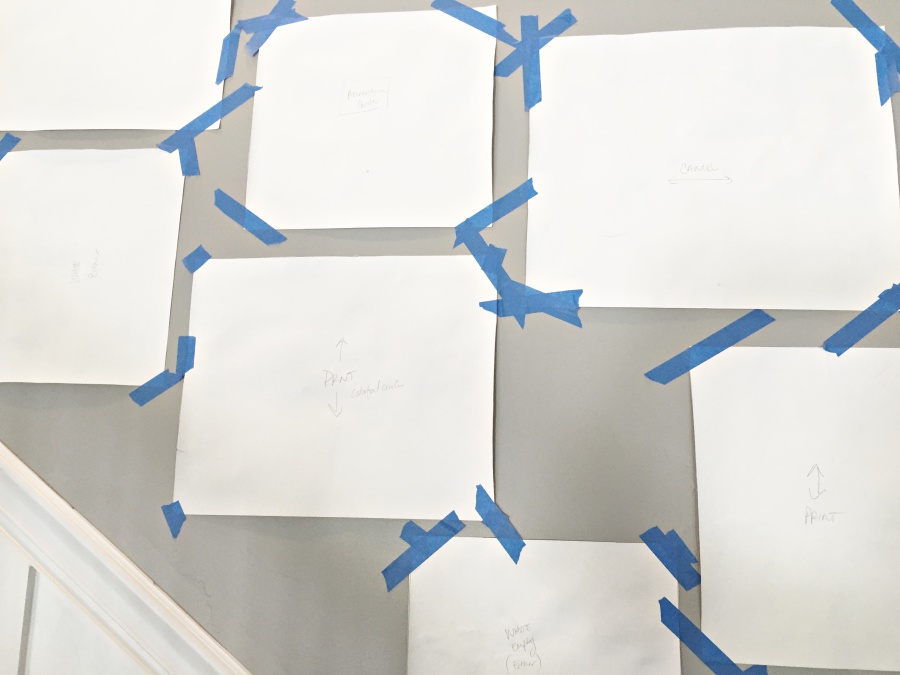
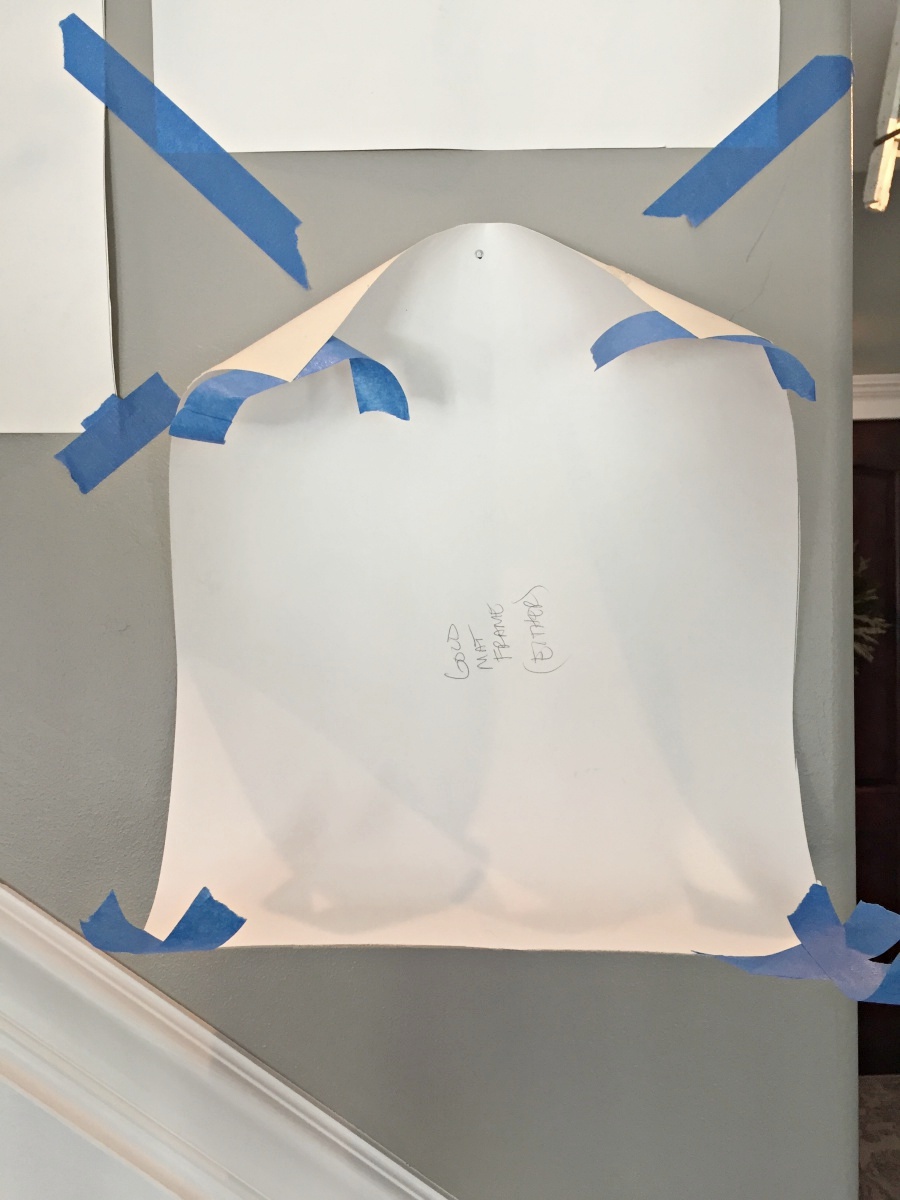
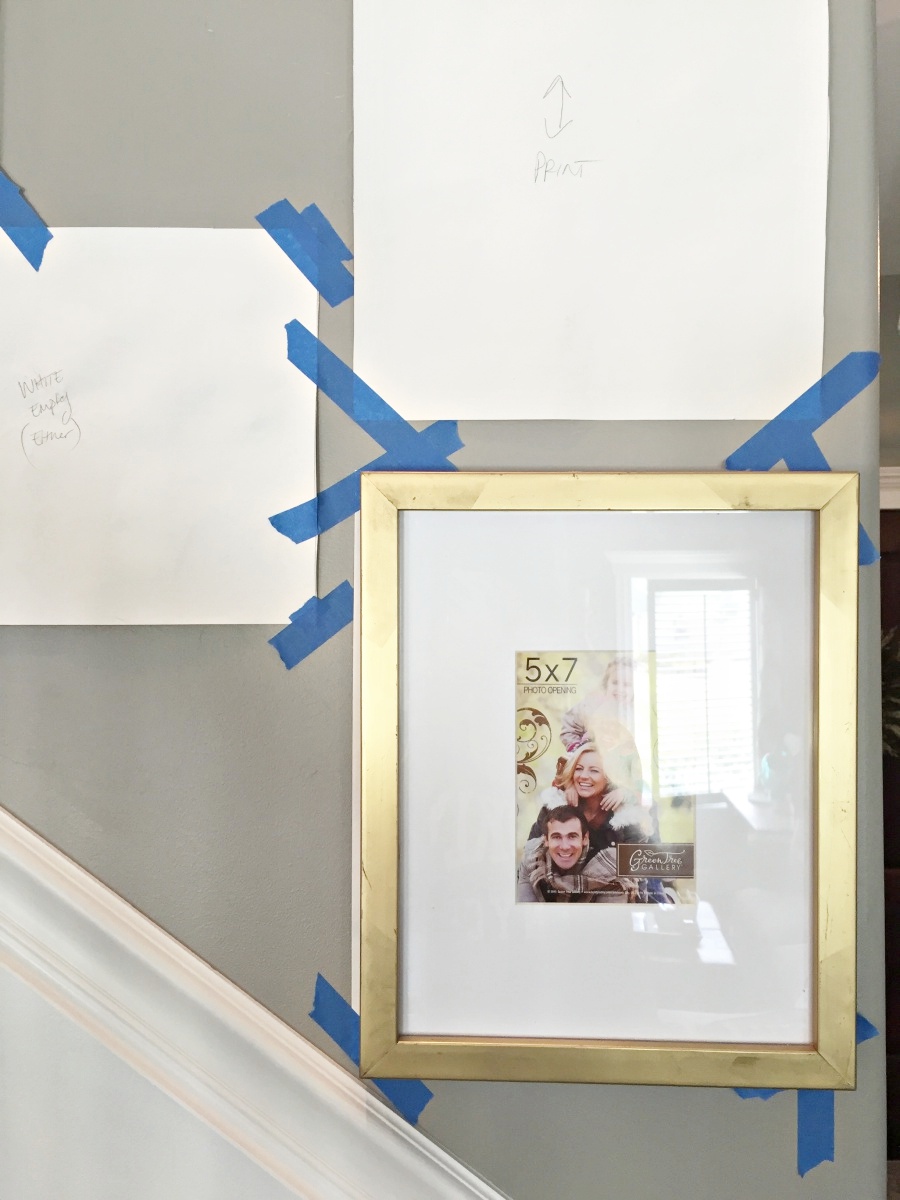
Next, trace the frames onto a roll of paper. I used leftover wallpaper from my last home, but brown paper, craft paper, wrapping paper, or any kind that comes in a roll will do the job. I marked each traced frame with the frame color and print. This will help you when designing your gallery. I noticed that beyond the size of the frame it was equally as important to note the color of the frame as well as which print was in side. This way the golds and whites were scattered throughout the wall and there were no clumps of art prints with no photos near.
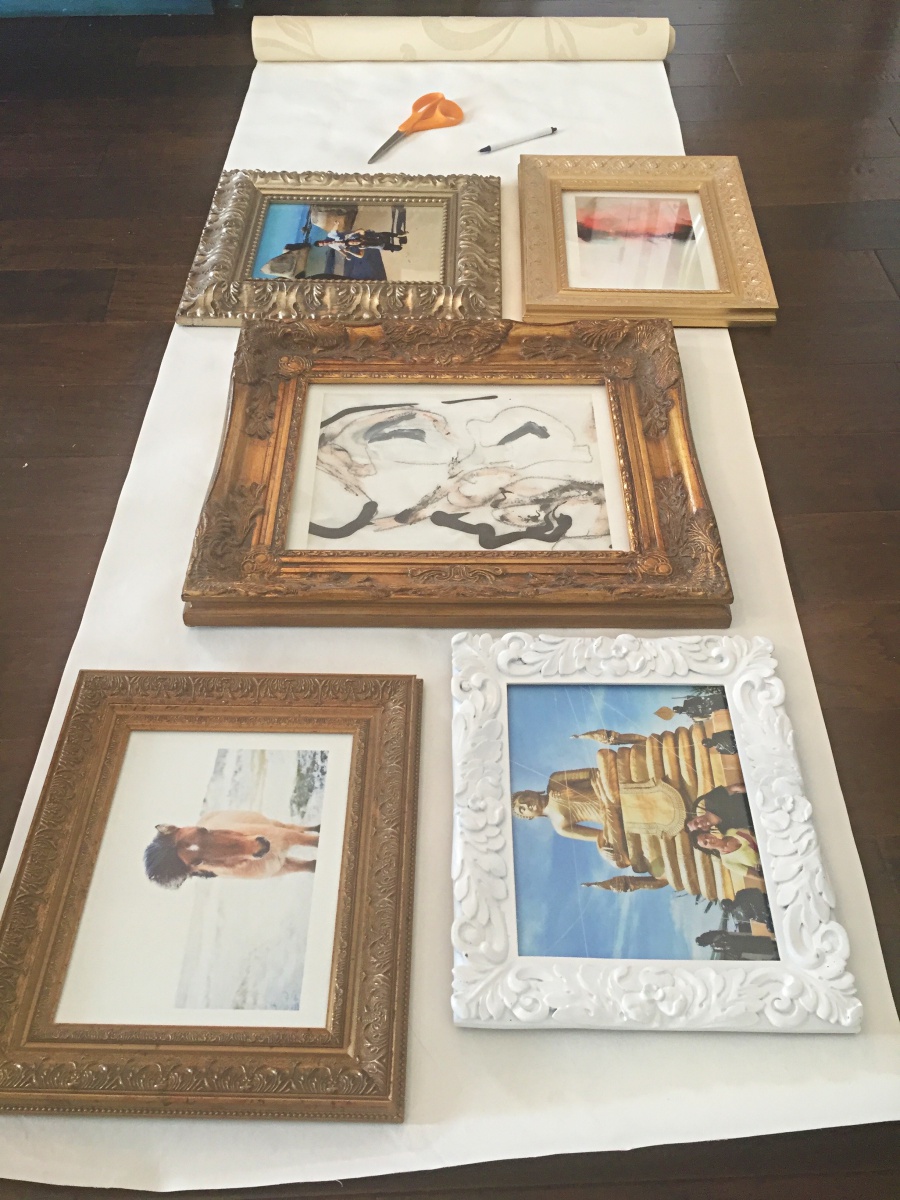
Cut out each traced frame with its designated title.
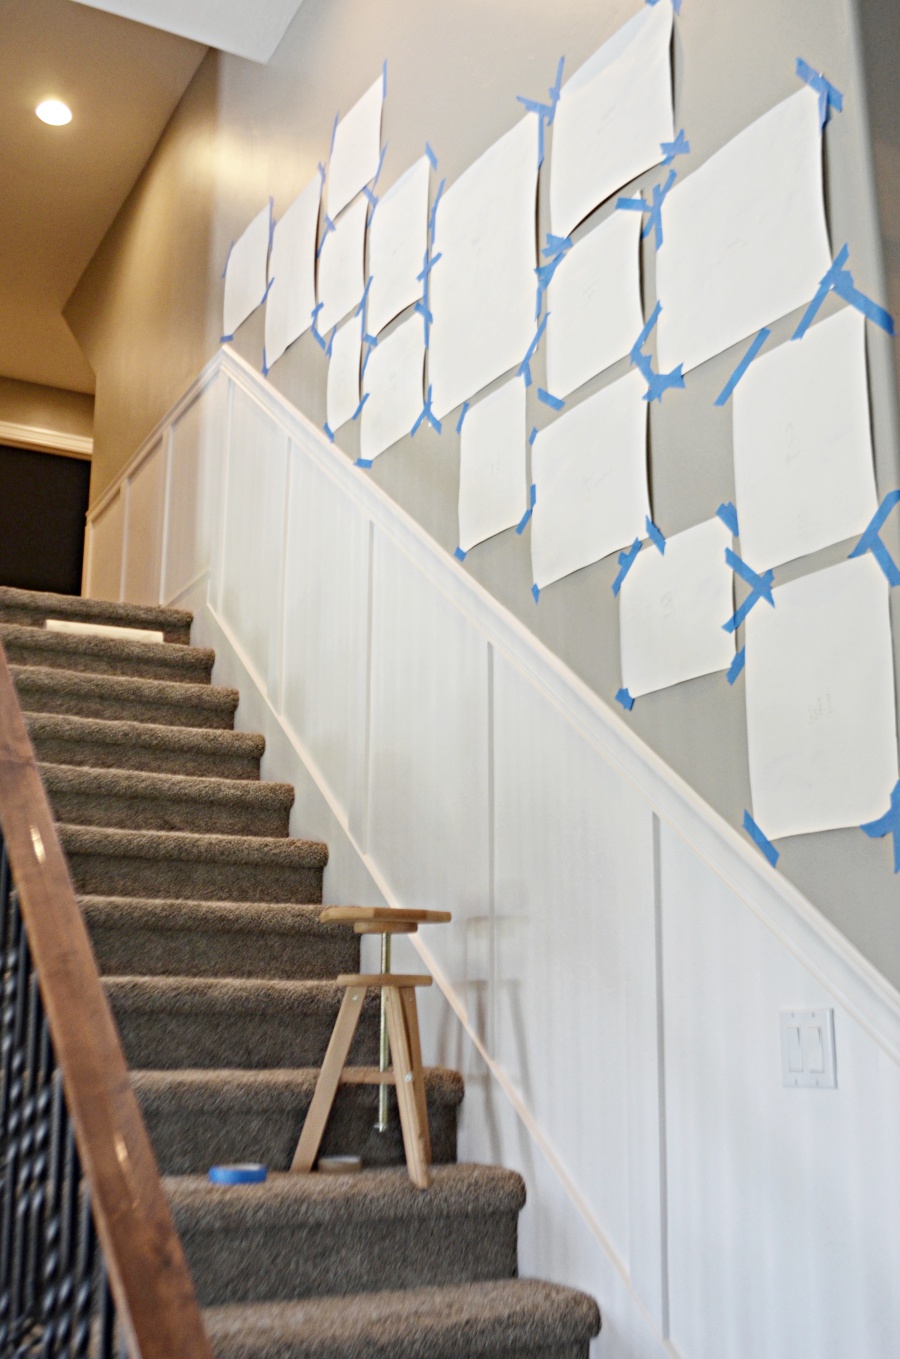
Grab a roll of blue painters tape and go to work! (this will not pull the paint of the wall and come off easily for adjustments). I started at the bottom with some medium sized papers first. Play with it! This is the whole purpose of using the paper cutouts! I did not measure the distance between frames or fuss about leveling the papers. I just taped up a paper cut outs and made adjustments till I had something that looked balanced. This step took the longest, but once I had each paper in the perfect spot I could really see my gallery wall starting to take shape.
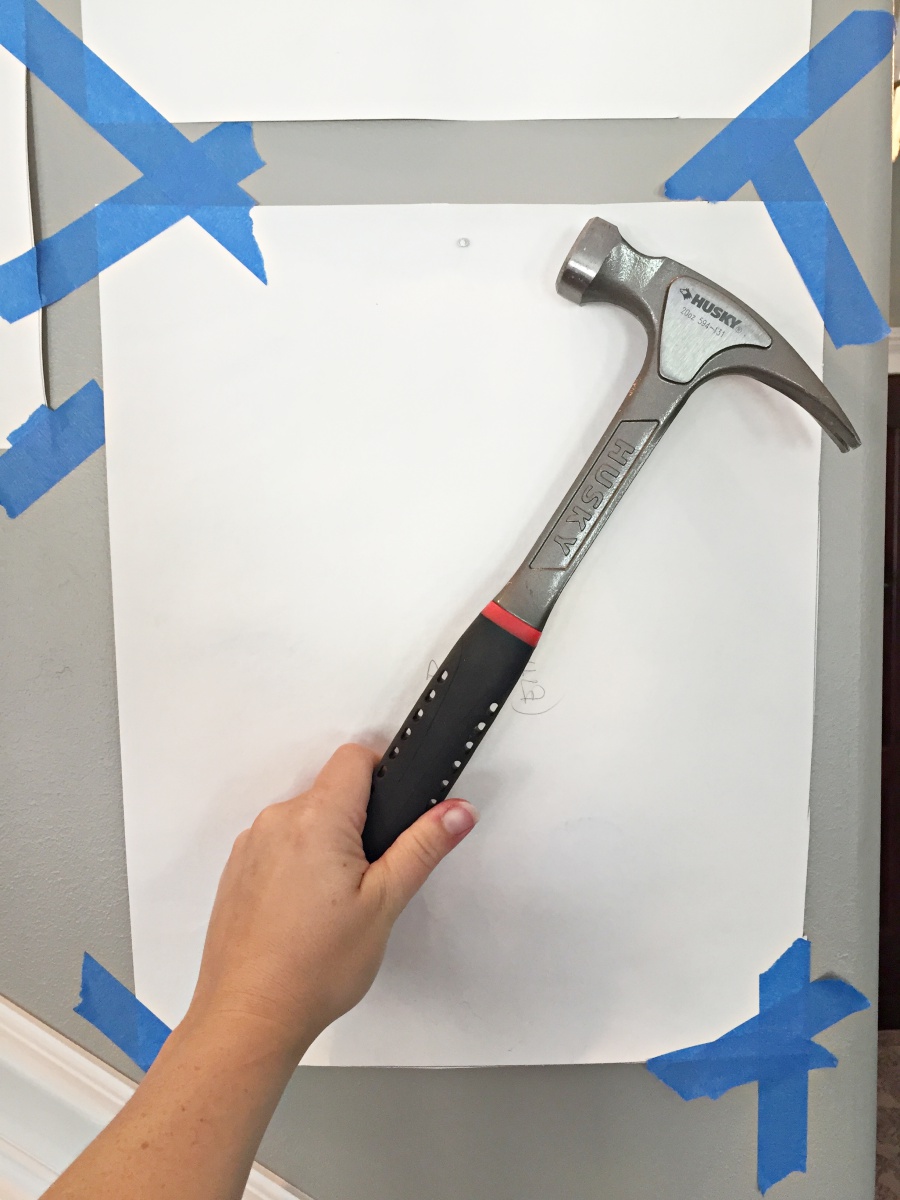
Remove the tape and pull the paper off the wall leaving he nail behind.
Voila! (I left the paper up behind to illustrate that it was a perfect fit). One frame down, 20 more to go!
Hang some more! This is the fun part! Can you see the staircase gallery wall coming together?

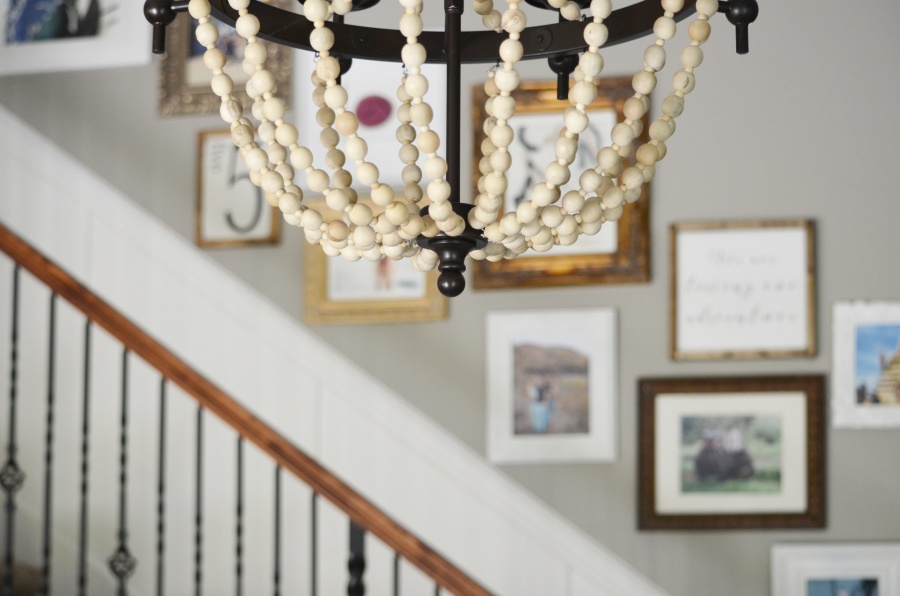
I’m pretty happy with how it turned out, and especially excited about the lack of excessive holes in my wall! Yay for a win! I sure hope you enjoyed my little staircase gallery wall tutorial. Now go hang your own unique “unholey” gallery! And Here’s a list of some other gallery ideas to get you started!
- family photos
- children’s art
- empty frames
- Awards
- travel photos
- mirrors
- typography
- pressed flowers/plants or botanicals
- eclectic mix of everything listed
- one photo split between multiple frames
- A single color that appears in every frame no matter what it holds (example:every frame has green)
- A variety of art prints from the same artist

 Add to favorites or read later


Your gallery wall turned out beautiful! I love a photo display up the staircase, so fun!
thank you so much Kristen
Beautiful gallery. I live that all frames are different and eclectic. Gallery looks relaxed and not too preppy. Excellent work.
Thank you Ilona
This is awesome and way better than how I do it! Just pinned it… Thanks for sharing! Xo
Truly… this is a handy websites