$15 Modern Cedar Planter
I often see things at the store and think, I could totally build that for cheaper…occasionally its true, but more often I’m way too over confident haha. When it came to the cedar planters, however, I hit the nail on the head! With the Home Depot Patio Challenge here, I got just the kick in the pants I needed to execute my vision. Consider this your sneak peak and stay tuned for the full reveal.
Update:
To See full patio reveal click the link below:
http://blog.homedepot.com/3-
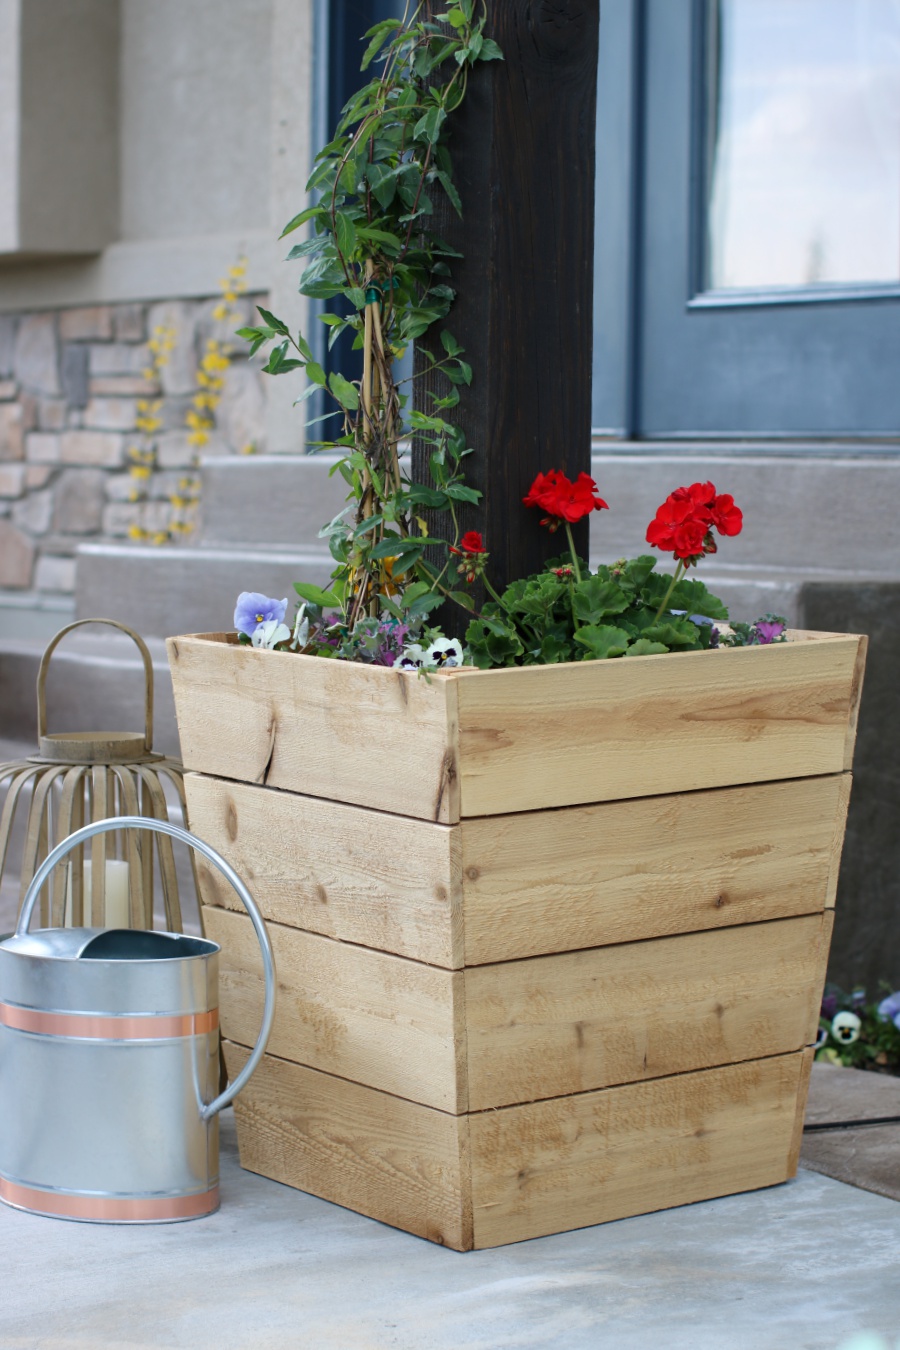
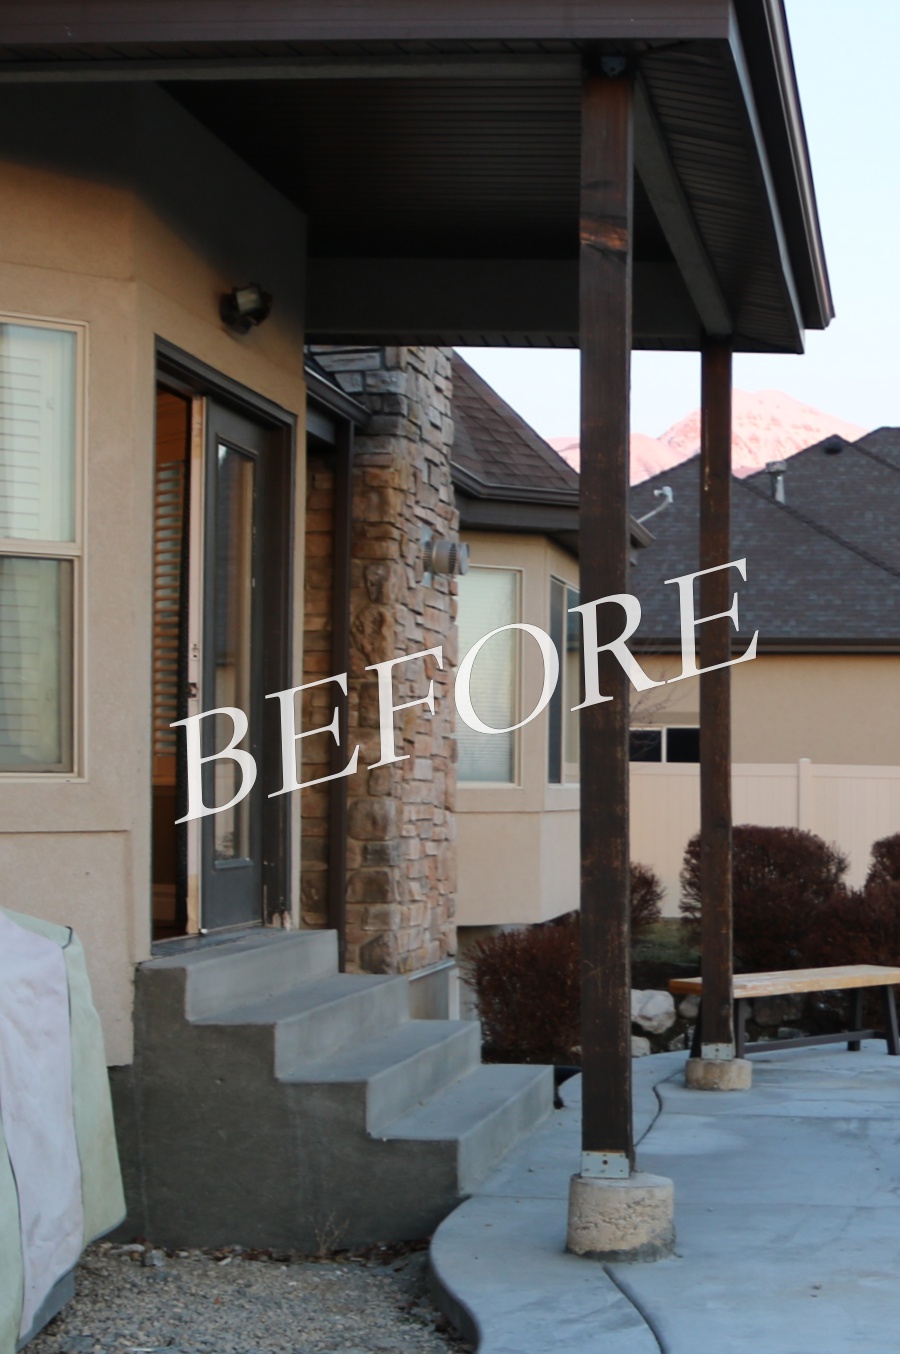
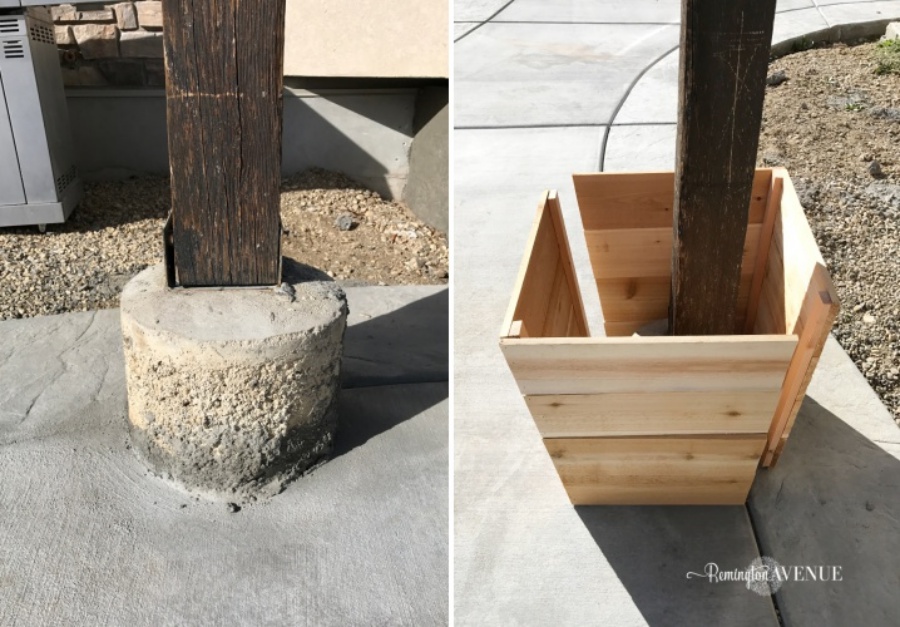
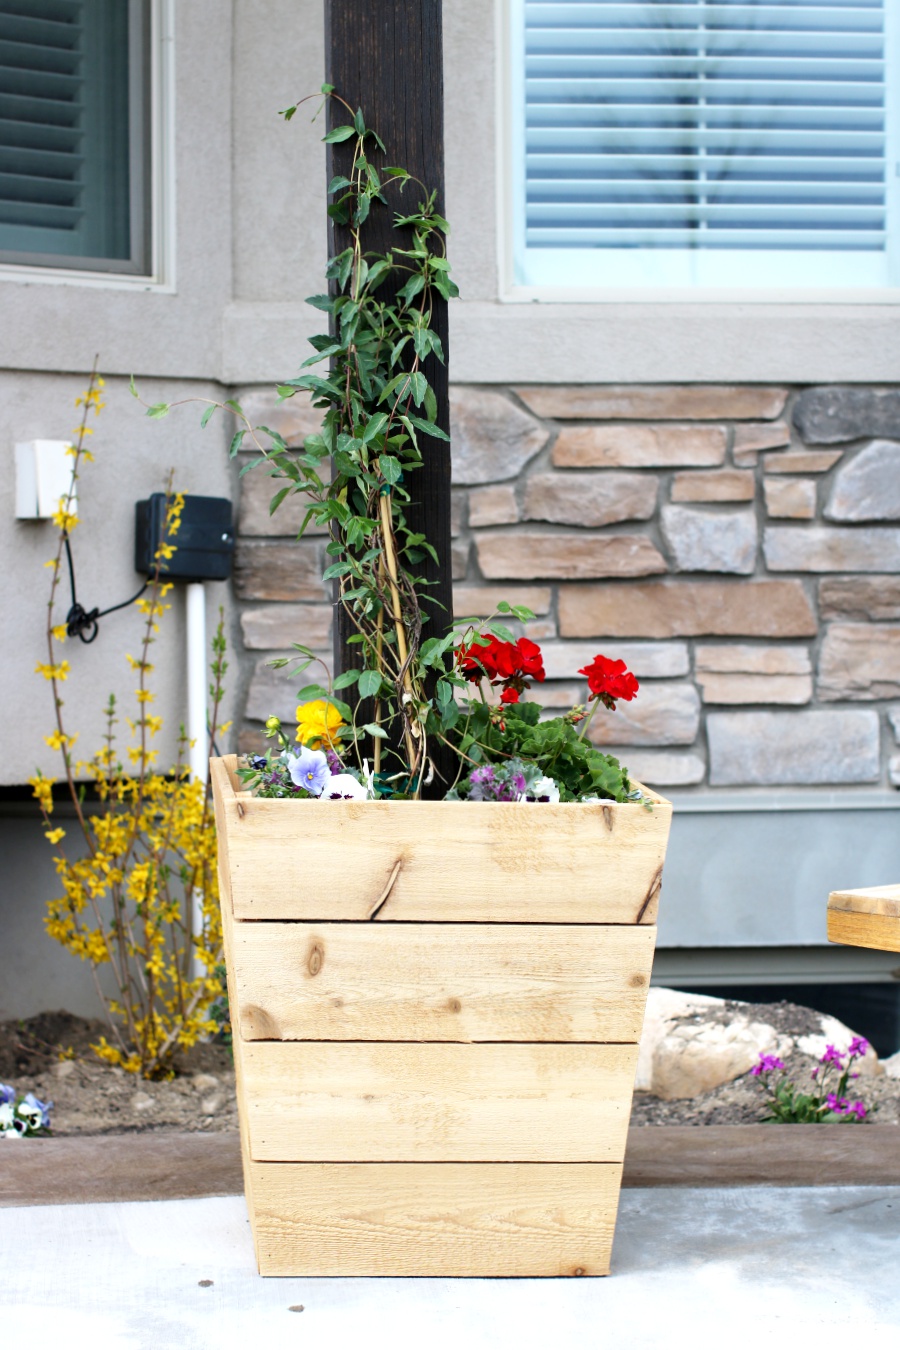
I already had the perfect spot picked out for these bad boys. The cedar planters would hide the ugly cement foundations under my patio awning columns. The perfect disguise and nobody woud be the wiser! With my kids fast asleep and my trusty nailer in hand, I went to work creating the modern cedar planters of my dreams! What do ya know, I had a pair of cedar twins before my own kids woke up!
Katie from Bower Power Blog was the inspiration for these beauties! My planters are a variation of her creation. You can find her plans HERE.
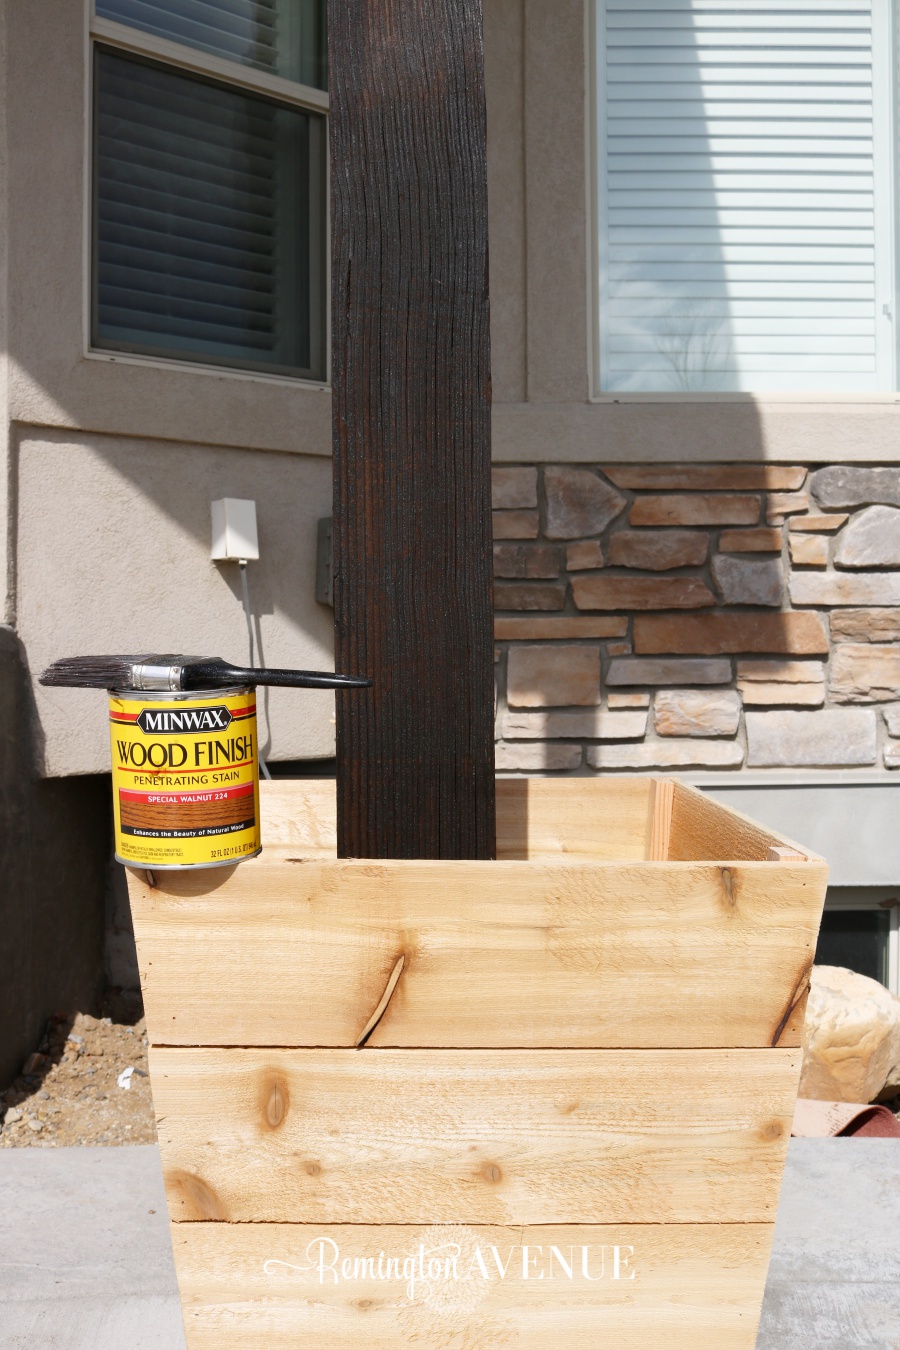
I used cedar fence pickets selling for $1.93 per picket. We even took a family photo to document this momentous smokin’ deal!

Each planter only cost me $15. That’s $30 for the pair for all you math wizards like me! This really is a super simple and inexpensive project. I designed my cedar planters to surround my awning posts, which is where my measurements came from. Feel free to adjust accordingly!
Tools & Supplies:
Pencil
Nail gun or hammer & nails
Safety Glasses & Hearing Protection
1 – 1x2x8 board
Shop my Tools & Supplies (Scroll & Tap image below):

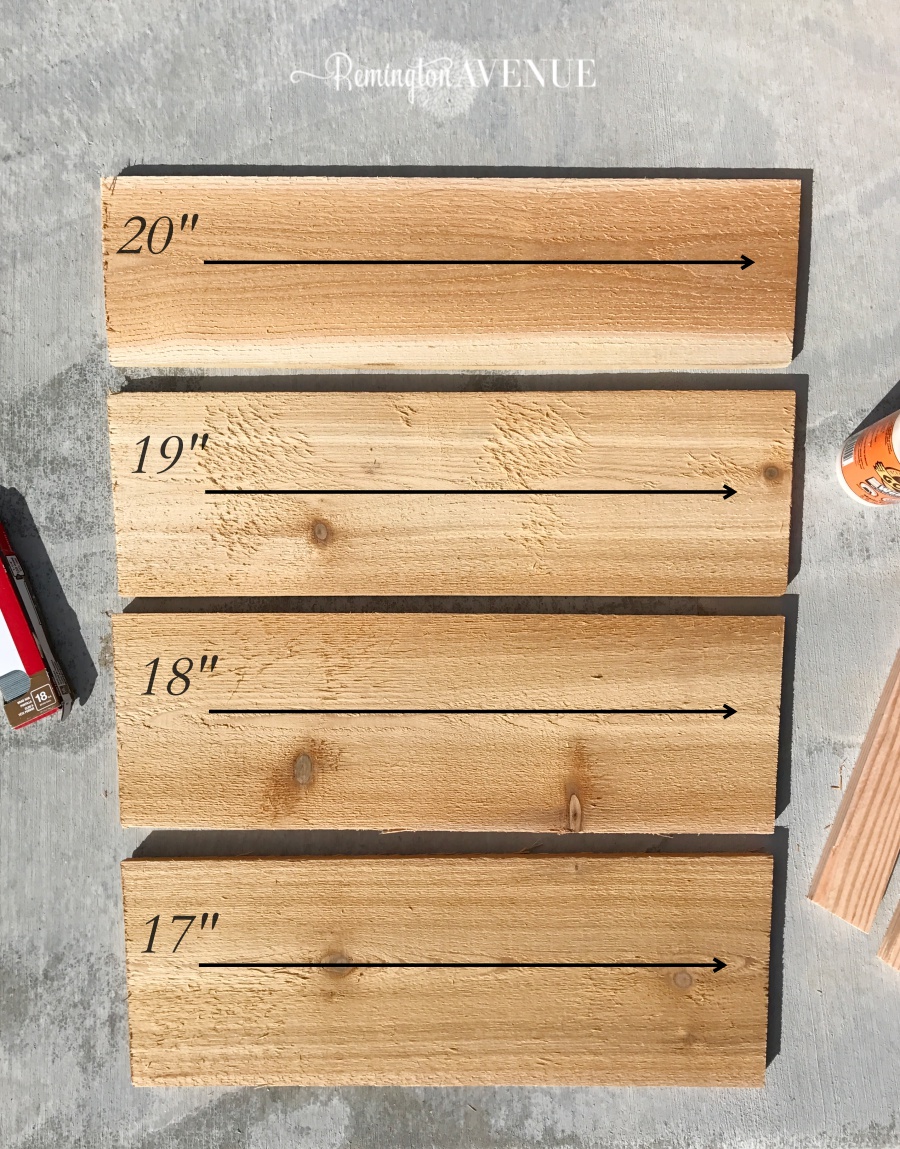
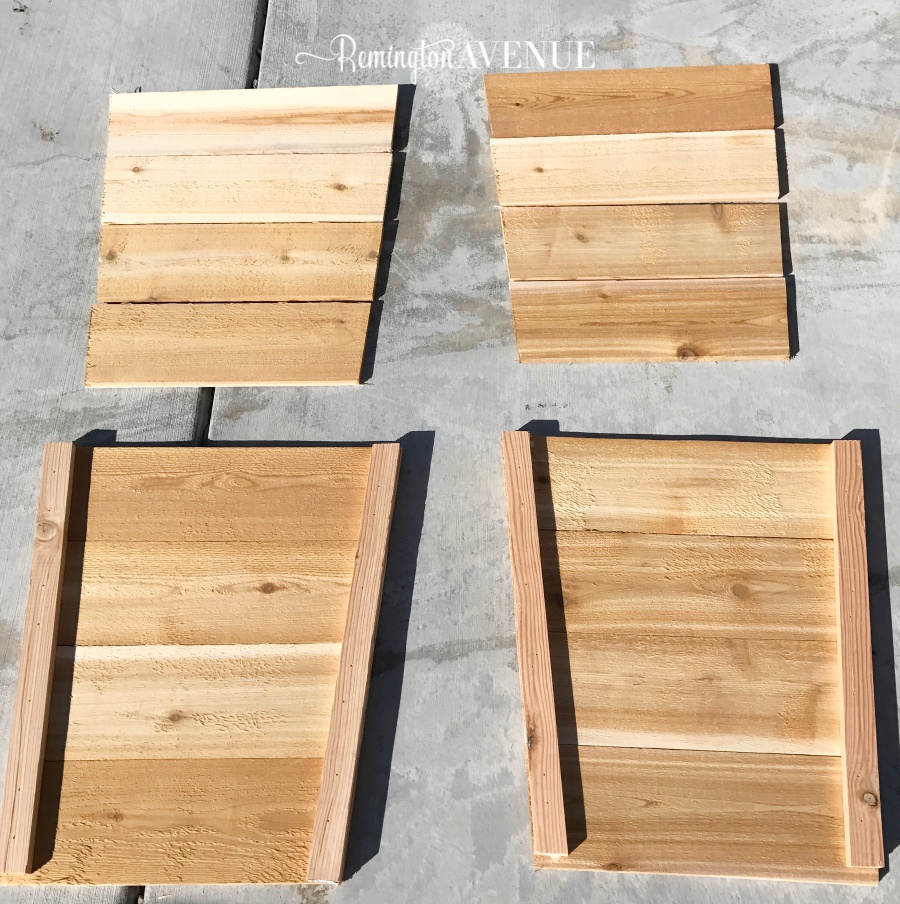
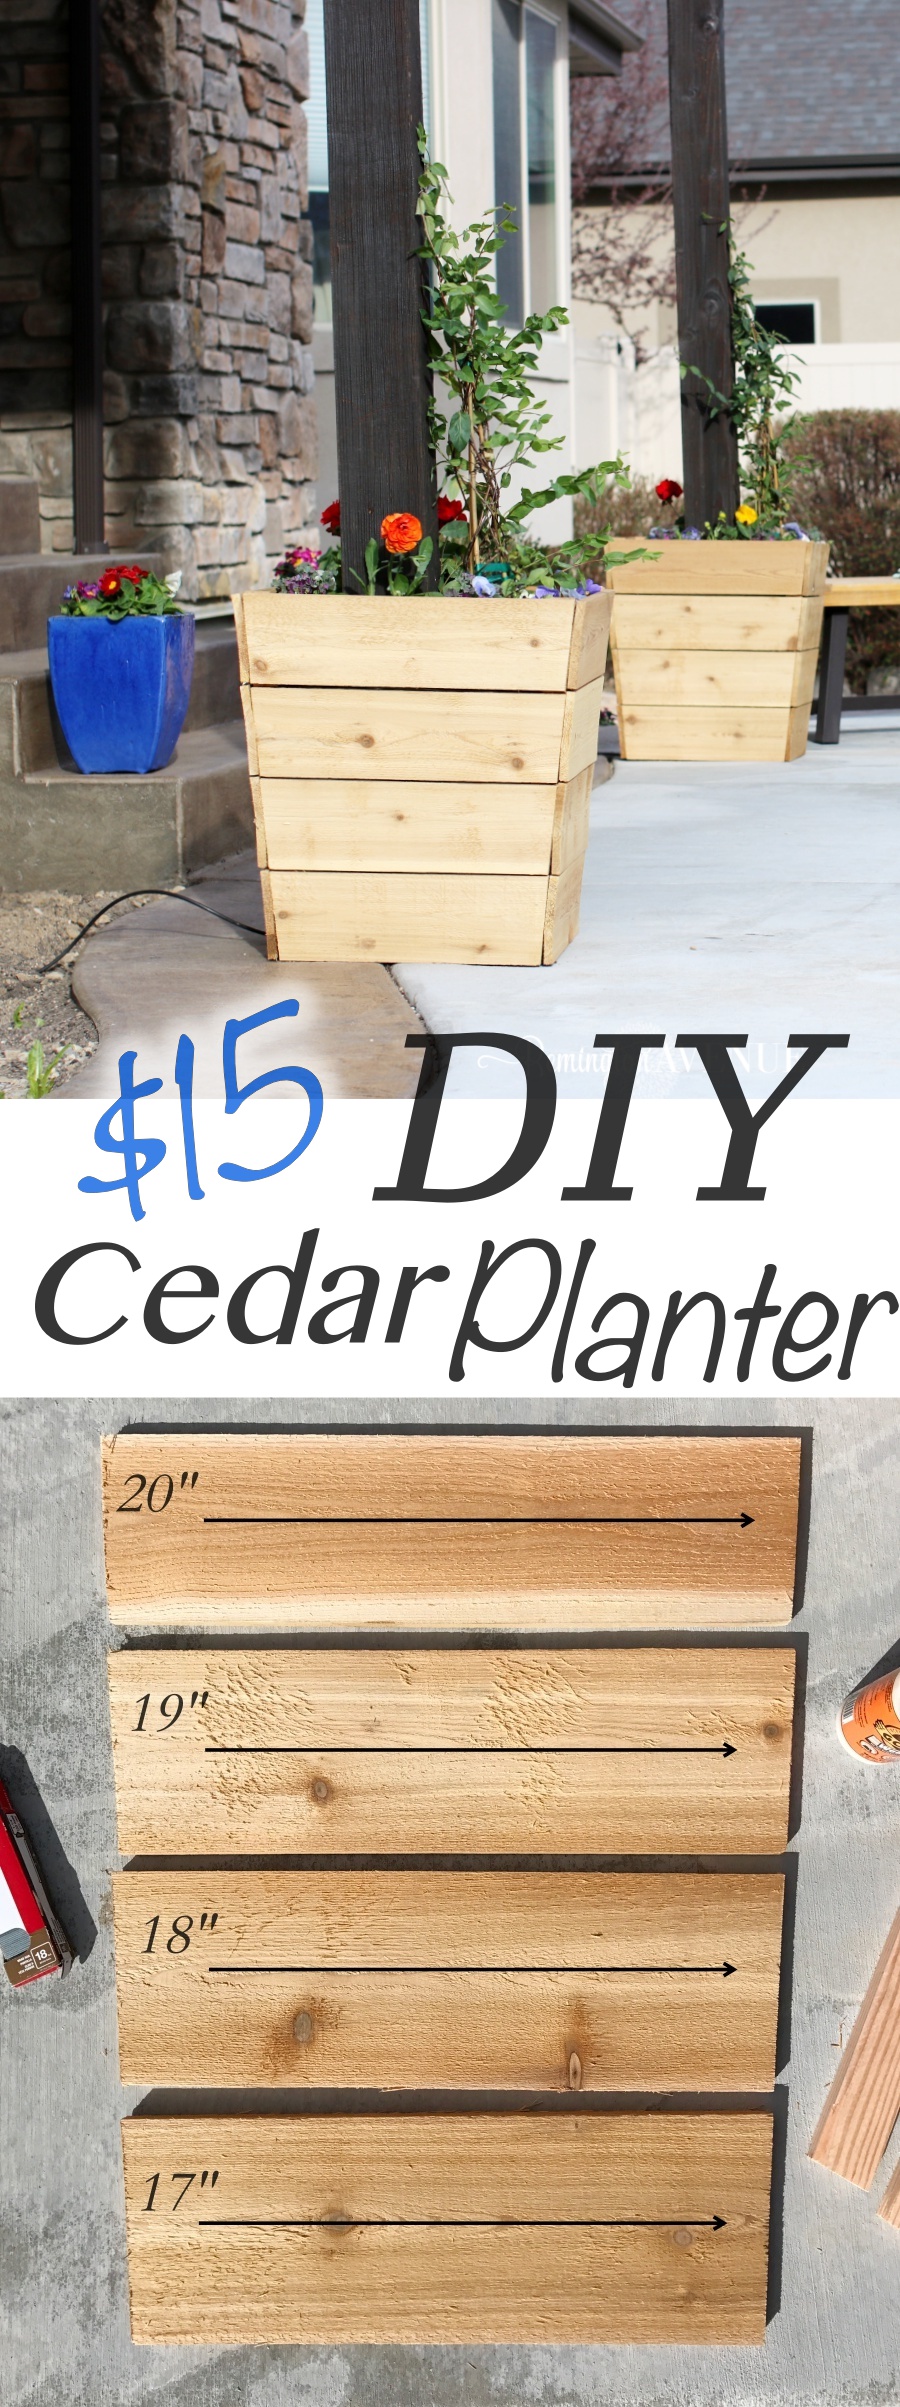
Cut List for One Planter:
*Cut all pickets at a 5 degree angle
4 – pickets @17″
4- pickets @18″
4 – pickets @19″
2 – pickets @22″ (can use scrap wood for this)
4 – 1×2 @ 14″ (can use scrap wood for this)
Tutorial:
First, I cut all my cedar pickets at a 5 degree angle. I started with the smallest, cutting 4 of each size, and working my way up the largest. Again thats 4 boards for all 4 sizes, or 8 boards of all 4 sizes if your building two. Just throwin’ my fellow math wizards a bone! You’re welcome!
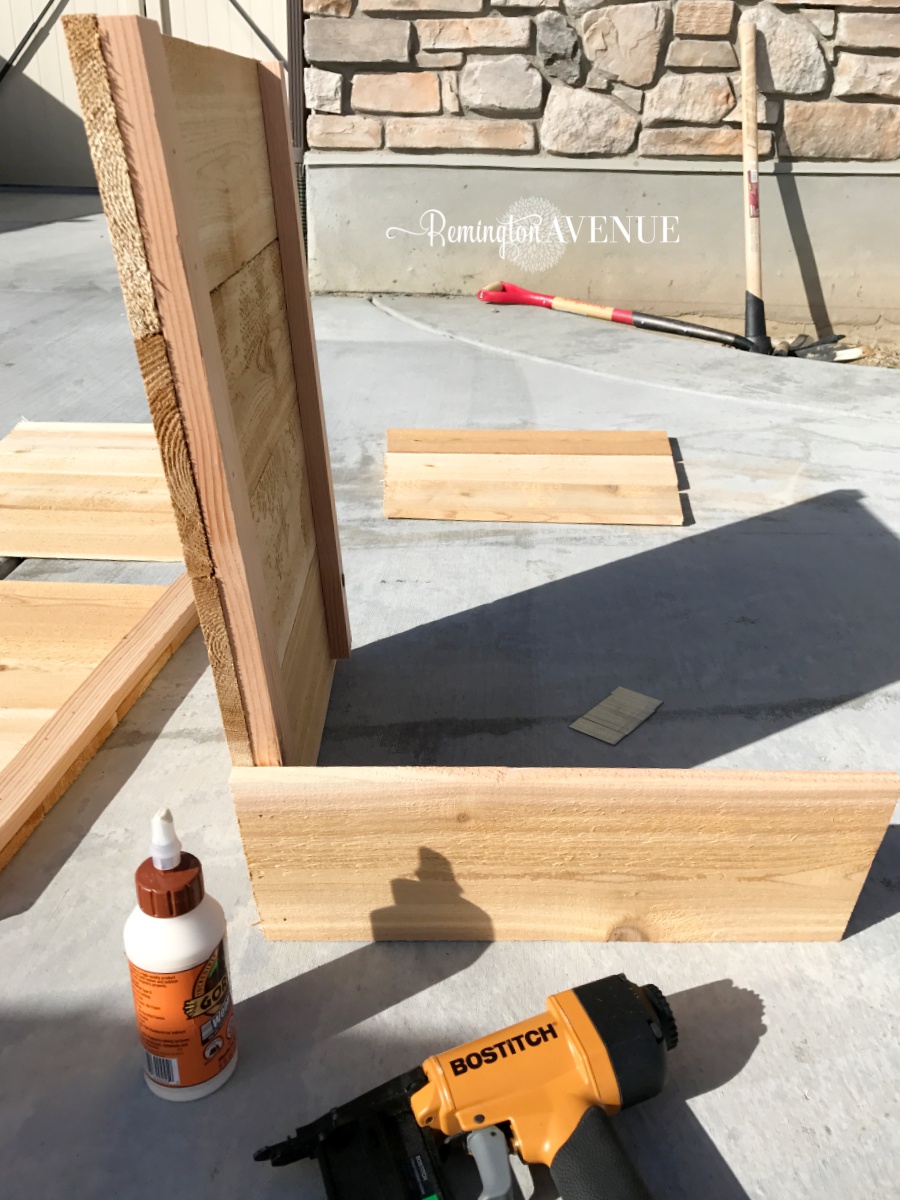
I cut 4 pieces of a 1×2 board to 22 inches, the size of each vertical side of the planter. I used wood glue and brad nails to construct 2 panels for each planter. 4 total that looked like this:
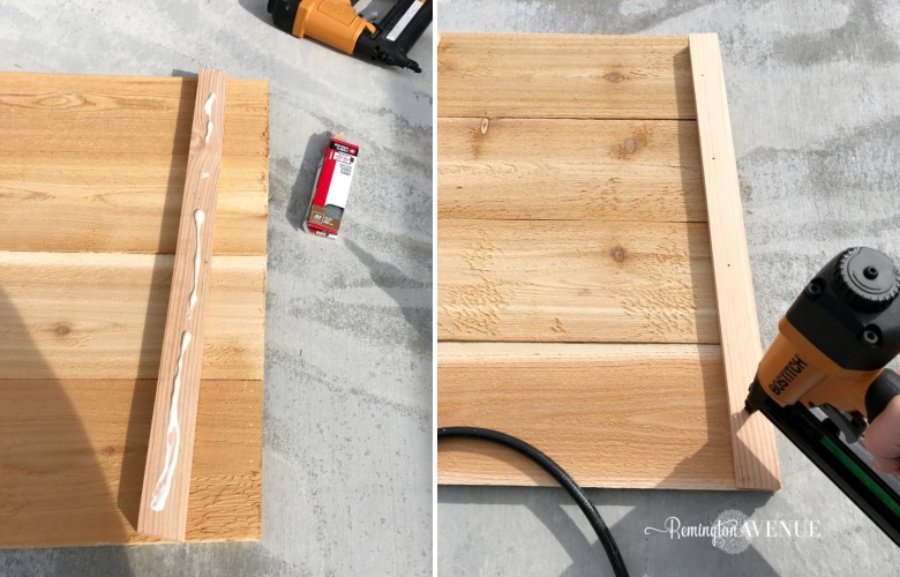

Using wood glue and my nailer I adhered the other 2 sides to the 1×2″ to look like this:
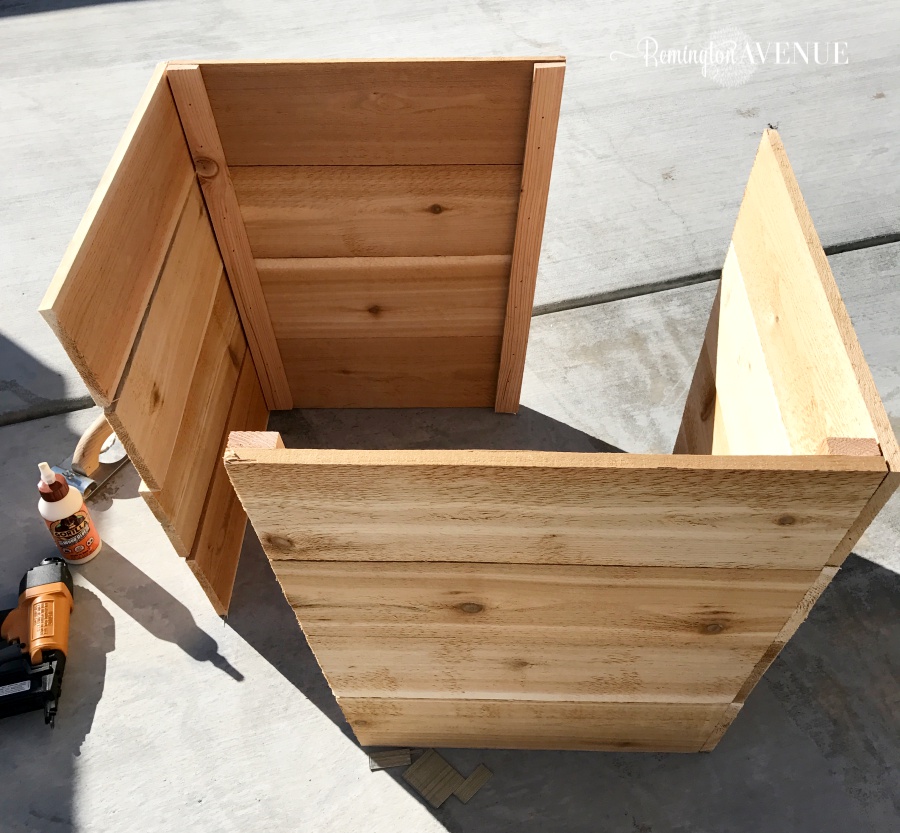
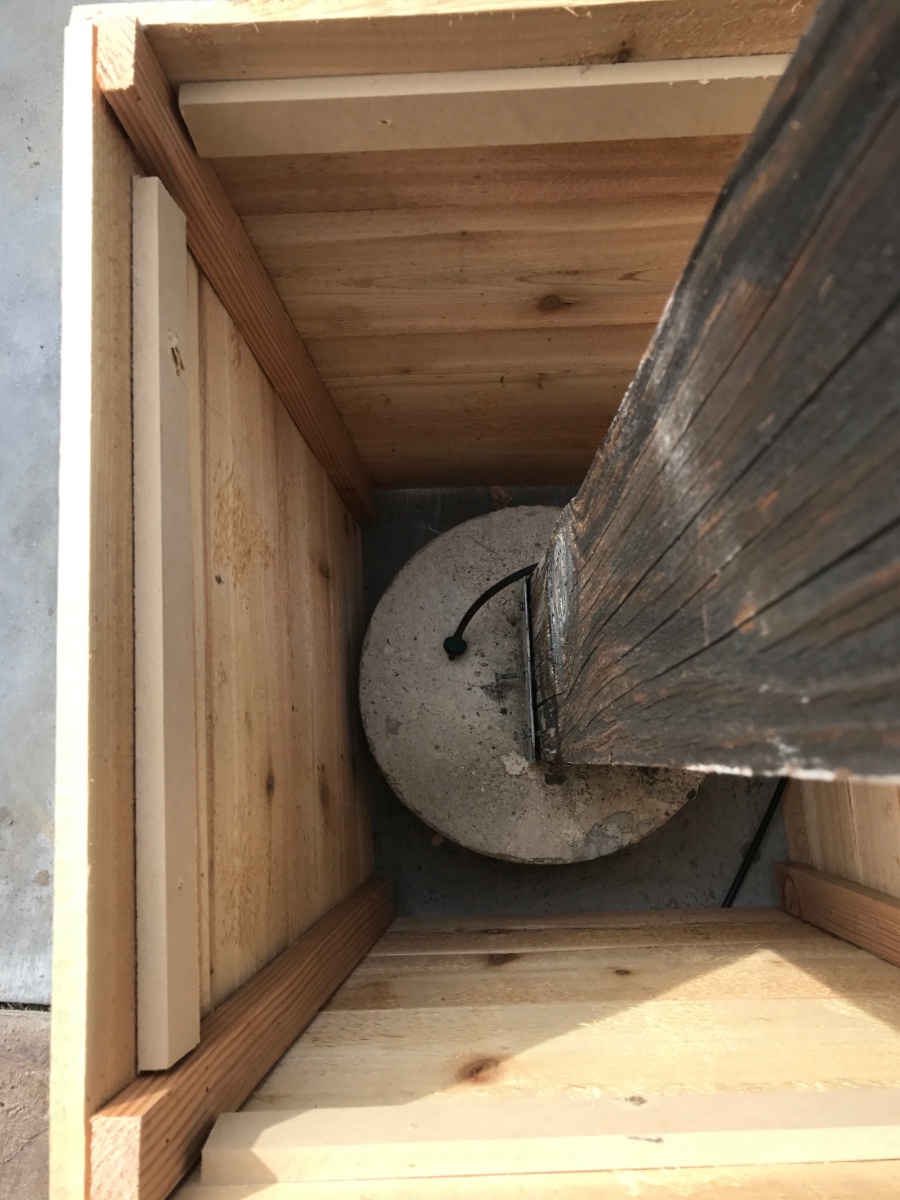
Keep in mind my planters are going to surround my ugly cement blobs, so thats why I finished constructing them around my patio posts. If your just building the boxes like a normal person would just ignore that and go bout your business securing the last 2 corners the same way to form a box.
Shop My Tools & Supplies:

Cedar wood is a great option for exterior use because it’s naturally resistant to decay. If you like the fresh cedar color to last a little longer, go ahead and slap a couple coats of matte polyurethane to protect it from weathering.
I went ahead and re-stained my dark wood columns while I was at it! They were overdue for some love.
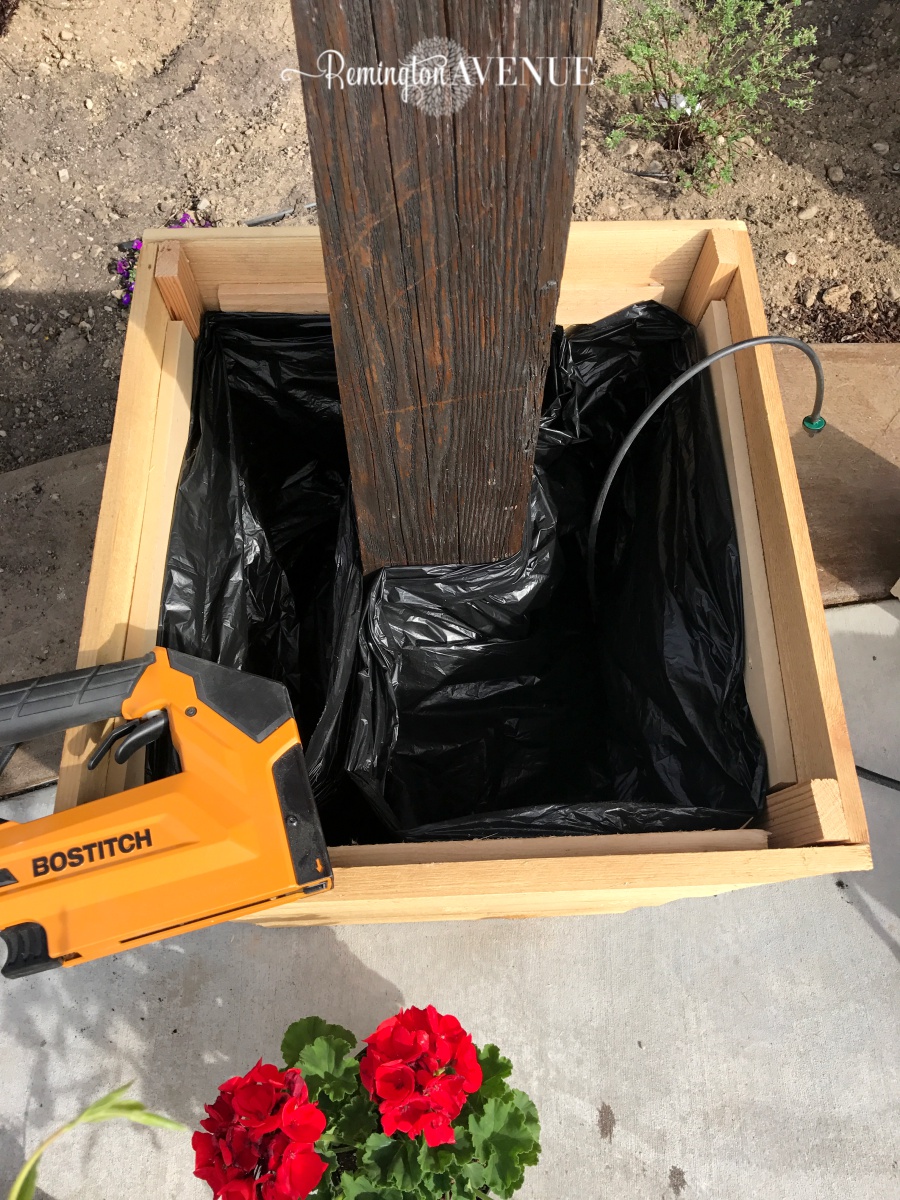
My cedar planters have no bottoms, but that would be easy to add if you wish. Using extra 1″x2″ boards @14″, I cut supports for pots and nailed them inside like so:
Shop my tools & Supplies:
There is no need to fill the entire planter with dirt. Instead, place a pot or box to rest on the supports. It works great if you don’t have a protruding column in the middle! I used the supports to staple a yard garbage bag with holes cut in the bottom to contain the soil from eroding out the bottom. Ya gotta get a little creative sometimes! Just keepin’ it real!
Well whatcha think? For $15 and 1 nap time, I got myself 2 grade A cedar planters! Come back on Thursday to see the full patio reveal!

Thanks for stopping by friends! If you build this cedar planter for yourself, please feel free to share your handy work. Please email me a photo or tag me on Instagram @remingtonavenue. Oh, and PIN the Image below so you DON’T FORGET IT!

 Add to favorites or read later
Love love love your version of my planters!!! I love that they pulled double duty and hid those concrete bases! Great job girl!
xo – kb
Thanks so much katie! I love yours too. Thank you for sharing your tutorial
I’m definitely going to build some of these! Enjoyed your post and great tutorial!
Im so happy you like them Rose! Cant wait to see yours
Love your ingenuity and saving those $$$.
What is the electrical ?? wire for?
Mysha, this is my second time reading this lol! I love what you did! We built 2 a little similar a couple weeks ago and I love how you broke it down! It looks sooo good!
You linked the wrong Pickett. 3.5 inches will only make 14 inch tall planters and need to be cut at a bigger angle.
HI rachel thanks for bringing that to my attention. I really figured I’d be showing people the products here and they would go into the store to buy it anyway. Ill update it though.