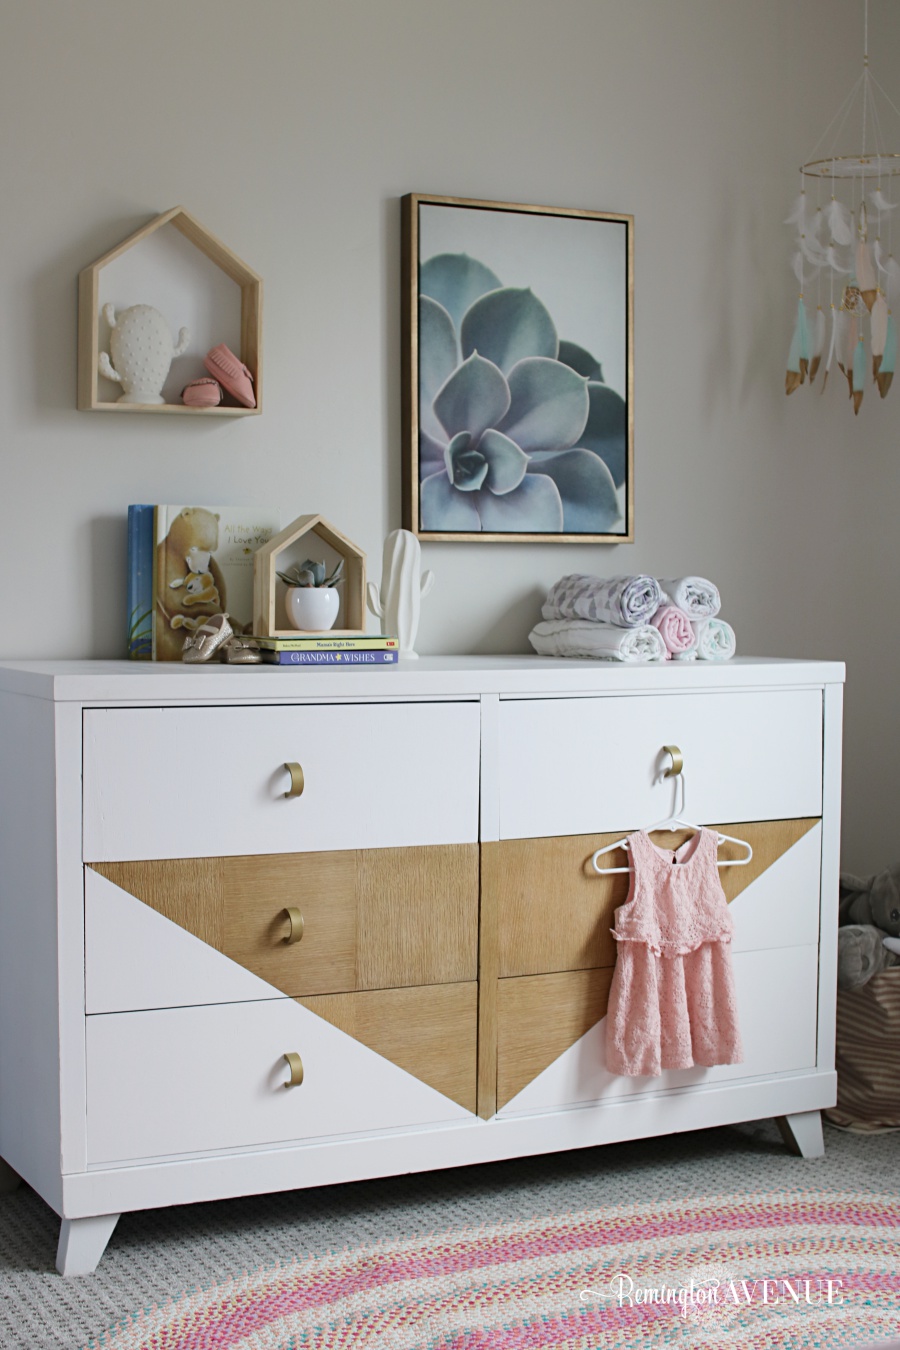
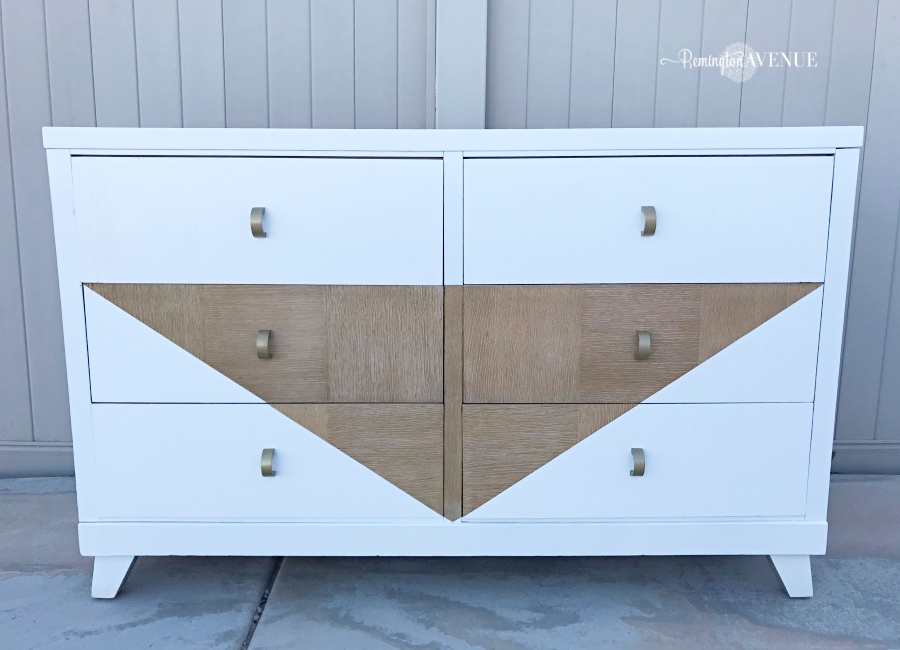
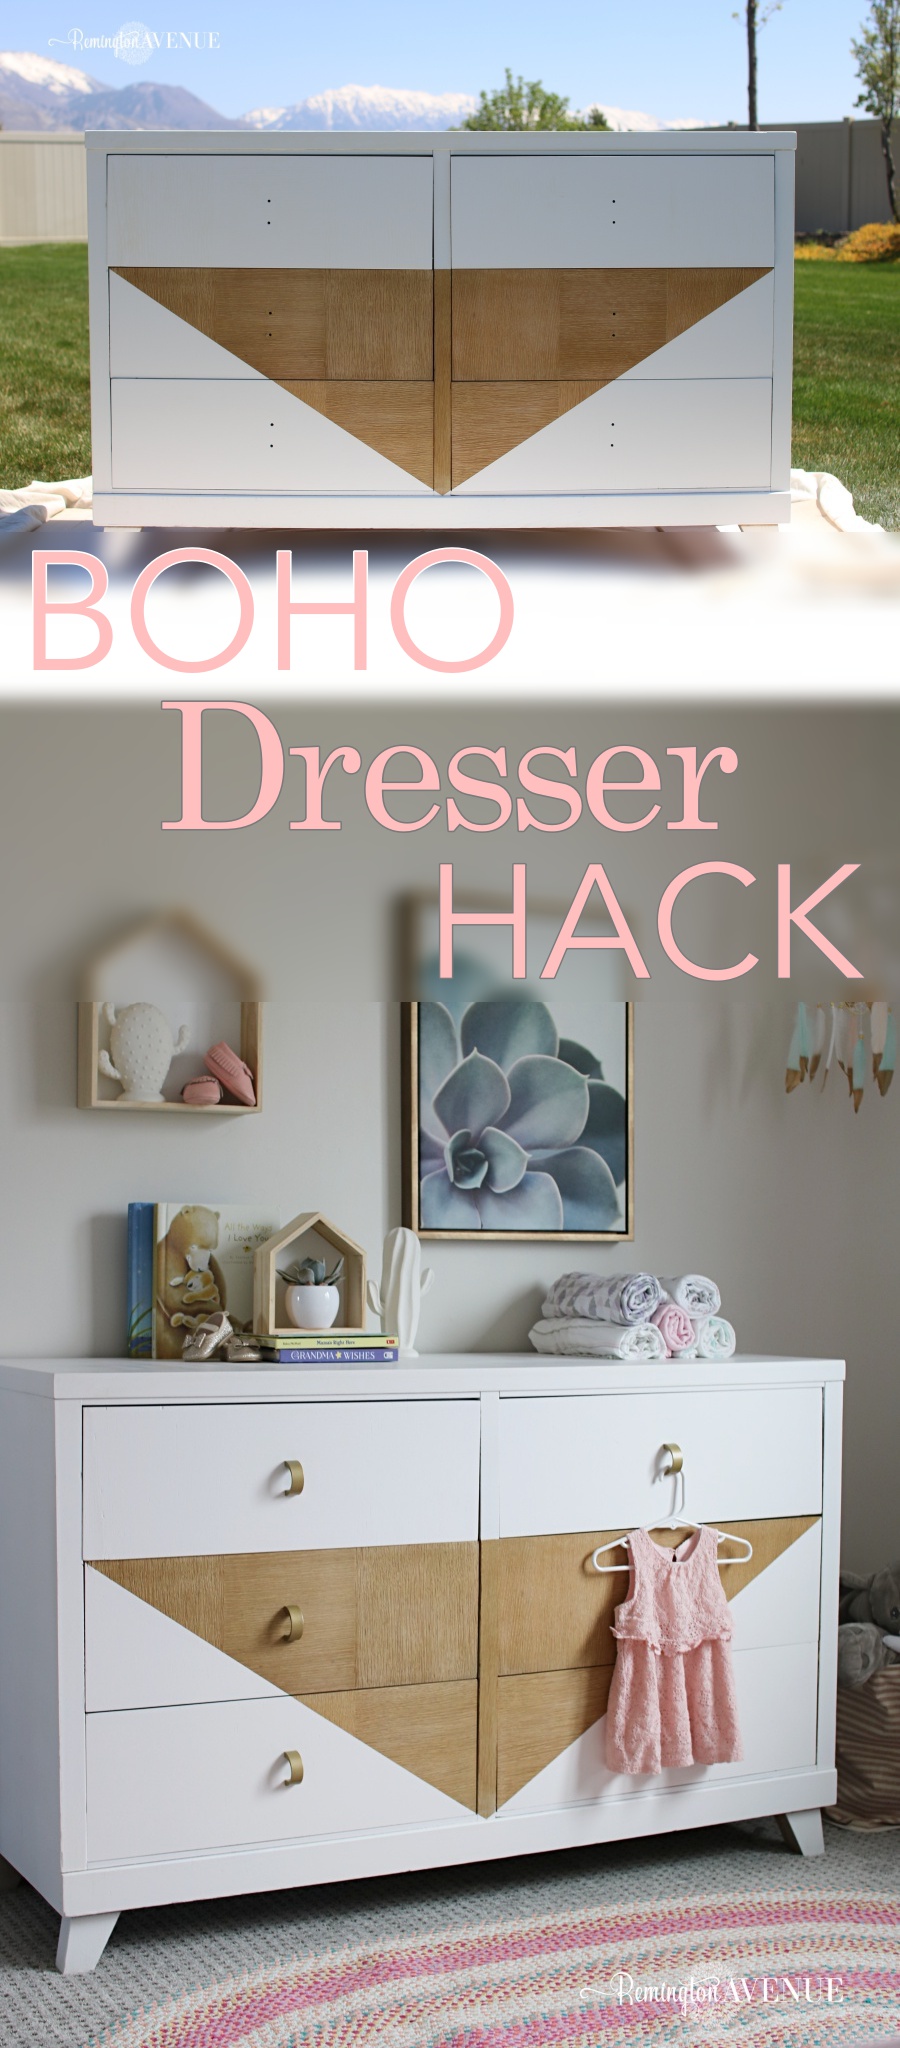
DIY Boho Dresser
Upcycling furniture is one of my favorite things to do, especially when it has history. This dresser was given to my sister and brother in-law from his grandma. They were very close, and when she passed away, she gave them a whole bundle of furniture. Sometimes we fall into the trap of having to keep things just as they were for remembrance sake. However, styles change and we all have unique taste. I think taking something with sentimental value and transforming it into something we love will get way more use and serve as a constant reminder of those that lived before us. Whether you want to achieve a one of a kind look on a budget, or just want to re-love an old piece of furniture, this project is for you. This diy boho dresser is totally doable and I am going to show you exactly how to replicate it.
DIY Boho Dresser Tutorial
Step 1: Remove hardware & Sand down the dresser using 150 grit sand paper. A light sanding helps to roughen up the surface to give the paint something to adhere to. Wipe clean with a damp cloth.
Get the tools and supplies for this project (Scroll & tap image to shop)

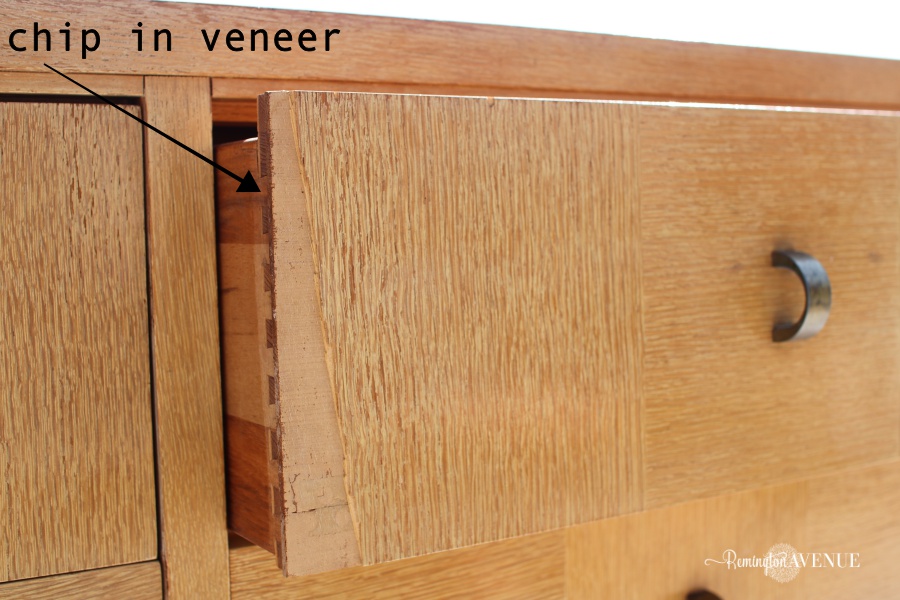
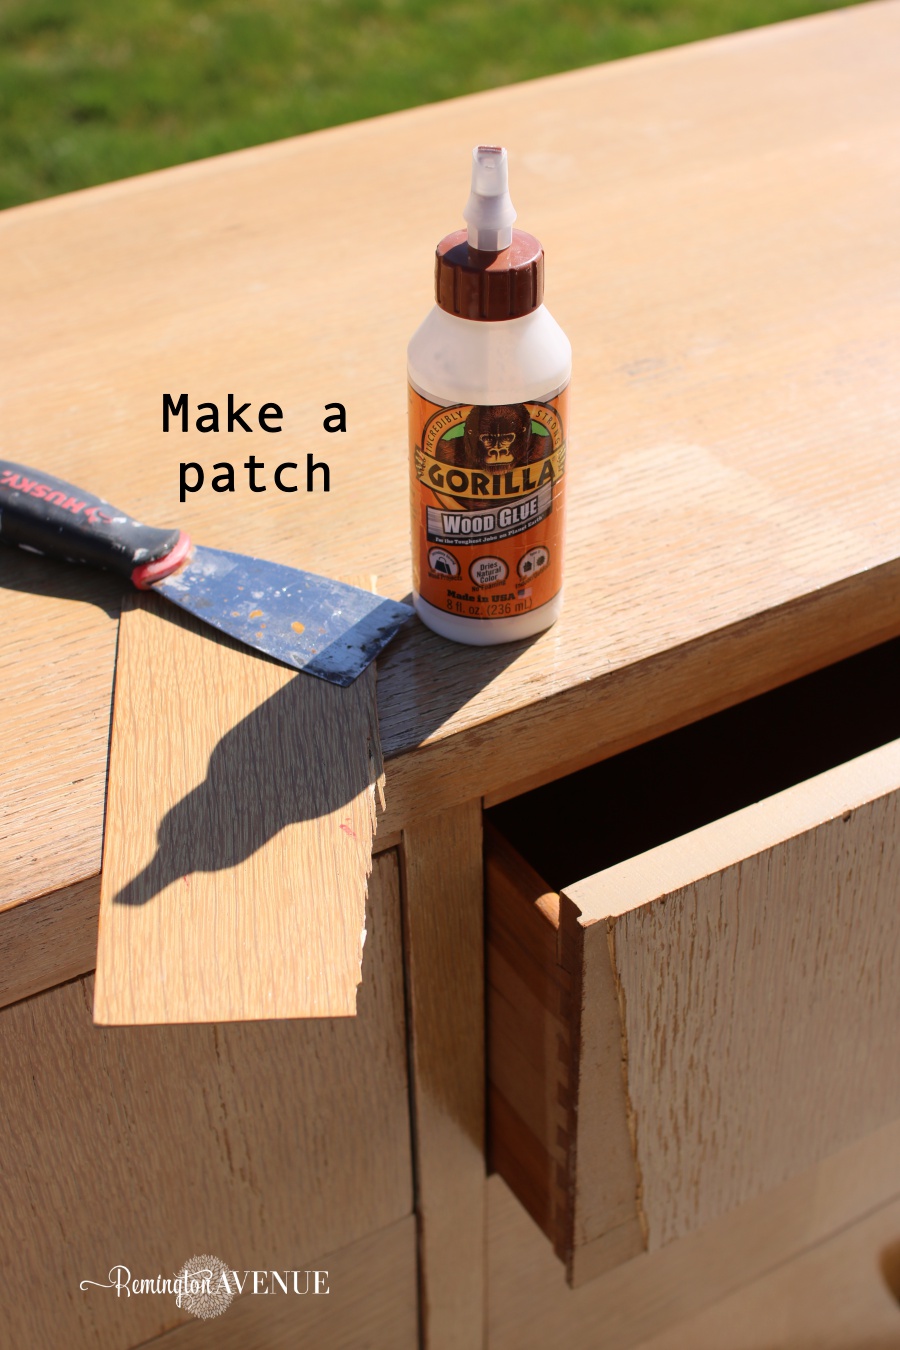
Step 2: Repair any dents, cracks, or chips. This dresser has a veneer finish. There was a large chip it the veneer so I took a piece of veneer from a different piece of the passed down collection and fitted it like a puzzle using gorilla glue. Once I had my veneer patch, I just filled in the cracks with wood filler. This will work on dents, holes, and other imperfections that you dont want to show through the paint. Sand down the wood filler until you have a nice smooth surface. (You may have to repeat this step a few times to achieve a completely smooth finish.)
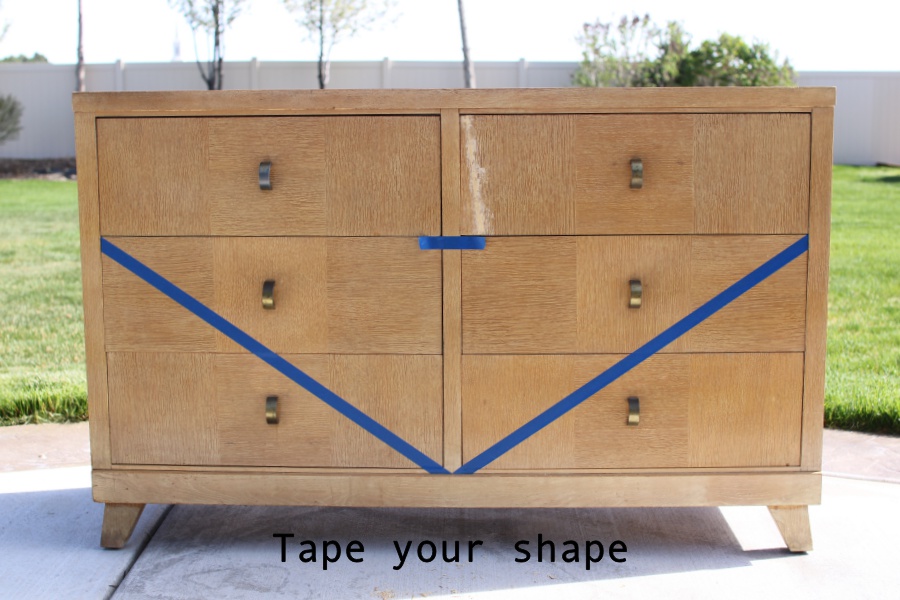
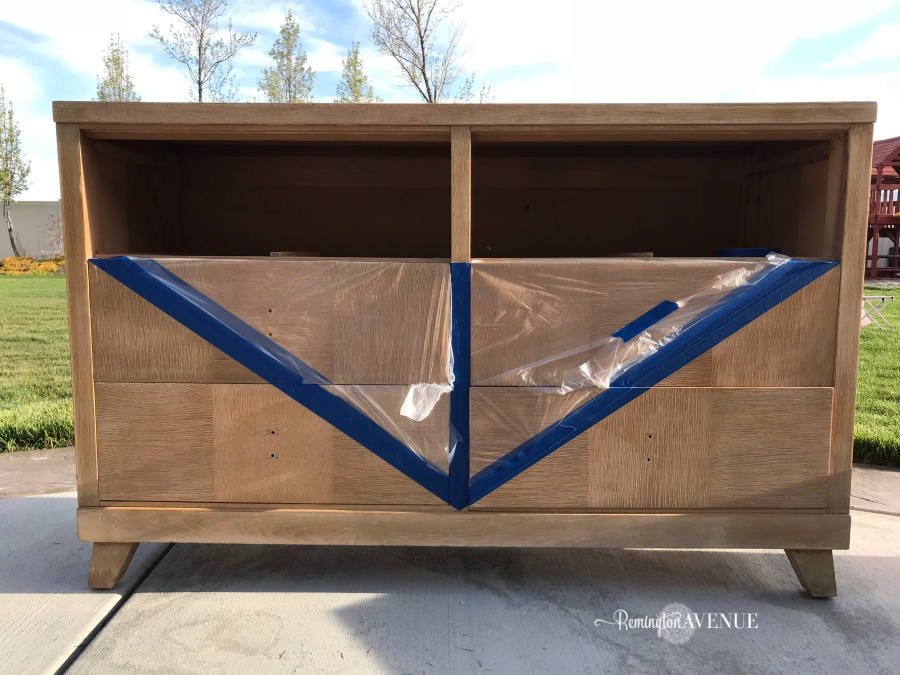
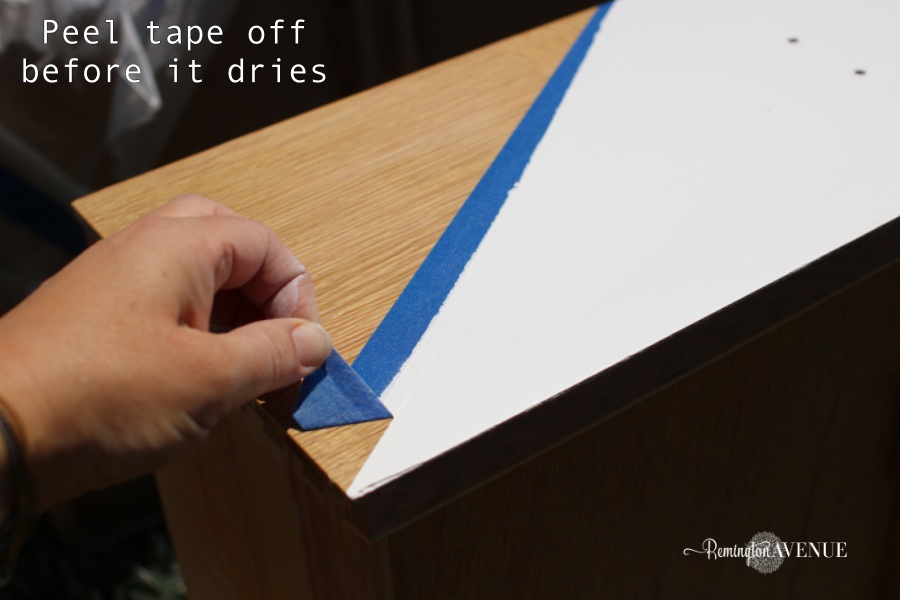
Step 3: Tape out your design. Using blue painters tape, create a triangle by spanning a piece of tape from one corner of the middle drawer to the bottom of the dresser. Repeat this same line on the other side. Make sure the tape comes to one point at the bottom of the dresser. *Note: If you do not want to leave any of the original wood finish or color in the design, paint the entire piece one color first. Then tape out your triangle shape once the paint has fully cured (at least 24 hours). For example, if you wanted the dresser to be white with a black triangle, you would first paint the entire dresser black. Then go back and tape out the triangle shape.
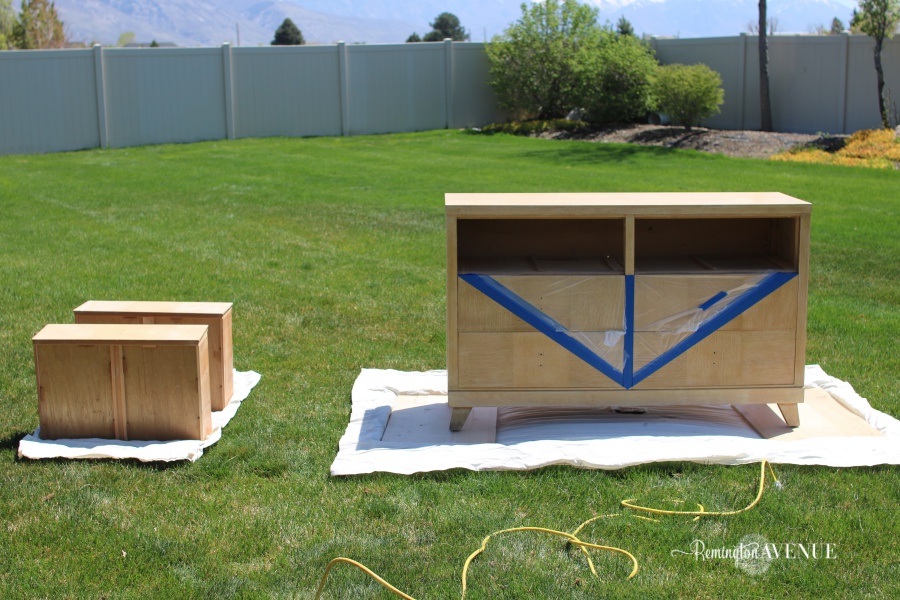
Step 4: Mask the area you don’t want painted (triangle). Cut the tape on the top and bottom of each drawer in order to remove the drawers from the dresser. Using painters plastic, cover the entire triangle shape. Secure it in place using painters tape. This is very important so you don’t get overspray on your shape. Click here to see another boho style dresser I painted. I call it the gold dipped dresser!
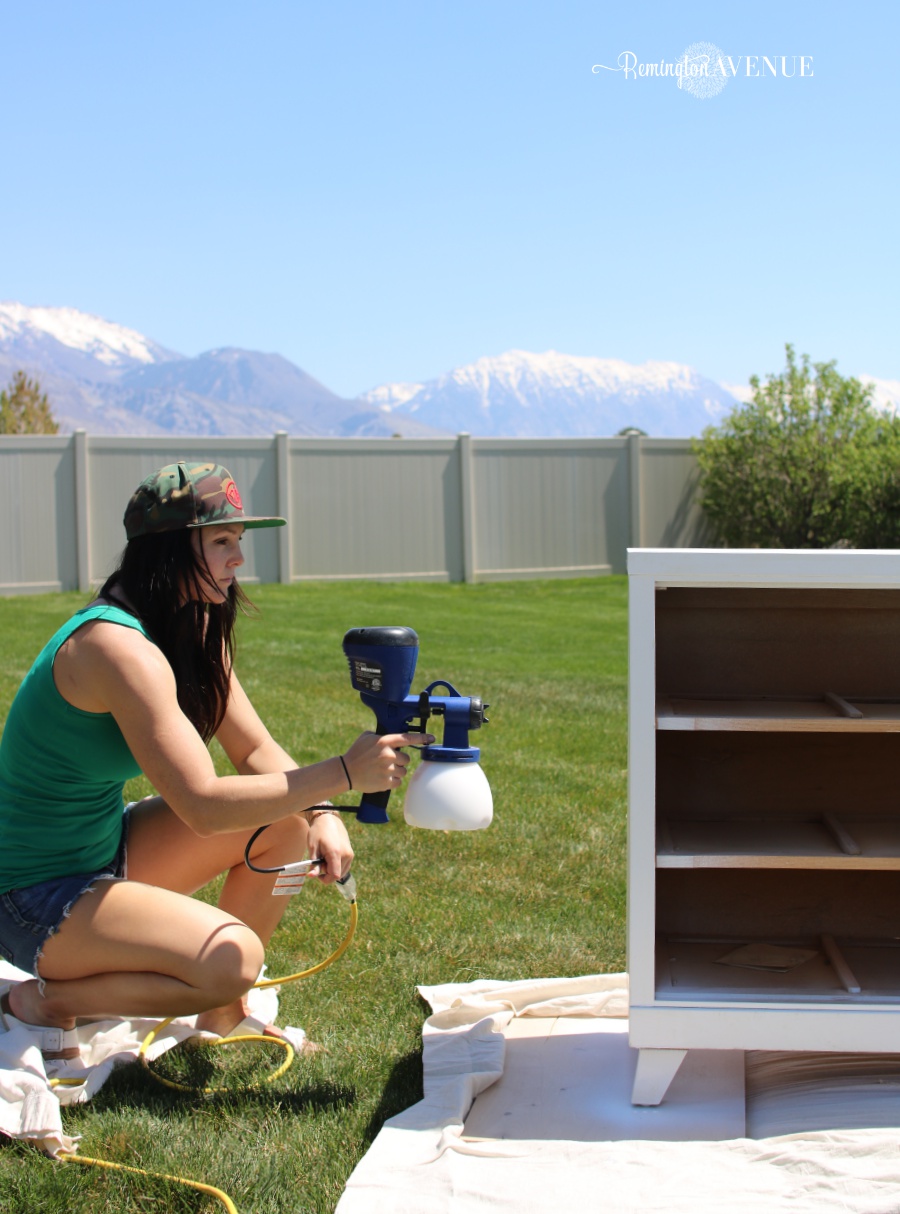
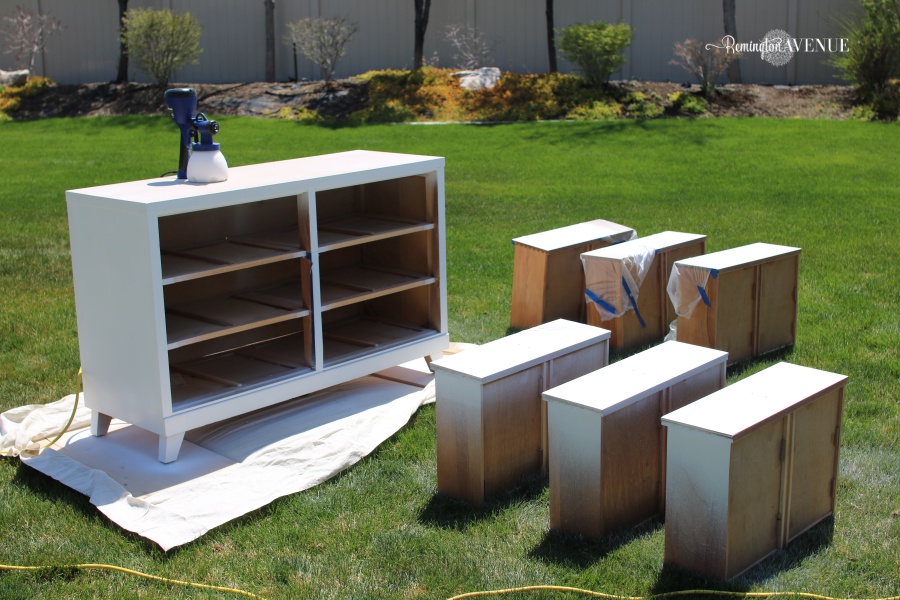
Step 5: Paint it! I used my favorite hand held paint sprayer to finish this dresser. It took me 15 minutes to paint the entire piece. I love this sprayer for furniture redo’s and other smaller projects like this. It is light weight, sprays evenly, and super easy to clean. Click here to get my favorite paint sprayer. Click here for the smaller version.
If you don’t have a paint sprayer, you can totally use an angled paint brush. It will take a bit more time, but the end result will still be beautiful. I used a the same furniture paint that I used for my daughters dresser a couple years ago. I love it because you can tint it to any color and it has a hard finish. No need for any extra protective sealers.
Step 6: Remove the tape and plastic masking. Before the paint has dried, remove the tape from the dresser. Removing it before drying will prevent peeling. Let furniture piece dry overnight.
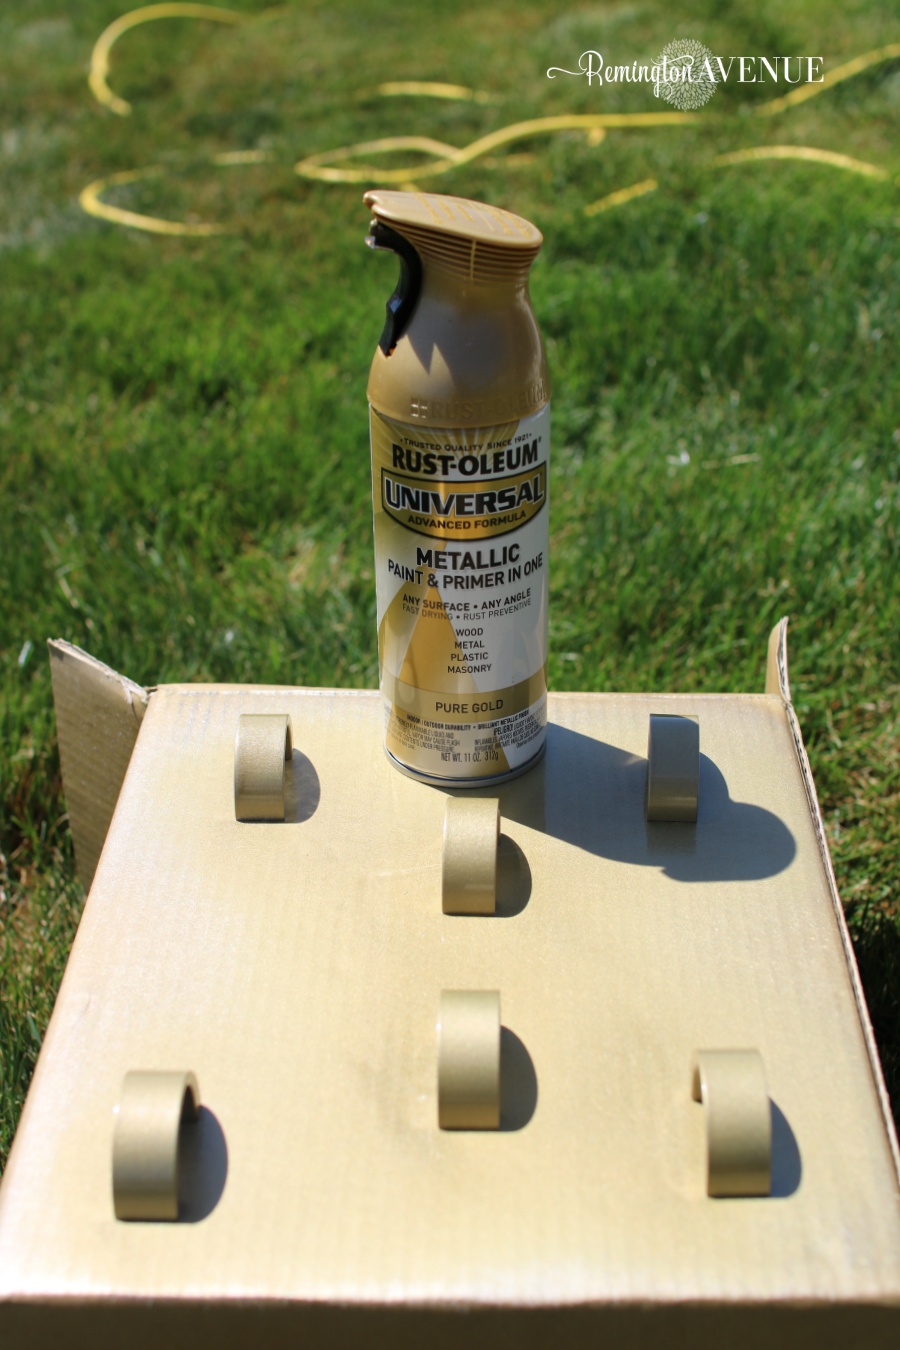
Step 7: Install Hardware. Sometimes its fun to add new hardware to an old piece. An easy update like this can add a unique flare. In this case, I liked the original hardware, but it just needed a little bit of sprucing up. One coat of my favorite metallic spray paint and it was good as new. Click here to see how I how I use this spray paint to update old shower fixtures too!
Get the tools and supplies for this project (Scroll & tap image to shop)
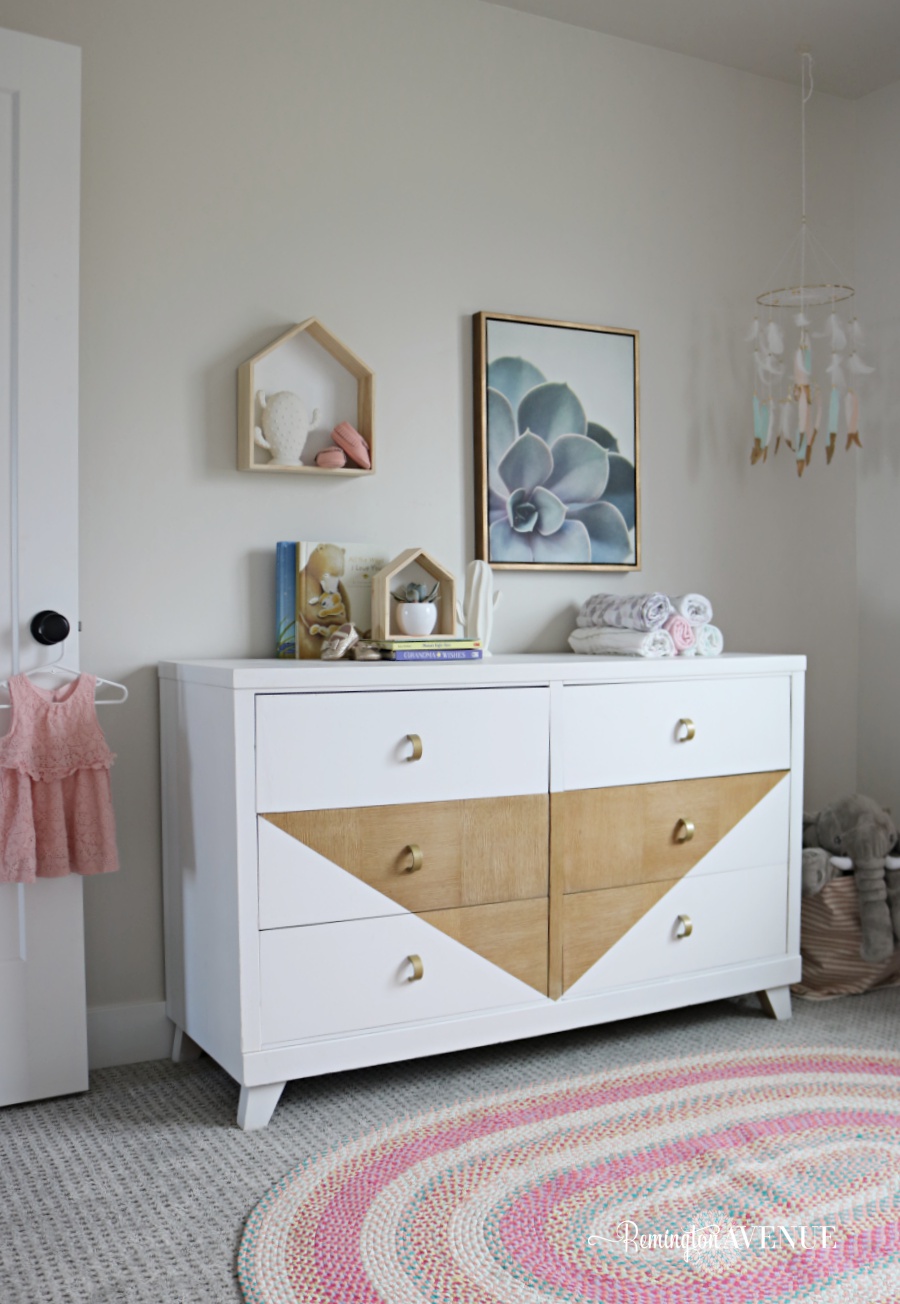
This boho dresser design is totally gender neutral and could be used in a nursery all the way up to a teen room. Don’t be afraid to add your own design to the mix. You would be surprised what a fresh coat of paint and some creative shapes can do to an old piece of furniture. Click here to see another diy boho dresser I upcycled for my daughters nursery. This time I used pink and gold!
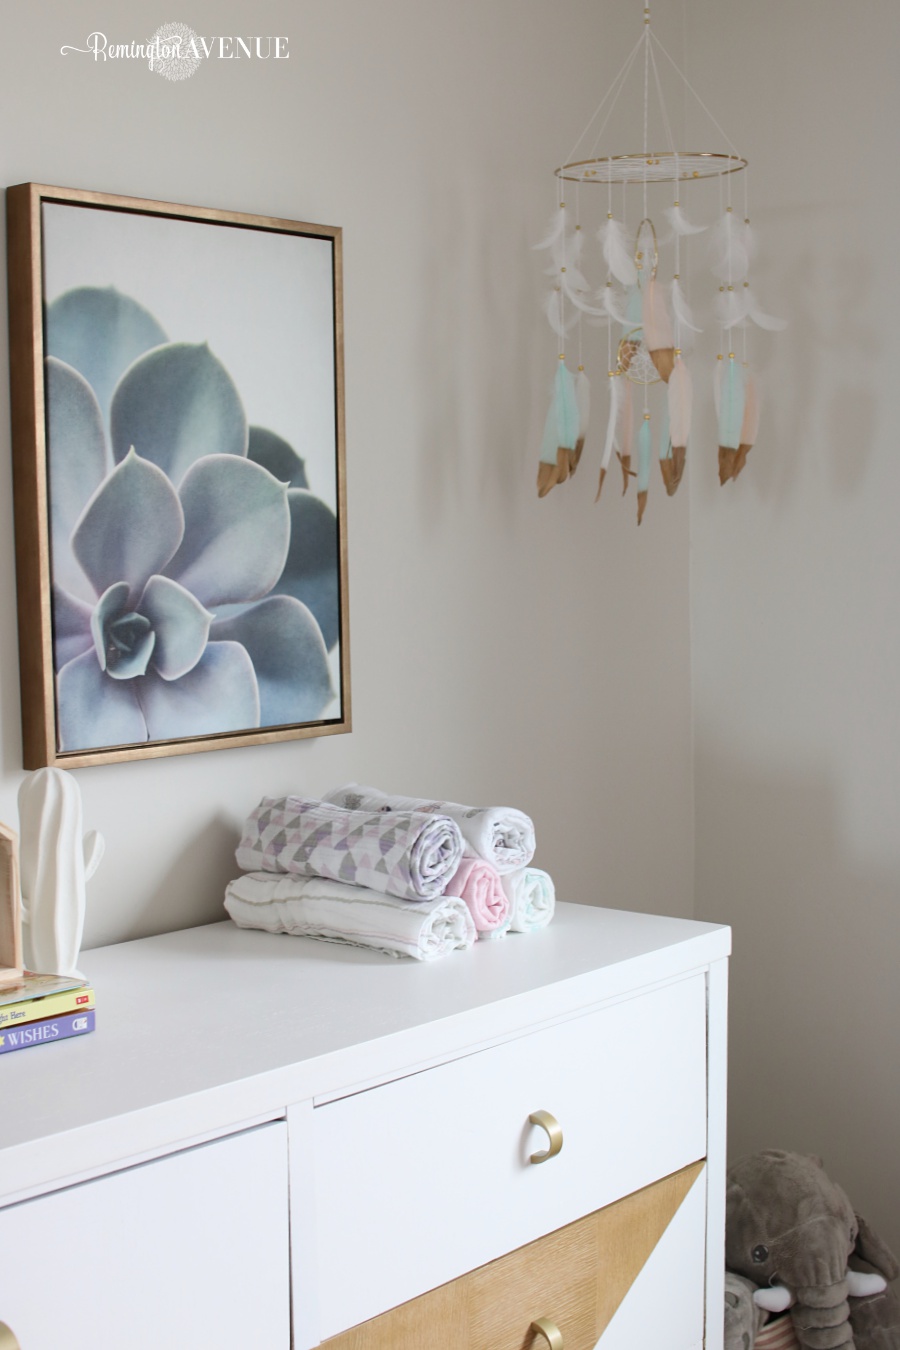 Get the Nursery Look (Scroll & tap Image to shop)

 Add to favorites or read later
I’m loving how it turned out! Thanks so much sis. ❤️