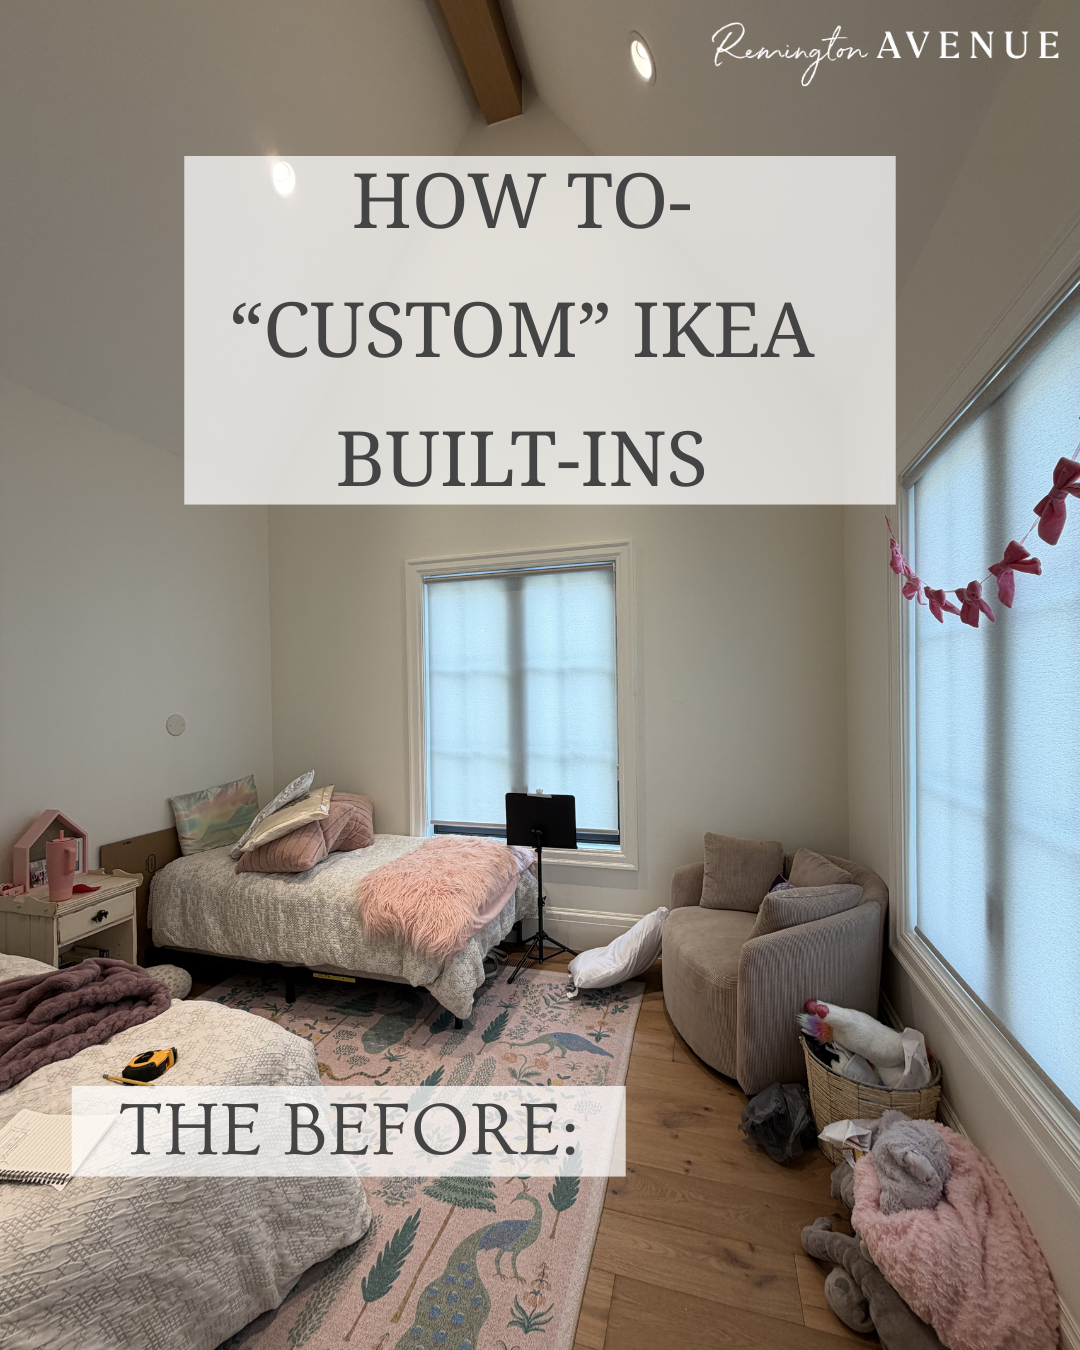
DIY Custom IKEA Built-in
IKEA is a great resource for taking something basic to ‘WOW’! So, I am sharing this DIY custom IKEA built-in ‘how to’ we did in Lou’s room to not only inspire you, but show you how simple it is to execute!
Scroll down for a “master guide” below with everything I have used to execute this IKEA DIY built-in project!
For Lou’s room, I knew I wanted to build a space that uniquely fits her.
She is definitely my collector-girl, she loves to collect trinkets and books. I wanted a space for her to display all her things. But also to hide some in the cabinets to help keep it looking more organized, if we’re being honest! We had this rifle co rug in the play room in our last home and we just loved it so much! I knew I’d want to design a new room to fit it’s scheme.
This space needs to fit her now as a 10 year old, but also as she starts to grow up – even if I’m not ready for that. So while we’re keeping this room girly with florals and patterns, we’re also keeping it classy with vintage looking details like the mirror, the wallpaper, and bed frame. This way it can work perfectly from childhood to adulthood.
Step One – The Build
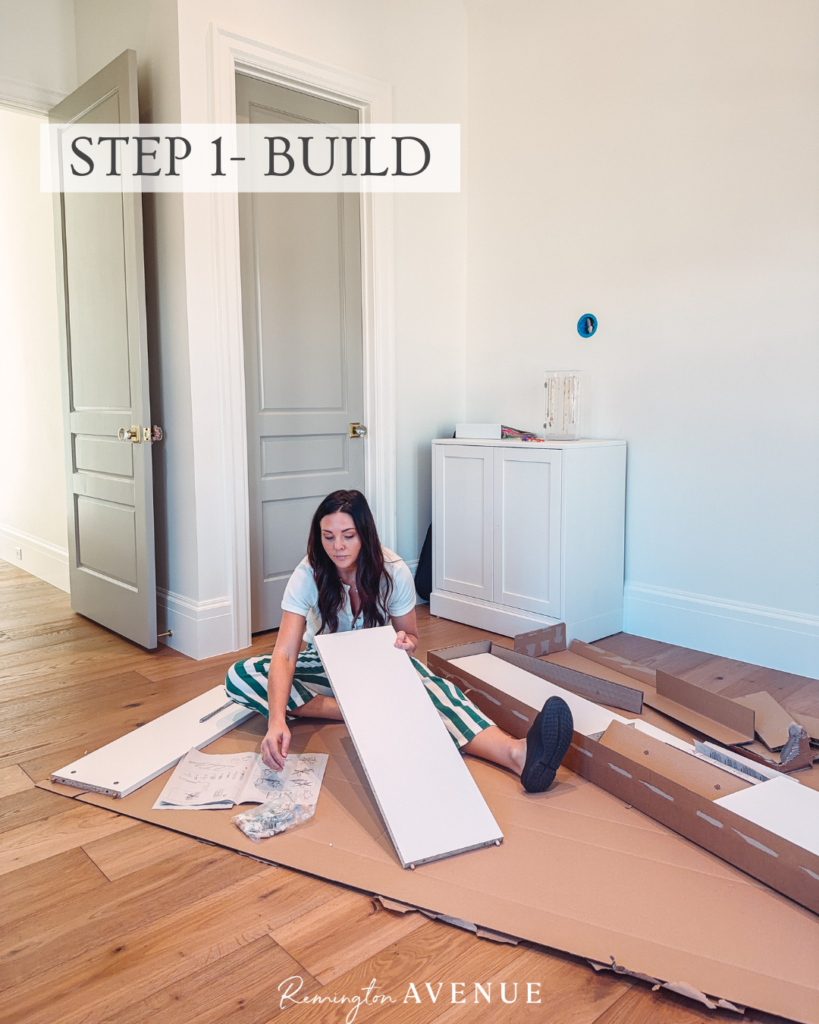
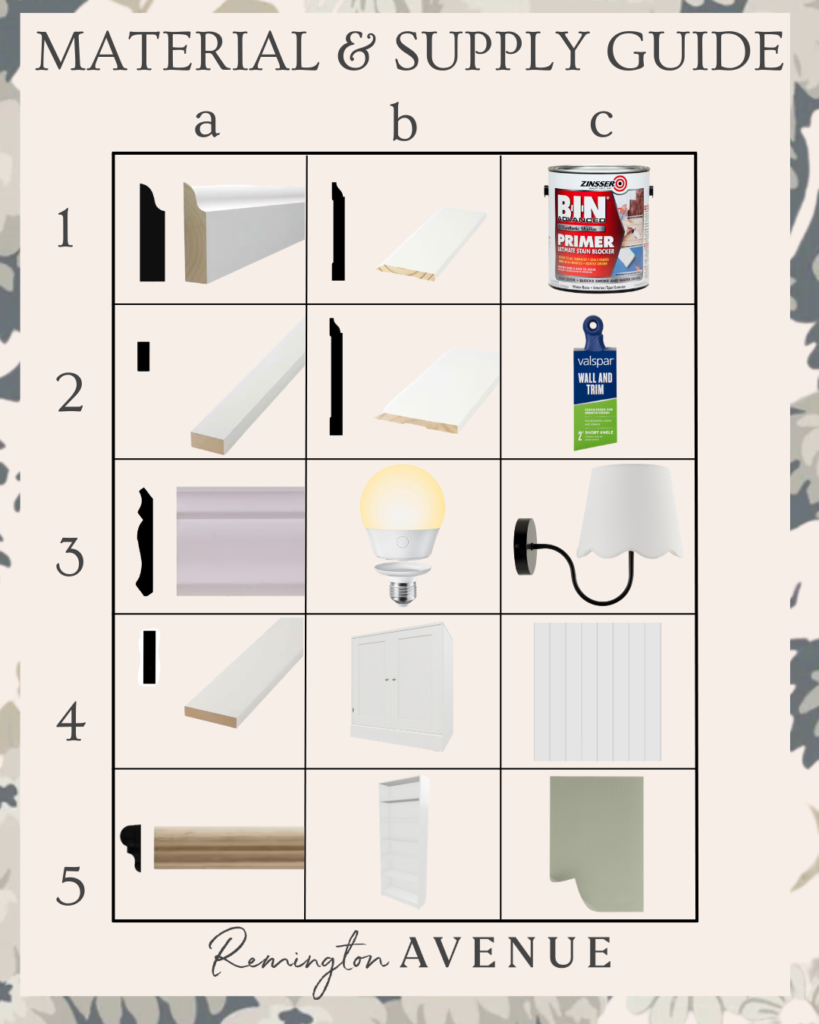
To get started on these “custom” DIY built ins, we selected these cabinets (4b) and bookcases (5b) from IKEA. Time to spruce them up!

I flipped the bookcases upside down so they would have a flat, even seam with the dressers. I planned to cover the top of the built ins with crown molding so the legs being at the top wasn’t an issue.
Step Two – Measure
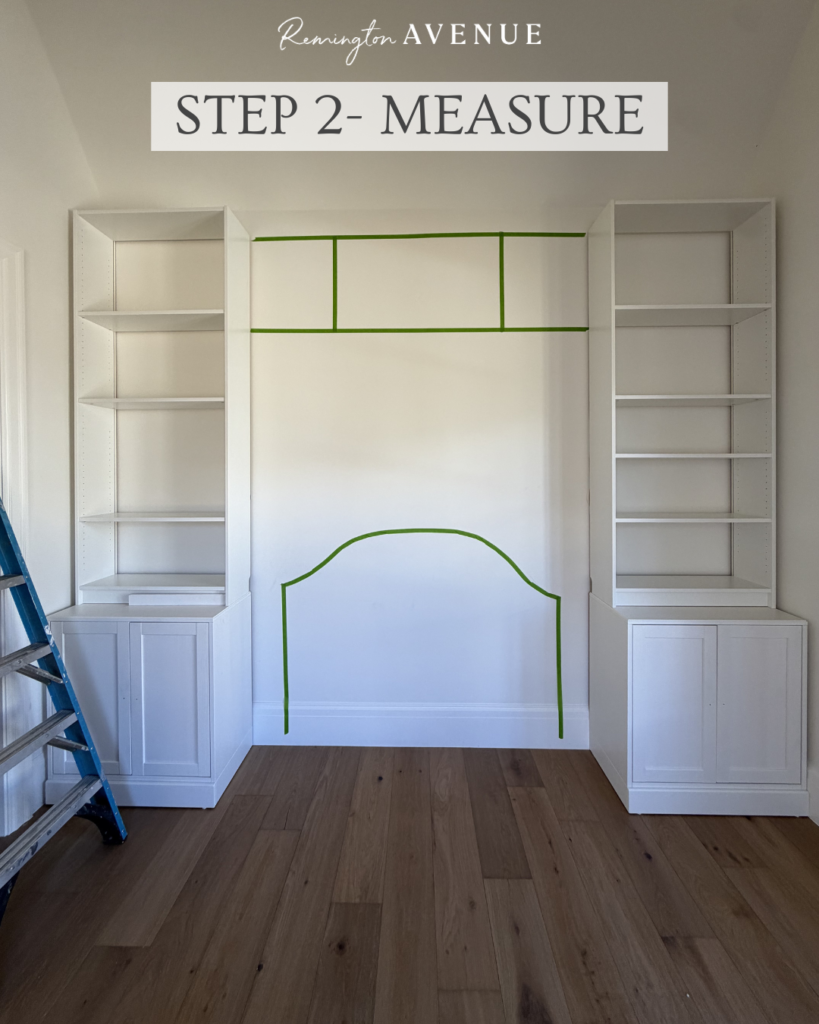
Once we got those put together and measured, I had an electrician come and extend the original sconce wires out from behind the bookcase. This allowed for me to attach these sconces (3c) to the bookshelves and really elevate the custom look. I drilled a hole through the back of the bookcase directly and threaded electrical wire through to the sides so the sconces could attach directly to the sides of the built-ins. I made sure to thread these very strategically so you can’t see them unless you squat down and look in from underneath.
If you don’t already have sconce wiring, you could just as easily use these rechargeable light bulbs (3b)! This way you don’t have to worry about any rewiring at all and you can still get a custom look.
Step Three – Secure Cabinets

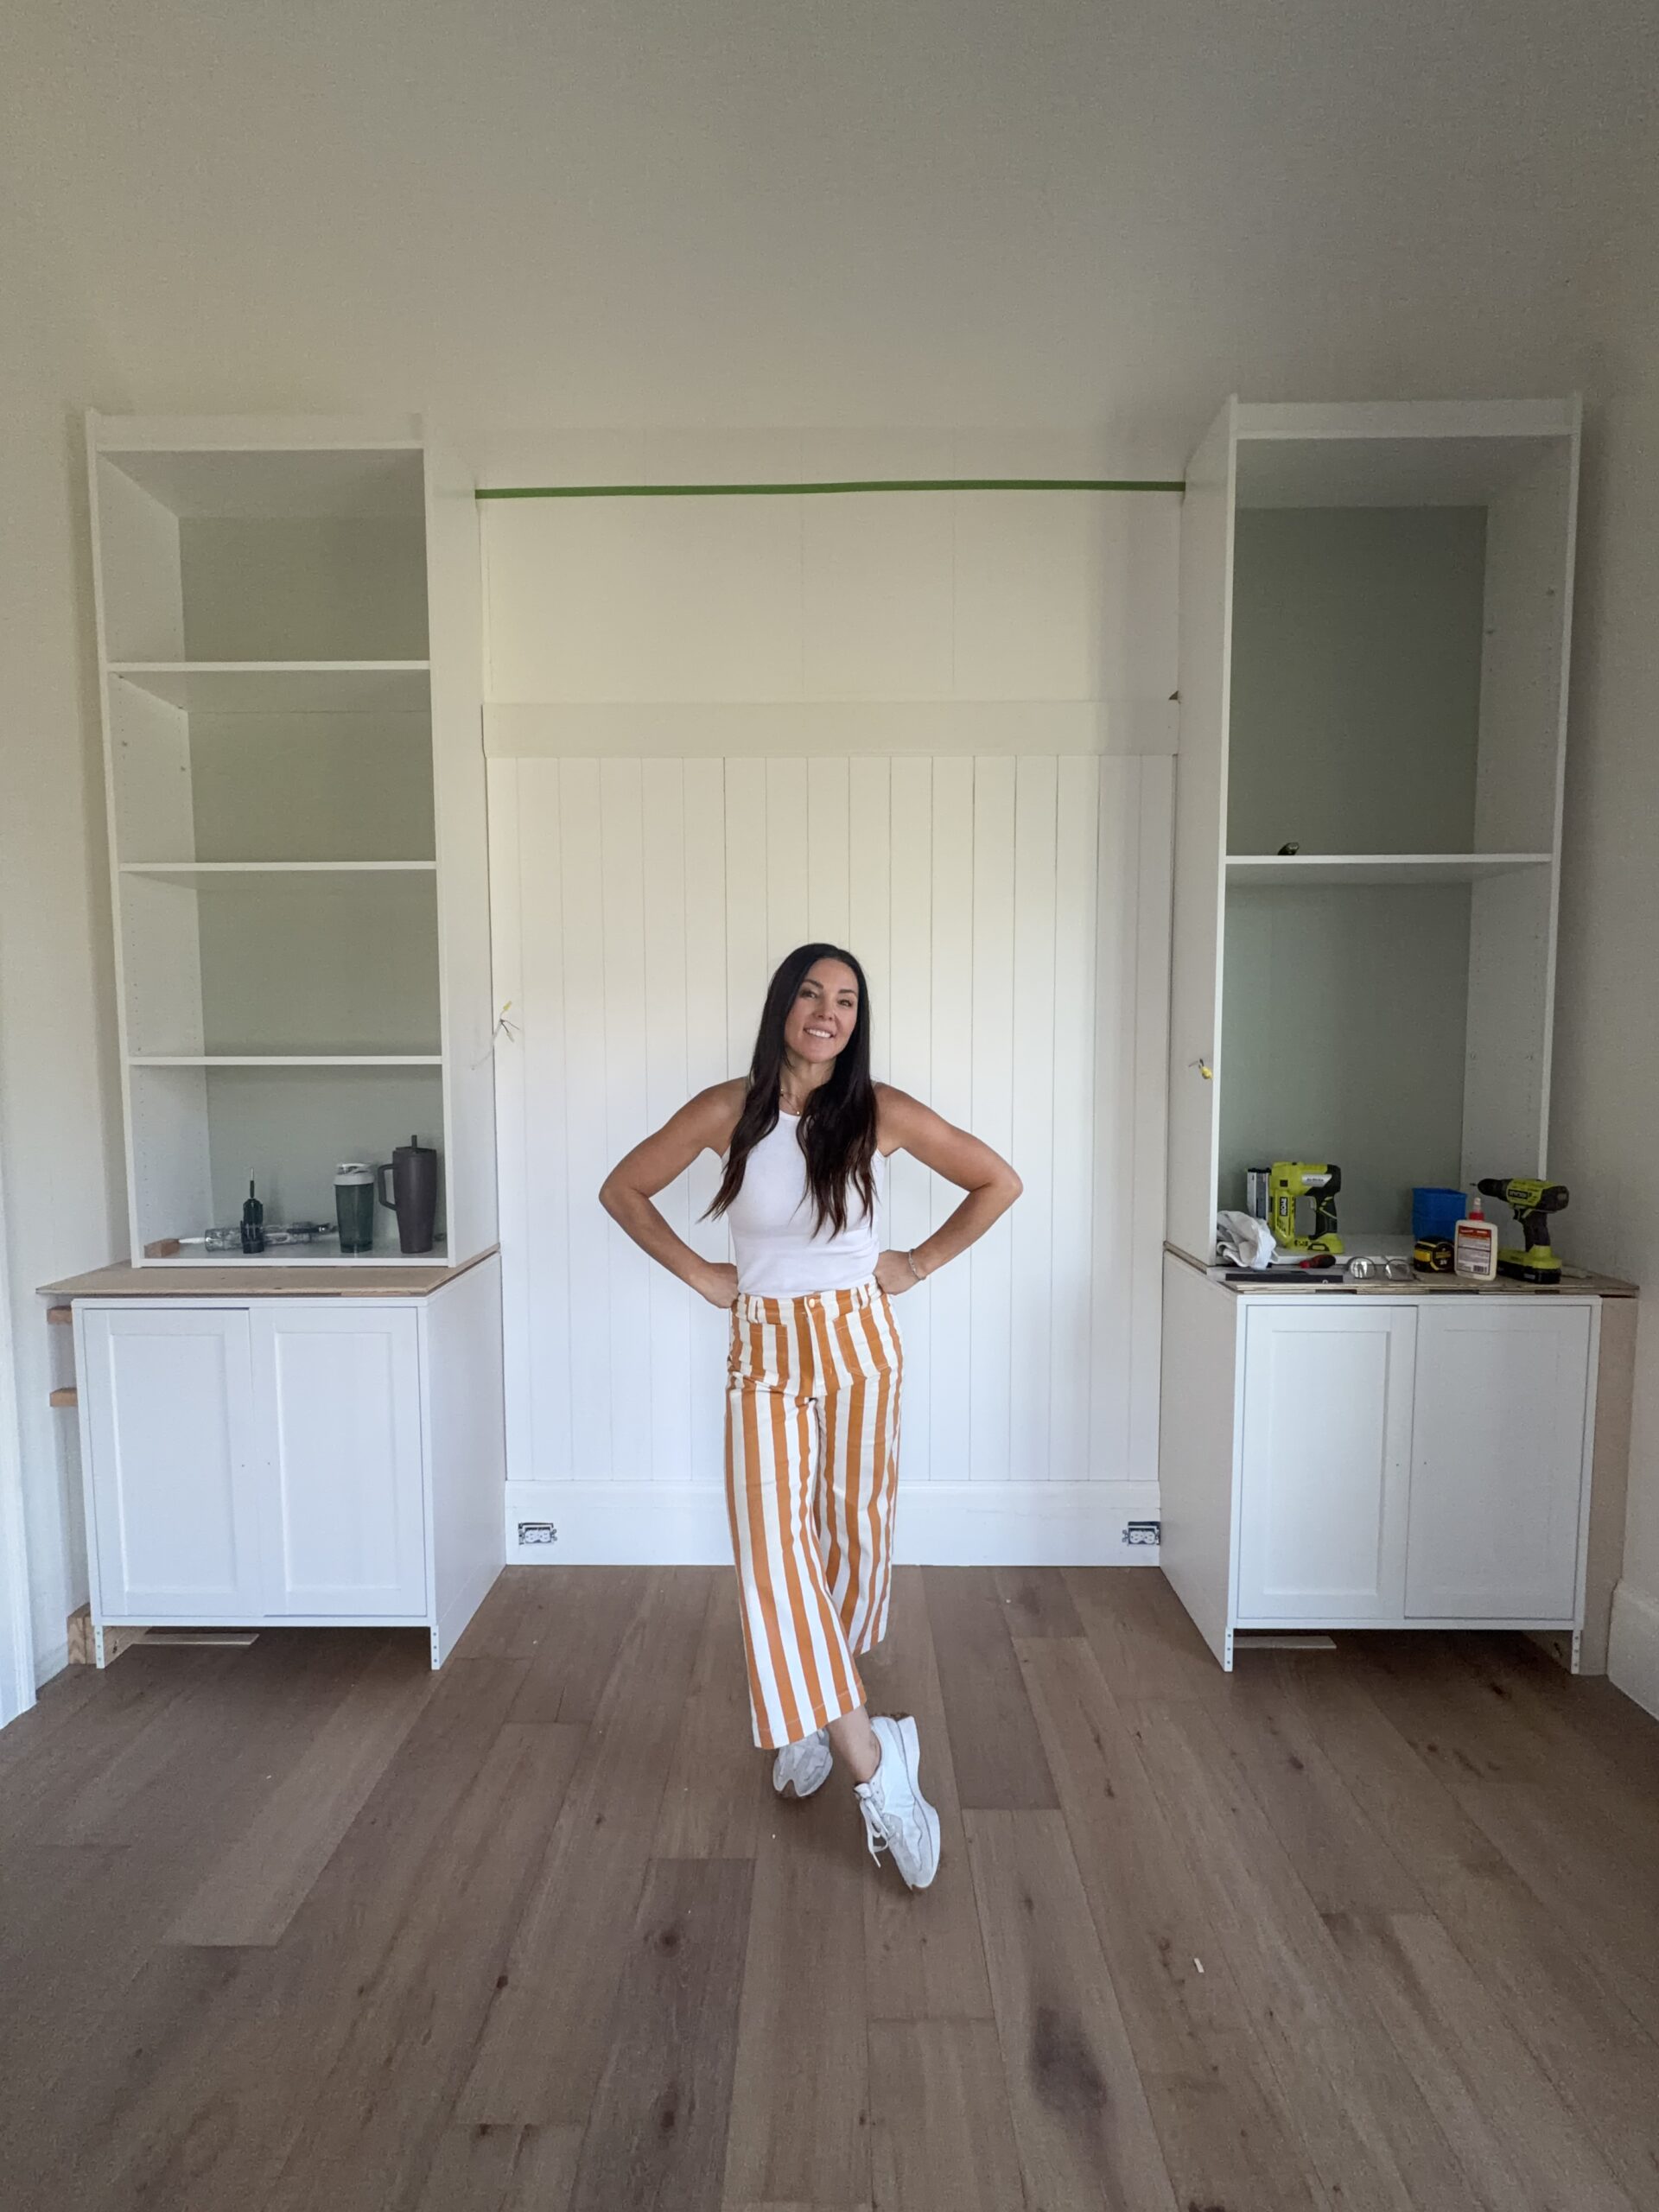
We took some time getting the cabinets and bookcases put together, and then measured exactly where we wanted them to end up. Starting with the cabinet, we secured the sides to the wall using wooden blocks that connected straight into wall studs.
Step Four – Add “Countertop”
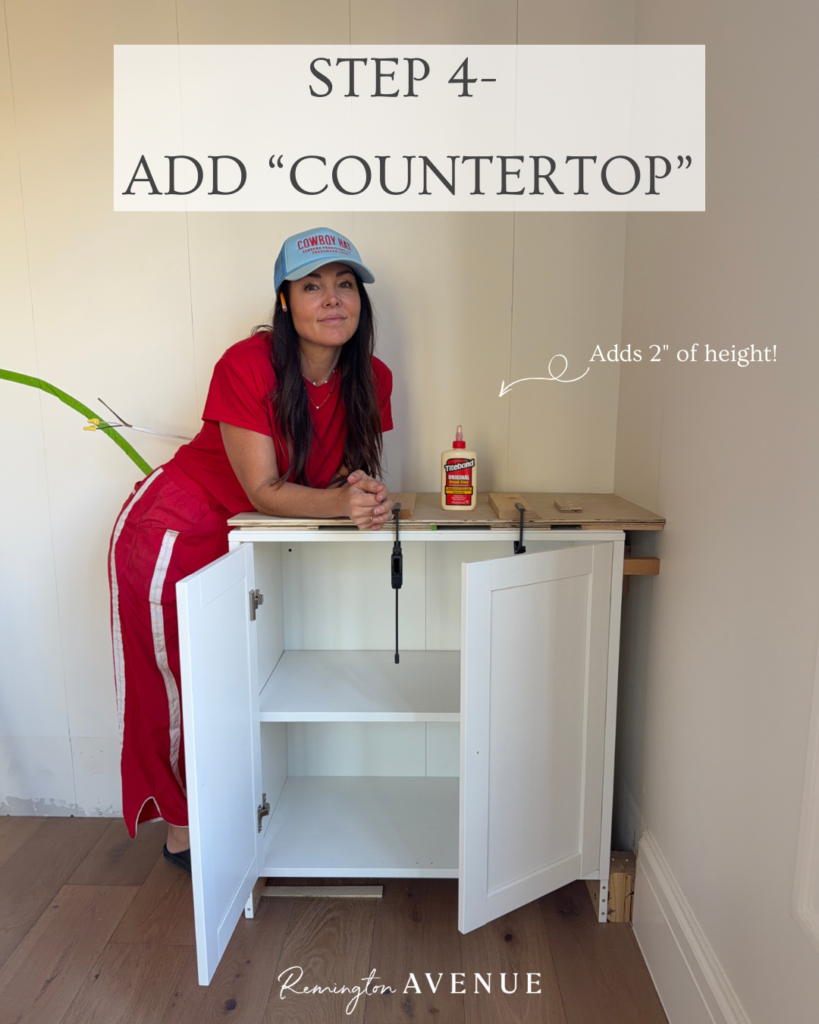
Now that the cabinets were locked in place, I glued down a slab of 1/2″ plywood that I cut down and face framed to act as a countertop between the cabinet and bookcases. This helps to give a more finished look that elevates the bookshelves (literally) so they don’t look like they’ve just been plopped right on top a cabinet.
Step Five – Secure Bookcases
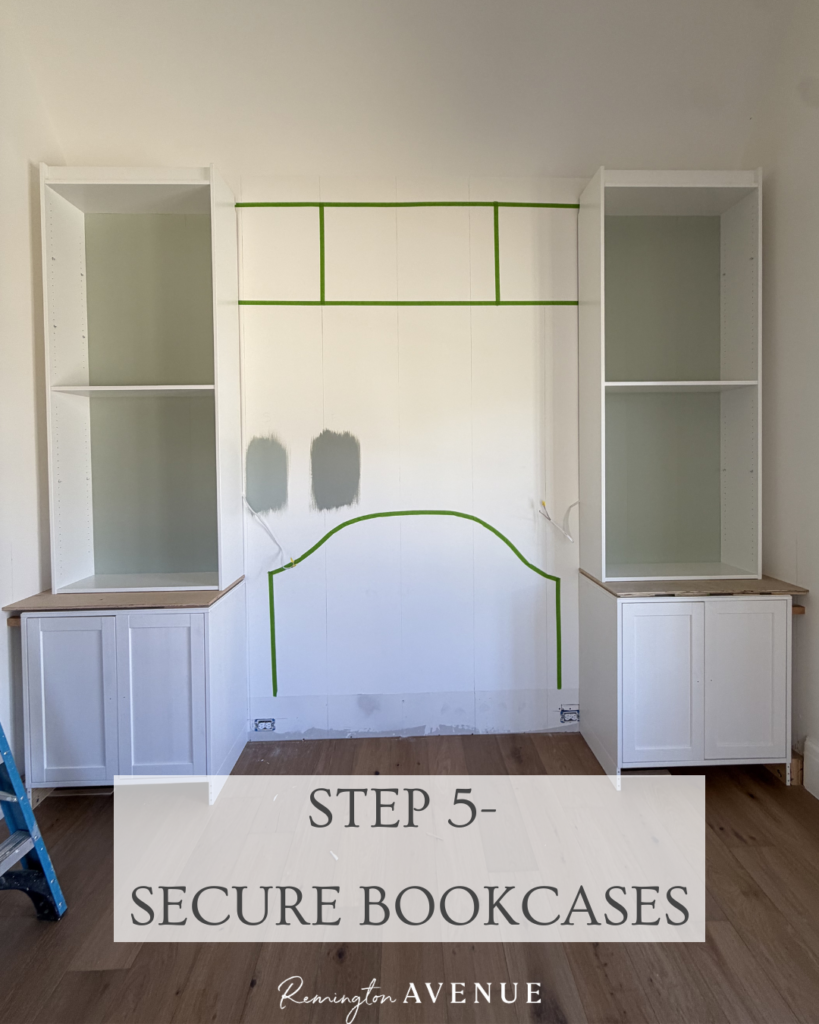
Once the glue of the makeshift countertop was dry, we placed the bookcases on top (although upside down) and got them into place.
I then secured the three pieces together using three screws from the floor of the bookcases all the way down into the cabinet.
Then to secure the bookcases further, I added more wooden blocks to connect from the bookcase straight to a stud in the wall. Any place these built-ins are touching a wall, whether it’s the sides or the back, it needs to be screwed into the studs so there is no chance of slipping or falling.
Additionally, I used L-brackets that attached from the back wall to the outer side of the bookcases, as well as more brackets on the top of the bookcase, and secured them into more studs. It’s certainly tedious, but absolutely necessary for safety and security.
Step Six – Shiplap
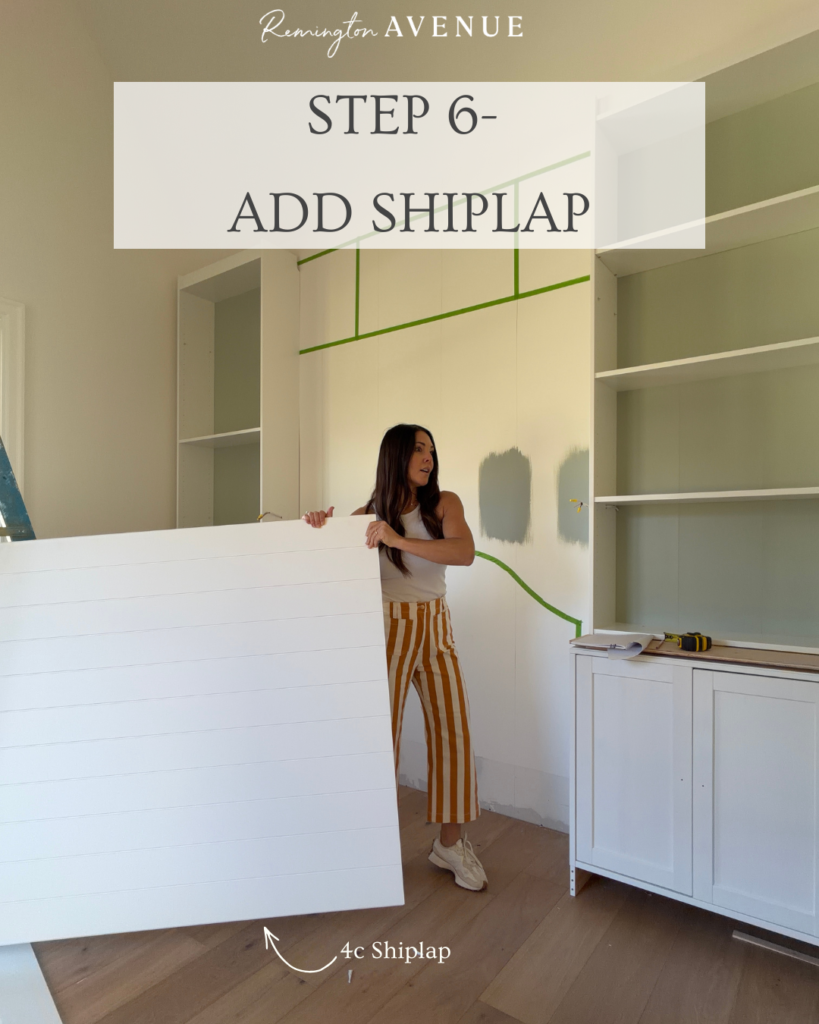
Next, I added decorative shiplap (4c) paneling to go behind the headboard. I used two pre-fabricated panels of shiplap.
I was able to cut it down to fit between the bookcases. Then, I secured them into the wall with a nail gun. Perfect fit!
Step Seven – Shelves
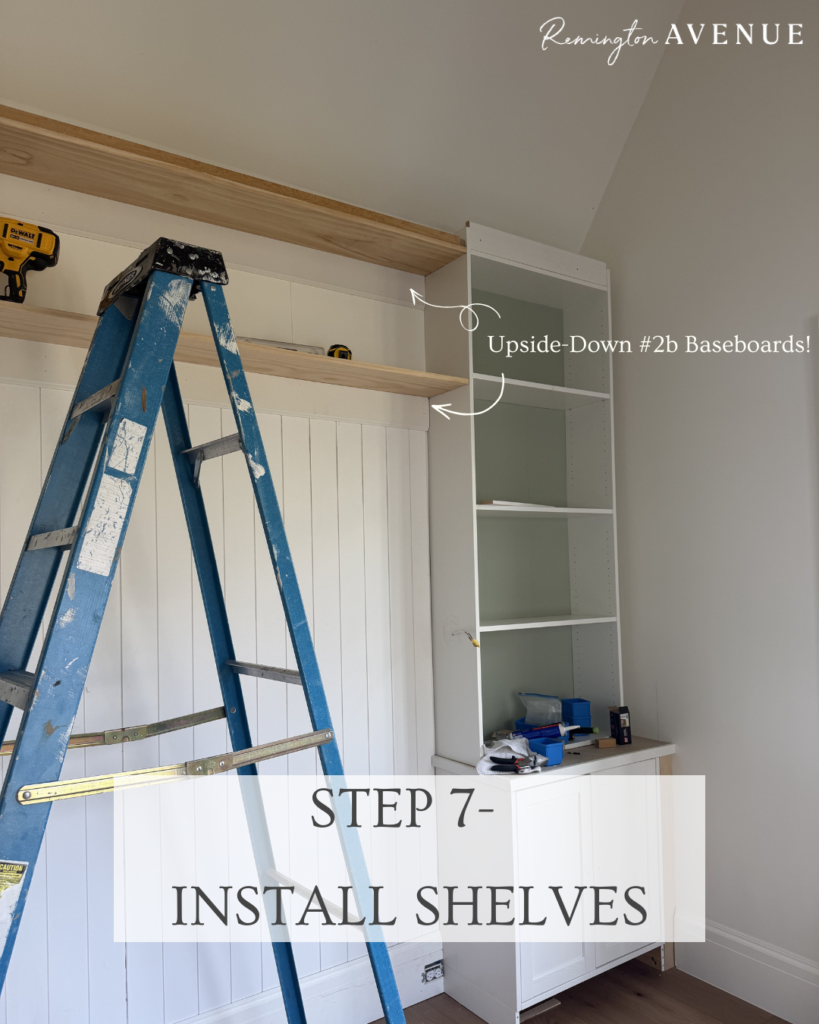
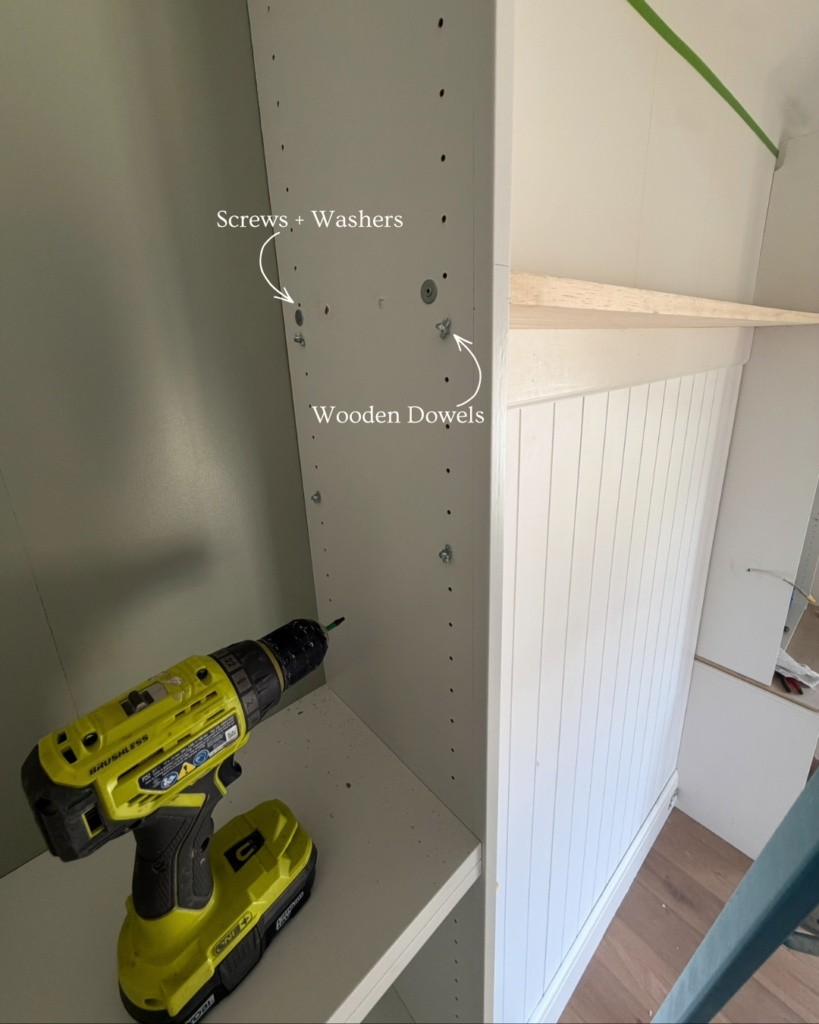
I then installed two 7-foot baseboards (2b) just above the paneling and mounted them right into the shiplap. These will help support the weight of the two floating shelves that suspend between each bookcase. And, they give a nicer finish than just mounting straight into the walls. For the shelves, I just purchased wooden shelf boards from Lowes, then secured them to the sides of the billy bookcases with two screws through each side, two dowels, and wood glue. Those things aren’t going anywhere.
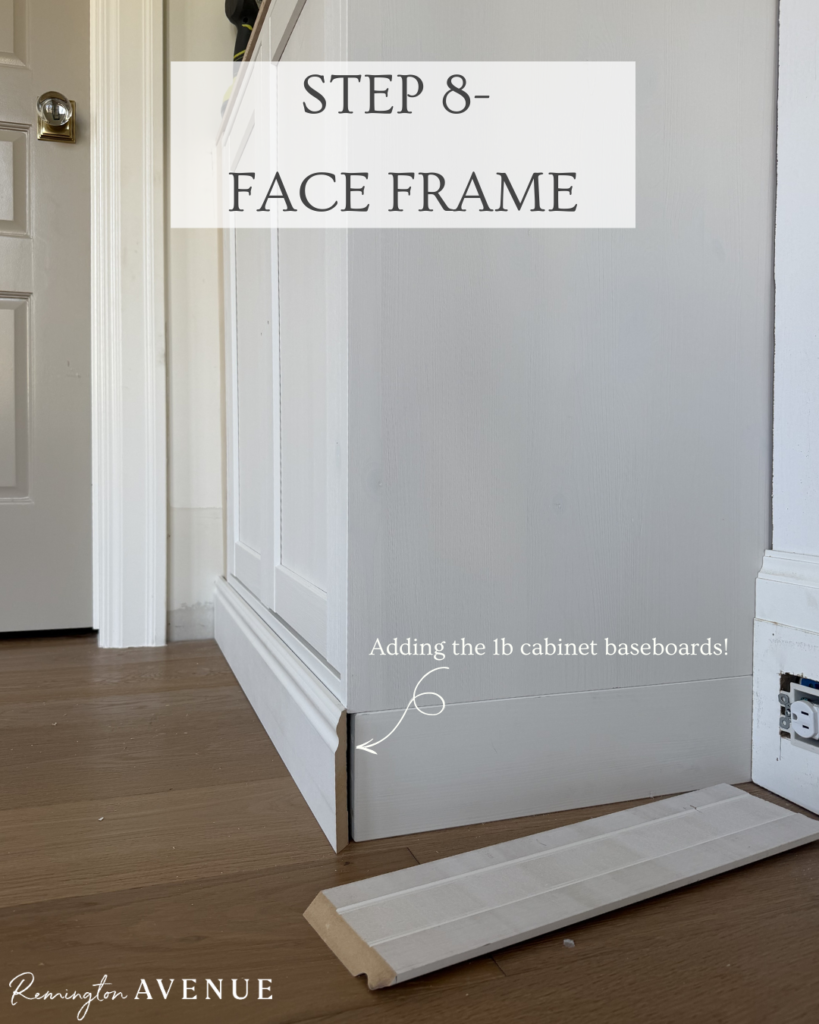
Step Eight – Face Frame Exterior
Before starting to seal the gaps between the shelves and the wall, the main frame of the shelves need to be their final size. So I face framed around the entirety of the bookcase. I also framed the seam from the plywood countertop with this 1”x2” pre primed molding (2a). Not only does this make everything look seamless between each different piece of furniture, but it shows me exactly where to start the next step!
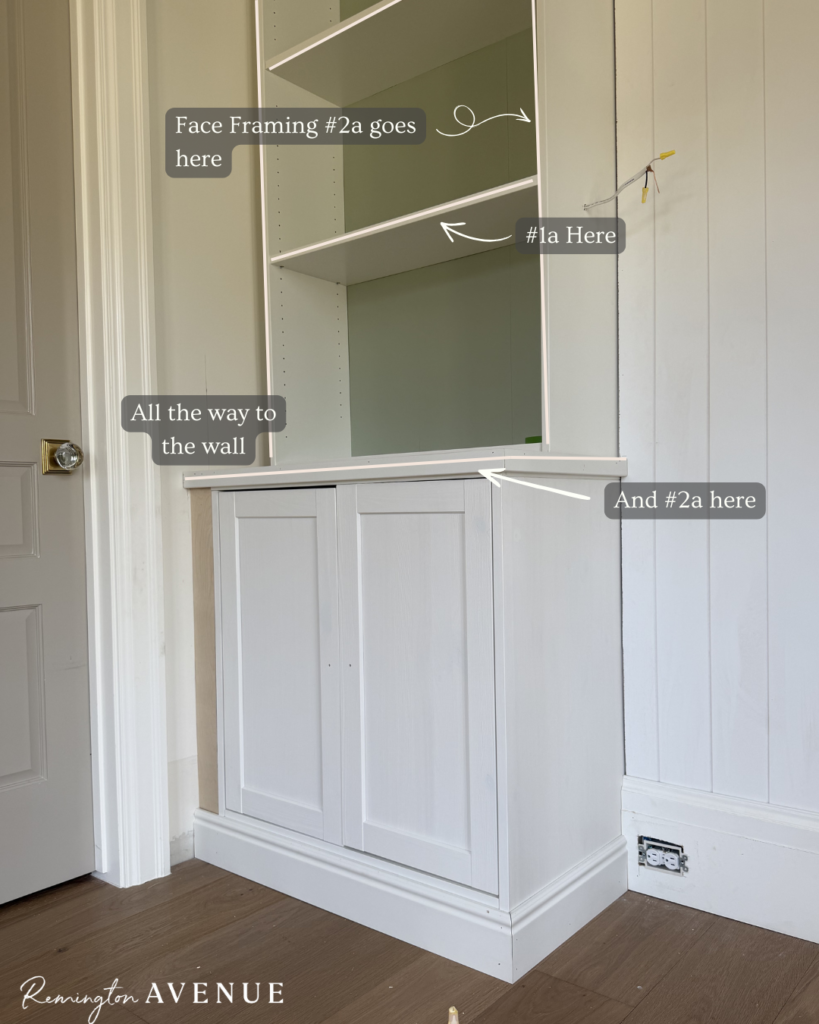
I then finished with trim by adding a face frame (1a) to the exterior of the horizontal shelves themselves.
Just before I moved on, I added baseboards (1b) to the legs of the cabinets to tie them into the rest of the room. This gives that overall finished look. These baseboards are the same style as the ones I used above the headboard. But these do have a smaller profile that lines up with the bottom of the cabinets.
Step Nine – Scribe the edges

For the next step for these DIY Custom IKEA Built-ins, I needed to scribe my plywood. Scribing is a precision woodworking technique that ensures a snug trim against irregular surfaces, like uneven walls or baseboards. This is definitely a skill that comes with time, but makes the end result so much cleaner. So, I used my table saw to scribe some plywood for the lower cabinets. I typically would prefer pre-primed molding boards for this, but I had extra plywood from a past project and I don’t like to waste it!
I then used a 1”x4″ (4a) pre-primed plywood to fill the gap from the bookshelves to the walls. This part of the wall was mostly flat, but still needed a bit of extra care to be completely flush. This not only hid all the security blocks, but it filled in the gaps between the shelving and the walls. This is truly a crucial step to getting these to really look custom.
Step Ten – Secure the top
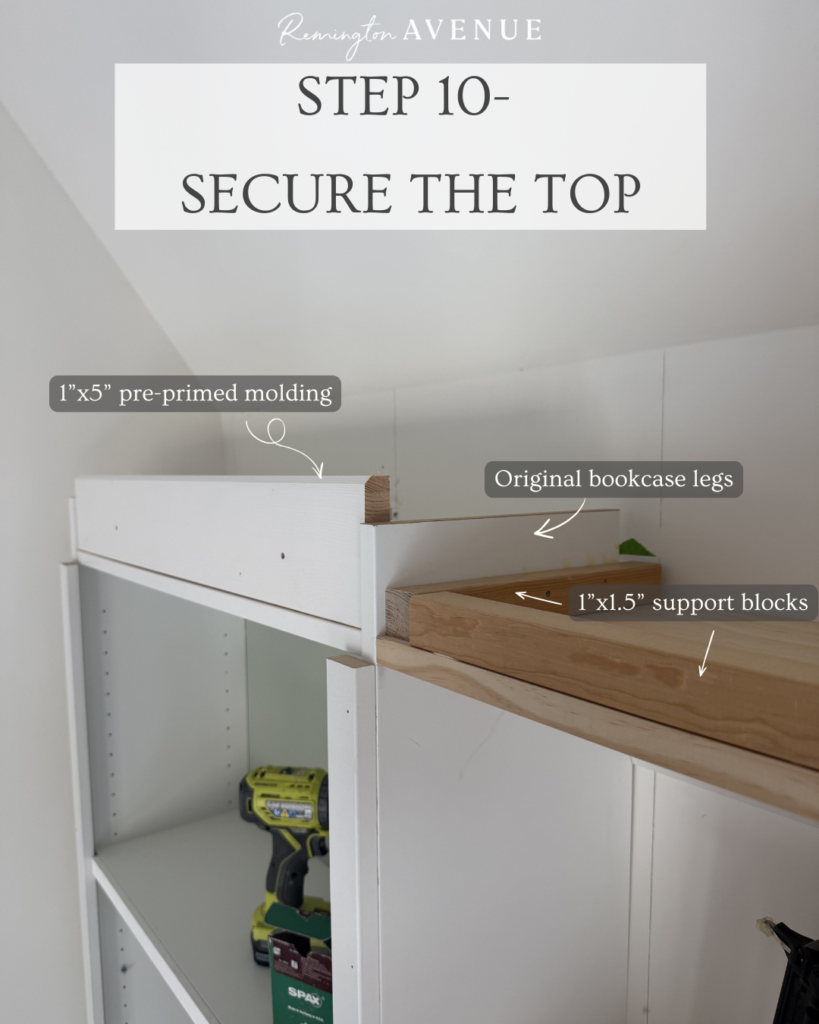
Once the sides were scribed in and secured, I added long wooden blocks to the very top of the bookshelves (all from my scrap pile). After getting those secured into the top of the shelves, I added a 1”x5” pre-primed board to the front to face and build out the entire top of the built-ins wall to wall. This gave me a taller, more stable base that allowed me to start on the fun stuff!
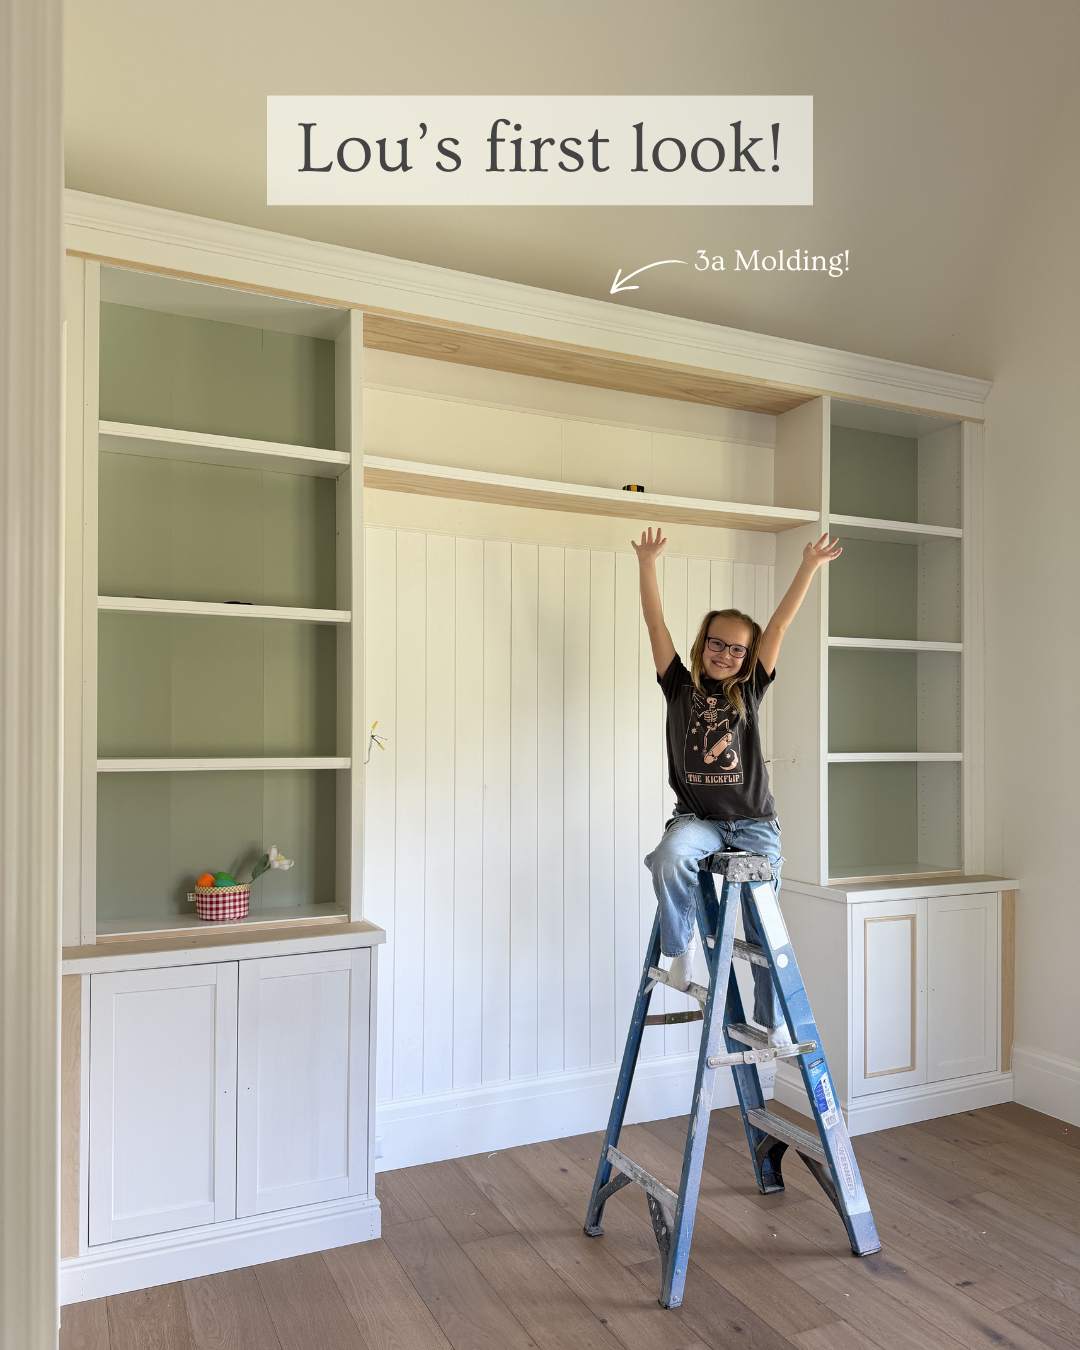
Step Eleven – The prettiest add to DIY IKEA built-ins! Molding!
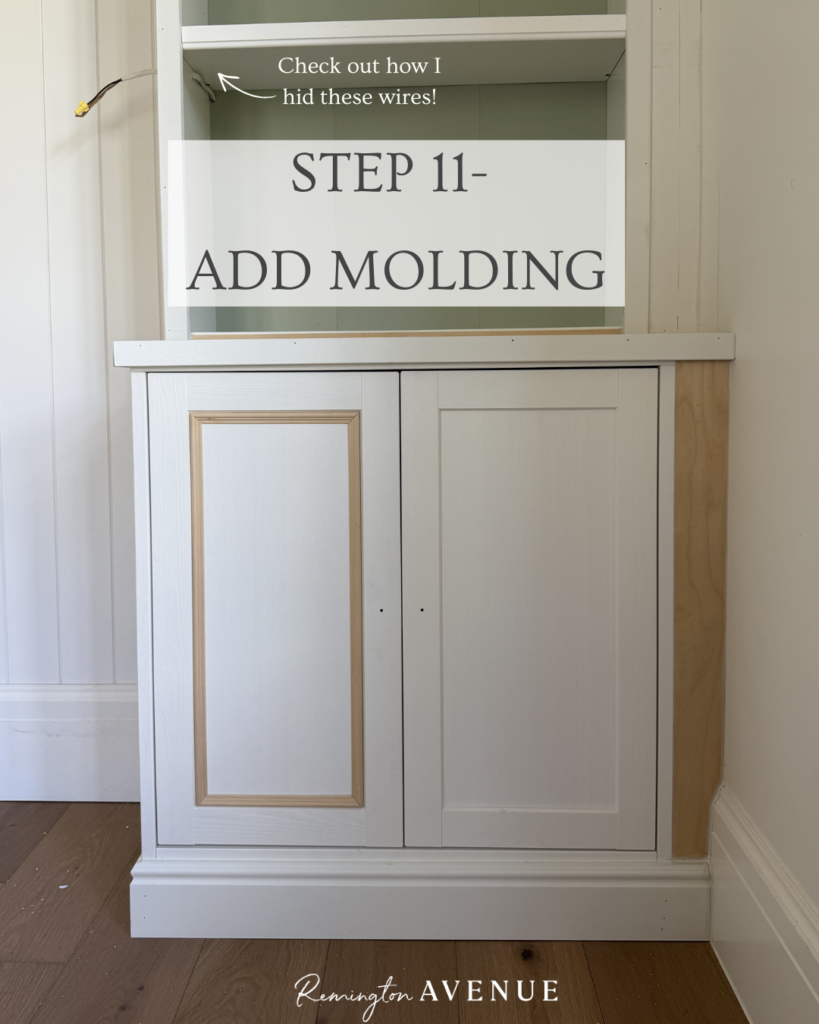
I hung my crown molding(3a) from the 1×5, then added the thin wood trim to the cabinet door faces (5a) & the seam from the button of the bookcase to the top of the cabinet, and just below the top molding. Using this trim in these 3 places keeps it constant and traditional.
Step Twelve for this DIY Custom IKEA Built-in – The fun part…Prime and Paint
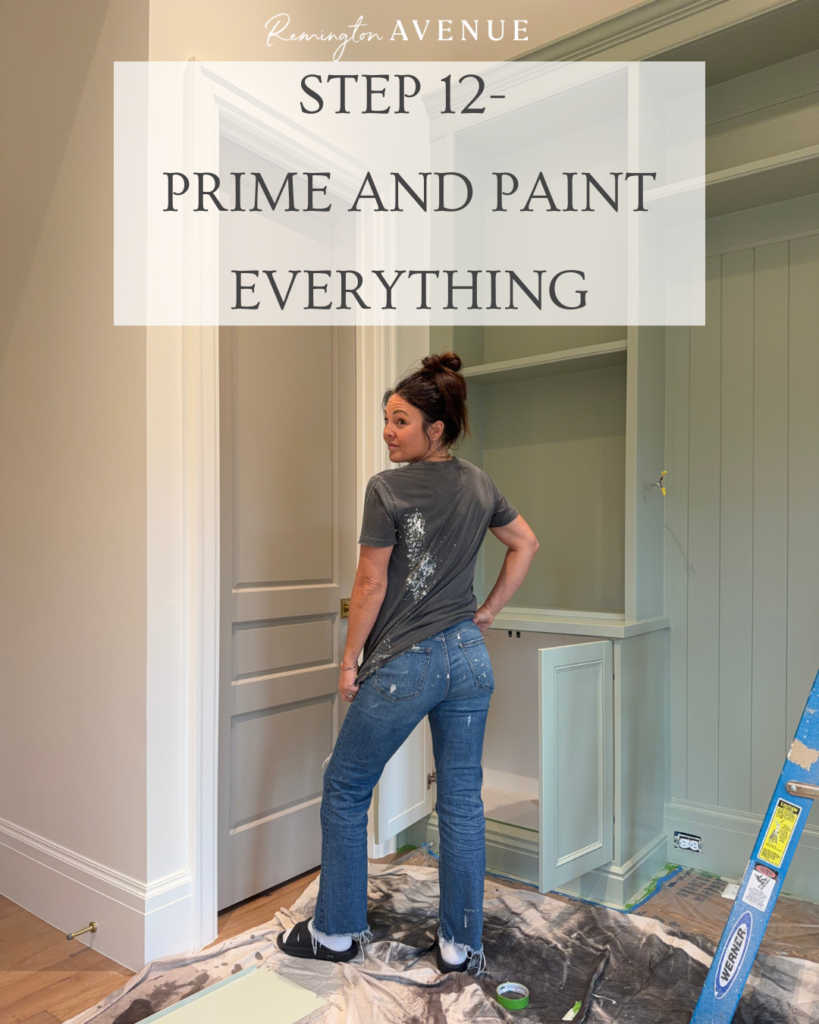
Now that all the pieces were in place, it was time for the final touches! I patched any holes from the nail gun with wood filler and caulked any gaps. This includes gaps between the molding and the walls, the baseboards, or really anywhere there was a long seam. ‘
The shelves still had holes for the adjustable shelving. But once I decided exactly where I wanted the shelves to stay, I filled in all the remaining holes with more wood filler to make it look even more custom.
Now that everything was filled and prepped, time to prime and prep for paint!
Any pieces that didn’t come pre-primed, I then coated with this primer (1c). If you don’t use this specific primer, your paint will not adhere properly to your pieces. I prefer to use this brush for getting all the details (2c) IKEA furniture is covered with a melamine finish. This primer allows for the paint to hold without separating or sliding. Just make sure you use the proper roller for this primer so it is correctly applied.
Once it was all primed, I got to painting this DIY Custom IKEA Built-in.
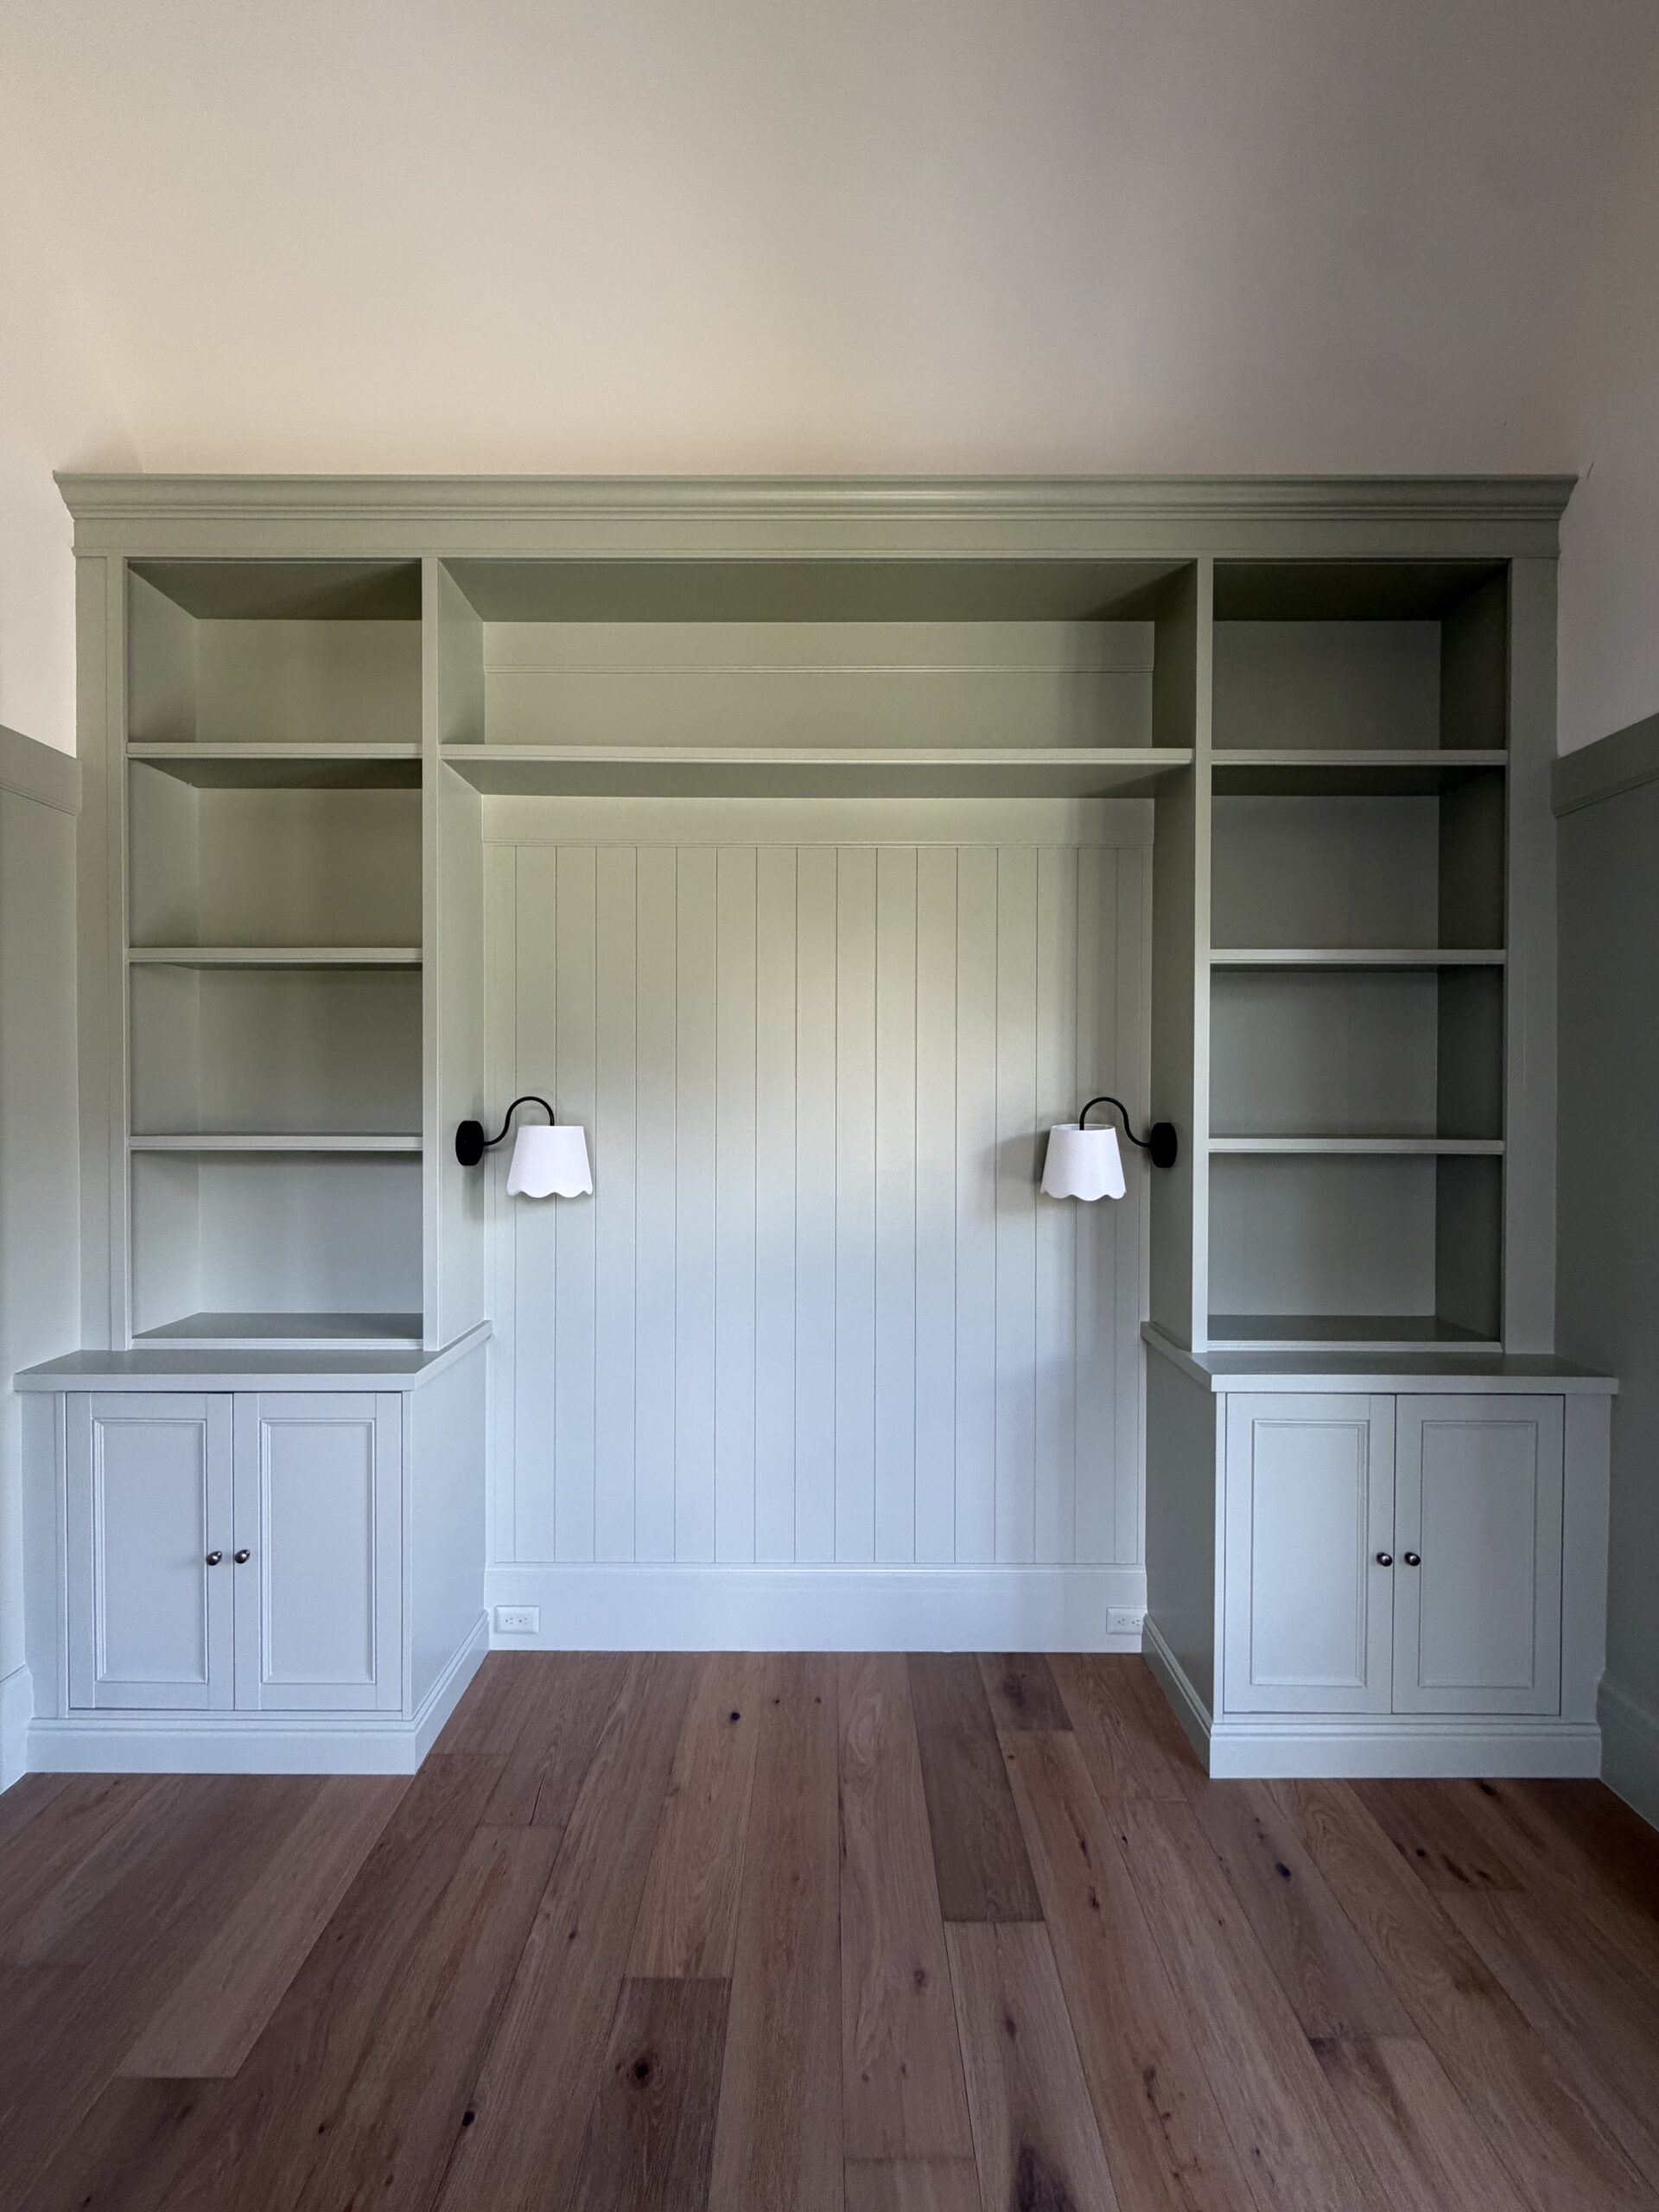
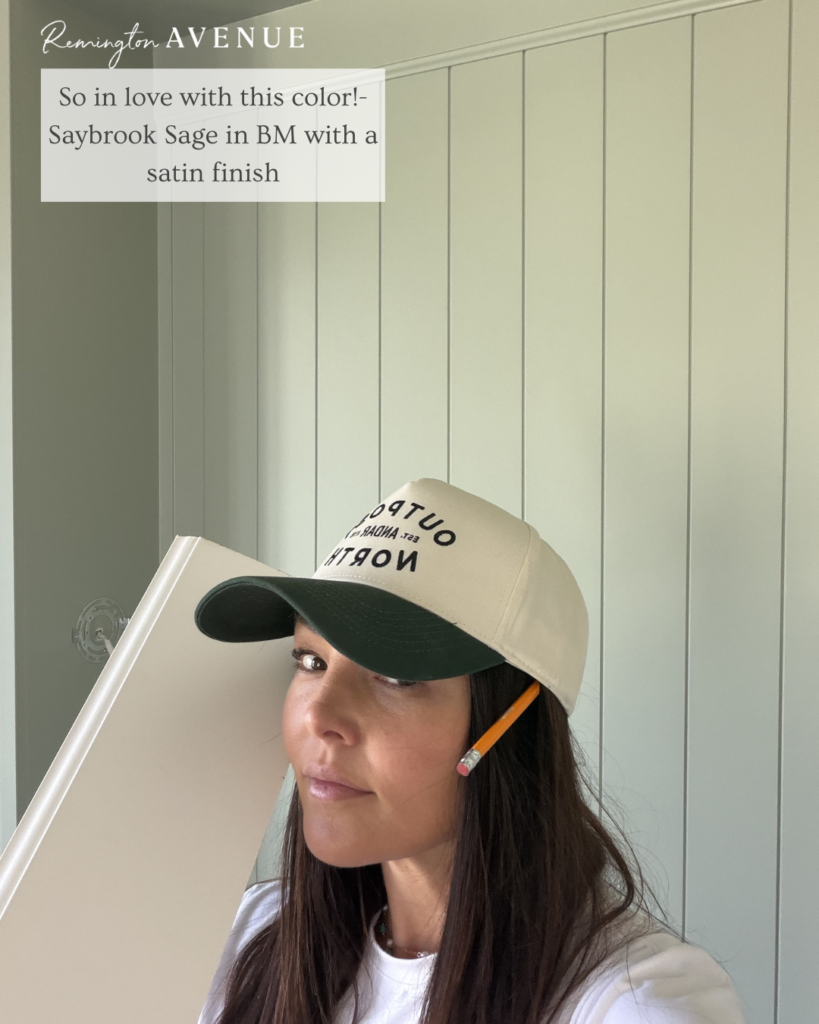
I used two coats of Saybrook Sage (5c) by Benjamin Moore. It’s a satin finish so it was easily wipeable.

And I made sure to do all the trim and cabinets in the same finish so it looked cohesive. Lou and I absolutely love this color. So we weren’t going to stop at the built-ins.
Next, I used more of the baseboard molding from the headboard backing and measured it at the same exact height. They were originally placed at 7’ above the floor. This really helped to bring the ceiling down and gives it a ground effect since the ceiling is so high. With everything taped and prepped, I painted from the molding all the way down to the baseboards. I also painted the molding around the door and window frames to finish it all off!
Sharing everything below I used for easy access – you can do this!


wallpaper // mirror // dresser // bed // duvet // shams // paint color // sconce // rug
Source Key: 1a // 2a // 3a //4a //5a // 1b // 2b //3b // 4b // 5b // 1c // 2c // 3c // 4c // 5c
Additional supplies needed for your DIY Custom IKEA Built-in project:
All linked here: Painters tape // Roller Frame // Paint Tray //Roller Cover // Mini Roller Frame // Mini Roler Cover
For more IKEA Built-in DIY Hacks, check out this post!

 Add to favorites or read later