Faux shiplap Wall
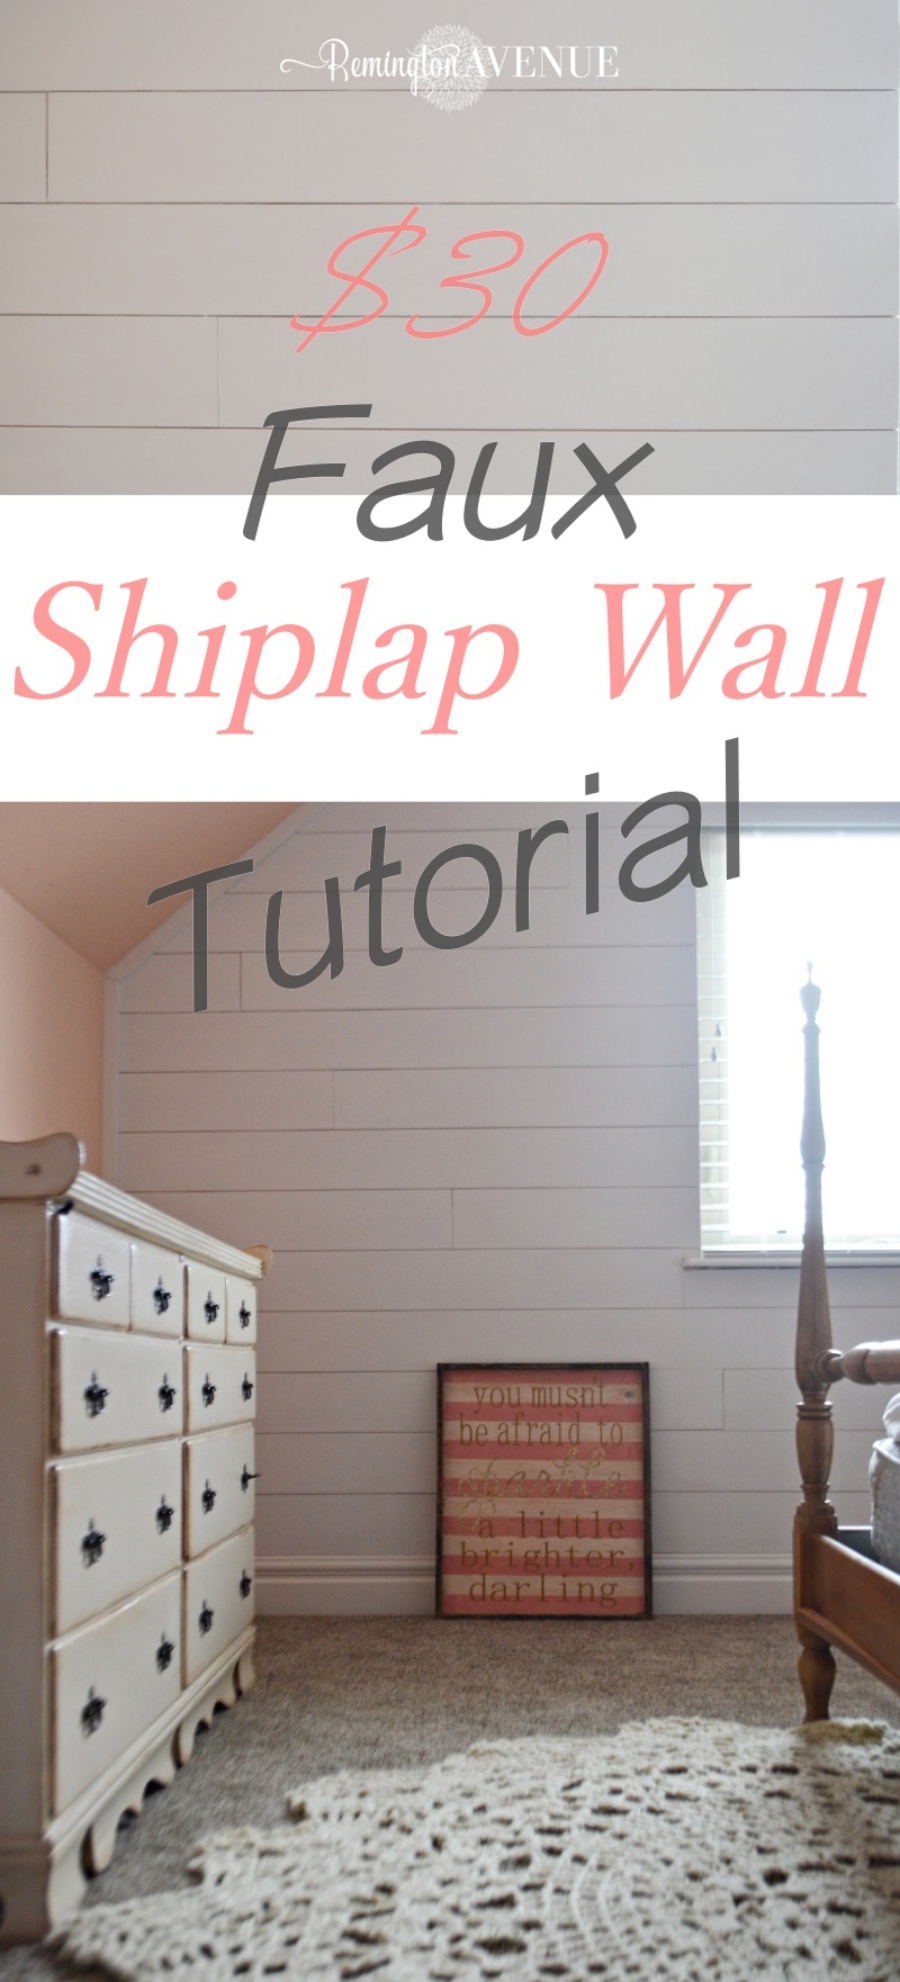
It’s no secret that shiplap has become super duper popular! Not only do you see it in farmhouse style, but it can be dressed up or down to match any decor preference. I’m totally in love with the look, but to install the real thing can be expensive. After doing some research I came upon the idea of using underpayment instead of wood. Brilliant! I did not invent this idea, but will share the tutorial on how I installed this faux shiplap wall just in case you havn’t run across one yet! Read on to see exactly how I installed this faux shiplap on my daughters wall as part of a whole room revamp.
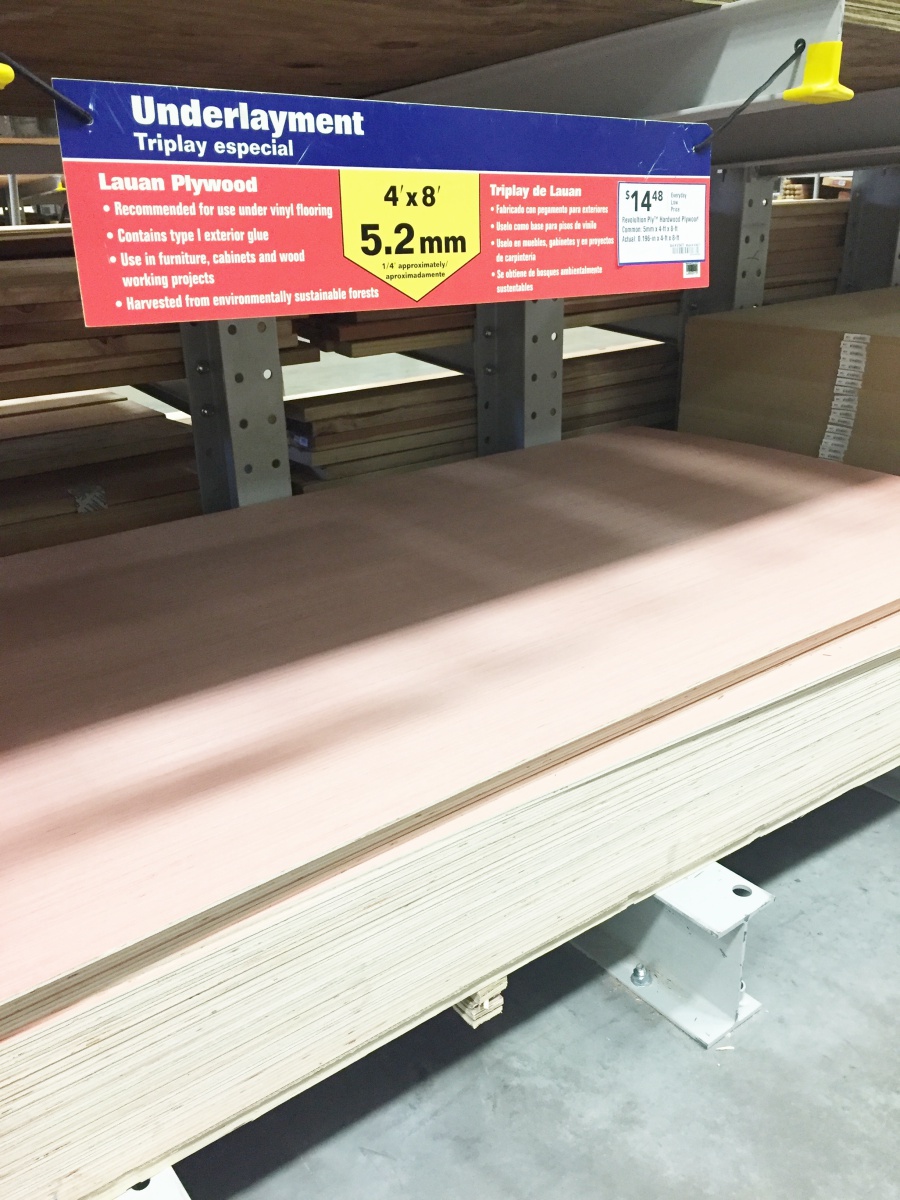
First off I headed over to my neighborhood Lowes to pick up 2 sheets of floor underlayment for around $15 each. I had the sheets ripped down into 6″ strips at the store. A wink and a thank you goes a long way to the nice employees down there!
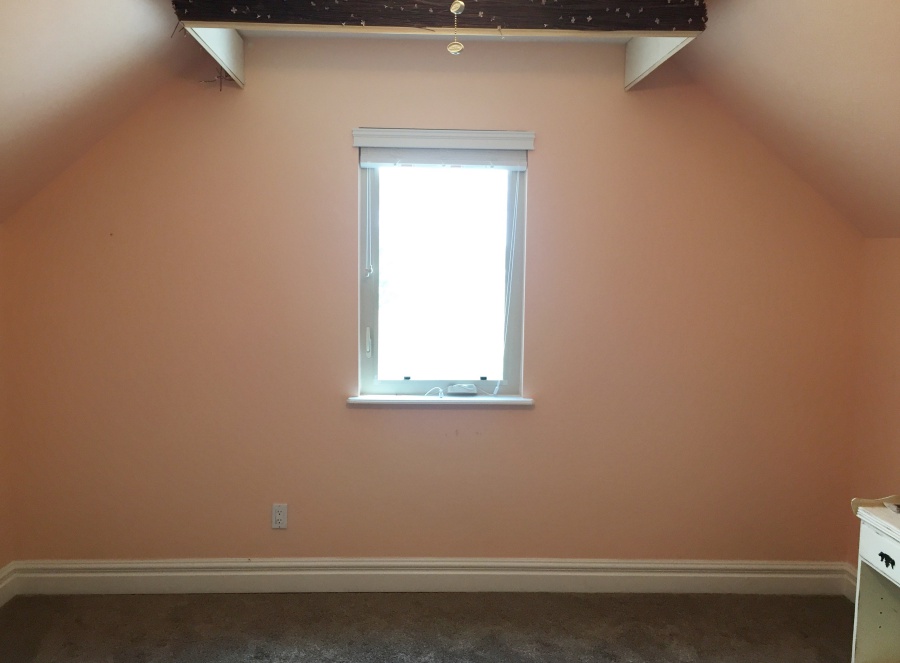
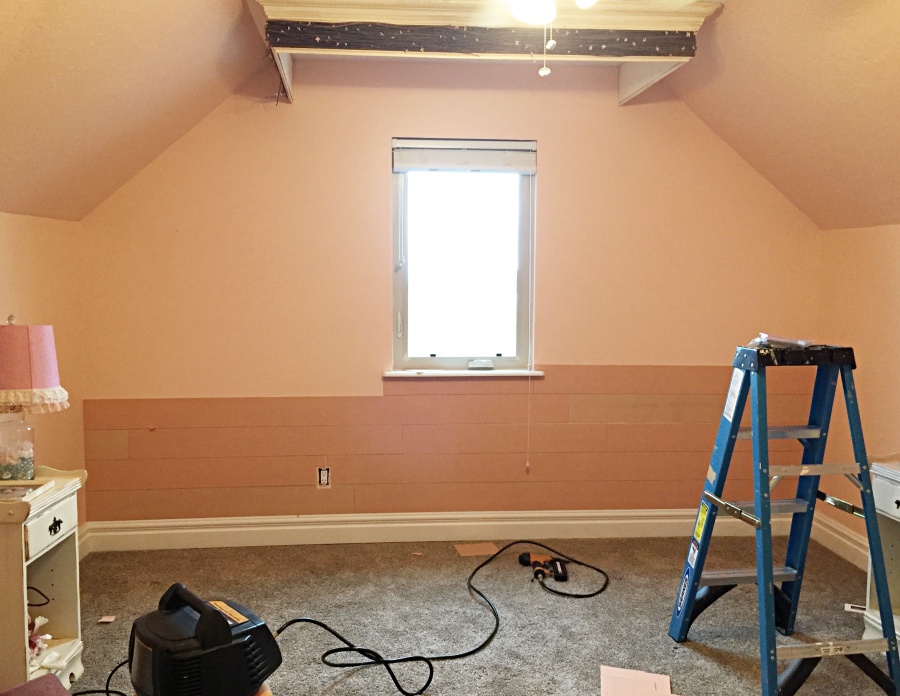
Here is the wall pre shiplap! I had previously painted her room Peach Ale-mode by Glidden and decided to keep the same color.
In retrospect I would have painted the entire wall white before installing the shiplap. There are a few areas that the pink showed through and it was difficult to get the paint brush in the small crevices to cover it up. I managed to cover all the pink in the end, but do as I say, not as I do haha! On that same note, go ahead and paint each strip of wood before you install in as well. Live and let learn baby!
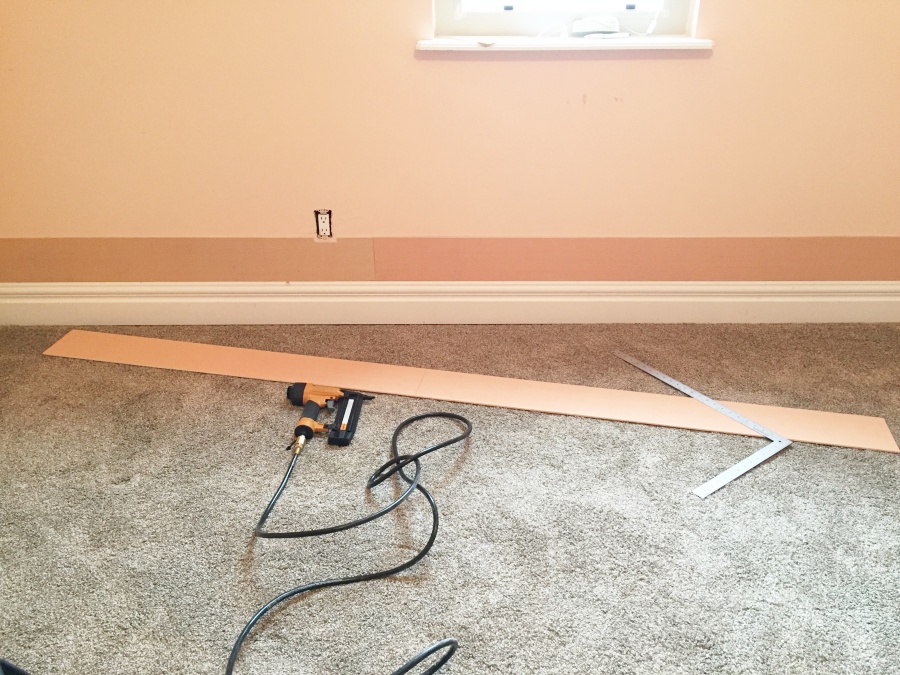
All it took was a few cuts to start with. To fit the length of my wall it took 2 strips of the faux shiplap for each row. Make sure to find and mark the studs before you start nailing. Honestly this material is so light weight though that I ended up hittin’ it with a few extra nails:) I used my finish nailer, but I had a friend who used a staple gun and gave rave reviews on that method as well! To each his own;)

Shop the Supplies
I started from the bottom. I alternated long to short, short to long, to give it a staggered effect. I used the funniest spacers ever- nickels! You might even spot one on the right side of the above photo. This helped give it that shiplap look and made the process go by quickly.
I had another friend who installed REAL shiplap on all her nursery walls. She was super excited until she painted it white and all the crevices got lost in the paint. She forgot to use a spacer and it basically became an ordinary white wall! Can you imagine…after all that hard work? Anyway, the moral of the story is use spacers! And nickels work great!
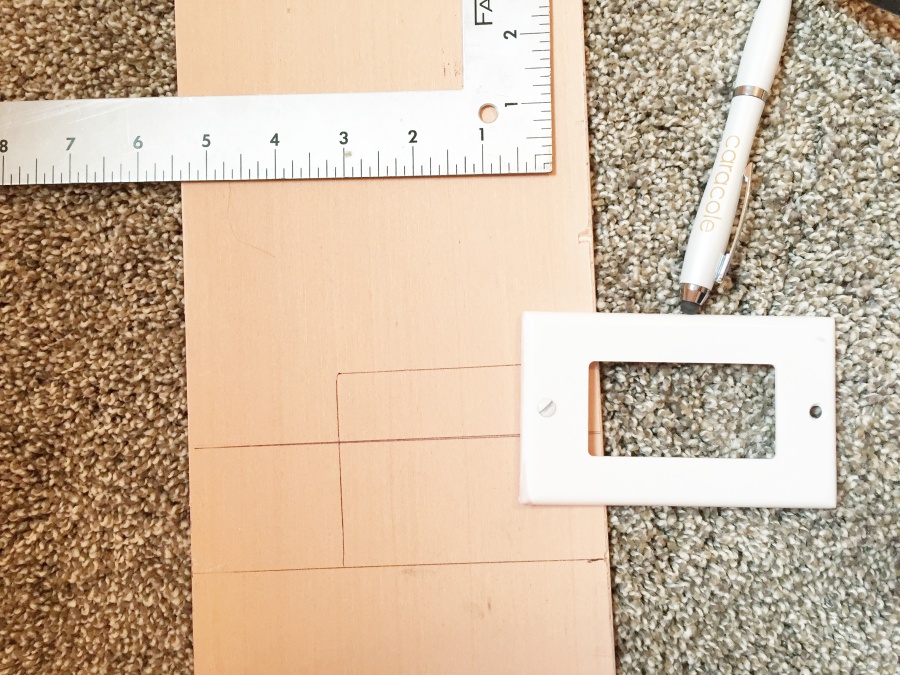
Since I don’t own an oscillating tool to cut out around outlets, I simply traced the outlet onto the wood strip. The line running though the traced outlet is actually a cut mark to create 2 stips. Once the outlet was traced, I used my saw to cut the 2 sides and an Exacto knife for the top edge. I had to get a little creative but it ended up working nicely.
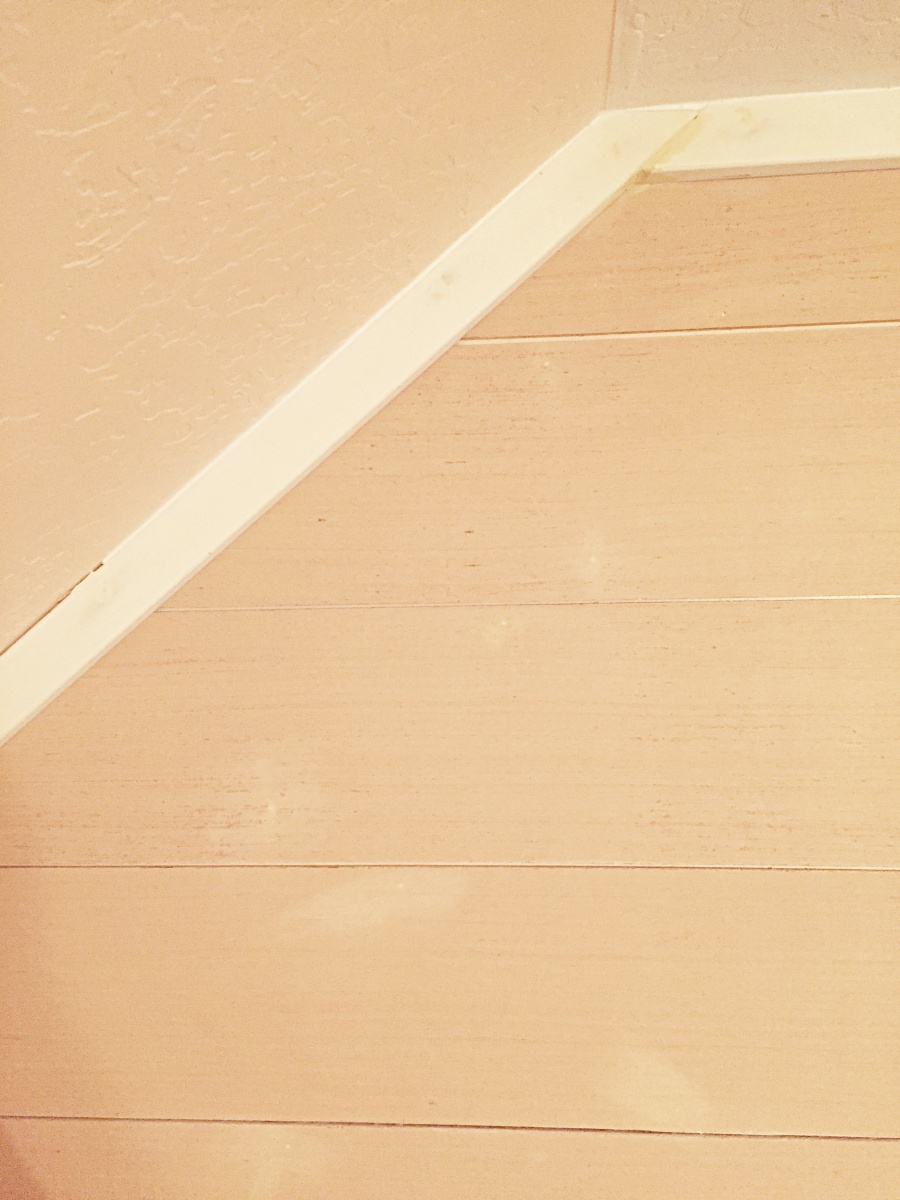
Everything went along smoothly till I hit the angled ceiling walls…GURRR@! I set my saw to a 45 degree cut but it wasn’t quite right. I tried readjusting my angle but never did come up with the correct one. Either I totally suck at math, or my ceiling is wonky….Im guessing both! I really didn’t worry about it too much though because I planned to hang some corner molding to give it a nice finish anyway!
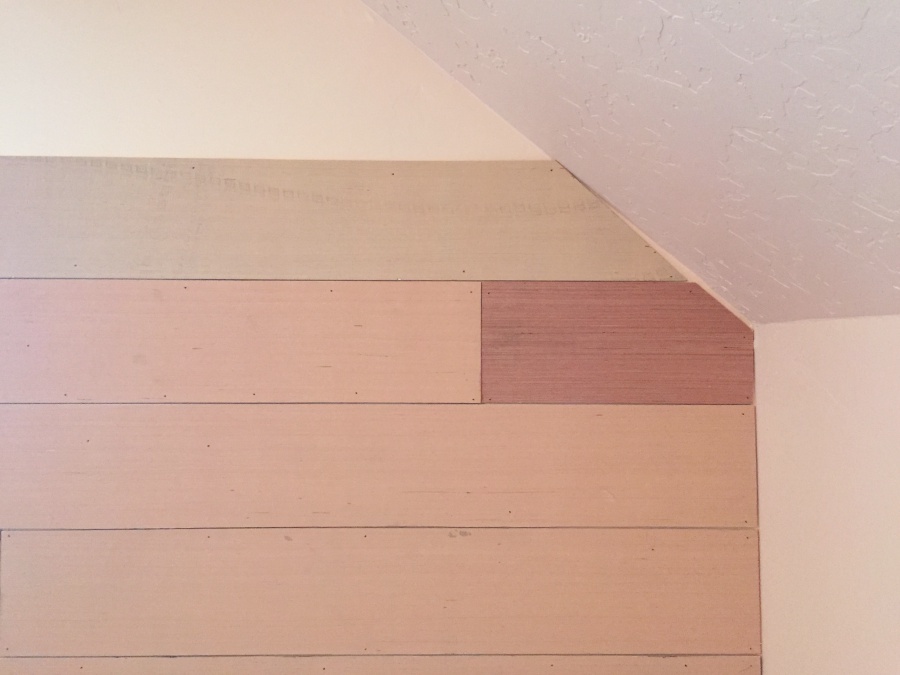
Sorry for the horrendous lighting in this photo, but you get the idea. The corner molding really did save the day! As you can see I patched all the nail holes. I used Elmers Wood filler – my fav! Okey…yes, I may have gotten a bit carried away with the nailer.
Then I caulked the seams and the wonky ceiling disappeared!
Shop the Supplies
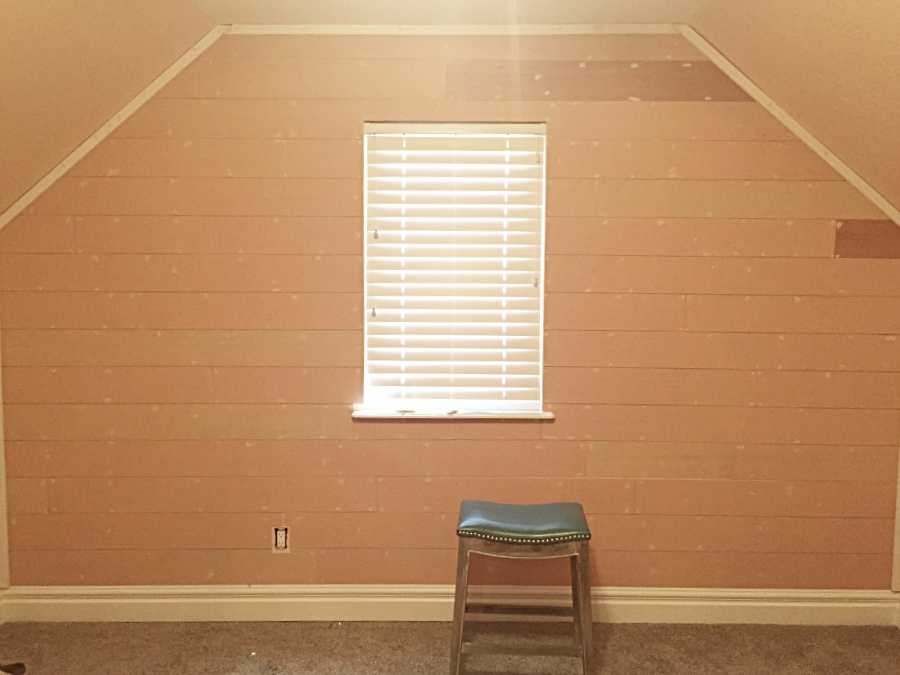
Once all the faux shiplap strips were up on the wall, and all the holes patched and caulked, I gave it a coat of white eggshell paint. The low sheen helps keep that aged rustic feel.
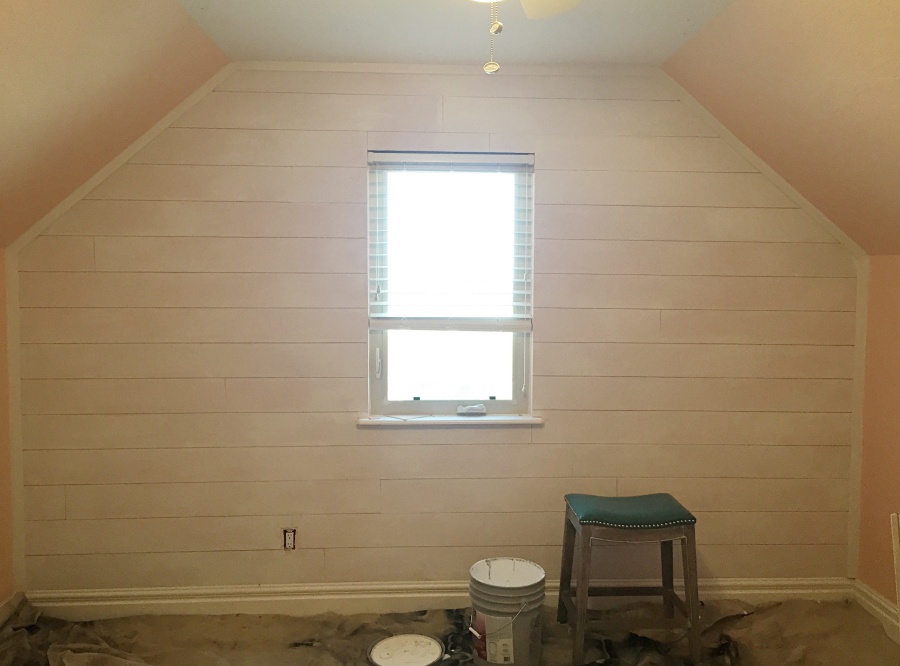
Another 2 coats of paint and the rest is history! When its was all said and done, I couldn’t tell that it was a faux shiplap wall and neither could my family!
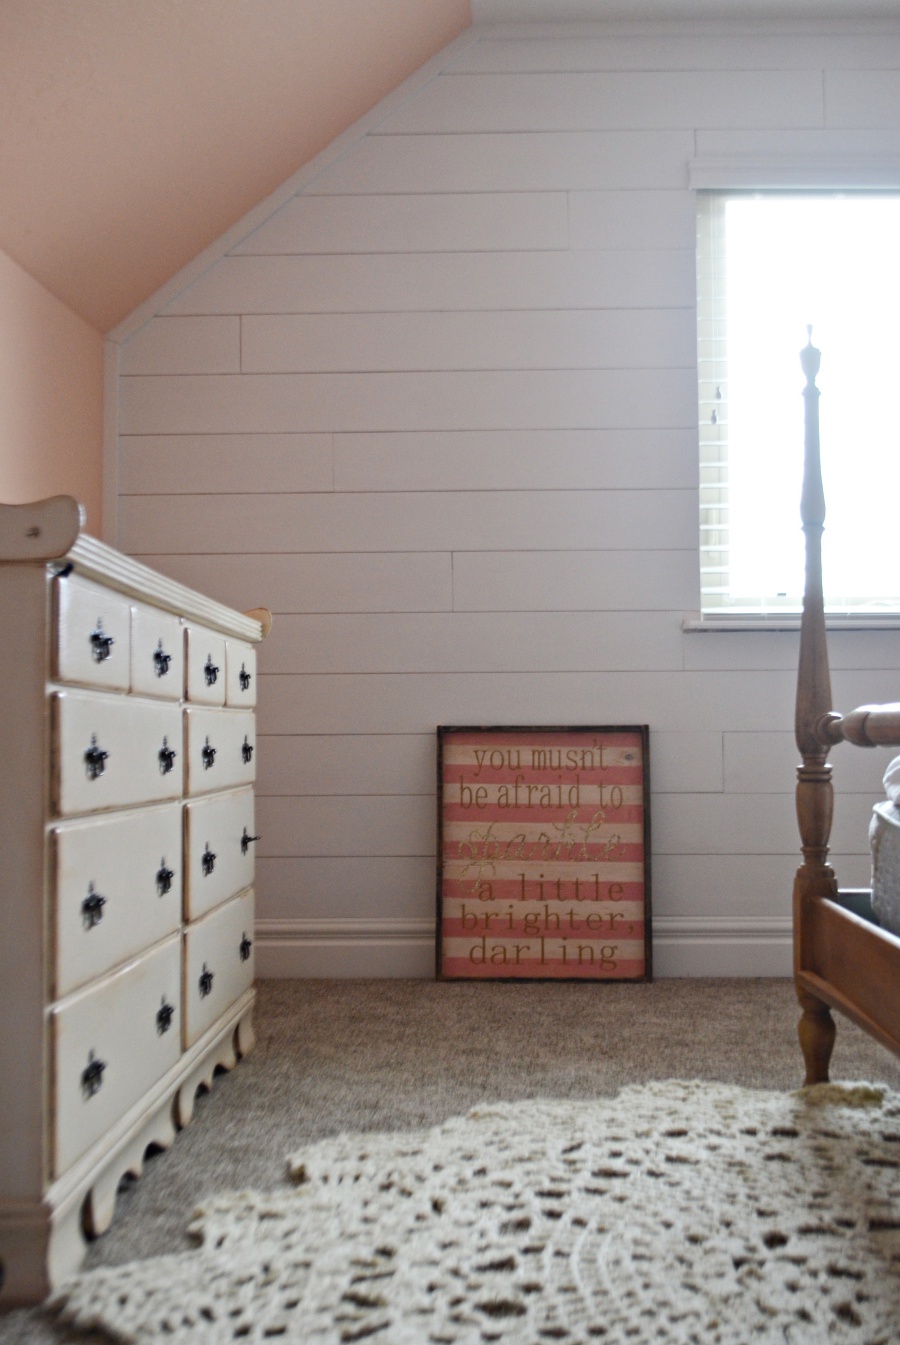
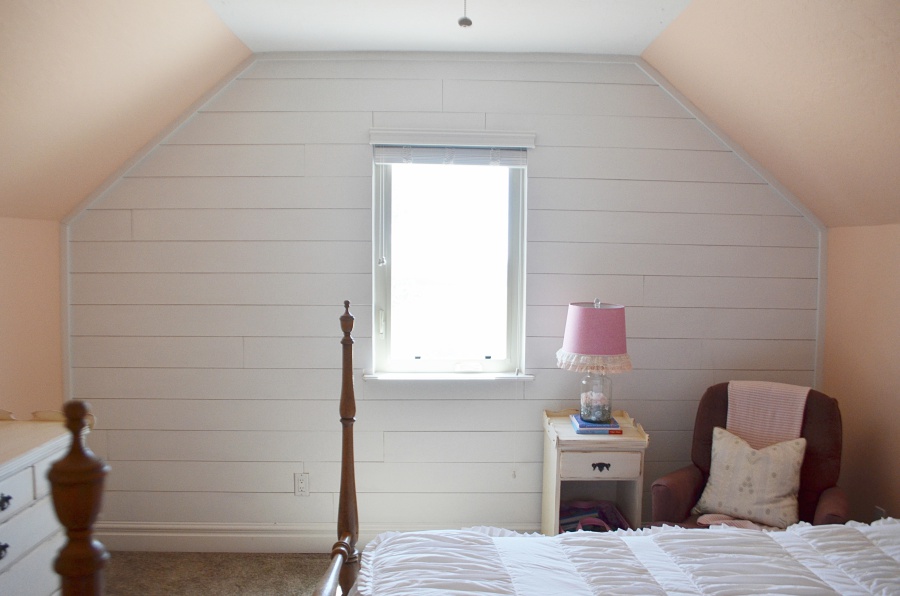
I love how the white faux shiplap wall creates such a soothing back drop to this vintage inspired room.
She’s not quite moved in yet, but we are almost there. I love how easy and inexpensive this faux shiplap wall was to complete. It only cost me a total of $30 (with extra material left over)! I’ll be back soon to share Remi’s full room reveal including all the accessories and decor AND a surprising makeover for this vintage bed you see above. I’d love to be friends, so don’t forget to subscribe to my blog and join me in all my crazy projects! If you love this project don’t forget to share it on Facebook or pin it on pinterest!
Shop the Supplies

 Add to favorites or read later
Great job! I love the look!!
Looks great!!! My daughter and I just finished her nursery with faux shiplap. I can’t remember if she bought underlayment or another inexpensive pressed board from Lowes. It was around 40 to 50 dollars though. She did one wall in the nursery as well and it was angled just like yours. They look identical although she wallpapered the top half. It looked great. Thanks for sharing yours. I would send you a picture but I not very “tech savvy”!
It sounds like it turned out amazing though! thanks for stopping in
Um you are my hero!! This is amazing! I wish you lived closer to me so I could come over and learn from you! Xo
wouldn’t that be awesome! we could totally collaborate
You are so talented girl! Awesome job and seriously – $30?!!! Incredible!
Thank you traci!
Hi Mysha,
Do you think this would go over textured walls ok? I have a laundry room I would like to do this on all of the walls.
Angelina
Yes I think it would be totally fine!
What about a popcorn ceiling??
You could totally do this over a popcorn ceiling! What a great way to update it!
You said you caulked the spaces… does that mean you caulked every board or just around the trim? I’m guessing if you caulked every board you would end up with what your friend did in a solid wall and not the shiplap look. Thank you for your tutorial. It was very helpful and full of great ideas!
Hi amy! I just caulked along the out trim pieces because as you said, If I caulked between each board, there goes the shiplap look I was hoping for! Good Luck, you will love it
That turned out beautifully! I am pondering the thought of doing a wall in my kitchen and was glad to hear there is a faux shiplap out there! Thanks for the inspiration.
You bet Cathy!F I bet it will look beautiful there
Where did you get the doily looking rug?!
HI DIANE, I ordered it from an etsy shop. I linked the product and shop on my home resources page under Remi’s Room. You will love it!
Love this idea! I want a feature wall behind our bed in the master and had decided on ship lap to keep it light and interesting. Your idea is perfect and so timely! I’m not always the best at finding the studs so I’m thinking some wood glue on each piece along with the nail gun will do the trick? Thank you, again, for sharing.
Oh Im so excited for you. Please post a picture when your done and tag my tutorial on Instagram or shoot me an email. Id love to see
On the ship lap do you need to take up the baseboard
I didnt, but you could.
Home Depot won’t rip boards. I was just there. Glad to know Liwe’s does. Looks great.
Thank you!
Just started following your blog. Question about the faux shiplap wall. This is a dumb question but what does “ripped” mean? You had Lowes “rip” the wood into 6″ planks. Does that mean cut or put those grooves real shiplap has?
Wall looks awesome!
Not at all…It just means that I had Lowe’s cut the boards to my specified measurements. Each Board was basically cut down into 6″ planks. Just an FYI I will be featuring a new shiplap product that just came out on tomorrows blog post. Ill be using it to makeover my entry way so stay tuned!
Did you prime the boards before painting them?
yes
Hi I am planning to buy supplies. Your supply list isn’t loading. Would you be able to repost. Thank you son much! I really appreciate your level of details.
I am writing about the shiplap walls project. Sorry about that.
Hi Andrea so excited to see your shiplap wall. I just updated by supplies list so you should be good to go and thanks for letting me know! Will you email me a photo or tag me on Instagram @remingtonavenue with a photo? I’d love to share with my readers?
I greatly enjoyed this article! Have been keeping up with your
blog fairly often and your always putting out some great articles.
I shared this on my facebook and my followers loved it!
Keep up the good work 🙂
That looks awesome. I plan on doing a beach decor in my living room and wanted a ship lap wall to make the room feel like a beach cottage. This is a great way to do it cheaply. Pinning for later when I’m ready to start my remodel.
Oh how exciting. Yes this would look amazing in a beach house. Thanks for stopping in