$50 DIY British Brace Barn Door
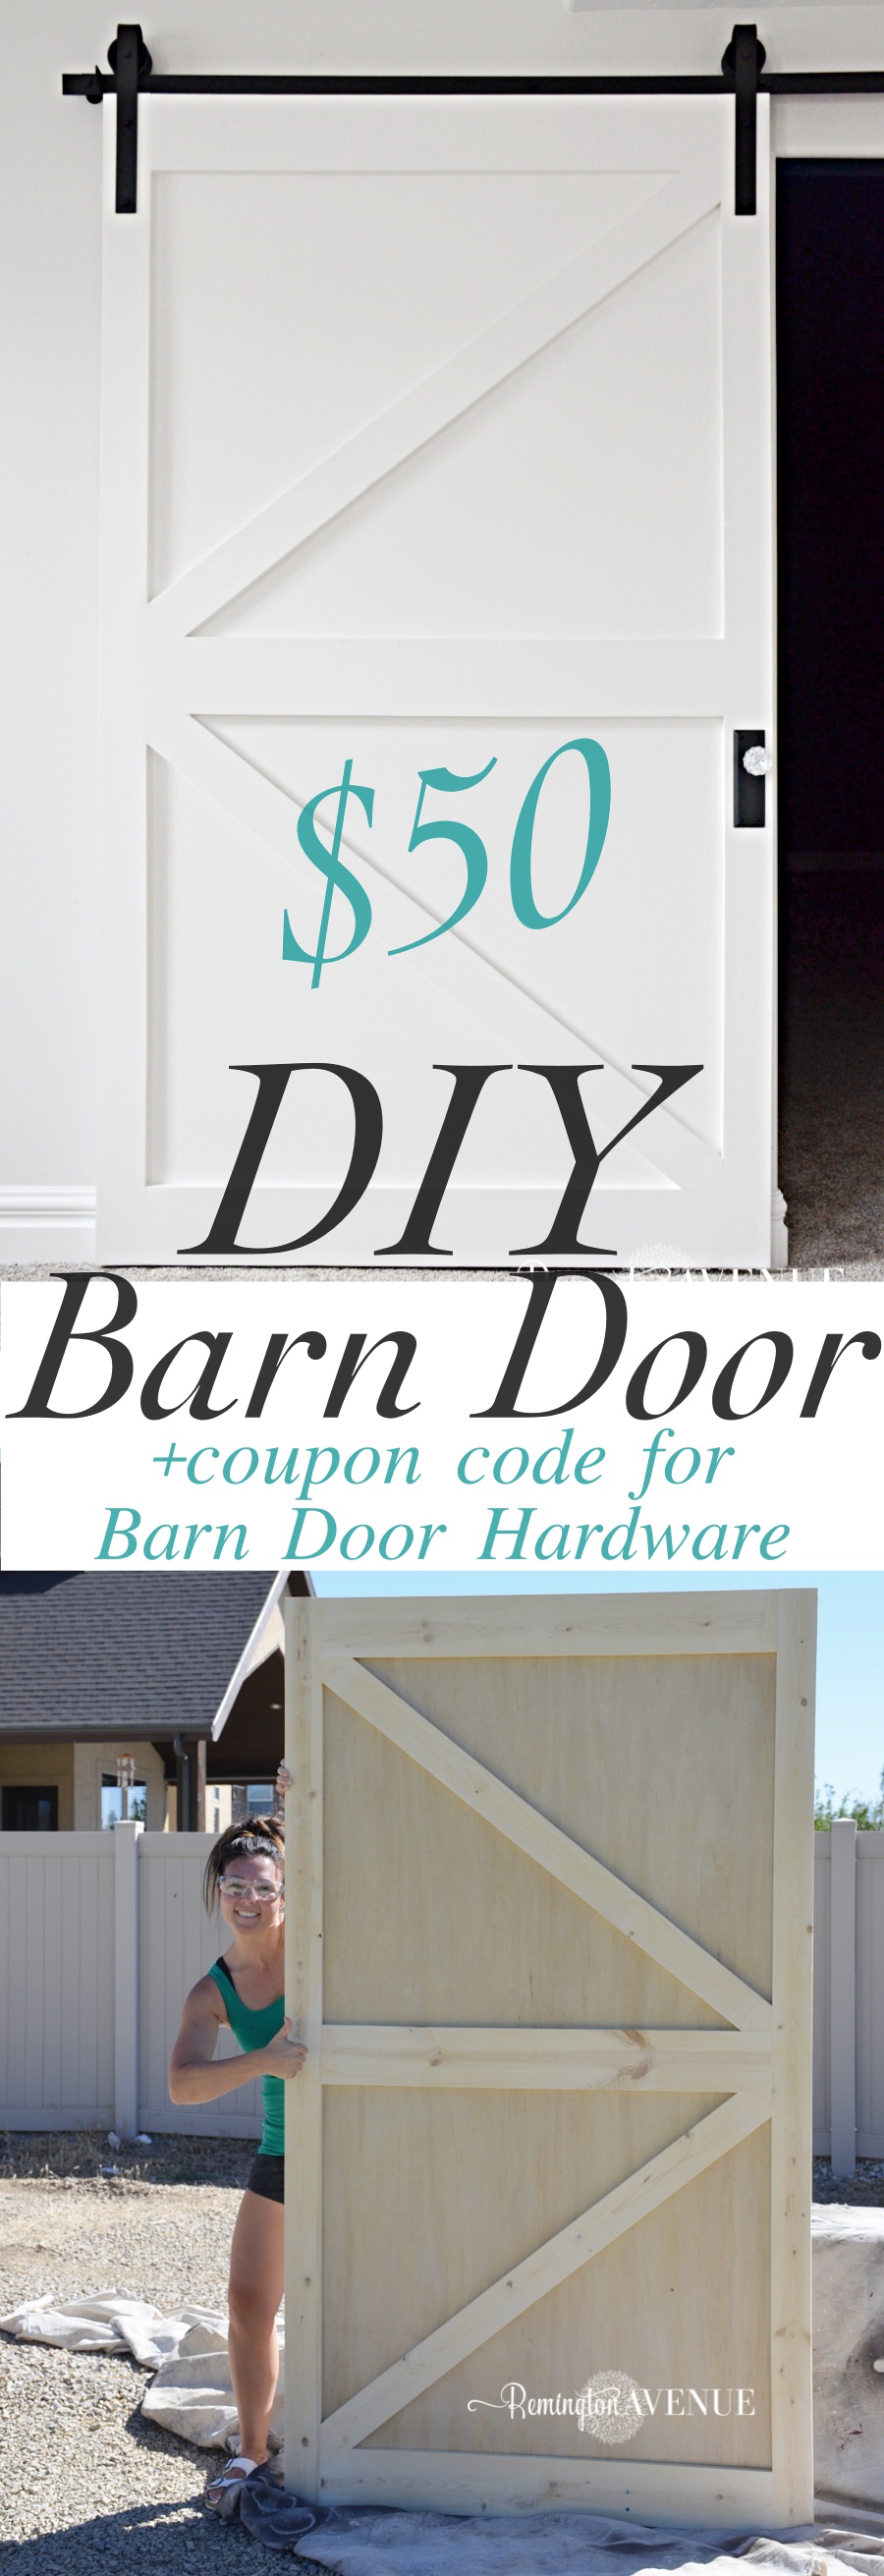
Today I’m going to Share with you a $50 DIY British brace barn door. If you’ve been following me on my Instagram (remingtonavenue) then you know we have been slowly plugging away at finishing our basement… now I can check this one off the list! We added a theater room down there with a large opening. A DIY barn door seemed like the obvious choice! I did a ton of research before taking on this project. I found some great barn doors on pinterest but all of them seemed a lot more involved than I wanted to get. So I put my DIY loving thinking cap on and came up with simple and affordable solution. Read on as I show you exactly how I built this budget friendly $50 DIY British brace barn door and what materials I used!
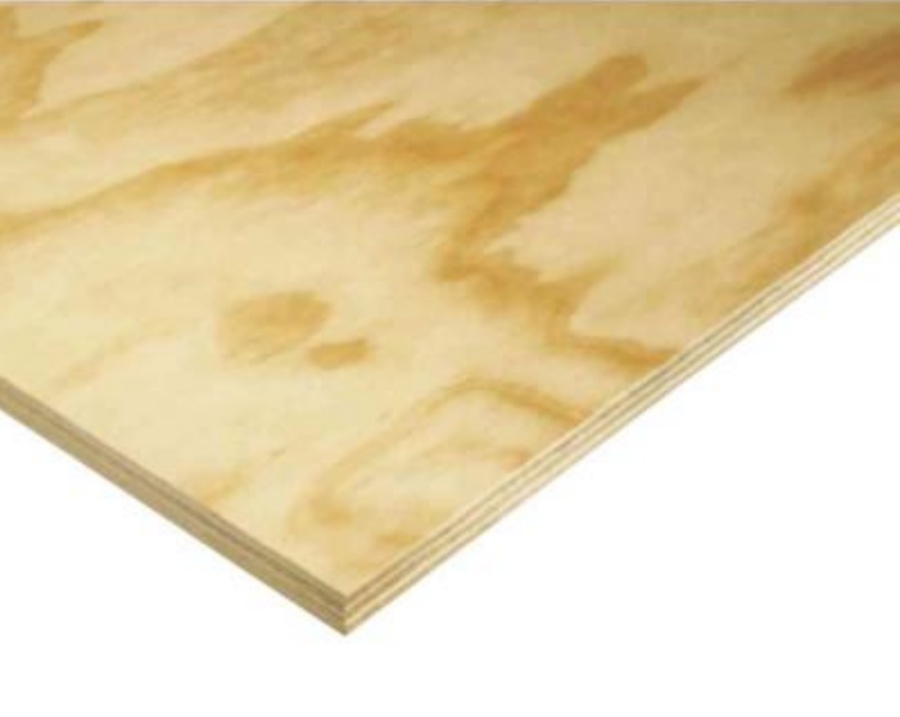
To begin building the British brace barn door I started with a 4×8 sheet of pine plywood that I purchased at Home Depot for 34.98. That was the majority of the cost.
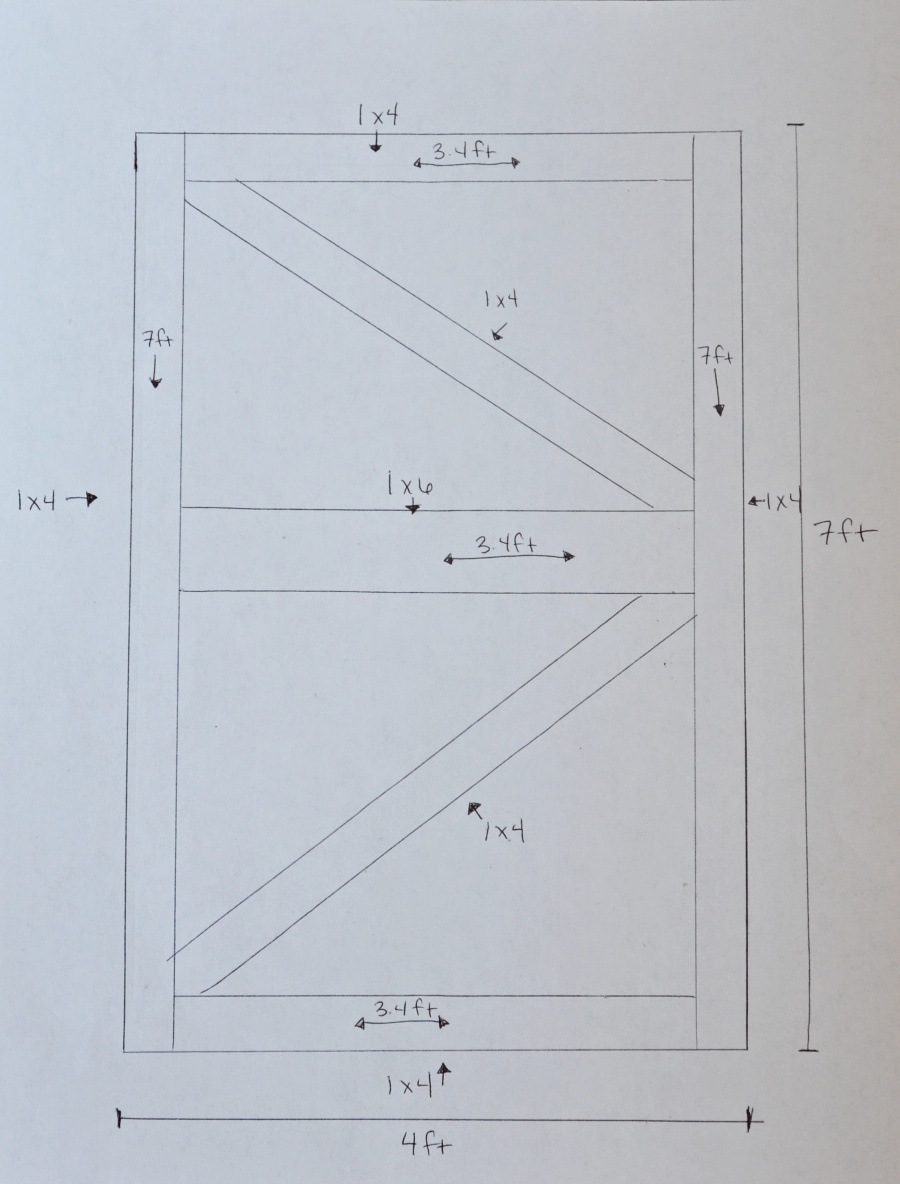
 The opening to my theater room measures 42 inches (3.5ft)wide by 81 inches (6.9ft)tall. I had the nice man at Home Depot chop a foot off the length to bring the size down to 7 ft. This allowed for 3 inches overlapping on the top of the door way and 3 inches overlapping on each side. Measure TWICE, cut ONCE! Can anyone else hear their dad yelling that in the head?! Seriously though, make sure to take accurate measurements and allow for overlapping on both sides of the door!
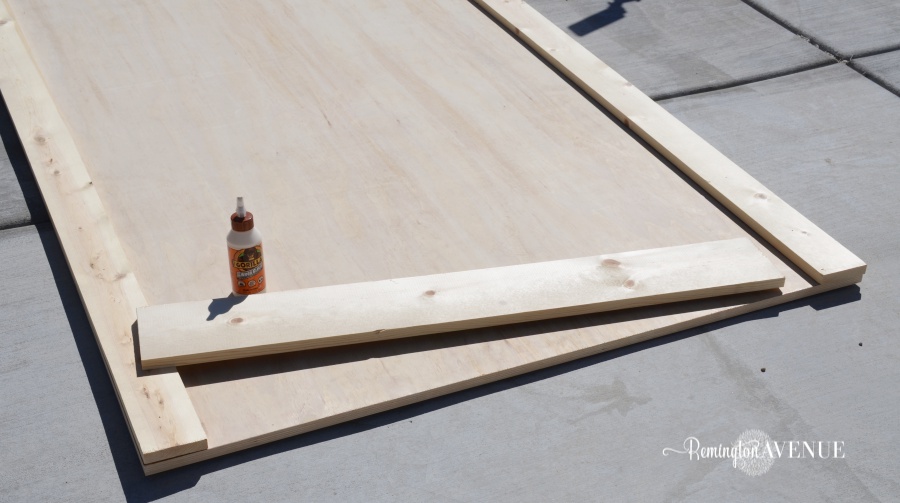
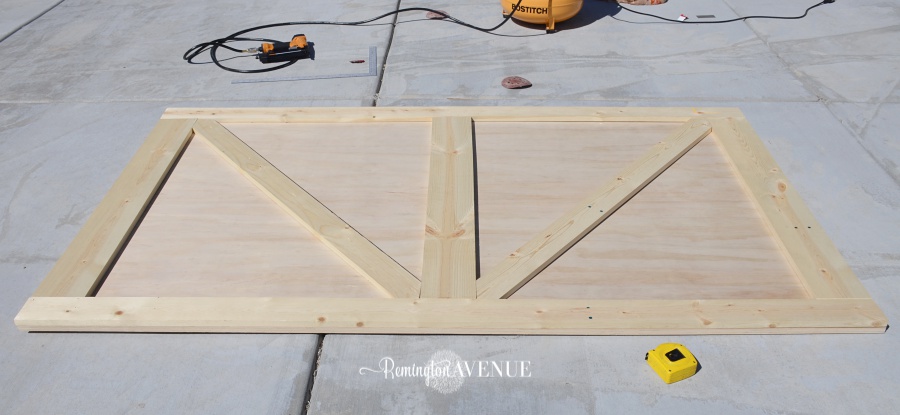
Since the plywood is the base of the Barn door, give it a good sanding. I sanded mine with my orbital sander on both sides. If you don’t have an orbital sander, no sweat, just use a hand sander to smooth out the rough spots. I added 1×4’s around the edges of the door and to create the British Brace pattern (sideways V). I used a 1×6 for the middle of the door. These are all common boards that come in various lengths. Make sure to check for warping when your choosing your boards cause that can really mess things up. Select the straitest boards you can find.
I had the same nice guy at Home Depot cut the boards to my specified measurements. If you are building this exact door, the top and bottom 1×4’s can be cut to 40″ or 3.4ft. The other 2- 1×4’s can be cut to match the length of the door 7ft.. These 2 boards will run along to sides. The 1×6 board should be cut to 40″(3.4ft) and will lay across the center of the door. I saved the other 2 boards (1×4’s) that create the British brace to cut at my house once the other boards were in place. I drew up a quick plan below to illustrate the sizes. (My plan illustrates 1×4’s on top and bottom, but they are actually 1×6’s sorry)
Get the Tools

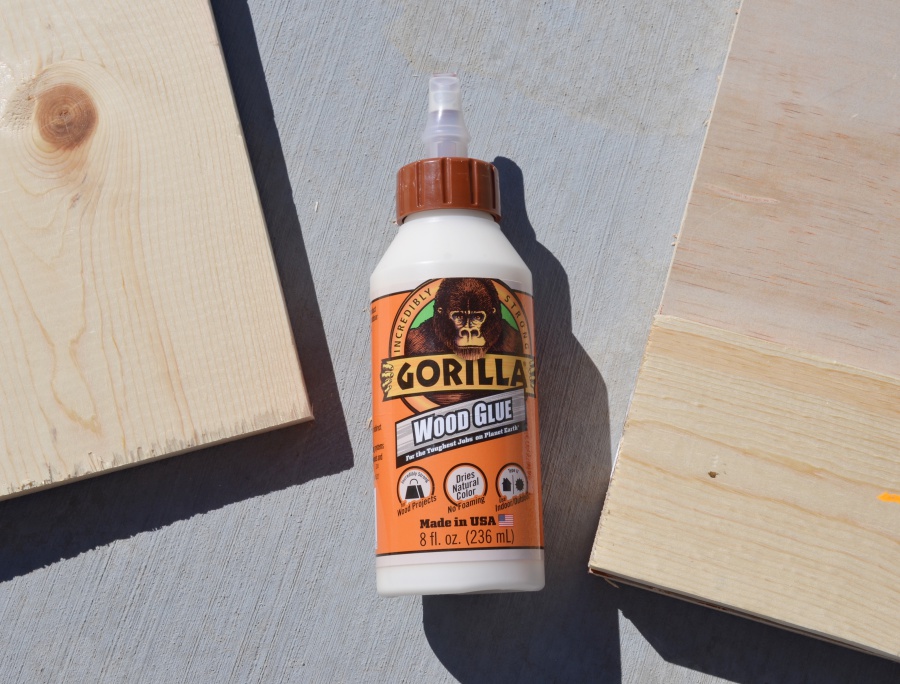
Once my plywood sheet was sanded, I applied gorilla glue to the back of a 1×4 and placed it at the top of the plywood. Make sure to align all the edges.
I nailed the outside trim sides (1×4’s) to the sheet of plywood using 18 gauge, 1-1/4 inch finish nails and my Bostitch nail gun. I repeated this on the top and bottom 1×6’s to complete the outer frame.
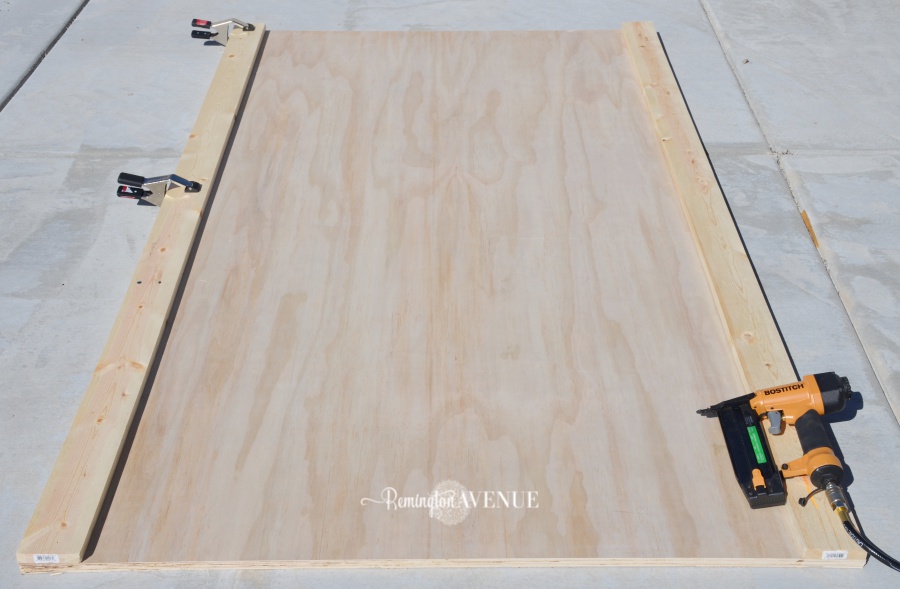
I repeated this process on the sides and bottom to create the outer frame.
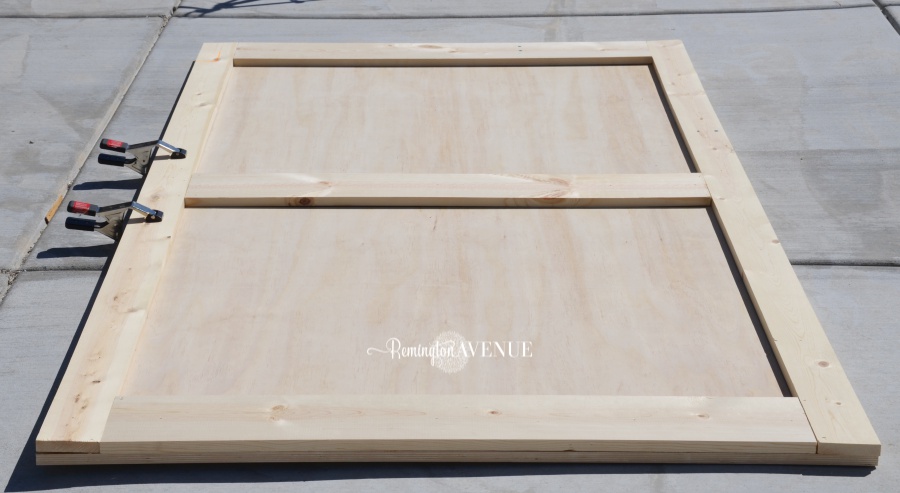
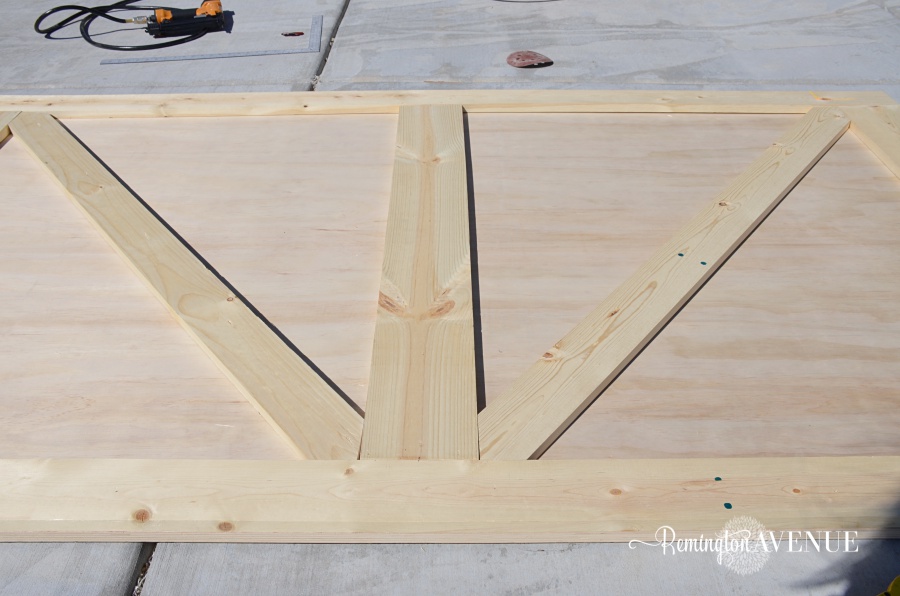
I glued and nailed the 1×6 to the middle of the barn door.
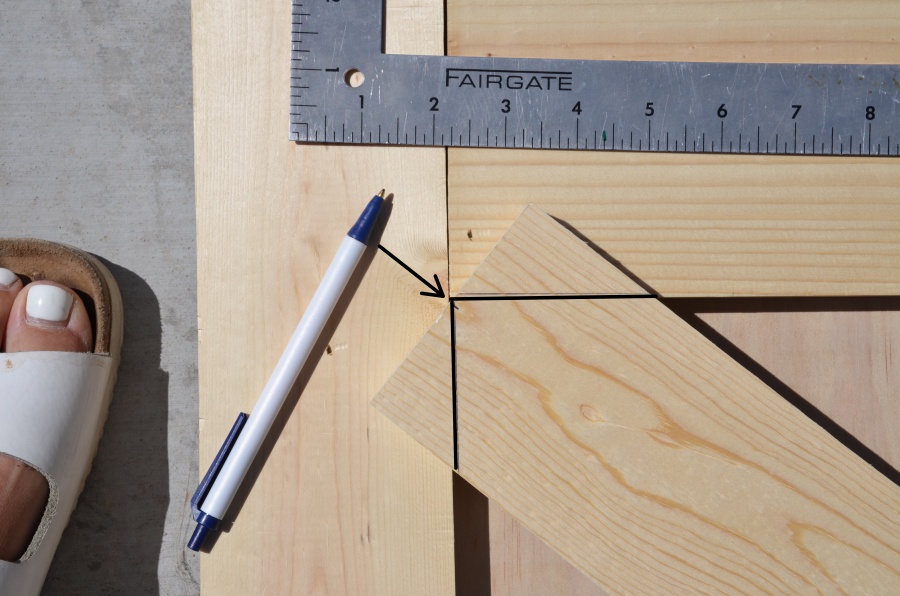
For the British Brace at the bottom of the door, I cut and measured a board the length of one corner to the other by lining up the middle of the 1×4’s in the corners.
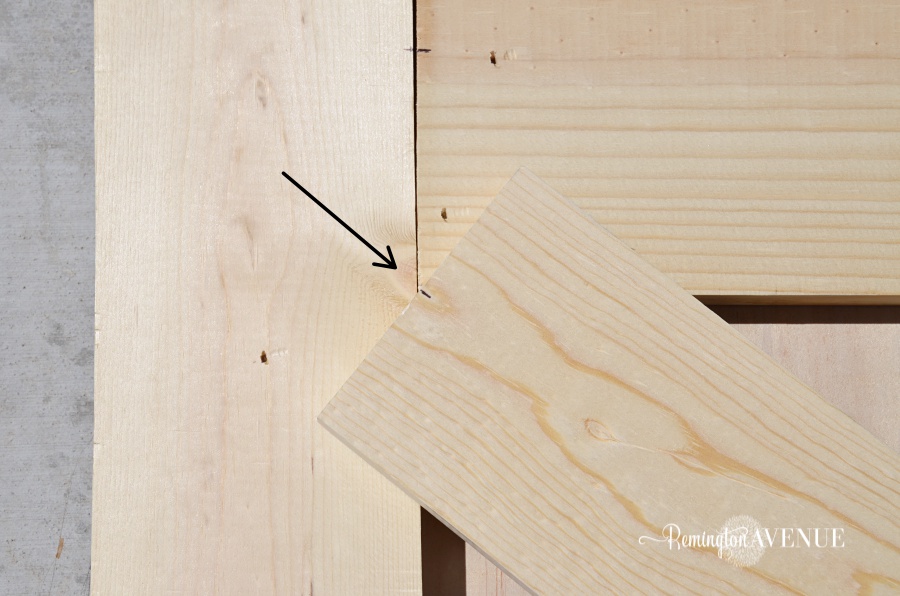
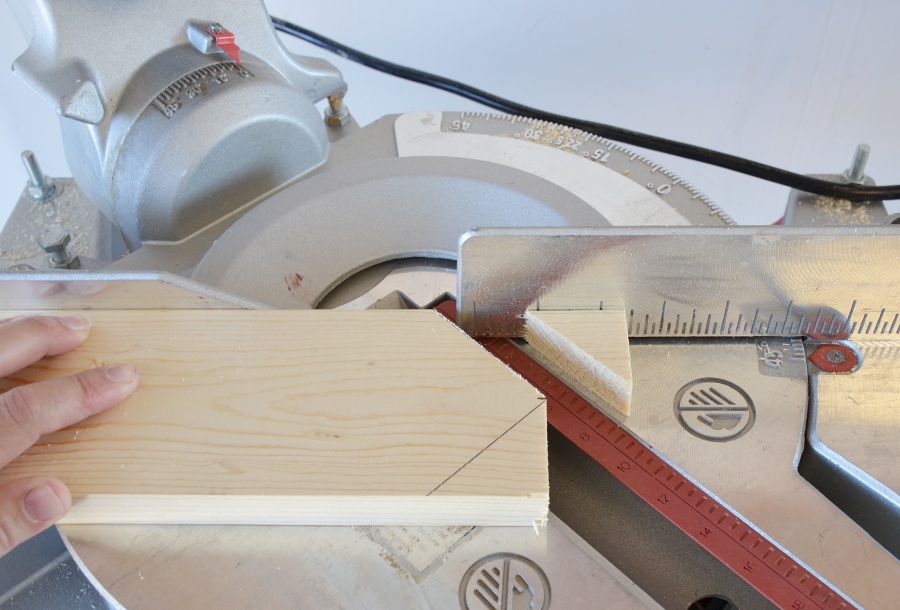
Then I just marked with a pencil where I needed to make the cuts.
Almost perfect!
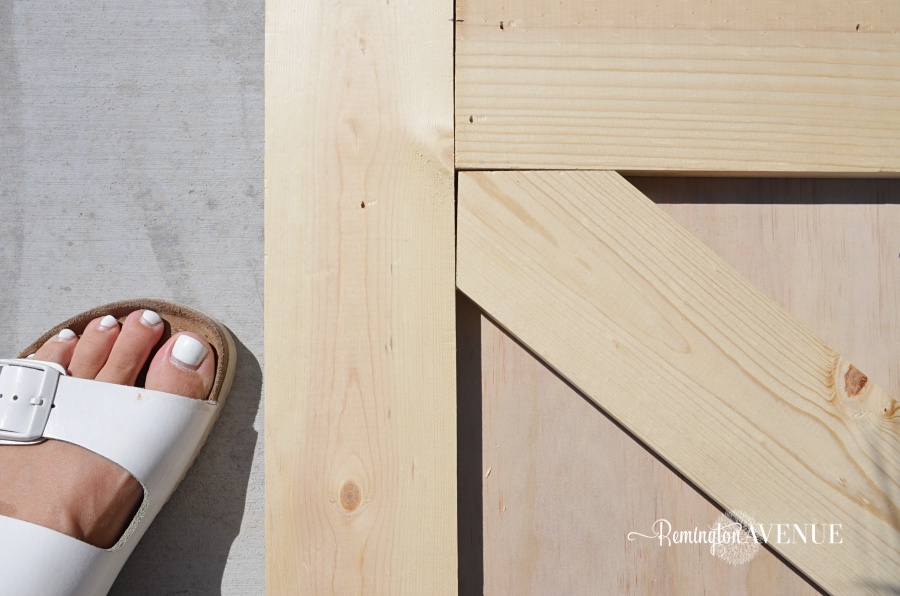
I applied gorilla glue to the back of the bottom British brace and then nailed it to the door.
I repeated the same measuring tactic as above and glued and nailed the top of the British Brace in place.
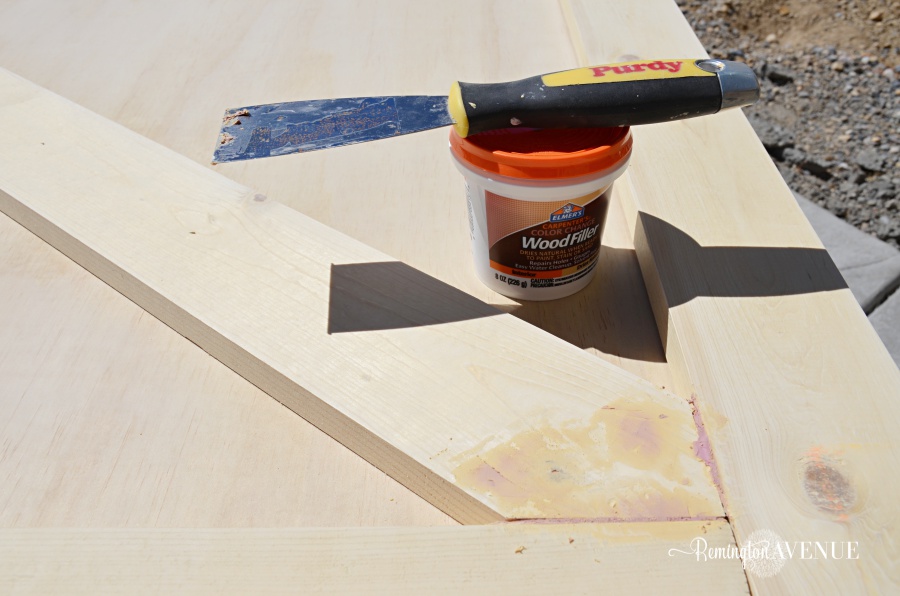
Once the Barn door was complete I filled in all the nail holes and imperfections with Elmer’s Wood Filler. This wood filler changes color from purple to neutral when its dry and ready to be sanded! Fancy!
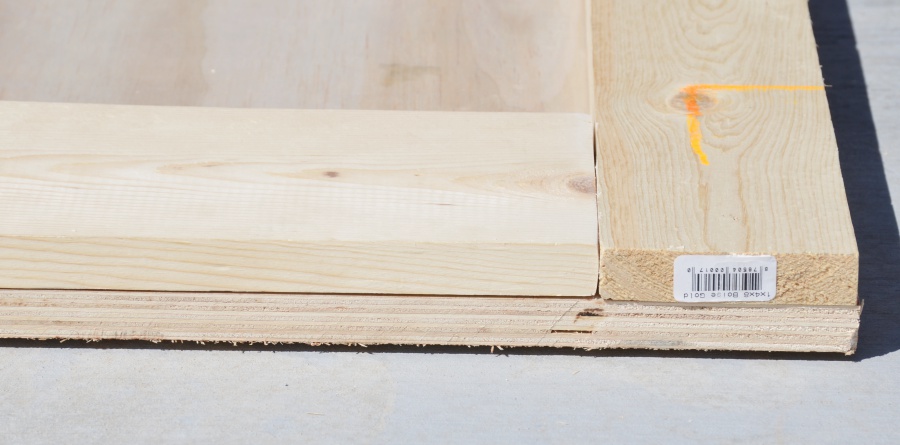
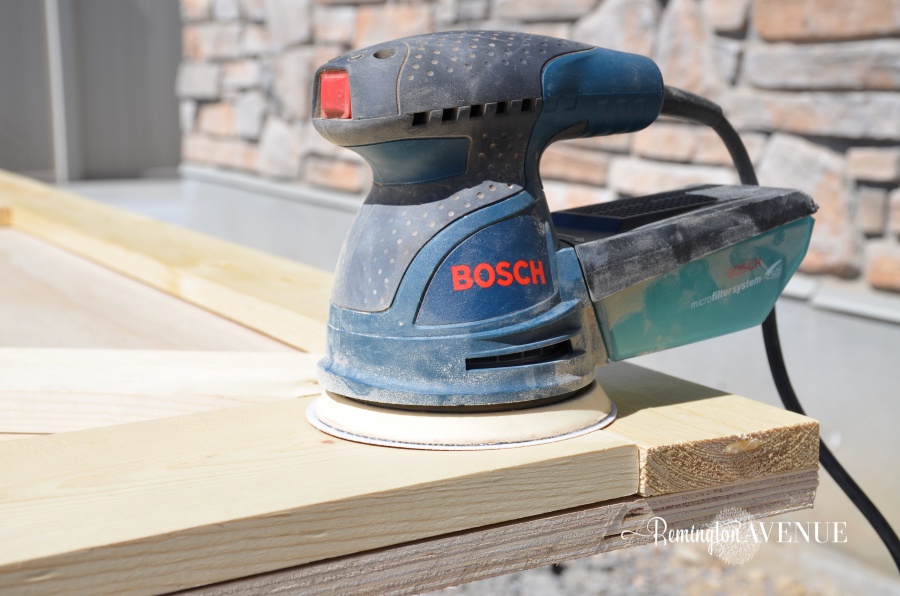
I sanded all the edges of the barn door thoroughly. You can even see I had a little overhang on one of the outer frame boards. I sanded it down so it was even with the plywood.
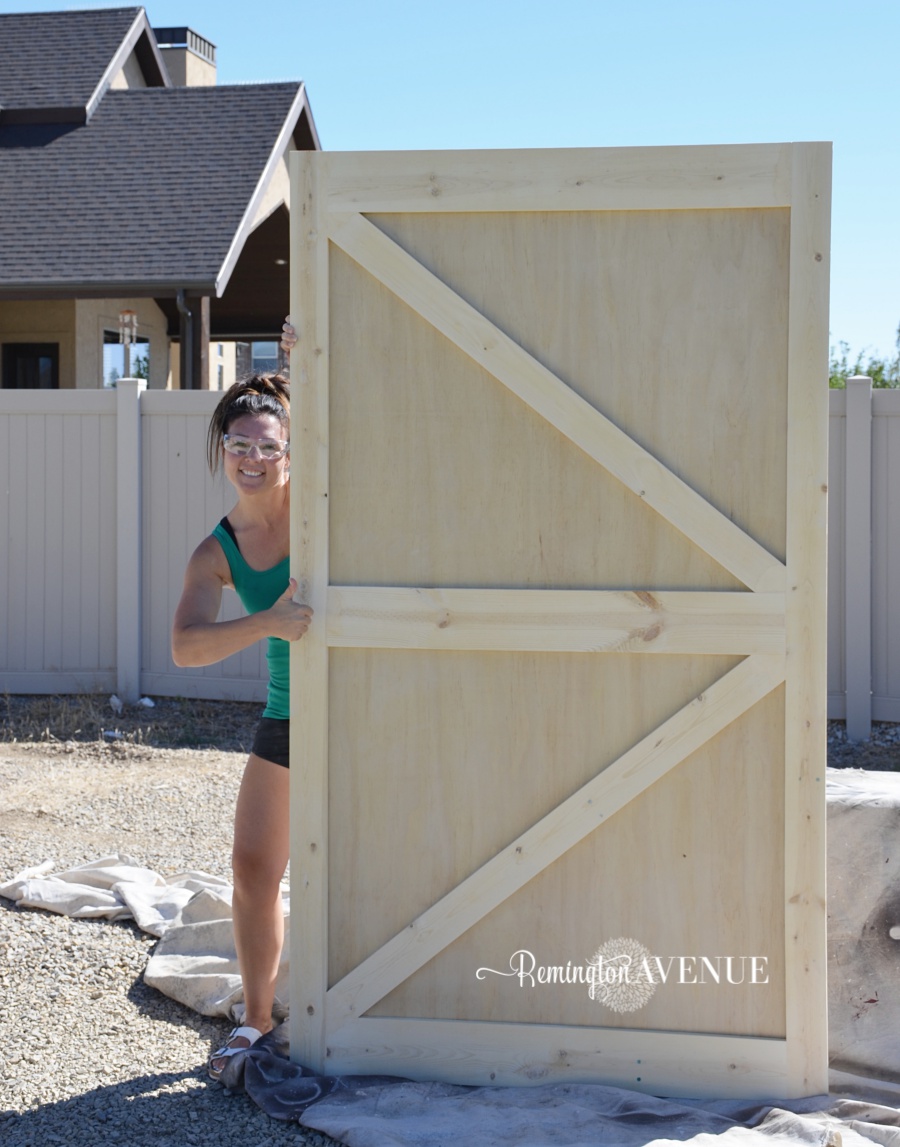
And just like that I built my first ever barn door with a British Brace!
Get The Supplies
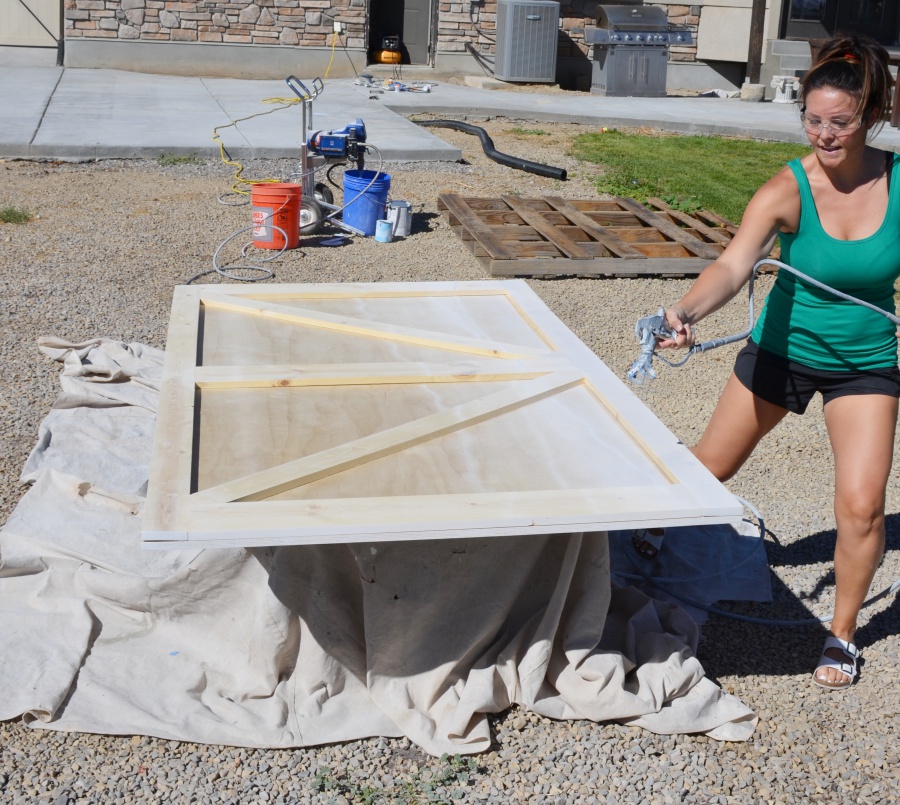
Now that my barn door was built, all I had left to do was paint it. I sprayed it with 1 coat of primer on both front and back of the door.
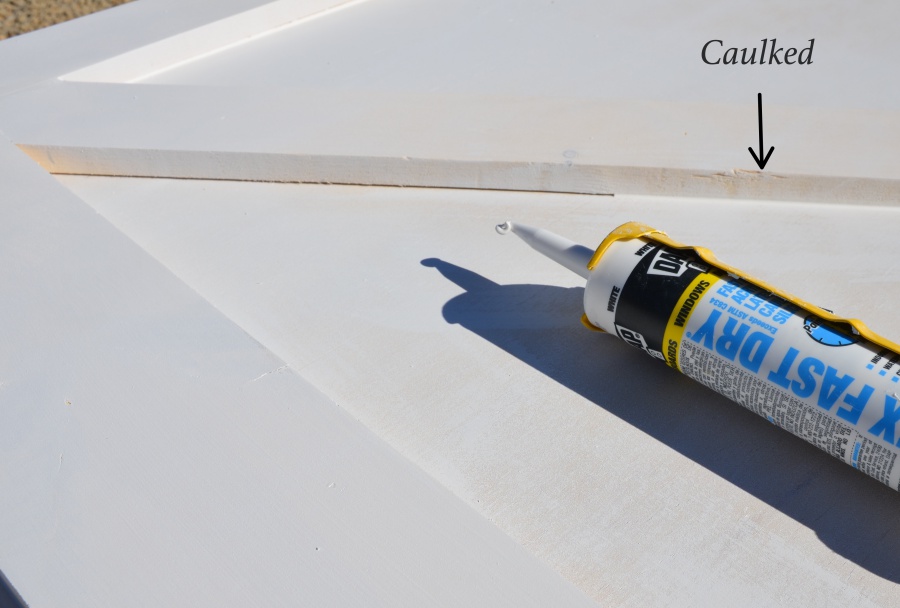
I also caulked any cracks between the plywood and trim to get rid of any gaps. Remember Caulk is a girls best friend!
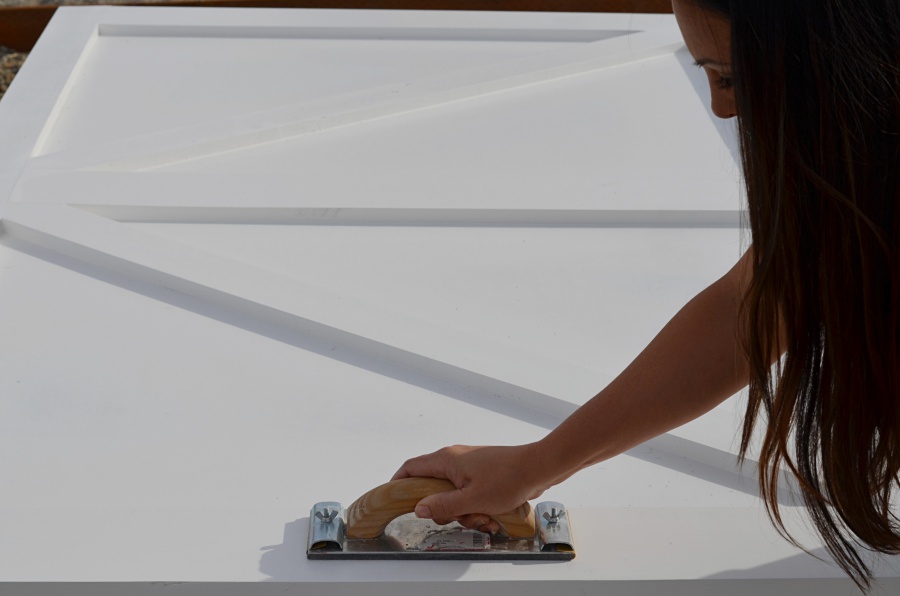
Once dry, I sanded the door one more time using a fine grit sandpaper.
Then I sprayed the Barn door with 2 coats of Whisper White Enamel paint by Behr. Same color as all the trim throughout my house. If you don’t have a sprayer don’t fret, A brush will do the trick just fine!
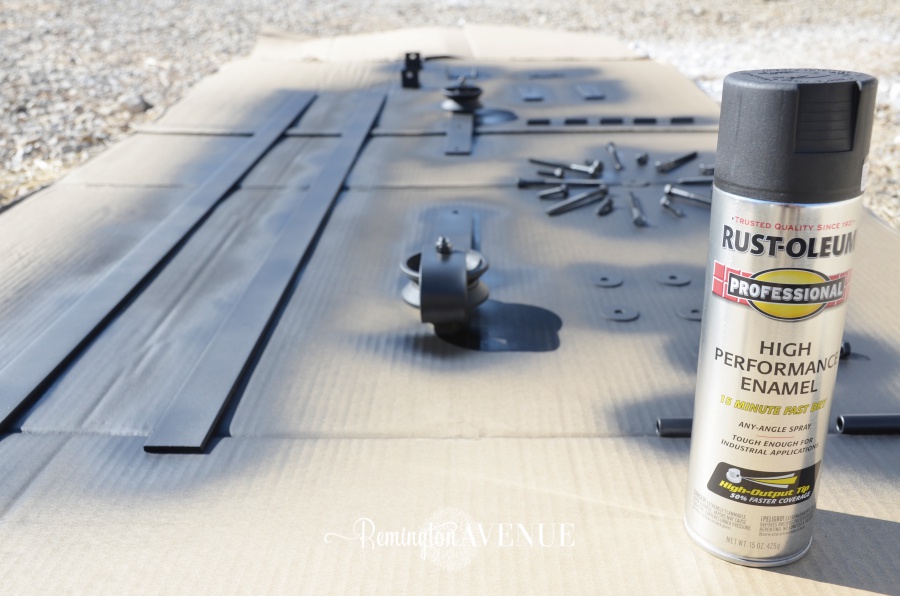
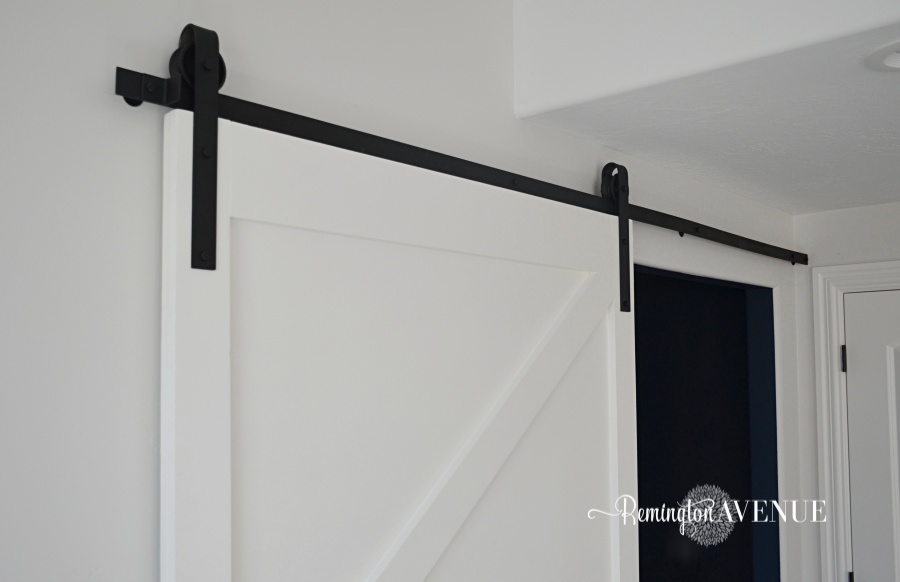
I installed the Barn door with this rolling door kit from The Barn Door Hardware Store. I selected the 8ft track (double the size of my door). I was thrilled when it showed up. The Barn Door Hardware Store provides a high quality product and comes in unfinished raw steel. How awesome is that! You can choose whatever finish you want by spraying it with Rustoleum High Performance Enamel Paint. I selected the Matte Black. UPDATE: There are so many more options now then when I built my door. Here is another option I found that a lot of my readers used when they built their own doors. It has great reviews and a great price point. No painting needed. Click HERE for budget friendly high quality hardware.
I love my barn door hardware so much that The Barn Door Hardware Store has agreed to offer 10% off any hardware to all my readers! Just pop on over to their site and enter the promo code: Remingtonavenue when you check out. Amazon does have some barn door hardware available as well. You can shop it by clicking the add below.
EACH SLIDING BARN DOOR HARDWARE KIT INCLUDES:
Two hangers/straps (1.5″ WIDE) with 3″ x 1.5″ cast iron wheels for years of wear – rated for 300 lbs weight limit
1.5″ steel track with positionable end stops – track available in almost any length
All hardware needed to attach hangers to your door and track to the wall
Two anti-jump stops to prevent sliding barn doors from accidently coming off the track – for your safety
One easy-to-install, floor-mounted U-shaped door guide for doors that are 1 3/8″ to 1 3/4″ wide
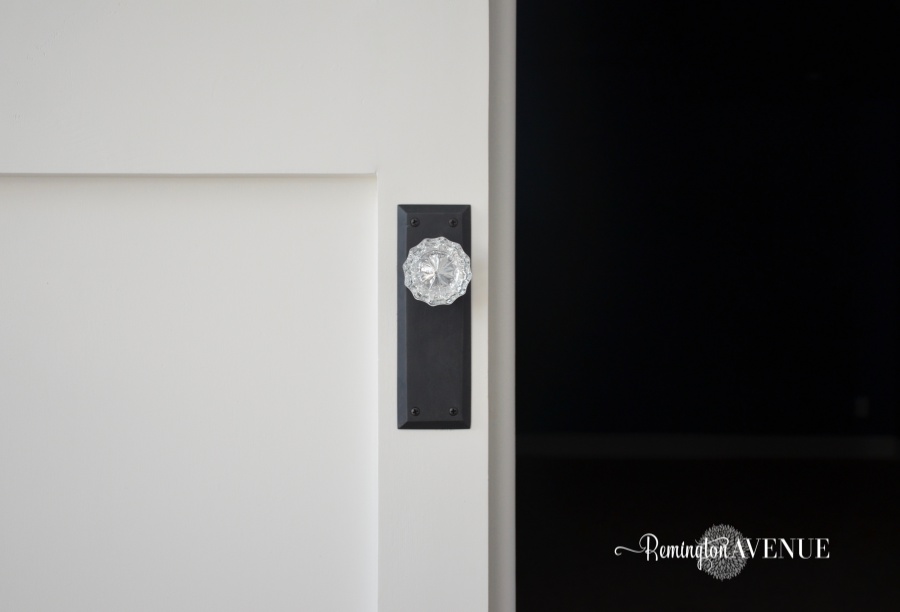
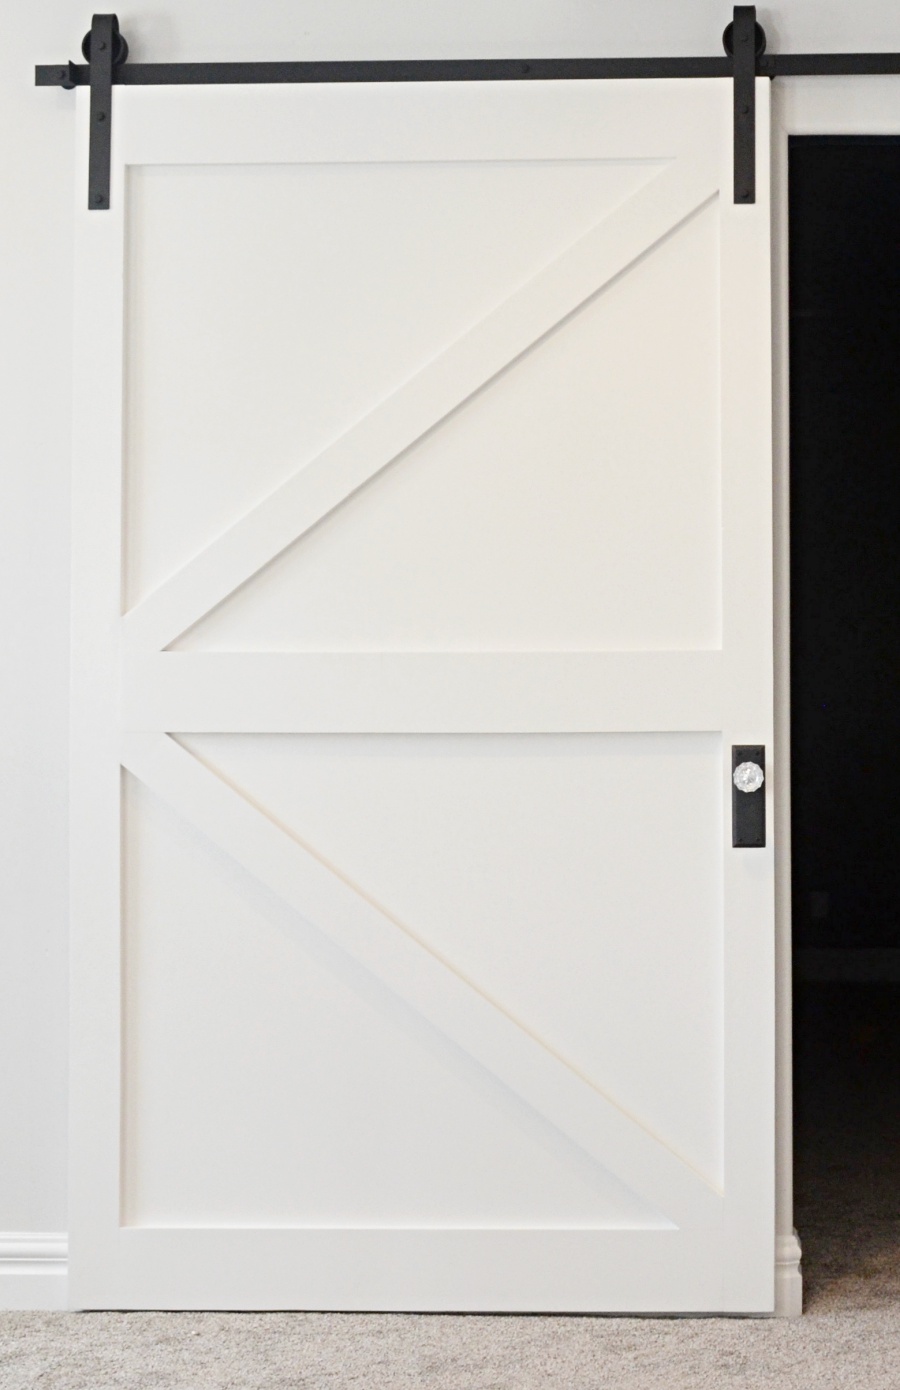
The finishing touch to the barn door was the unexpected crystal door knob .
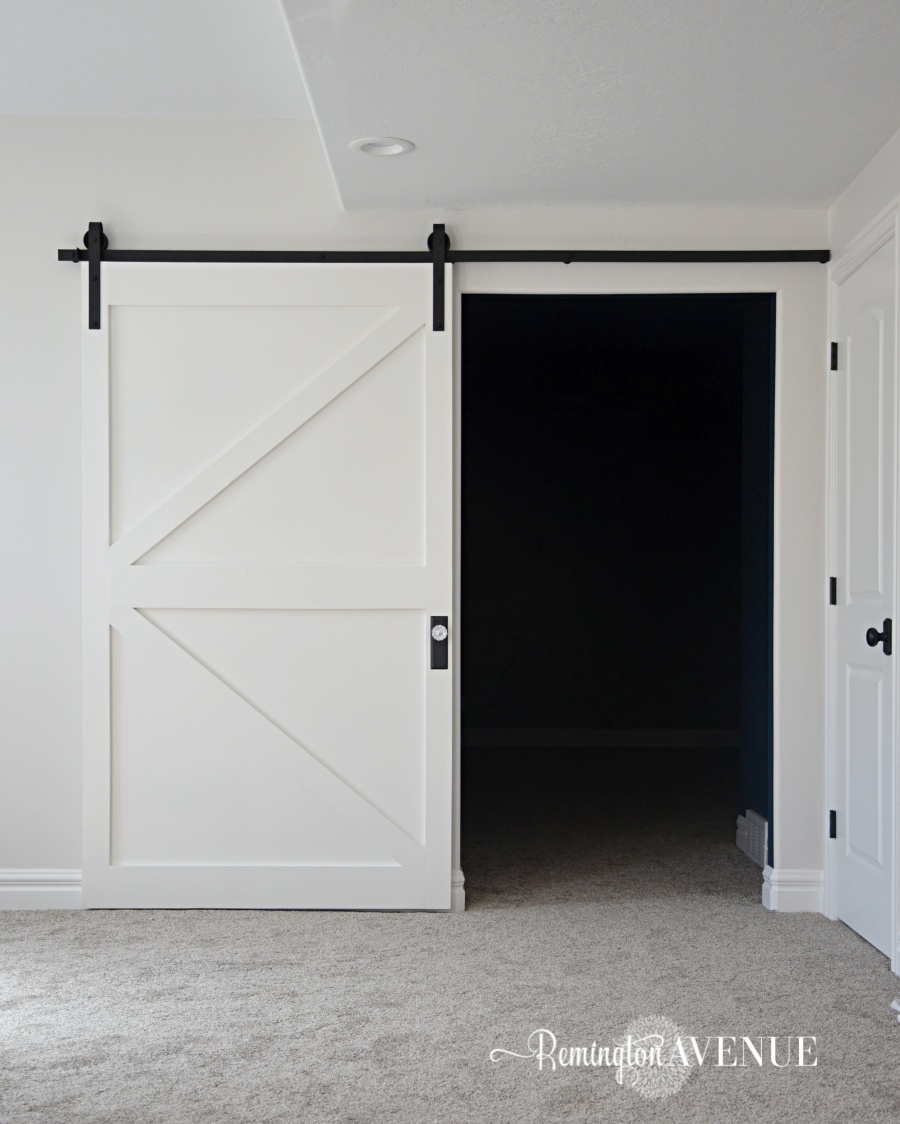
Pow! DIY British brace barn door for $50 and nobody would ever guess it was built for that cheep!

I love this DIY barn door so much! Not only will it block all the light for our soon to be theater room, but it looks pretty rocking too.
I hope you loved my budget friendly “DIY British brace barn door for $50!”
Get the tools & supplies (Tap & scroll images below to shop)
Barn door hardware (click on image below to shop
More Crystal Knobs
*some affiliate links used
BOUQS FARM FRESH FLOWERS DELIVERED RIGHT TO YOUR DOOR.
Click on the image below and manually type in promo code:
XOMYSHA at checkout
For 20% Off.


 Add to favorites or read later
Wow, I run a mile when I see power tools. You are one talented young lady:)
Can you show the back side?
hi trevor, the backside is just flat painted white. I didnt bother doing the British brace these just because barn doors are left open about 90% of the time. You could do the same thing on the back if you wanted though
I would want to do the same design on the back, does the barn door hardware brackets allow for a change in thickness?
Hi scott,
I contacted my rep at Thebarndoorhardwarestore and the hardware accommodates up to 2 inches but a header can be used for thicker doors. Since your door will be thicker when you add the brace to the back, just add the new measurement in a note upon purchase. That way you can get the header you need and they will send you a larger floors guide at no additional cost. Hope that helps. Just follow the link in my post.
What is the thickness of your door? Thanks!
2 inches
Did you have to remove old door trim prior to doing this project?
No, the barn door hardware I used allows enough room away from the wall to leave the existing baseboards in place.
Your post is valuable , thanks for the info http://myhealthandwellness.pen.io
Jesteś niesamowita 🙂
YOU are amazing!!
Mysha
Very nice step by step instructions…Your door came out gorgeous!
Great job
Thank you so much Tony
First of all awesome job.When I see these doors I alway worry about the door swinging out when opening or closing.Also does the door rub up against the existing trim along the bottom causing rub marks on door and trim…Thank you….
No it does not. The hardware is designed to keep the door off the wall and there is a floor piece included that keeps the door from swinging. Good Luck and thank you
Clicked on your hardware link and the least expensive kit i found was $139.
yes that is correct which is great for a full hardware set. The $50 refers to the materials to build the door. Good Luck
The similar hardware kits at Home Depot run between $180 and $225. So $139 is awesome, especially when you consider they will accommodate a thicker door for free.
I saw $159 at Lowe’s came in black and stainless steel. She did get a great price by buying it on line.
Thank you so much
What keeps the door from scrapping the wall when opened? It seems like it might sway a bit if it’s only attached at the top.
There is a piece included in the hardware that keeps it from swinging Also my door doesn’t even touch the wall because of the way the hardware is designed.
so the door is $500 but the hardware is 150.00?
The door is $50 but the hardware is $150 which was the best price I could find for a good product! Thanks and good luck!
The “title”or “lead-in” $50 price is very misleading. Say $200…more realistic. Great job though! Amazing lady! Loved all the little tips!
I have been debating putting a barn door in our master bedroom leading into the master bathroom for a long time and I think this blog post has persuaded me to do it. I have a question about the back side. When you are in your theater room is there hardware on the backside of the door to open and close it? I never know what the barn doors look like from the backside (no blog post usually shows it). The master bedroom to master bathroom to master closet is a high traffic area for my husband and me, does your door keep enough of the lights from going into your theater room? The crystal door knob is perfection and your barn door track/hardware is a great deal, they are usually so much more expensive.
Yes, you will love it! the barn door keeps out most of the light, buy there is a slight crack that comes in. Nothing bothersome though. Also I did not add hardware to the back, but you can get inset handles or regular ones if you prefer! I think its just as easy to open from the side!
Do you think it would turn out good if I stain the door instead of paint ?
Well its real wood grain so I dont see why not. Just make sure your cuts are extra precise and use a clear caulk to finish.
How did you manage this project for $50 when the track your recommended is over $200?
Hi laura sorry for the confusion. $50 for the cost of the barn door itself. Does not include hardware. However the hardware listed was the best quality for the price!
Hi,
I assume that price also doesn’t include the handle? I’ve been trying to find decently priced crystal knobs and I cant. Any suggestions? The one you listed is almost $200 is that correct?
Hi Shannon I just linked a few more options on my post if you want to check those out. Prices vary. The one I linked was more pricey but came with 2 handles. Thanks for stopping in
DID U PUT UR HANDLE ON THE WRONG SIDE? EVERY OTHER DOOR I SEE ONLINE HAVE THE HANDLE THE OTHER SIDE
Hi bryan I put my handle on that side because of the direction my door slides open. Place yours on whatever side your opening is
Awesome tutorial! How did you route the bottom of the door so it sits on the track?
The hardware I purchased had a floor mount that keeps the door on track. Do glad you liked the tutorial
Most misleading title ever.
“DIY $1 car, excluding the engine, the Windows, the lights, the gaskets, the tires, the brakes, the…..”
Hi alex I’m sorry you feel this way. The $50 price includes everything except the hardware.
hey alex if you would stop the downgrading , the door job would already be complete ! if it upsets you that badly I shall lend the $$$$ to you ….. heck I will give you the dough , do you WANT me to install it also *^%#@!*^&(
Really people. Even with the cost of the track it’s an awesome price. These set ups can cost an upwards of $1000. I’ll take the $200 cost. I was going to pay someone that, but because of this post I will do it myself! Thanks for this post and have no doubt I can do it myself and save tons of money! Thanks
Thank you so much Mark! I appreciate you stopping and good luck on your barn door!
Is the other side just painted? Curious if you have photos from the other side.
Just flat and painted white.
I have been dying to put a barn door in my master bedroom to bathroom area and have read blog after blog and searched between so many stores. THANK YOU FOR THIS POST!!! It’s perfect. I am super excited to get this project started and completed. Great job!!
Heather I am so glad I could help solve your problem. Id love to see the door when you complete it and If you could so kindly park the “tried it” button on my pin that would be so great. can’t wait to see
Could you please tell me what this door weighs? Great instructions and details. I want to do this with my furnace room and laundry room.
Hi Teresa, I actually don’t know the weight. Sorry I can’t be of help there but it is substantial
Thank you.
What type of saw did you use for all the cutting? This will be my first project without someone cutting the wood for me and I would love to purchase my own saw for future use.
Hi Nikki that is so exciting. I use a miter saw for most everything.
What type of plywood did you use and has it warped over time? It is beautiful btw, and you have made it look so simple. Thank you for a great post.
Hi Suzanna, I actually linked the exact plywood product I used on this post. There has been no warping or malfunction of any kind. Thanks so much and tag me on Instagram or email me a photo if you make the door. Id love to share it with my readers
Have you noticed if the hanging plywood has warped?
Hi Trisha, No warping. Its holding up great
Hi Mysha! Thank you so much for the thorough instructions. We made ours a bit smaller for our pantry door. It turned out perfect and I love it! We ended up getting the track off Amazon and put up a board behind to match up with the side and clear the molding. So the entire project minus paint (already had for other parts of the kitchen) was under $100.
Amazing! So glad you like how it turned out. would you mind sending a photo or tagging me on Instagram so I can share it! @Remingtonavenue
Will this door likely clear any light switches on the wall when it slides open?
Yes it should! Mine fly’s by my electrical outlet with no problem.
Do you think you could stain this DIY door, or would it be too hard to hide imperfections?s
I wouldn’t use stain on plywood, but thats just my opinion
I just ordered my track! Thanks for all your tips. I am wondering if you have had any problems with the paint wearing off the track?
Thanks again!!
Wahoo! Im so excited for you. I have not had any issues with chipping. Still looks brand new
Such a beautiful barn door! I would love to attempt to make something like this- but I am definitely a beginner when it come to working with power tools. What simple tips do you have? Are there alternative tools to use if others are intimidating (like the nail gun)?!! Thank you!
The nail gun is actually one of my favorite tools. Once you shoot it a couple times, you’ll be hooked too. As far as saws go, I would start with a jig saw or circular saw. Good luck and can’t wait to see. Tag me on instagram with a photo @remingtonavenue
my daughter and I are attempting to make one like this this week to surprise my wife when she comes back from her trip it will go between the dining room to the laundry room. we were able to find a door kit on Amazon for under $60 and it was rated their best number one seller we got it on sale. if you shoot me a test email I’ll send some pictures to let you know how it turned out. Thanks and it was a great article and design that you did.
thank you so much Brian. I would love to see your finished product. Could you tag me @remingtonavenue on Instagram? And I would love to know how that amazon kit turned out!
LOVE this idea. Barn doors are so darn expensive. I would like to do this but my opening is 39 1/2 X 89. Would this be to big for a single door? If not, how much should I add to the measurements to make sure it covers the whole opening?