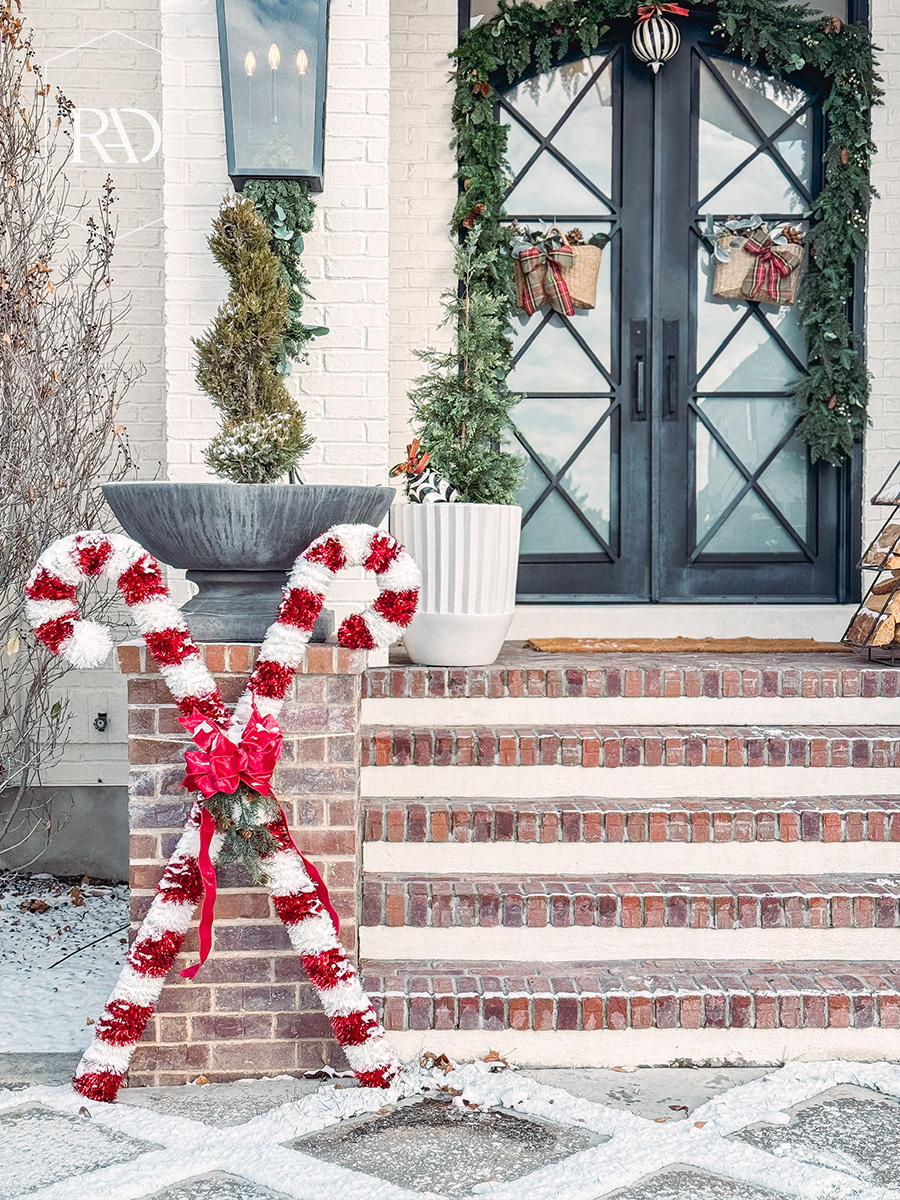
DIY Giant Candy Cane Tutorial
In case you haven’t heard, festive, giant yard decorations are all the rage this year. Let’s not forget the 10 foot skeleton for Halloween. So, of course I had to get in on the fun this holiday season. And it wouldn’t be a Remington Avenue yard without a little, or in this case, big, DIY project. But have no fear, because this DIY giant candy cane tutorial is so simple and easy to follow!
DIY Giant Candy Cane Tutorial
Supplies:
3″ PVC DWV 45 degree street elbows
Hot glue
Twinkle lights (optional)
5″ Lag bolts (optional)
Step 1: Choose your PVC pipe.
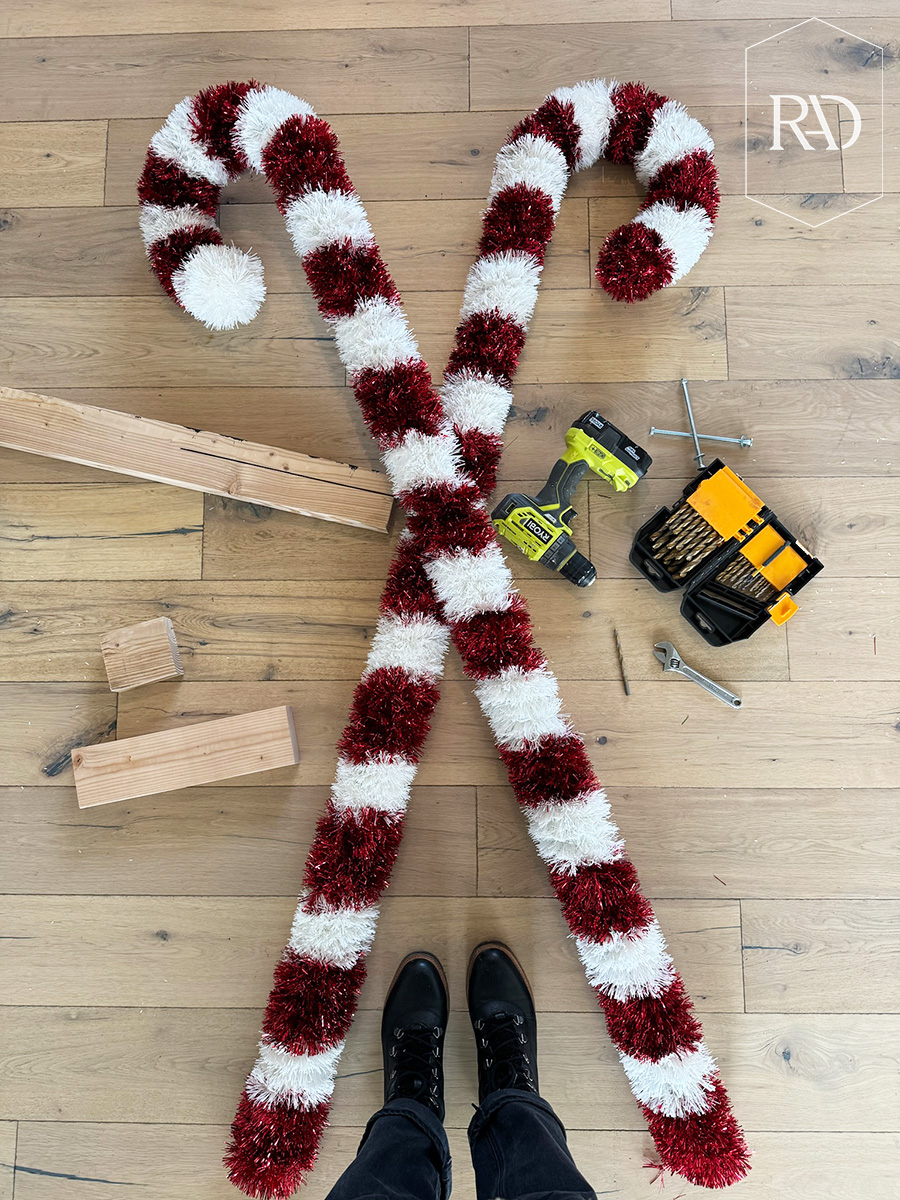
You will choose your length of PVC pipe depending on how tall you want your candy canes to be. So, I chose to do 2 – 10 foot long pieces of PVC pipe chopped down to 5 feet each. That way each of my candy canes would be taller than 5 feet once I put the connector pieces on. I got a total of 4 giant candy canes from this.
As for what size diameter of pipe to use, that’s also up to you. The diameter of the pipe will determine how thick or thin your candy canes are. I used a 3 inch diameter PVC pipe, but you can choose which size you want depending on the space you are putting them in. Just make sure you match the elbows and straight pipe to the same size.
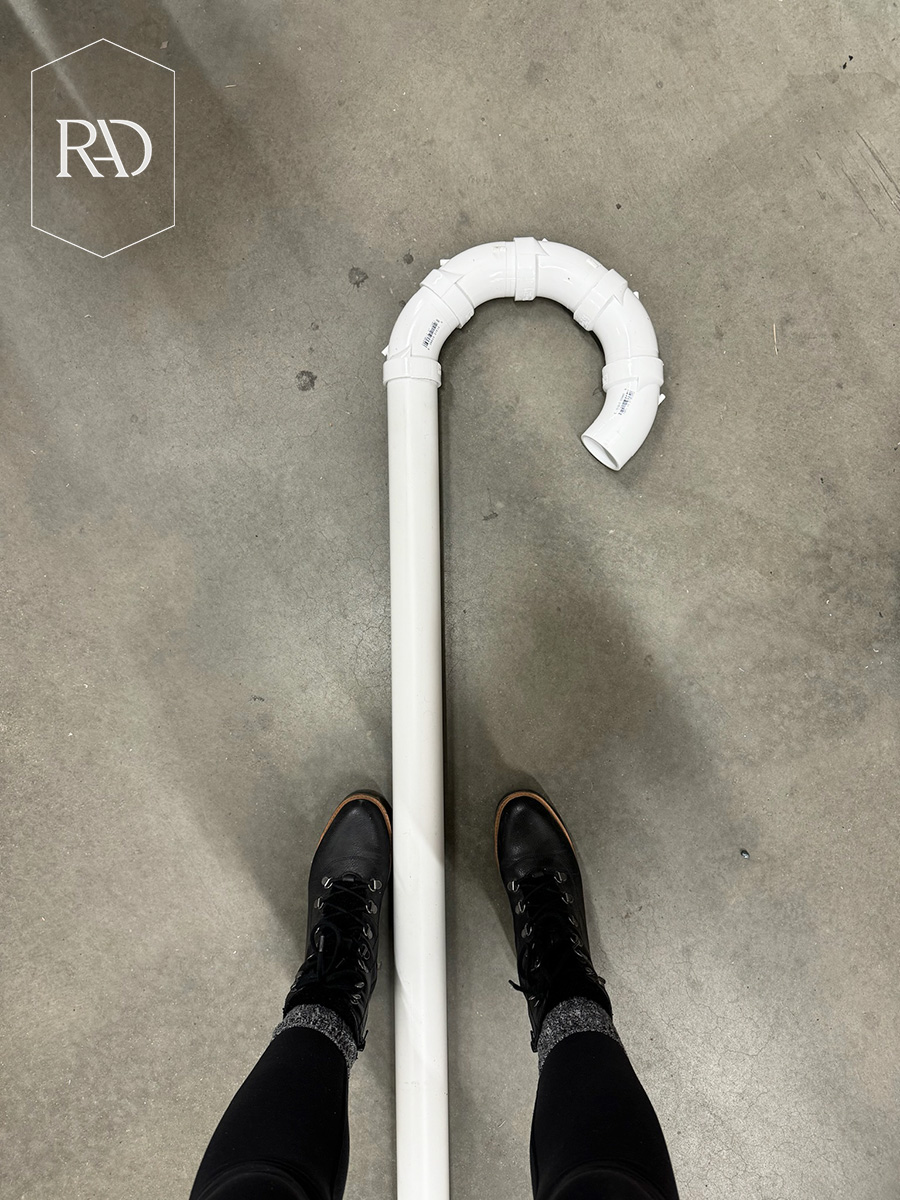
Step 2: Create the arch.
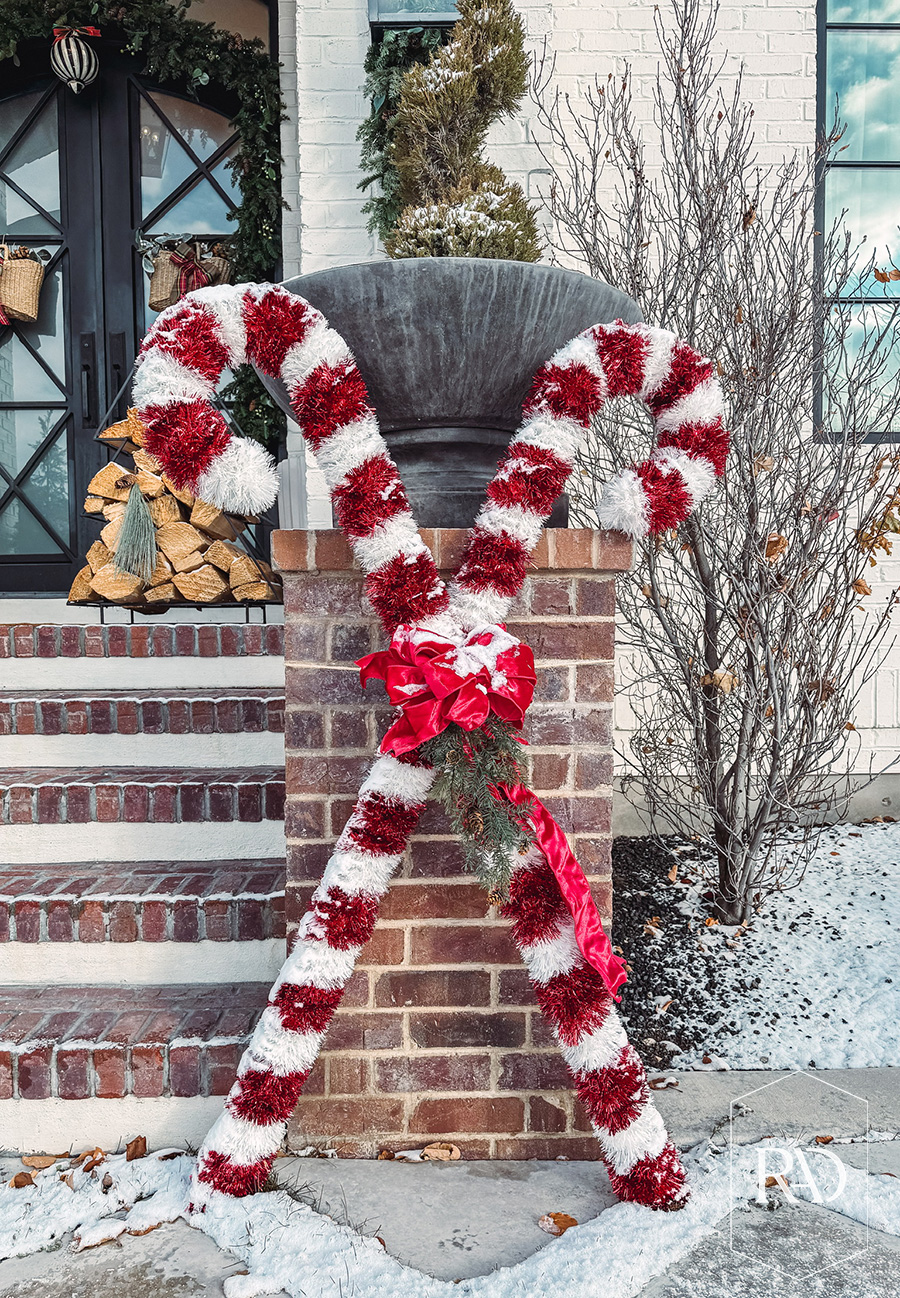
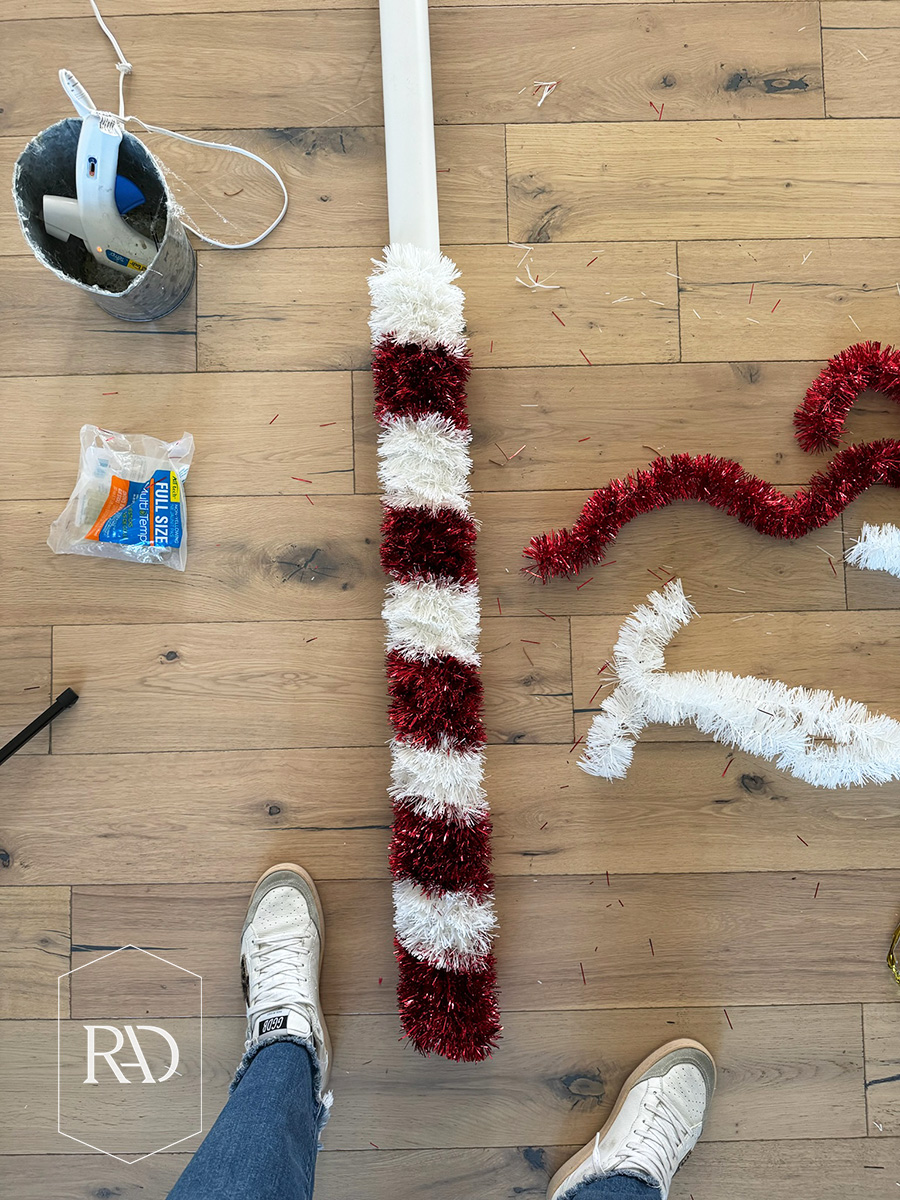
To create the arched part of the candy cane, I used 5 – 3 inch PVC DWV 45 degree street elbows. To round out the curved end, I cut a styrofoam ball in half and hot glued it on.
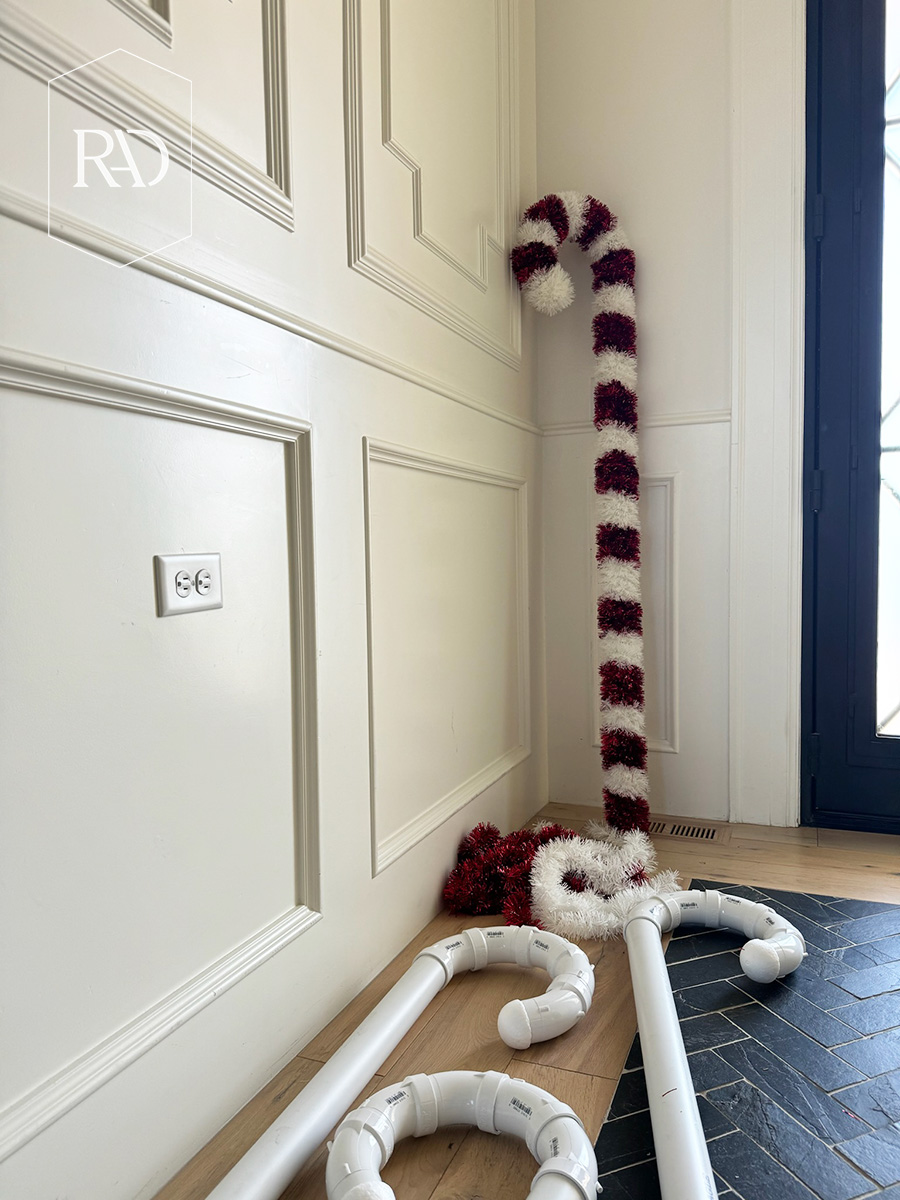
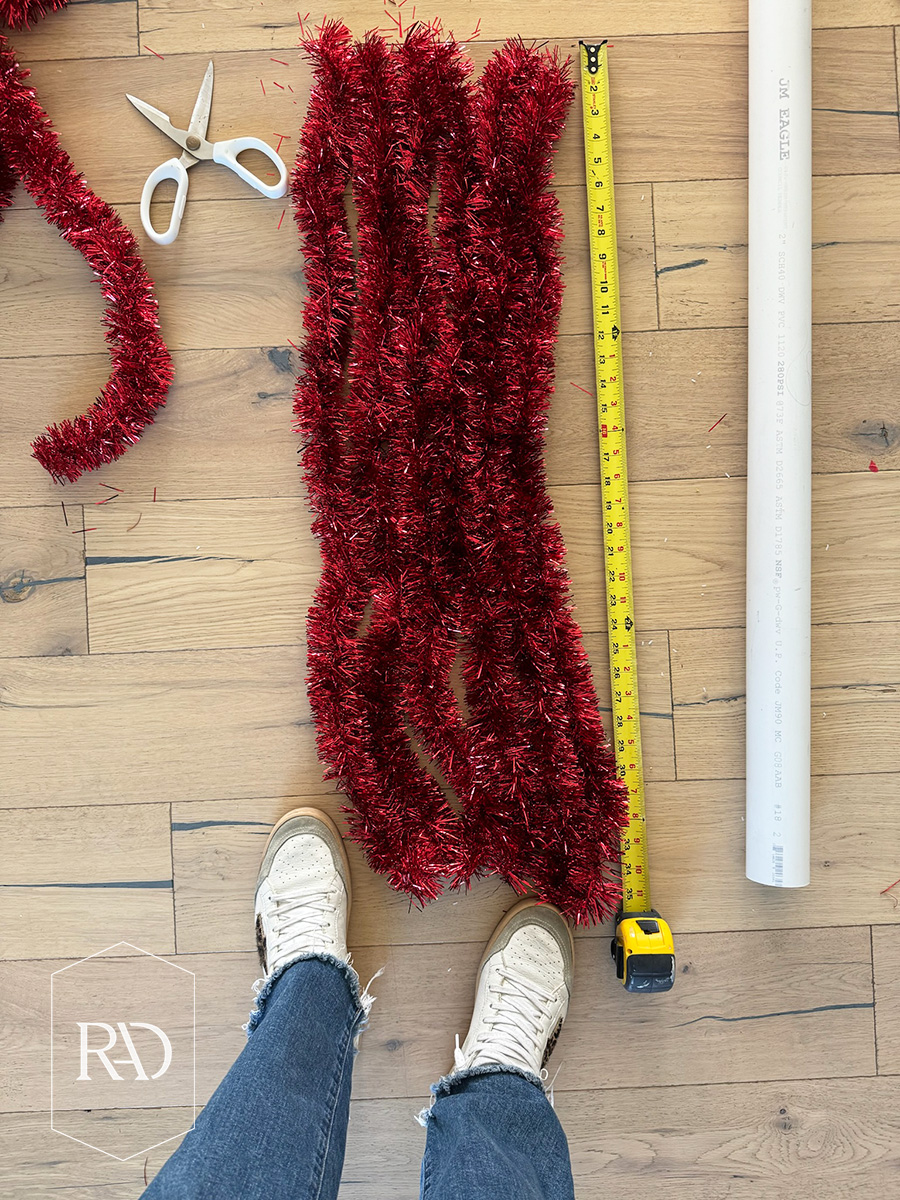
Step 3: Add the tinsel.
To create the stripes, I used tinsel. I purchased 4 of each color of tinsel and used a red one and a white one per candy cane. The specific tinsel I used comes as 50 feet long, so I cut it into 2-3 foot strips. Whatever size you choose to cut it to, make sure you cut them all the same so that your stripes will be the same width. I hot glued the tinsel around the PVC pipe in an alternating pattern. When I got to the top I twisted the tinsel in a swirl and hot glued it to the top.
Over on Instagram a lot of you said I could use double sided tape as well, instead of the hot glue. I do think that would work, but I just wasn’t sure how it would hold up outside against the elements.
Optional Steps:
Add lights.
If you want your candy canes to light up, you could wrap them with twinkle lights!
Connect your candy canes.
You can leave the candy canes as singles, since they are great for photo shoots or yard/house props. Or, I coupled mine into little overlapping bundles! I did this by drilling into the front of the PVC pipes (all the way through) with 1/4 inch drill bit and connected them with a 5 inch lag bolt (1/4 in as well) with one stacked on top of the other. Make sure to secure them together with nuts and washers. Then, you can cover the hardware with a bow!
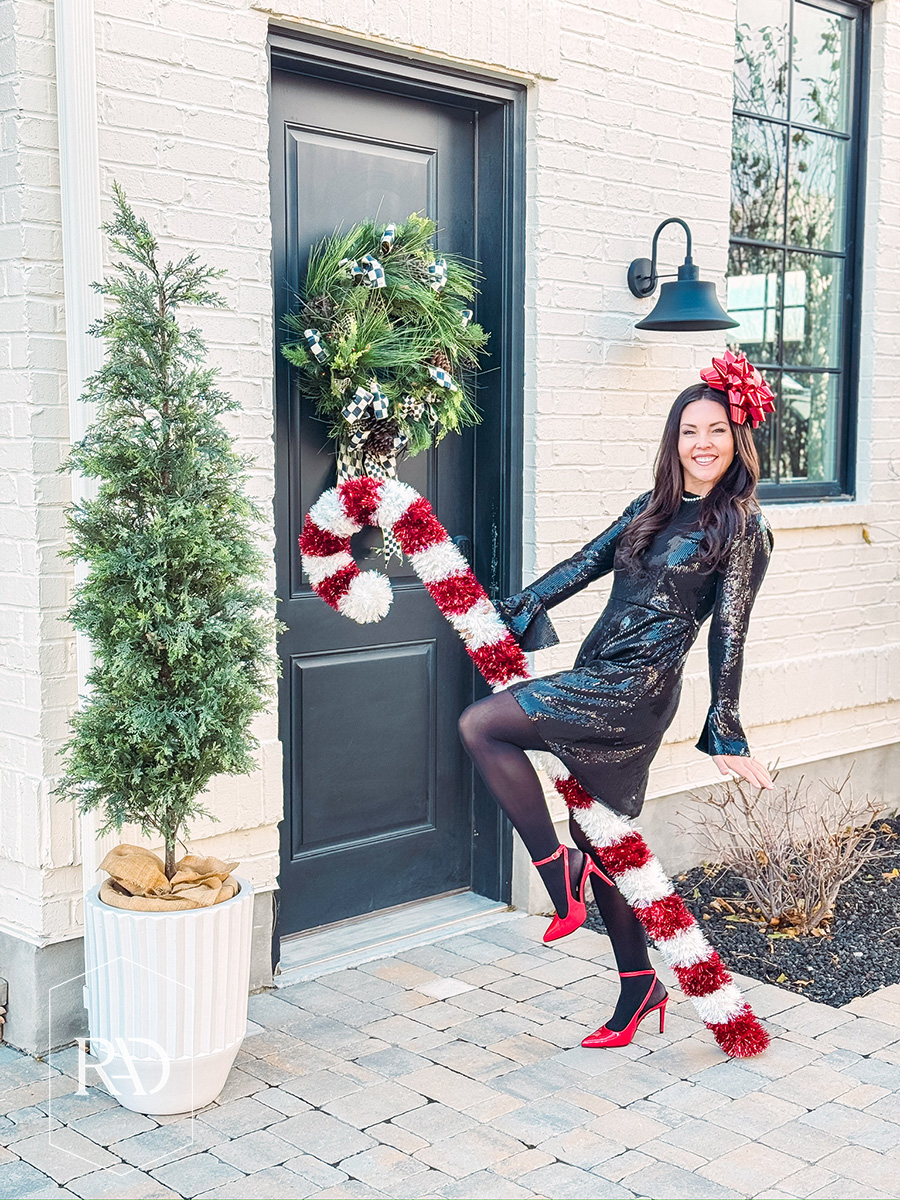
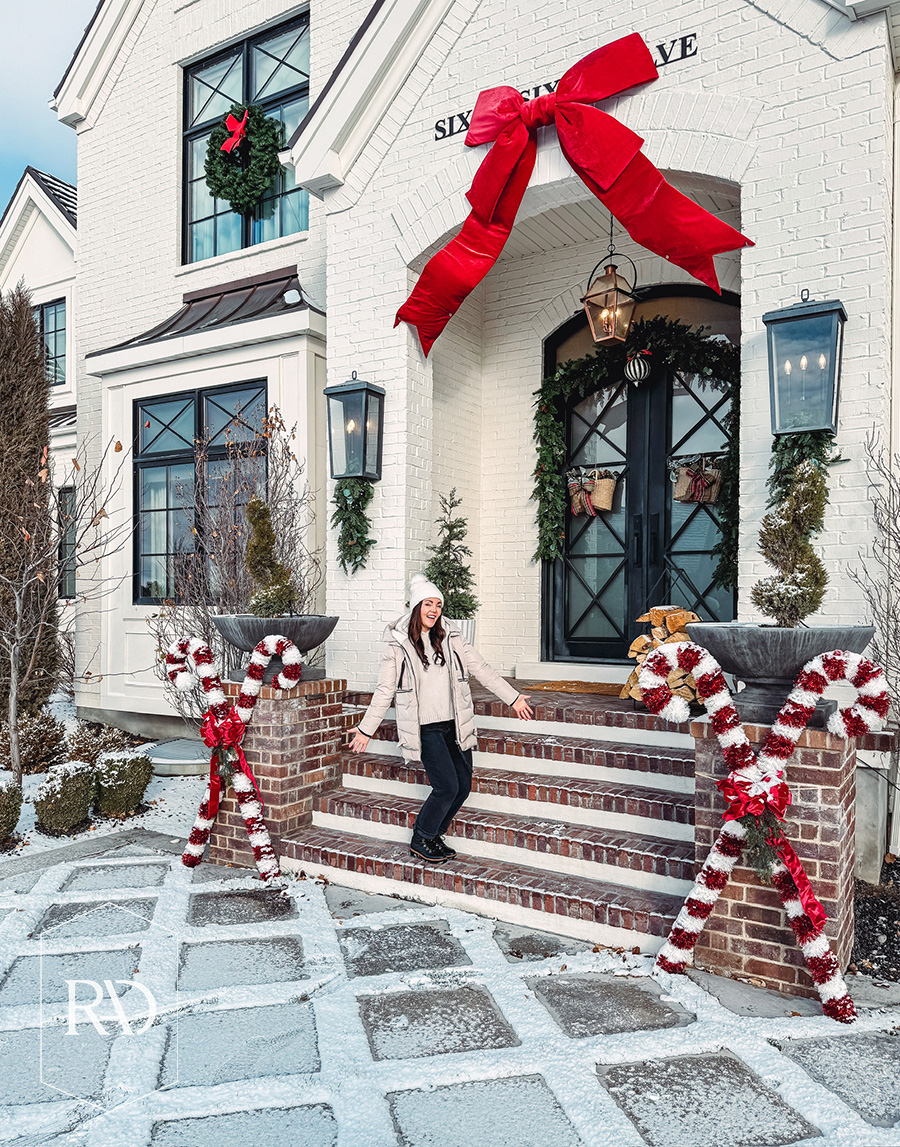
I took my connected candy canes, added bows to them, and attached them to either side of my front porch to frame it and round out my Christmas front porch transformation. These DIY giant candy canes are fairly sturdy, so they will hold up against the elements enough to be used again year after year! Mine have already withstood the snow like champs! And if you want all of the details on the rest of my Christmas front porch, be sure to check out that blog post HERE.


 Add to favorites or read later