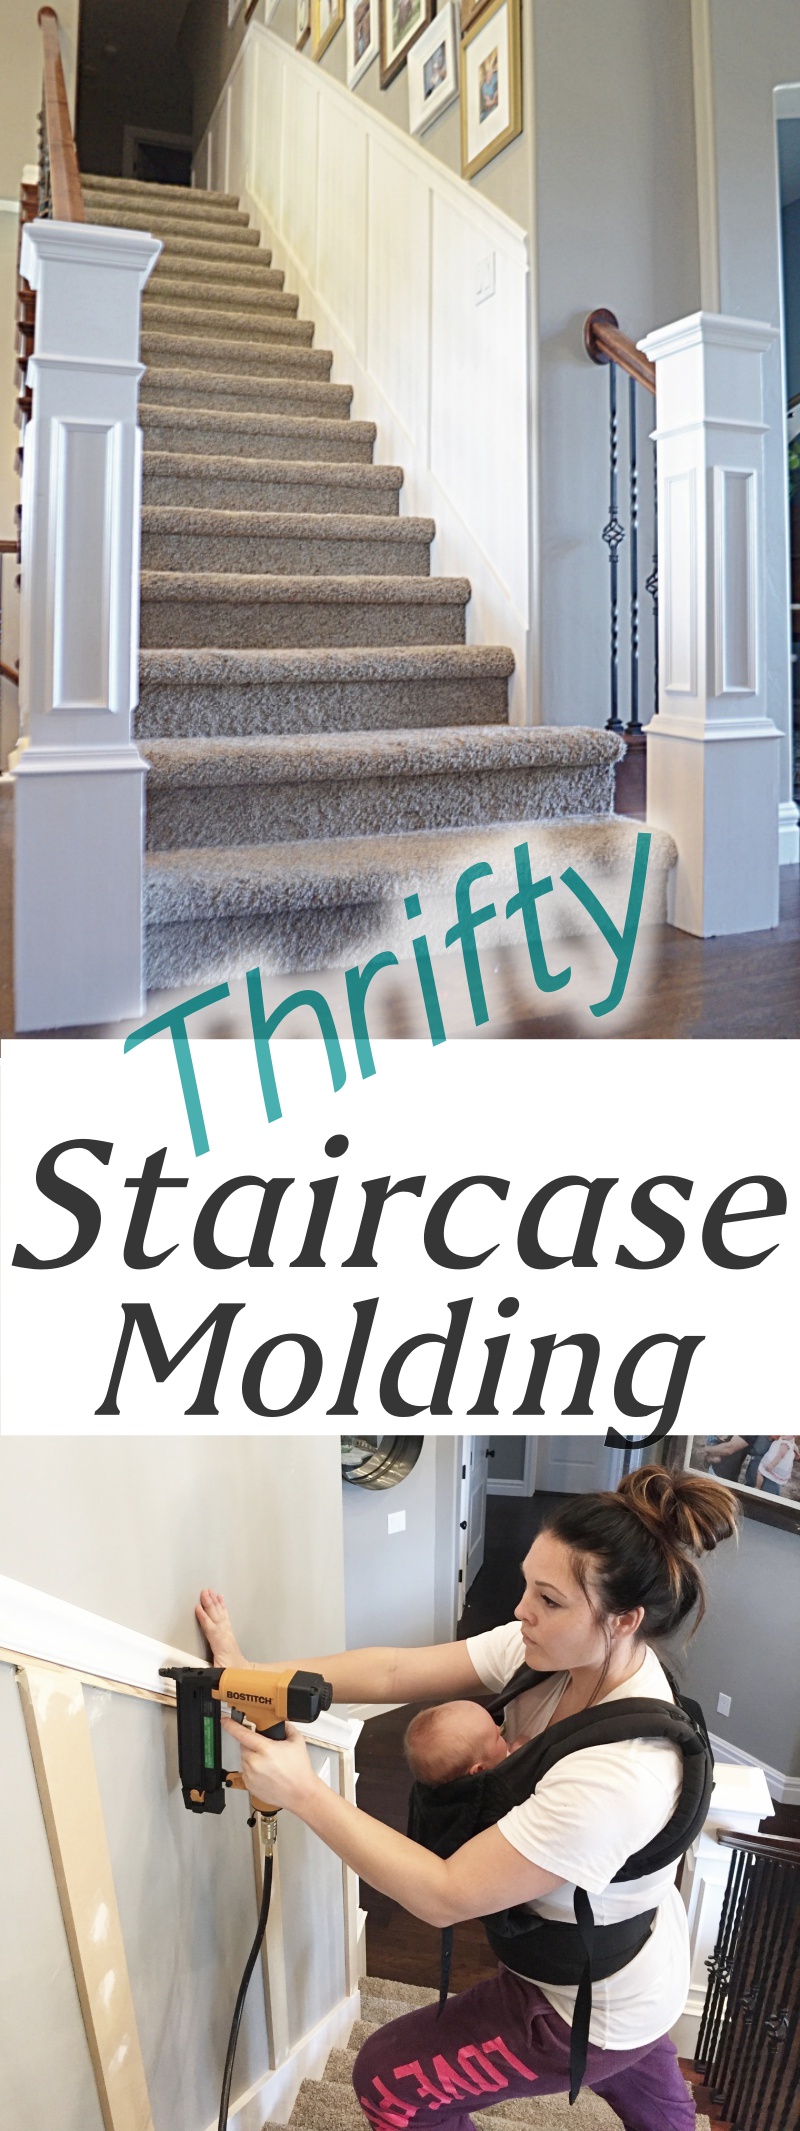
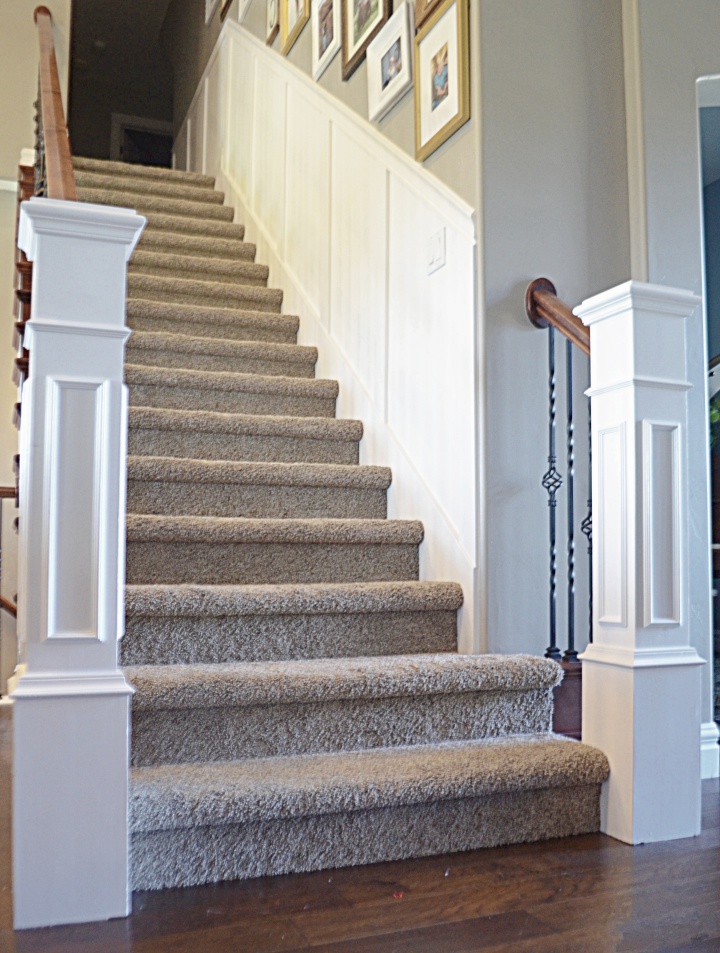
Staircase Makeover: How to Install molding
Well hello there! Im finally getting my project mojo back after having my 3rd child mid march – I’ve been a bit preoccupied and sleep deprived haha! Now that my little gal is approaching 5 months (wahoo) I finally have the energy and motivation to complete all these crazy ideas that have been floating around in my head! Or at least a few of them…slow down Mysha, take a deep breath! First things first, the stairway makeover: How to install molding.
I’ve wanted to add molding to my staircase since we moved in. My initial thought was to install thin molding squares, but after sitting on the idea all this time I came up with a less expensive solution – yay for saving money$$! Click here to see how I installed board and batten in my FRONT ROOM and above my FIREPLACE so doing something similar seemed more cohesive.
My motto is “if your gonna paint it, why buy solid wood”? So I set out to Lowes to get a sheet of MDF. I purchased an 8 x 4 ft sheet and had it cut into 3.5 inch wide planks (8ft long). That leaves plenty of extra material for future projects (aka my basement).
I also purchased 20ft of chair railing, and 20ft of thin molding for the horizontal railing going up the stairs. I chose to mix the fancier chair rail with the strait boards to blend the existing molding in my home.
Before I break it down for ya, a couple notes- 1) For some reason I thought it was a good idea to install the boards before the railing (I blame the pregnancy brain…does that excuse still work)? Anyway I learned from my mistake and wrote you the easier path, trust me! 2) Ignore the blue tape in the photos and pretend it’s chair railing already installed. It obviously still worked out, but would have been WAY easier this way! So here we go, the staircase makeover: How to install molding.

Shop The Supplies
Installing Chair Railing:
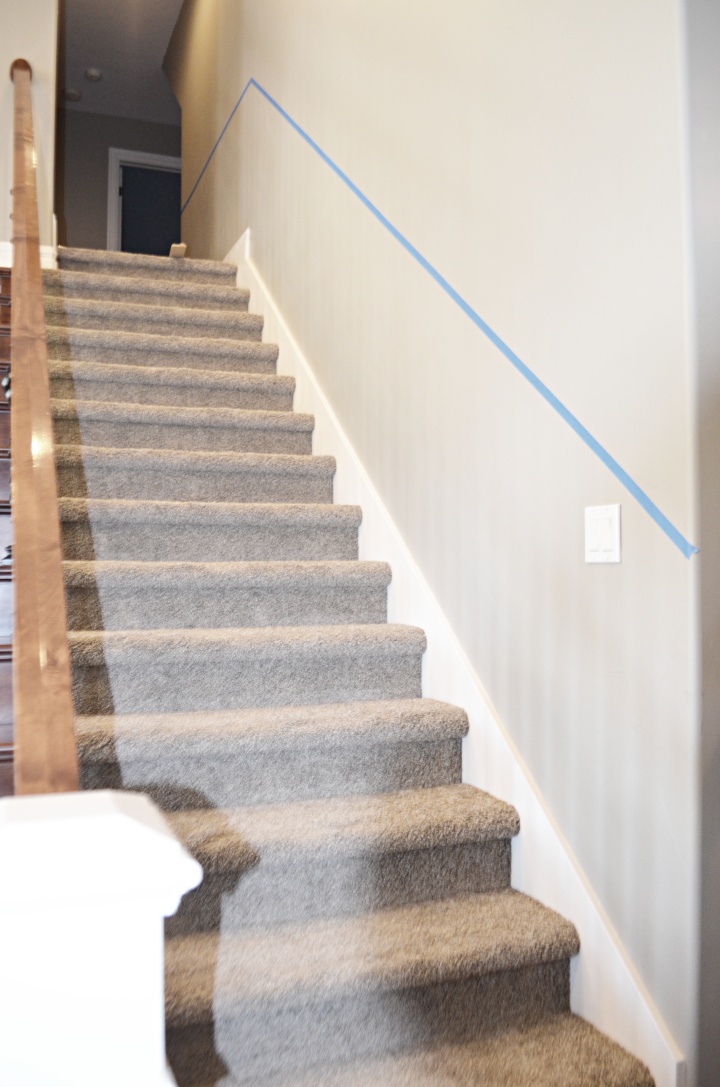
Step 1: Measure
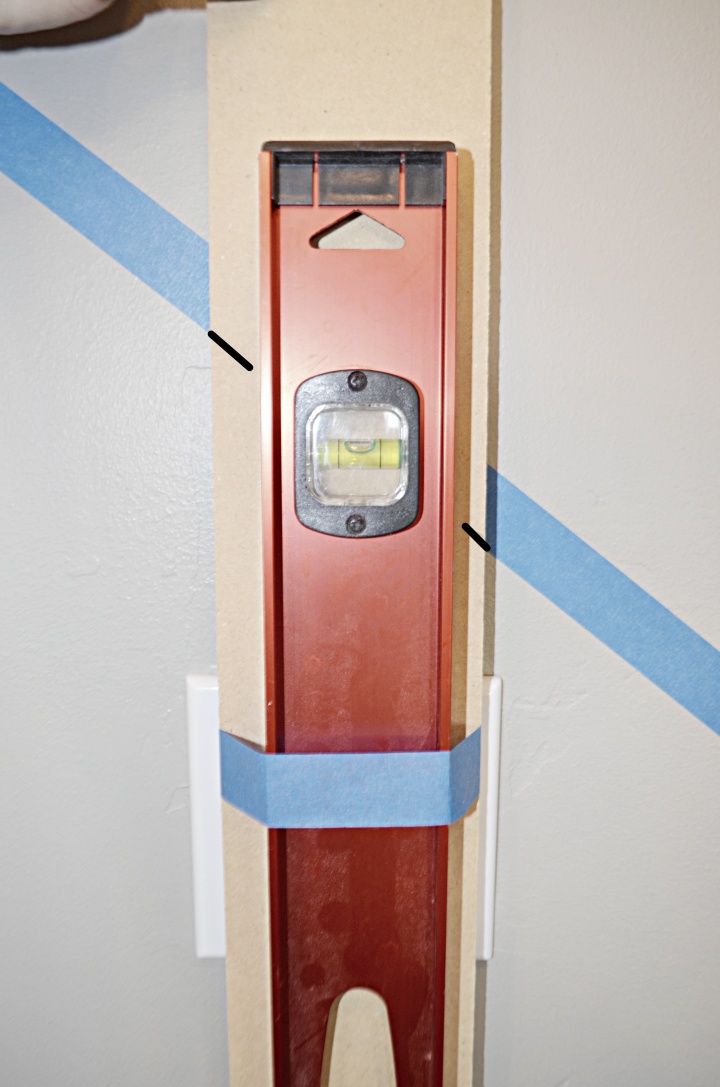
Measure up vertically from the end of each stair tread. The tread is the board or step where you place your feet. Measure up from each tread and make a mark on the wall anywhere from 30″-36″ depending on where you want your chair rail to hang. I installed mine right at 35″. Using a strait edge connect the marks with a pencil so that you have one continuous line going up the stairs. This just makes it super easy to place the chair rail at the designated height. (See blue tape… I’m telling ya, do as I say, not as I do lol!)

Step 2: Joining
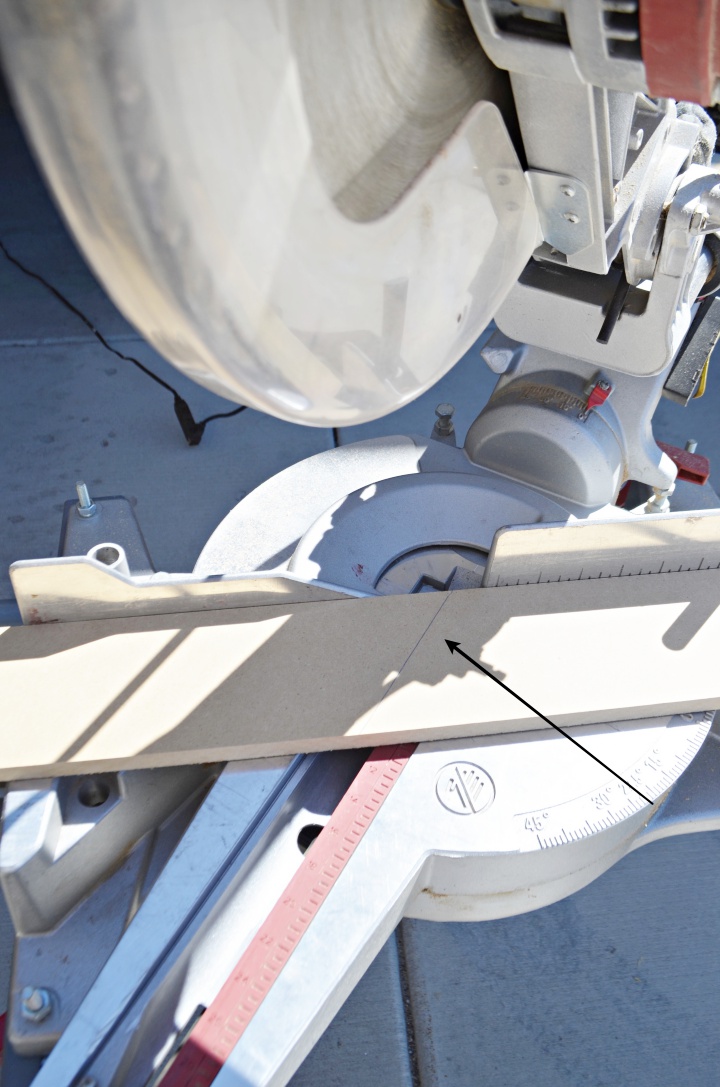
If you need to install another piece (like me), measure the distance to the end of the staircase and use a miter saw to cut another piece. I had two joints in mine. One I just butted the 2 ends up with 90 degree cuts, clean and simple.
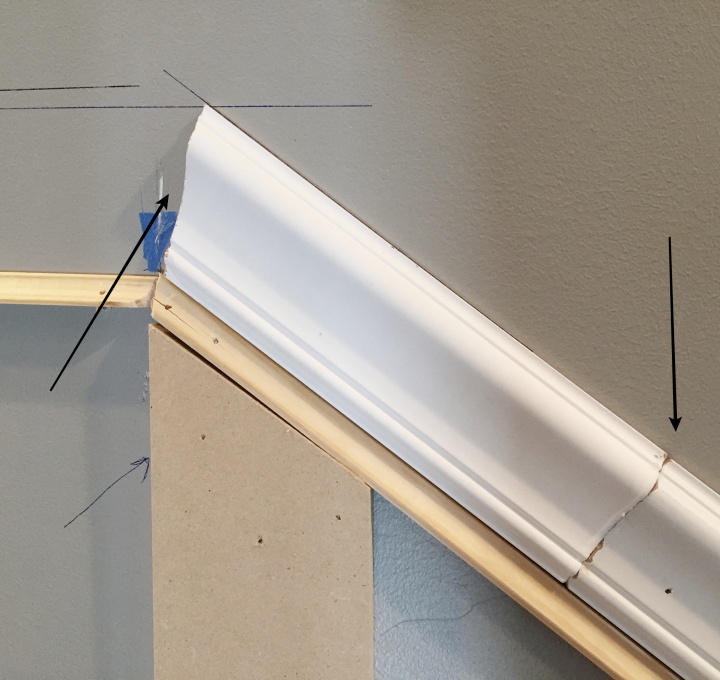
The other joint transitioned from the staircase into the upstairs hallway. This cut was a bit trickier. I aligned a piece of molding at my 35″ mark and extended it past the joint and traced a line across the top.
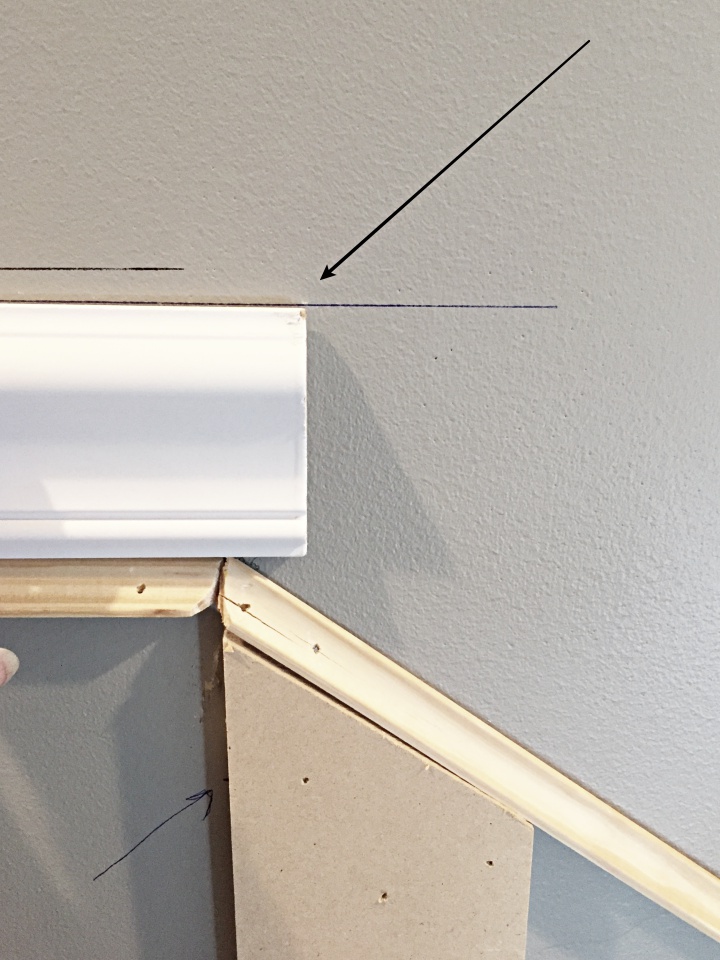
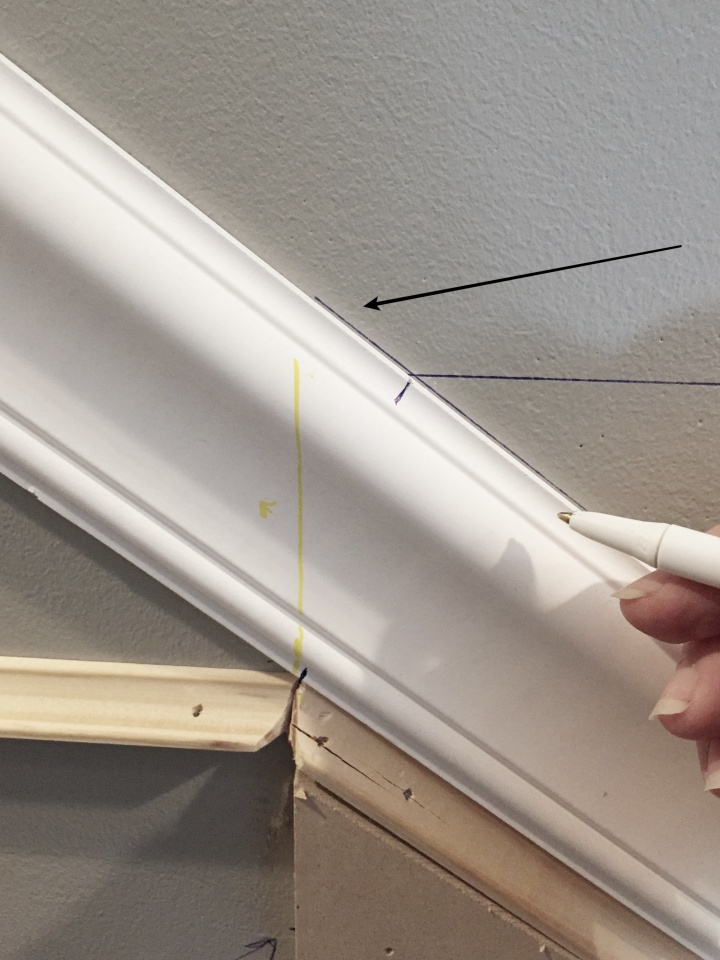
3: Glue & Placement
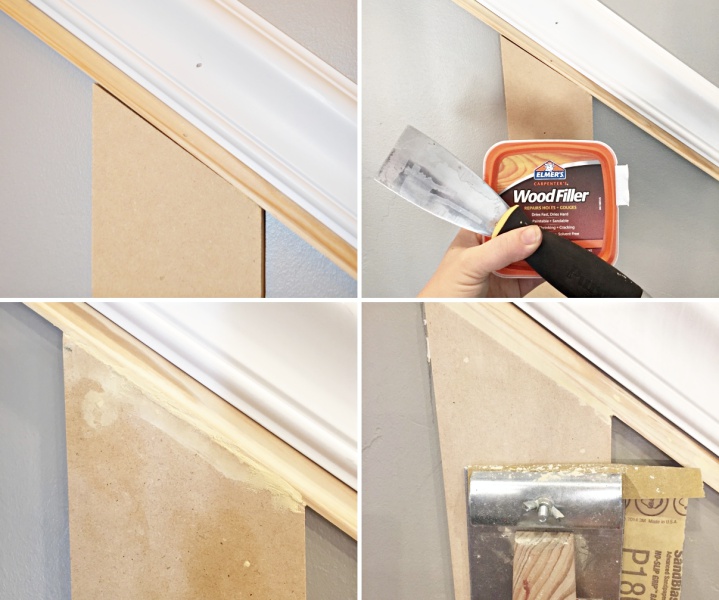
Run a bead of construction adhesive along the back of the molding. Place the molding on the wall, aligning the top of the molding with the 35″ marked line. My molding measured 2.5″ wide so the bottom of my molding was right at 32.5″ high, exactly where I wanted it. (Again ignore the mdf boards… we’ll get there I promise)
Step 4: Nail It
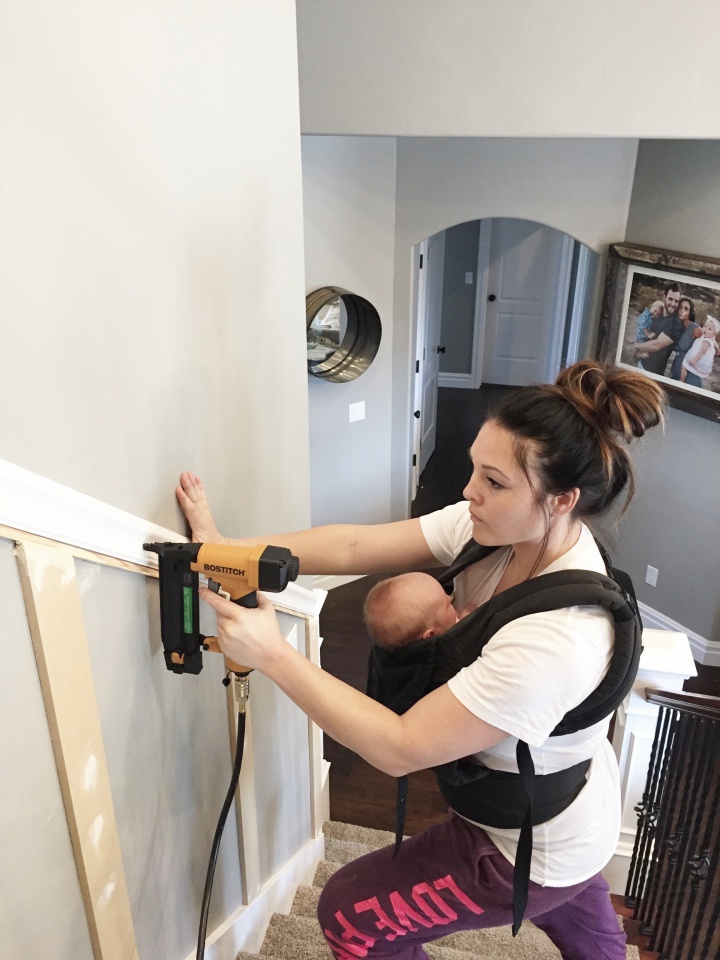
The construction adhesive will help hold the molding in place as you nail it up. I found that the railing was easier to handle and install if I started at the top of the staircase and worked my way down. Even still, If you can grab a helper to hold in place, thats even better! My hubs helped me here! Its best if you can shoot the nails only where the studs are in the wall. Otherwise, the nails won’t hold it tightly to the wall.
DISCLAIMER: I was not actually shooting nails here but I forgot to photograph this step, so I popped up there for a photo…Just so you know I’m not reckless! I would NEVER put my baby in harms way! That being said, this photo is an accurate depiction of my everyday life and DIY projects. She was attached to me during several steps of this staircase transformation, just not while using a power tool!
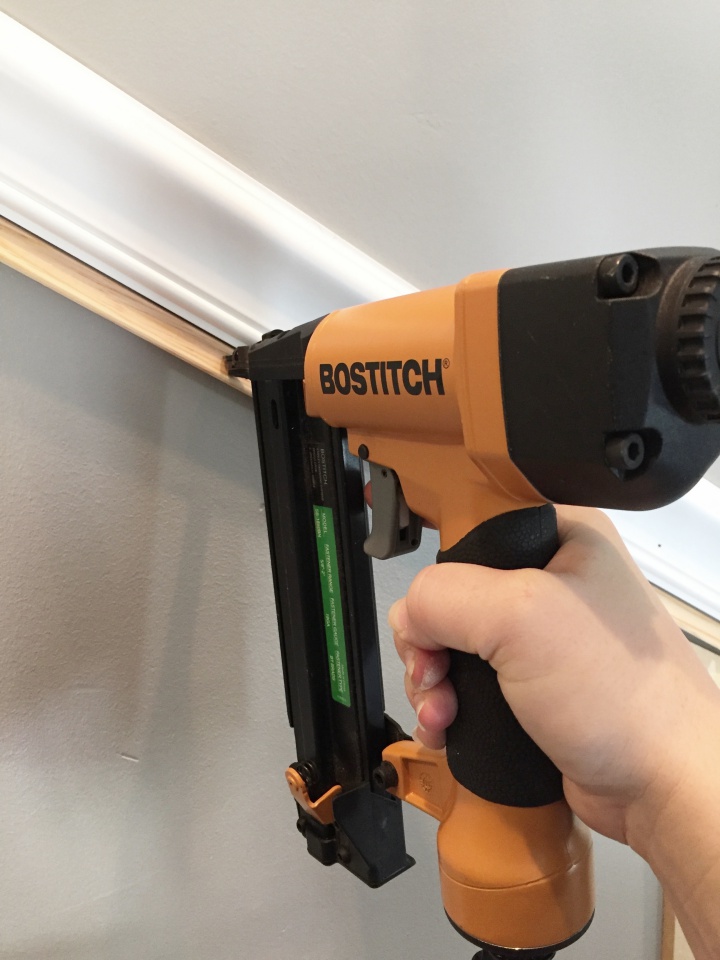
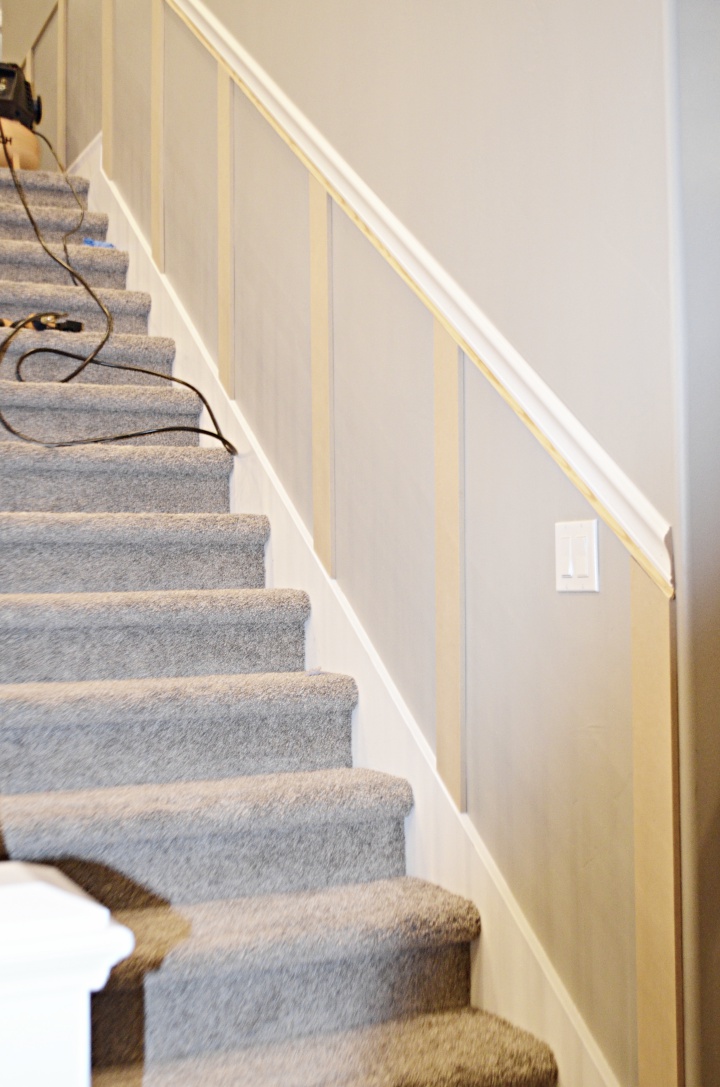
Now that my chair rail was in place, I secured a thin piece of molding right below it. I used the piece to transition the chair railing to the mdf boards. The mdf was thicker than the railing so this worked perfectly. Once its painted you’ll never notice the extra piece of molding. Another option would be to just use mdf boards for the whole project, chair railing and all!
Shop The Supplies
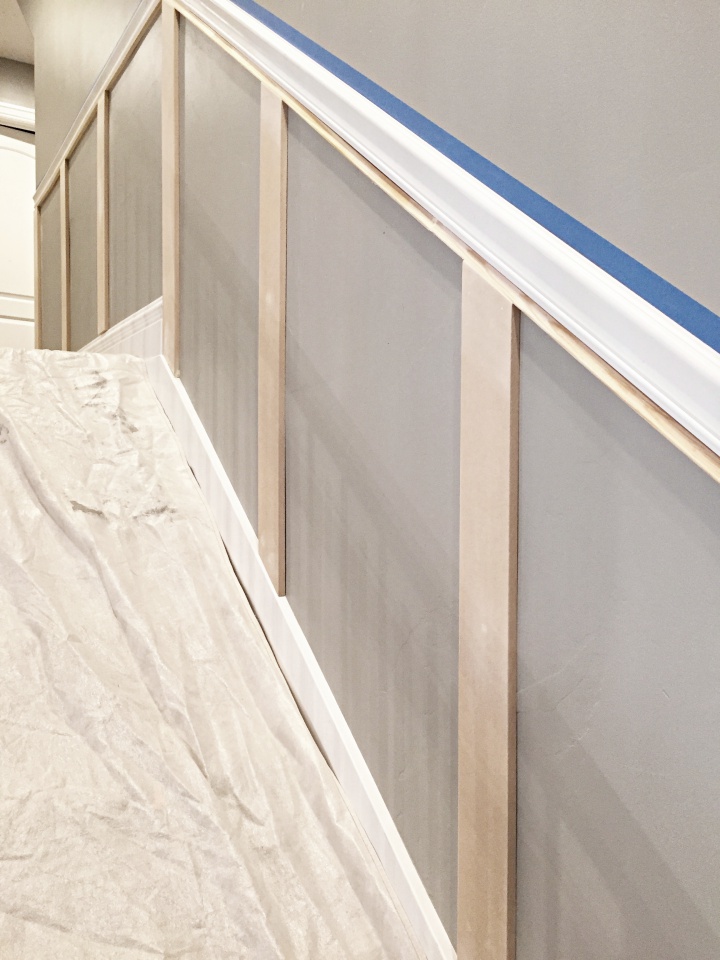
Installing Board and Batten:
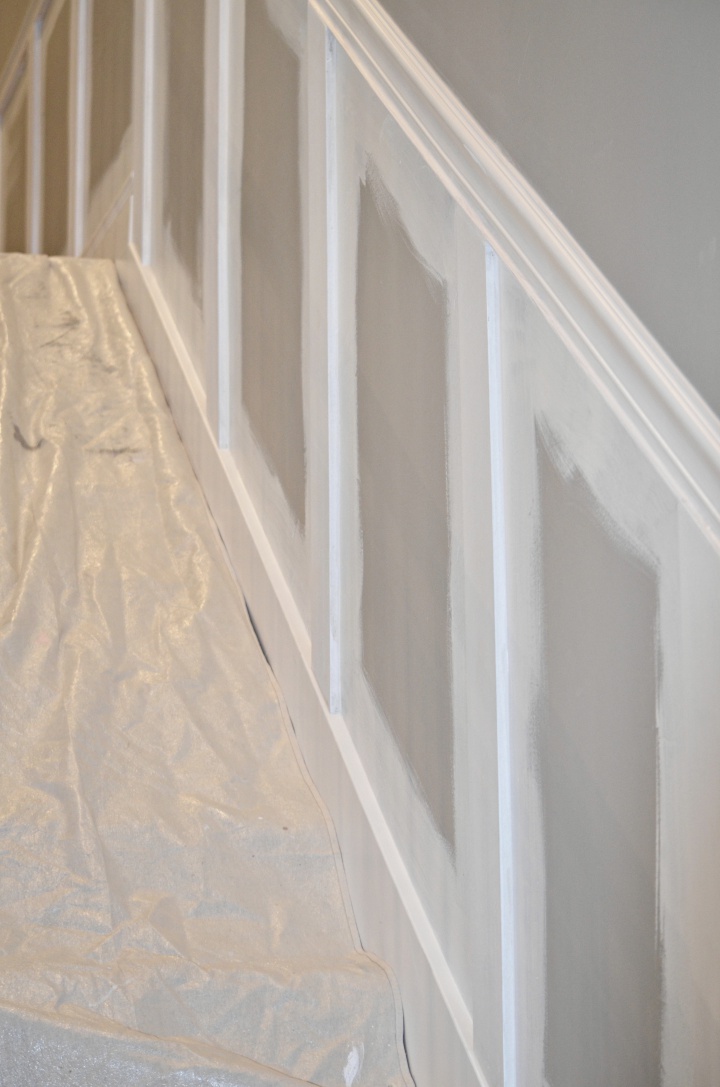
To figure out the angle of the cuts I needed, I held a piece of mdf up to the wall and marked the angle of the chair rail. (again imagine the blue tape is the chair rail)


 Add to favorites or read later
You’re my kinda girl! This turned out so gorgeous! Wow! ??????
Thanks Summer
You are relentless I love that, its me all the way, I built a shed last summer and I am so proud of it, love that Idea.
I guess comments questioning the safety of operating a nail gun with your infant child strapped to your chest do not pass the “moderation” phase……
If you read my blog post you would see the disclaimer about that specific photo.
Thank goodness. I admit when I saw that pic I was like whattt??? No safety glasses and a infant strapped to your chest with that noise and possibility of a nail hitting poor bb. Great work though. I wish my wife would be that enthused. She wants to trim out our staircase but I’m neck deep in other projects.
That’s Rosey the Riveter 2017. Single Mom edition. Lol
I agree! I love and support women doing projects but come on!….
This is a staged photo as I explained in the post. Thanks
Read it better, it was a posed photograph
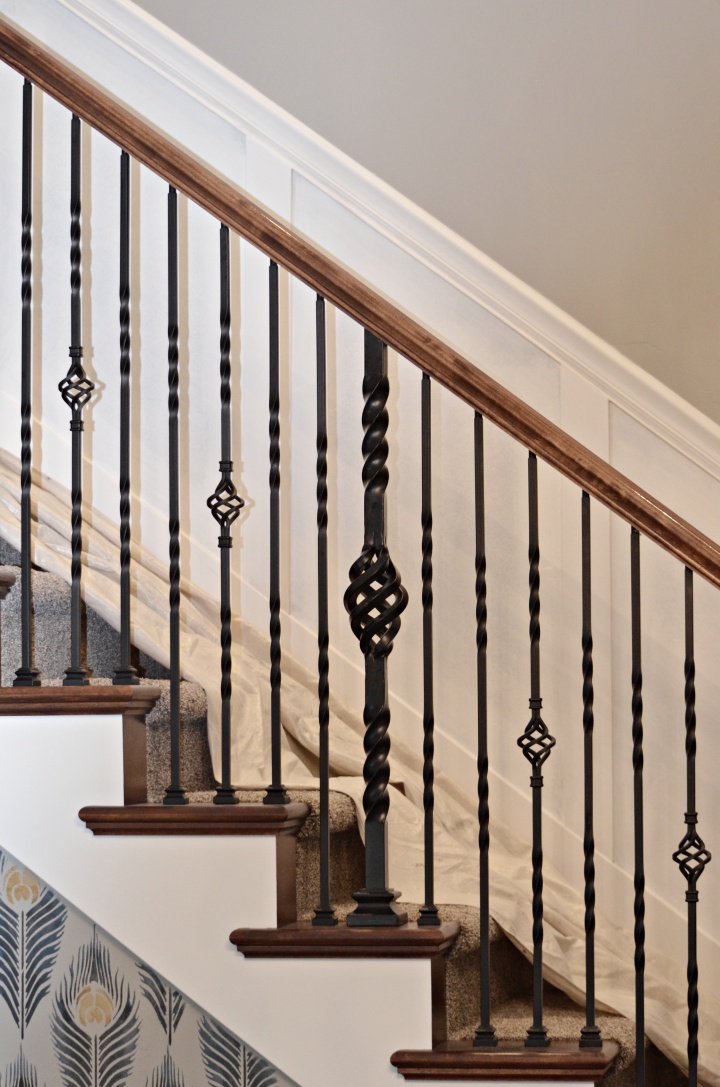
I sooooo LOVE this! I have been wanting to do this to my stairs but didn’t quite know how- so thanks for the post! I do have one question- were your end post like this or did you also redo them. I have the same black iron spindles and dark oak top but my end post is quite wimpy
Thank you becky and good luck. My stair posts were this shape but were a knotty alder stained cherry red. I filled the knots and painted them white!
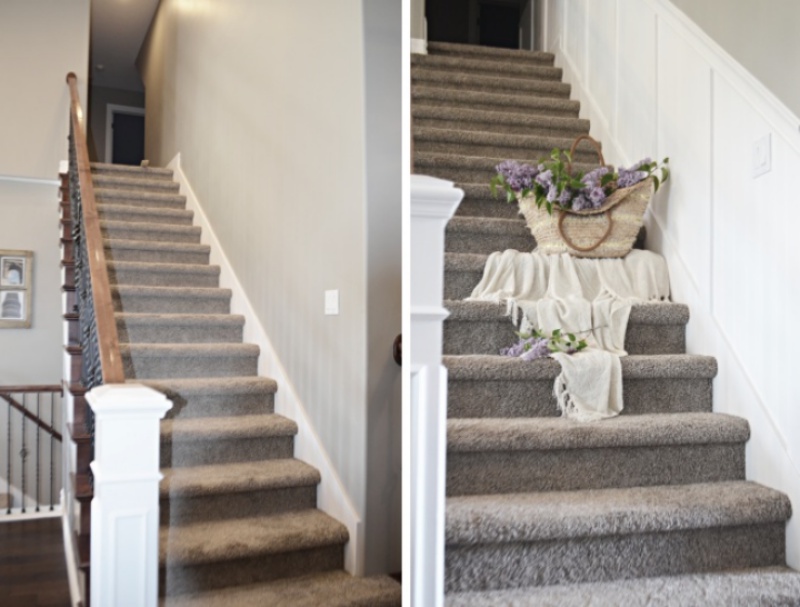
Do you mind sharing what kind of gray paint that is on your wall? Thank you
Dorian Gray by sherwin Williams Thank you
Thank you for adding the disclaimer! I found you on Pinterest. I had to open this to see what that power tool/baby pic was about! Lol! Great blog!
I thought you did an awesome job! A new mother and she is a handyman, SHE IS A KEEPER!
Thanks for this info! Was just looking at painting our stairwell Dorian gray also, and I too love your staircase posts!
Thank you Melissa.
Keepin it Real!! Gotta say I clicked on it because of the beautiful baby strapped to you 🙂 Love it
Great tutorial !
cool
It LOOKS AMAZING… GREAT JOB, disregard all the rude comments about you having your baby strapped to you… for the love of god, how do you think we got by raising our kids back in the good ole days, THATS RIGHT.. they were on our hips and doing it with one hand….MY HATS OFF YOU YOU LADY…
I hope the picture with the baby is not the real situation, it could be dangerous using a drill so close to you and your baby on a staircase. Think about it.
Thank you for your concern Martha…It is indeed just a photo as I would never put my baby in harms way. I explained in the blog post if you care you read further! cheers
How on God’s earth do you handle this?
Firstly, even if it wasn’t staged I think it’s awesome.
The problem is your pretty, and look badass and they’re jealous.
Jen, thanks so much for taking the time to stop in and offer words of encouragement! Happy weekend
Fantastic job, Mysha! I love how this addition of molding elevates the staircase to the next level. I’d love to give this a try at my house, but I never trust myself with measurements. I think I’ll get over it, because this looks great!
Thank you Krista…it really adds so much to the staircase. You will not regret it
I’m working on my stairs at the moment and your tutorial is erfect as is the finished picture. How far apart did you place the vertical mdf boards and how did you determine the spacing?
Hi jamie and thank you. I can’t remember the spacing of he boards and I am out of town so I can’t measure for you, but I would measure the total space where the molding will be installed and them divide it by how many boards you want to do for the look your going for. There is no right or wrong answer, just depends on what you want the overall look to be. Good luck
Hi
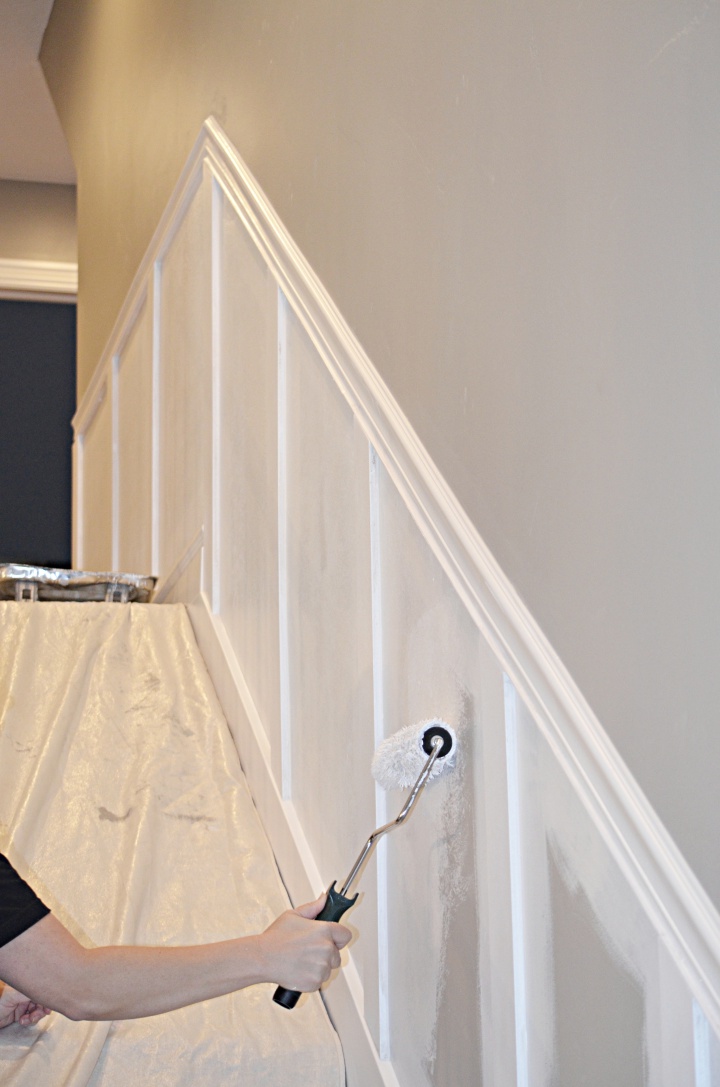
Just looking through your staircase makeover snd btw, love it. Did you use a semi/gloss on the entire bottom portion? I just had my dining room done and used the vertical boards mounted to Sheetrock. I’m trying to give the illusion that it’s all wood so would the semigloss painted on the molding and Sheetrock give that illusion? Thanks!!
Hi Cris and thank you. I used an enamel paint which dries harder and it is glossy.
Thanks so much! What is the shade of color you used for the wall above the molding?
dorian gray by sherwin williams
I found this post through Pinterest and would love to try it on my stairs! I do have a question, though. I thought in one of your pictures, it looked like your walls were textured, not smooth. If this is the case, does it stand out as not being actual board & batten? My walls all have a slight texture to them, which has made me question whether this would work in my home!
Hi Crystal my walls have a very light texture too. It doesn’t bother me at all, but if you are wanting a real smooth finish yo may want to install the backing. Cant wait to see what you do
Your work is beautiful and you inspire me! But please use hearing protection on your baby/children when using power tools and in construction areas. This is not to be critical in any way, most people don’t realize the damage. I have hearing loss and tinnitus because my parents did not protect mine when I was a child.
Hi Christine. Thank you so much for your concern. This is a staged photo but I appreciate the warning
Loved your blog…finding the time to do projects like this is a priority now. No excuses. I love DIY and find your chat interesting and entertaining. Well done. Will be back to see what your up to next. ?. Regards from Scotland. Connie ❤
Hi Connie and thank you. I’m so glad you have found some inspiration. Looking forward to more fun projects too
You go Mom! I am afraid of angles but you did a great job!
I love this!! I have 1 question though, my staircase has 2 landings so I was wondering how you converted the top of the stairs to your hallway with the molding on the bottom? Both of my landings have regular base molding at the bottom but I’m at a loss of how to line that up with everything starting at the bottom.
Monica, I am not sure what your asking?