DIY Oversized Christmas Bow Tutorial
This DIY Oversized Bow Christmas Bow Tutorial came to me on a whim and although there were some twists and turns with the original plan, it turned out better than I expected! It truly is a show stopper in the space. And like many other Christmas seasons before, a vision comes to me for our mantle and let’s just say this one…”she’s a beaut, Clark!”
I am so happy with it, and I love that it is different than other mantles I have done in the past.

Part of the inspiration for this DIY Christmas Tree Bow Tutorial was some stunning toile fabric I got from Etsy. It’s classic and festive and adds a stunning ‘pop’ of holiday.
And with other projects that I dream up, some things don’t always go to plan! I thought for sure I had enough toile fabric to create the bow and let it drape down the mantle…but once I started, I realized we were going to have to pivot!
For this Christmas Bow Tutorial, I ended up using a leftover plain, red fabric for the backing that I had from a previous project. And while it wasn’t my original plan, I think I think the layered colors turned out beautifully. I suppose holding on to a 15 year old bolt of fabric has its advantages lol.
This is a good reminder that things may not always go to plan when doing DIY, but you can be creative and come up with solutions that may turn out even better.
Here is the how to for this bow tutorial:
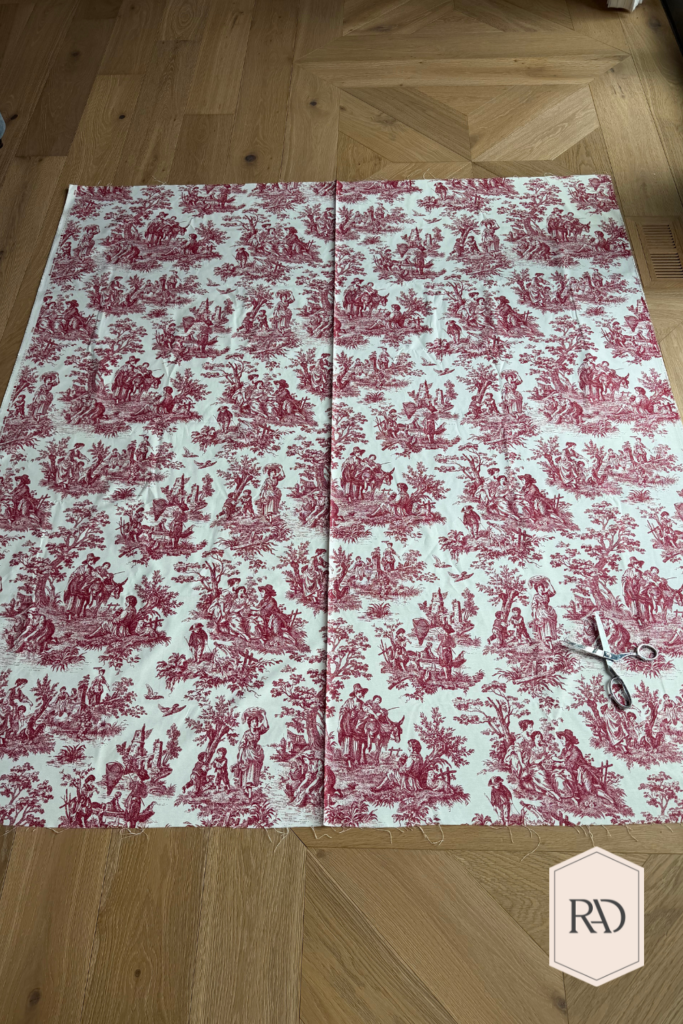
I started with 2 yards of the toile fabric cut down in half, long-wise.
I then cut one of those sections into half, length wise again. This gives you two 18 inch wide strips for the ends of the ribbon.
Then I cut the other yard in half width wise for thicker sections. These pieces make the top part of the bow.
In order to fill the bow and make it ‘3-D’ – I needed more fabric for the backing. So I layered the solid fabric on top of a regular cotton fabric 4 total inches wider and 12 inches longer (to drape the tales of the bow all the way down to the mantle itself). For the back fabric, you can really use whatever you like as long as there is not a stretch to it!
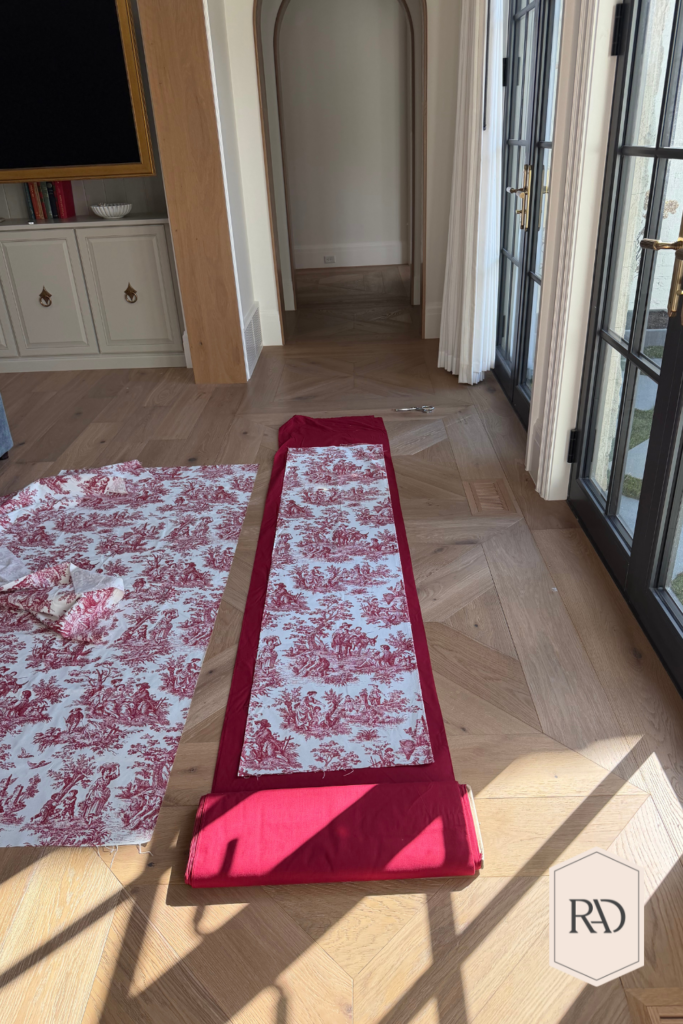
I originally wanted this to be a no-sew project. But, in order for the bow to be able to hold itself up, I had to sew the edges together so it could hold its weight. Think of it as making two Santa sacks and filling them with bating.
From there, I stuffed the top section with fabric cotton stuffing – this is the fun part. As you stuff, you can mold it how you want it to look.
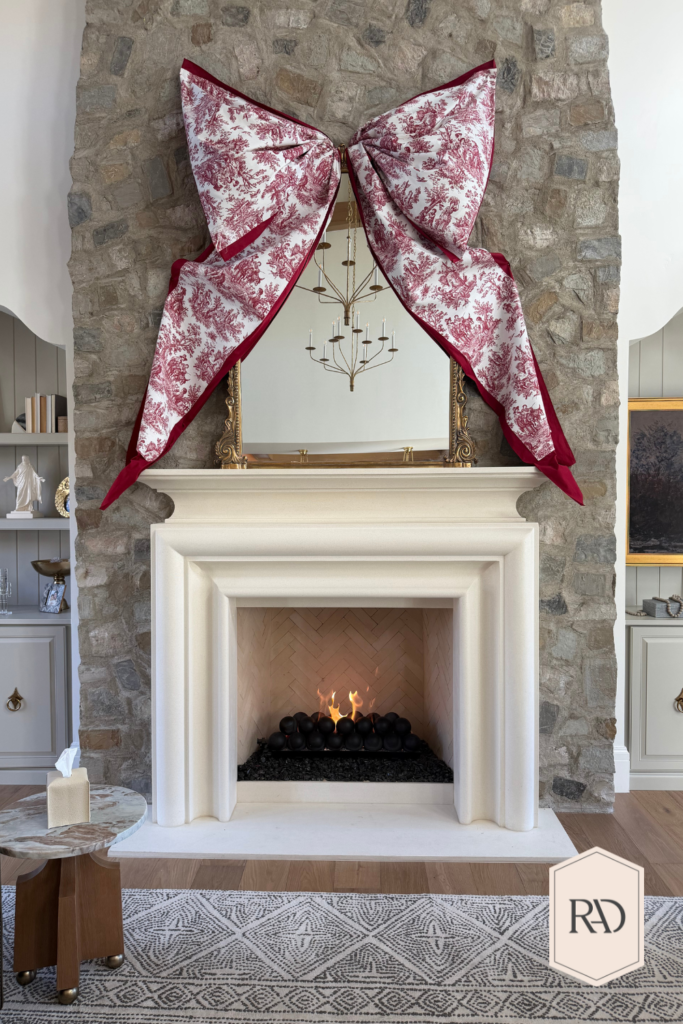
I used pipe cleaners to bunch the “Santa sacks together and tucked them right behind my heavy mirror. Really it’s all just tucked in place behind the mirror with no actual center knot.
Pulling together this bow tutorial has been an interesting task with this thumb, that’s for sure! But, SO worth it!


And if you’re curious just how big it is? My mirror is 5 foot and the mantle is 6 feet wide by 5.5 feet tall. This bow is BIG!
Check out more clips with video of this DIY Oversized Christmas Bow Tutorial here and follow me on pinterest!

 Add to favorites or read later