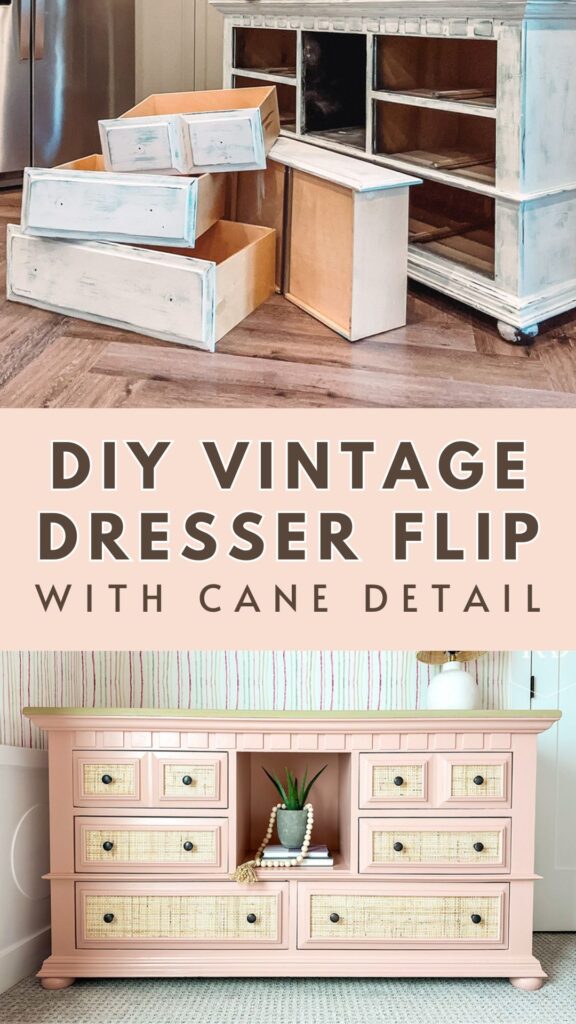
DIY Vintage Dresser Flip with Cane Detail
If you’ve been around a while, you should know by now, that I am all about taking the average up a notch, and doing it on a budget. And furniture flips are such a simple way to do that. There’s no need to invest in all new furniture for a space if you have a piece with great bones that will work really well. So this week I am showing you this DIY vintage dresser flip with cane detail that I did for my niece’s room.
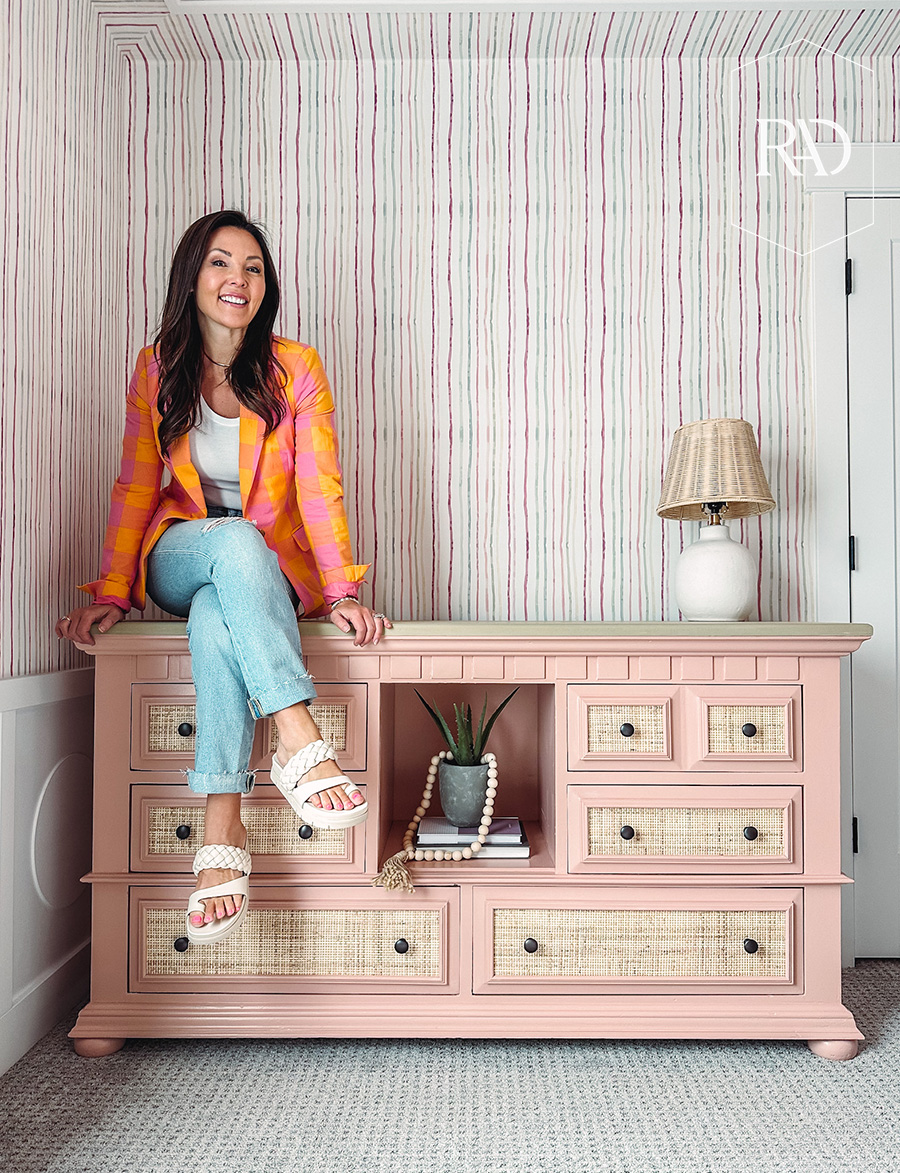
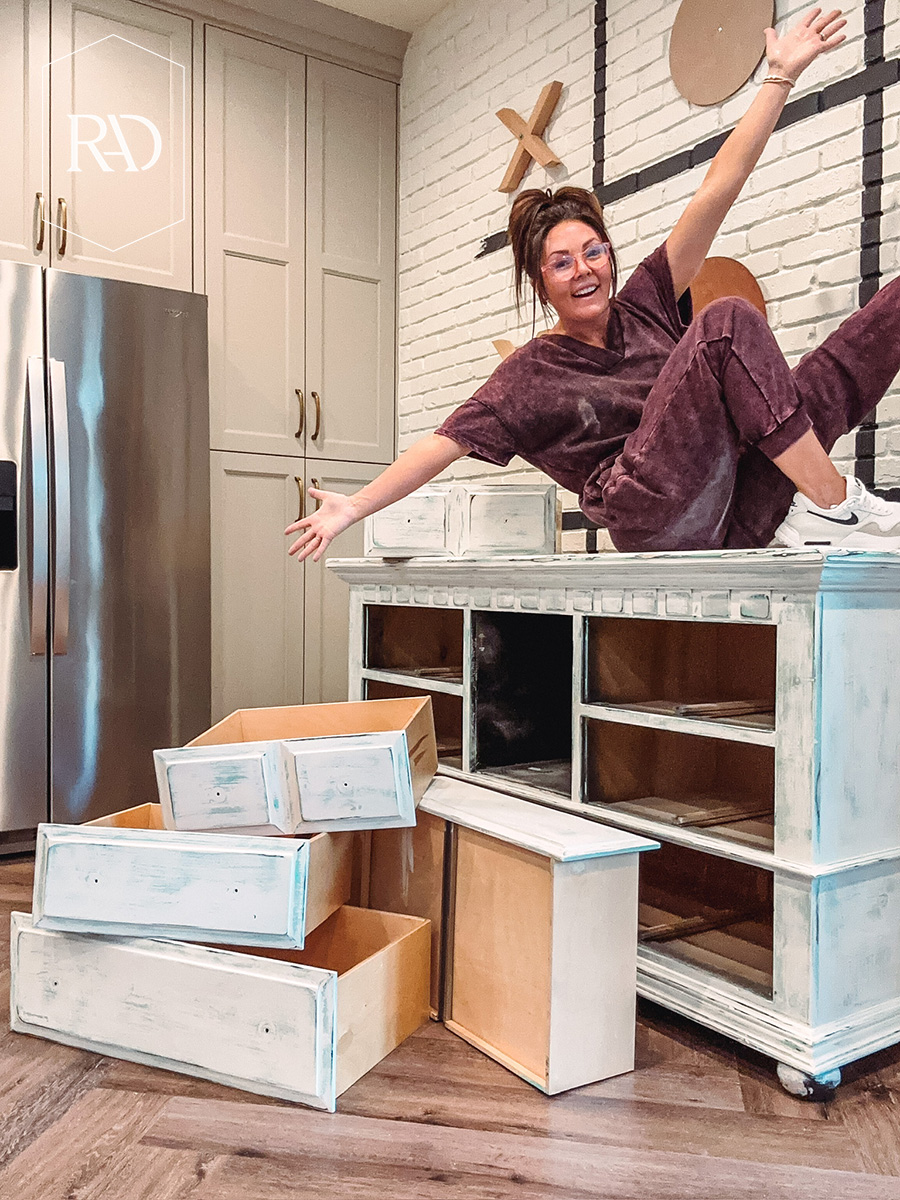
This dresser had definitely seen better days. It had a broken corner that I needed to repair, and desperately needed a paint job. Now, you may be asking, Mysha, how are you going to fix a corner of a wood dresser that’s completely broken off. And so we’ll start there. Then I am going to show you how I took this vintage dresser to the next level for my niece.
DIY Vintage Dresser Flip with Cane Detail
Supplies:
Toothpicks
Paint (I used Flower Pot by Behr)
Step 1: Make any repairs.
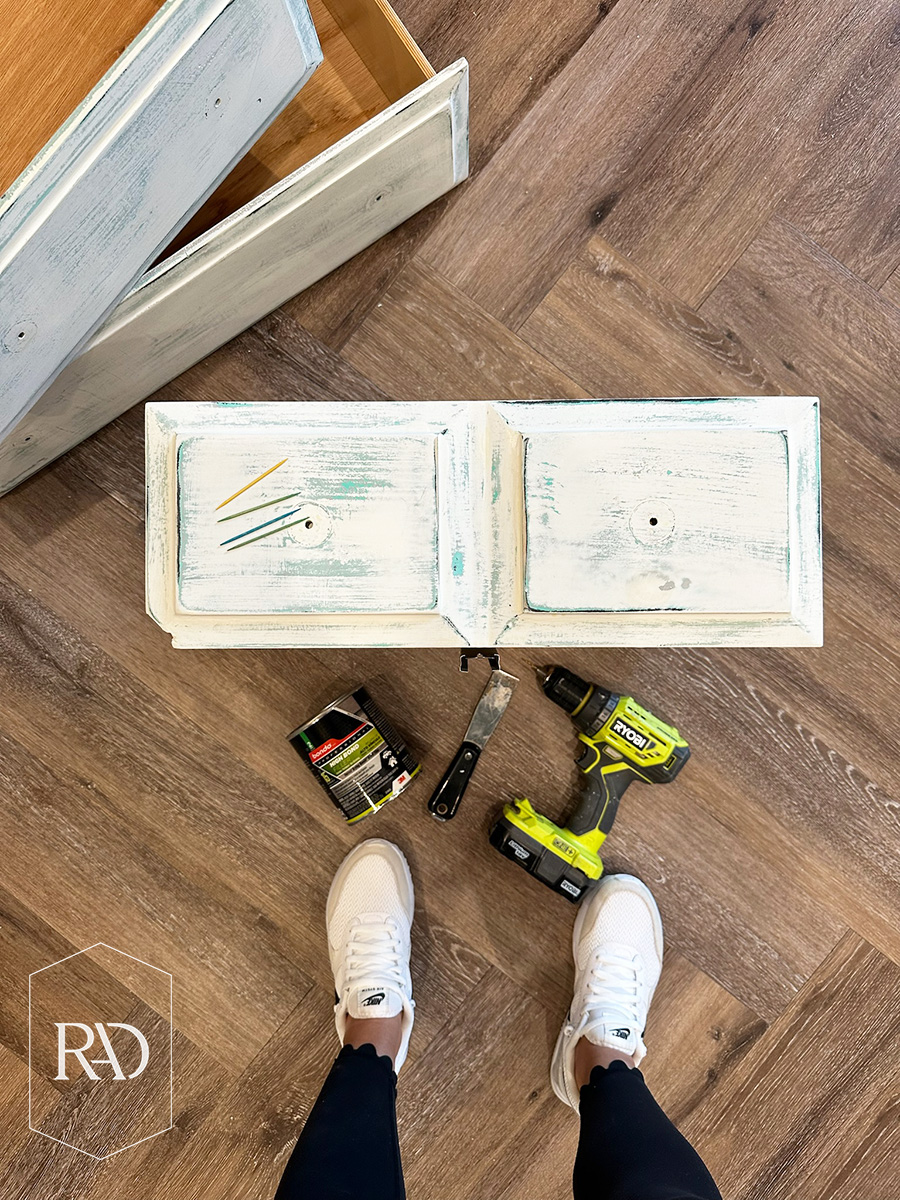
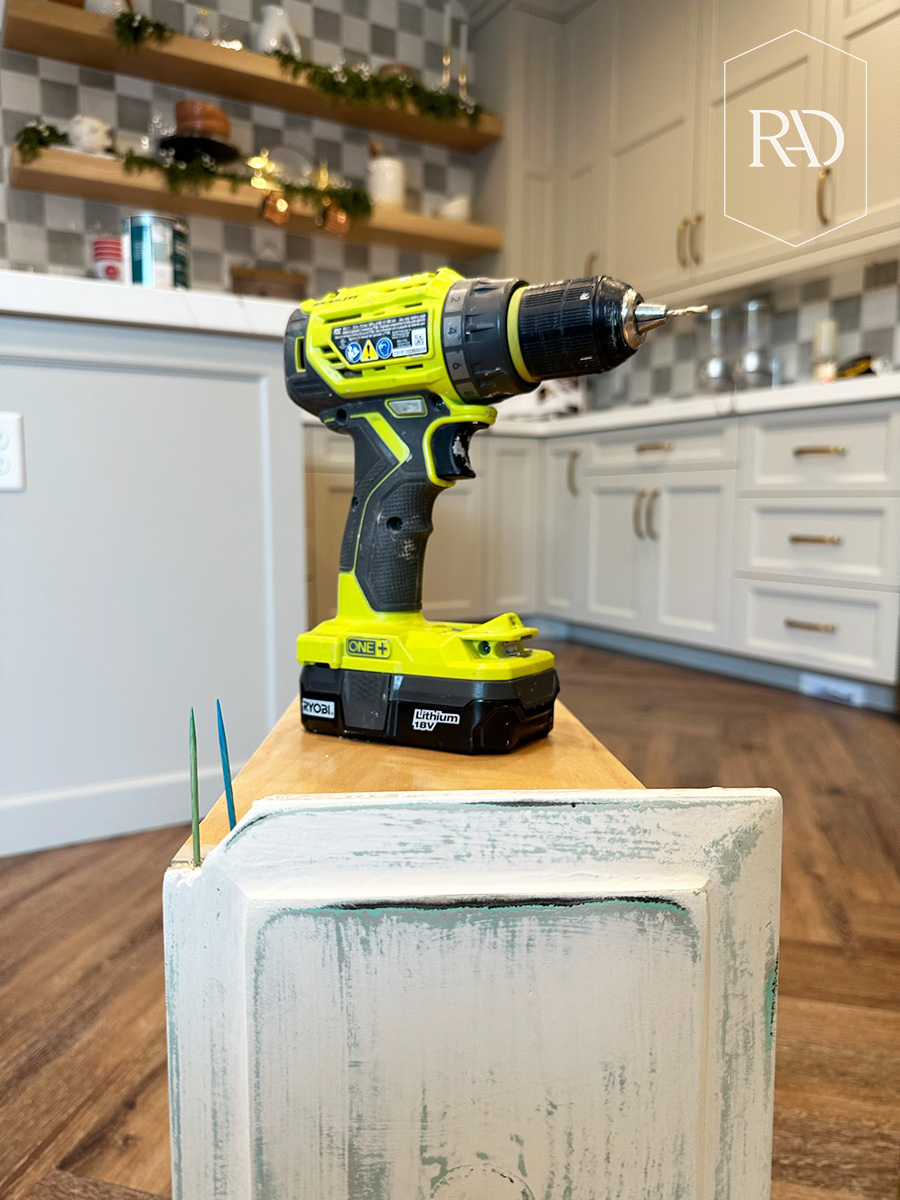
This dresser had a pretty sizable broken corner on one of the drawers. And believe it or not, I started with toothpicks to fix it. I used the toothpicks to act as little supports. So, I drilled holes the size of the toothpicks, stuck the toothpicks in the holes, and cut them down to size. And then I used Bondo to fix the broken corner.
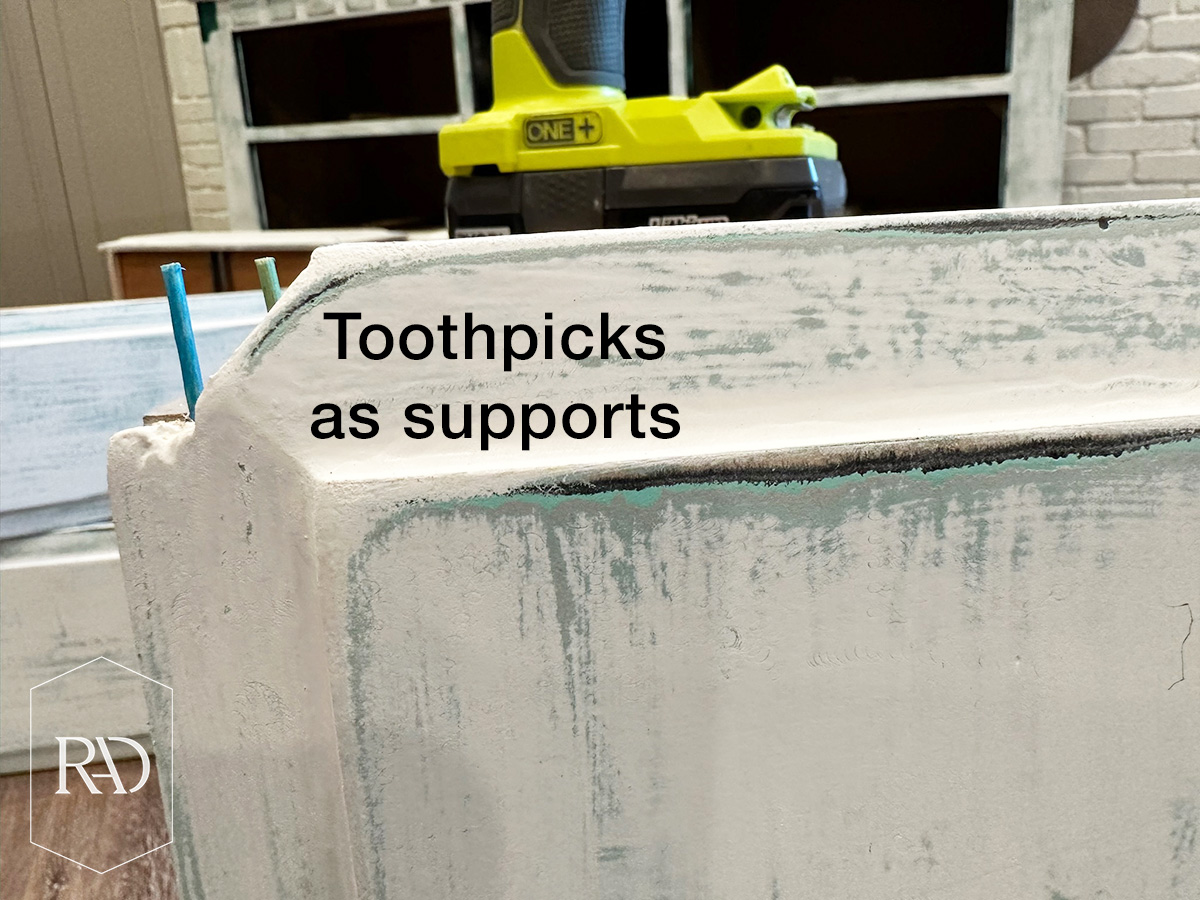
Bondo actually has a really strong scent to it, so I highly recommend wearing a mask while using it. Just follow the directions on the can to add the correct amount of hardener formula and start building with it. It dries very quickly, so it’s important to work fast. And don’t worry too much about the in progress look of it, because it’s sandable. You really just want to get enough on there to where it’ll harden and then you can sand it into shape.
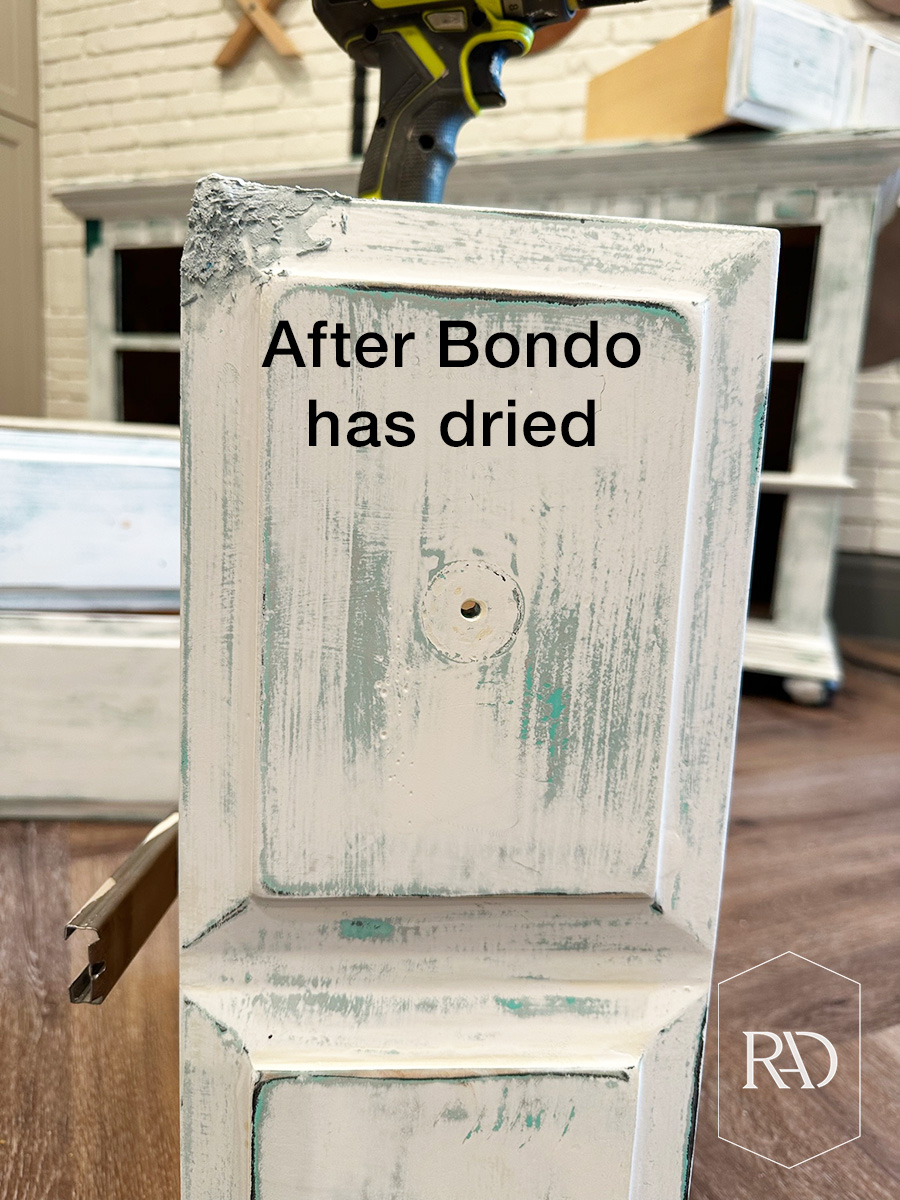
After 15 minutes, it’ll be hard as a rock! Then, you’ll just take your sander and sand it into shape and smooth it out. Once it’s painted, you’ll never even remember which corner was broken!

Step 2: Time to paint.
I wiped down the dresser with a tack cloth after sanding it to make sure all of the dust was removed. Next, I started painting. To start, I cut in with my brush in the angles where the roller wouldn’t get to. Then I used a foam roller for the smoothest finish. I painted everything except for the top of the dresser because I knew I wanted to return the top to it’s natural wood color.
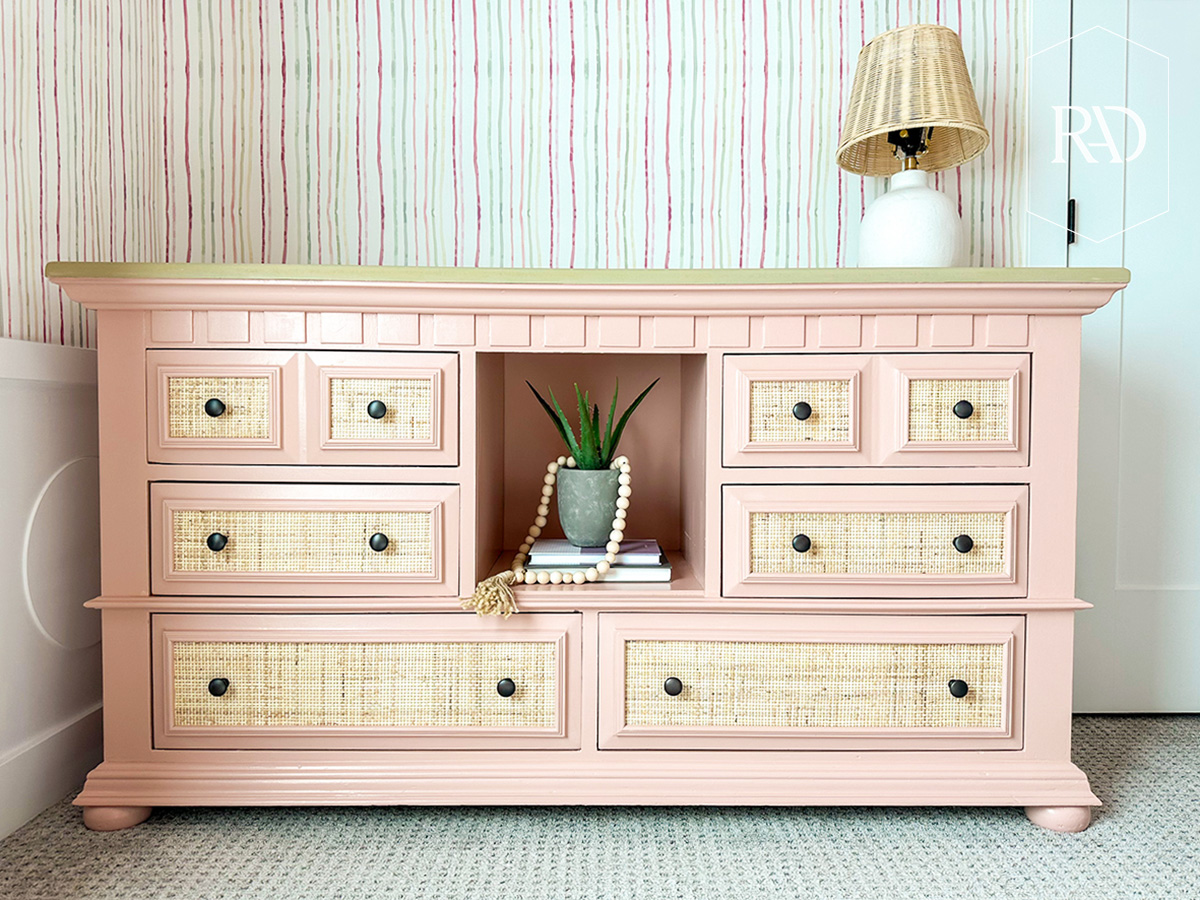
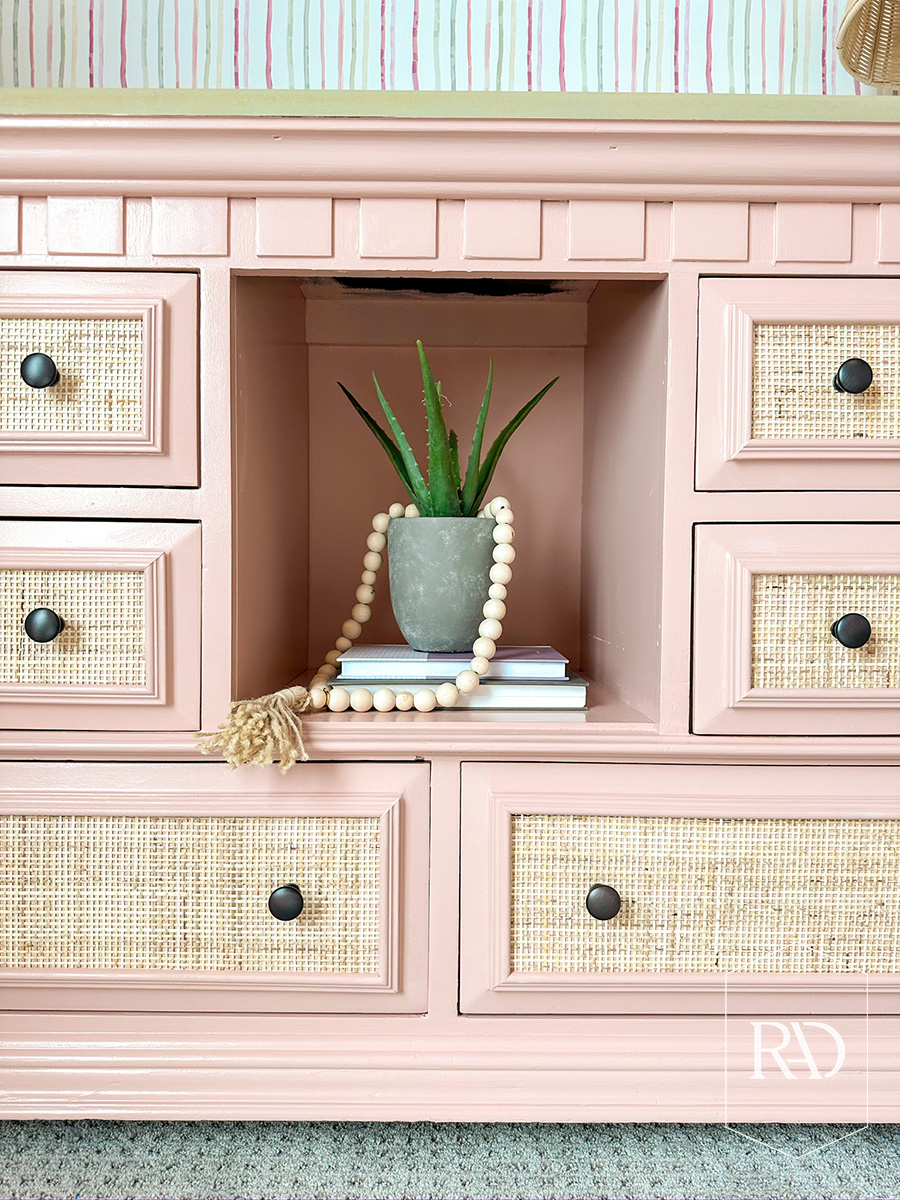
As for paint type, I used cabinet door enamel paint, it has a hard finish and no top coat is needed. The paint color I used is Flower Pot by Behr.
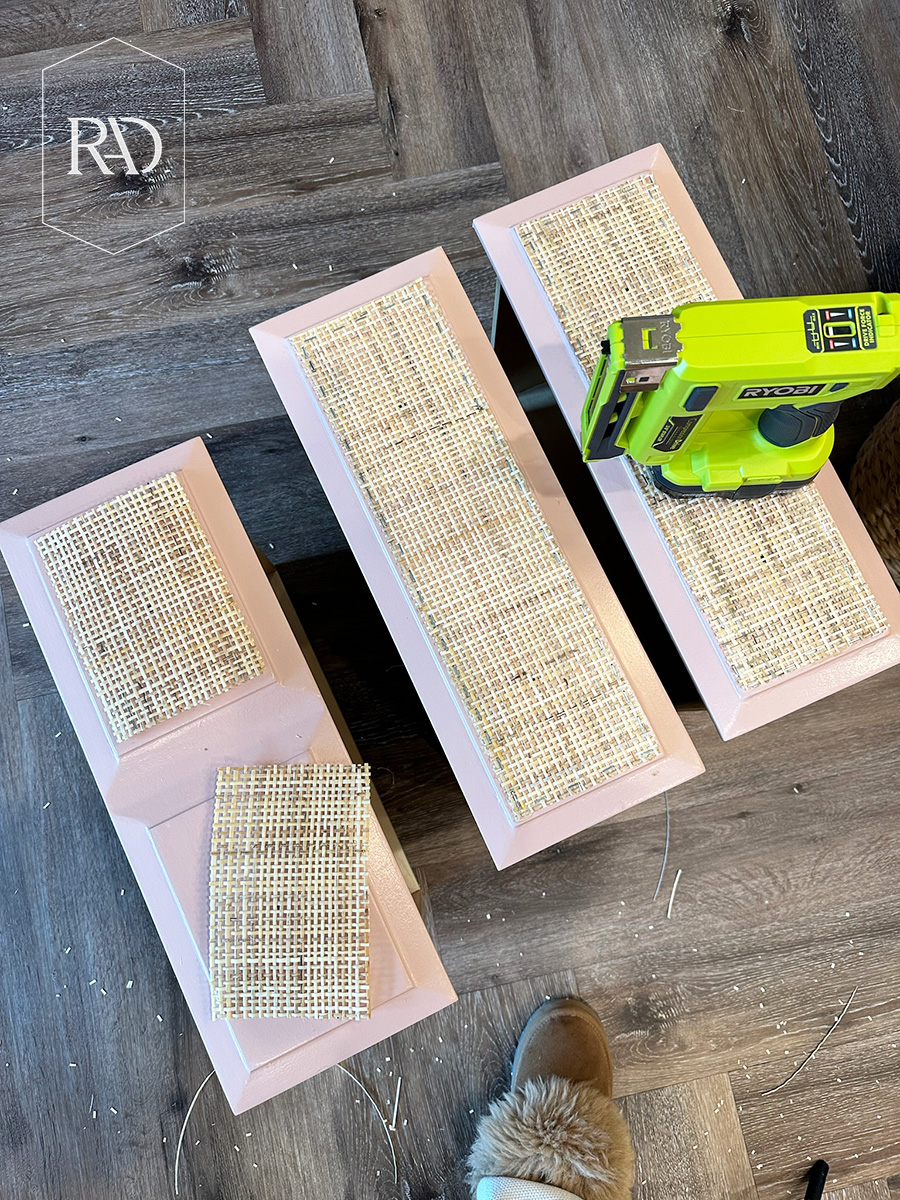
Step 3: Install the cane.
This is actually a lot simpler than it may seem. You’ll just take your roll of cane – I got mine on Amazon – and cut the pieces you need to smaller, more manageable sizes.
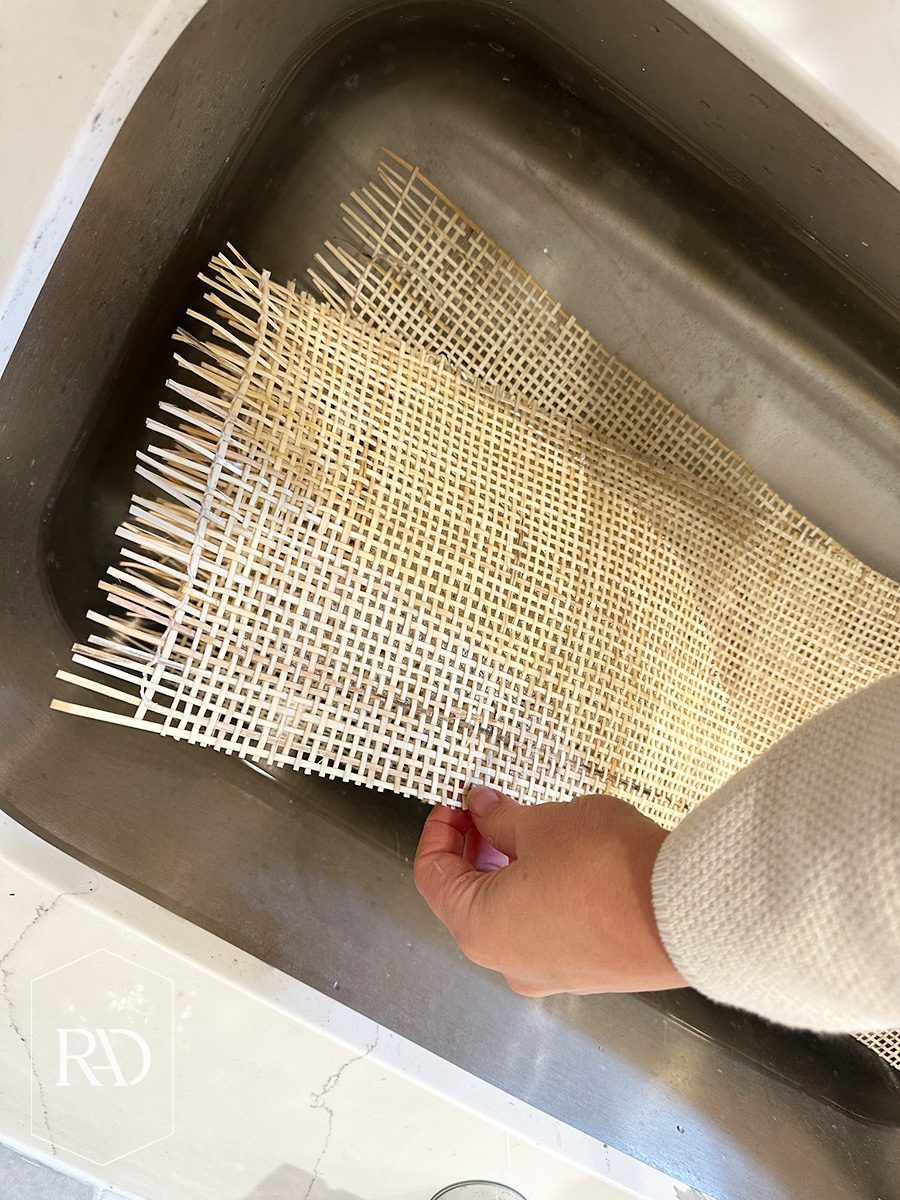
The next part is important. You need to soak your cane pieces in water for 20-30 minutes. This helps them flatten out and be more pliable to work with. Once they are flat, you’ll cut them down even more to the size you need for the space you’re working with.
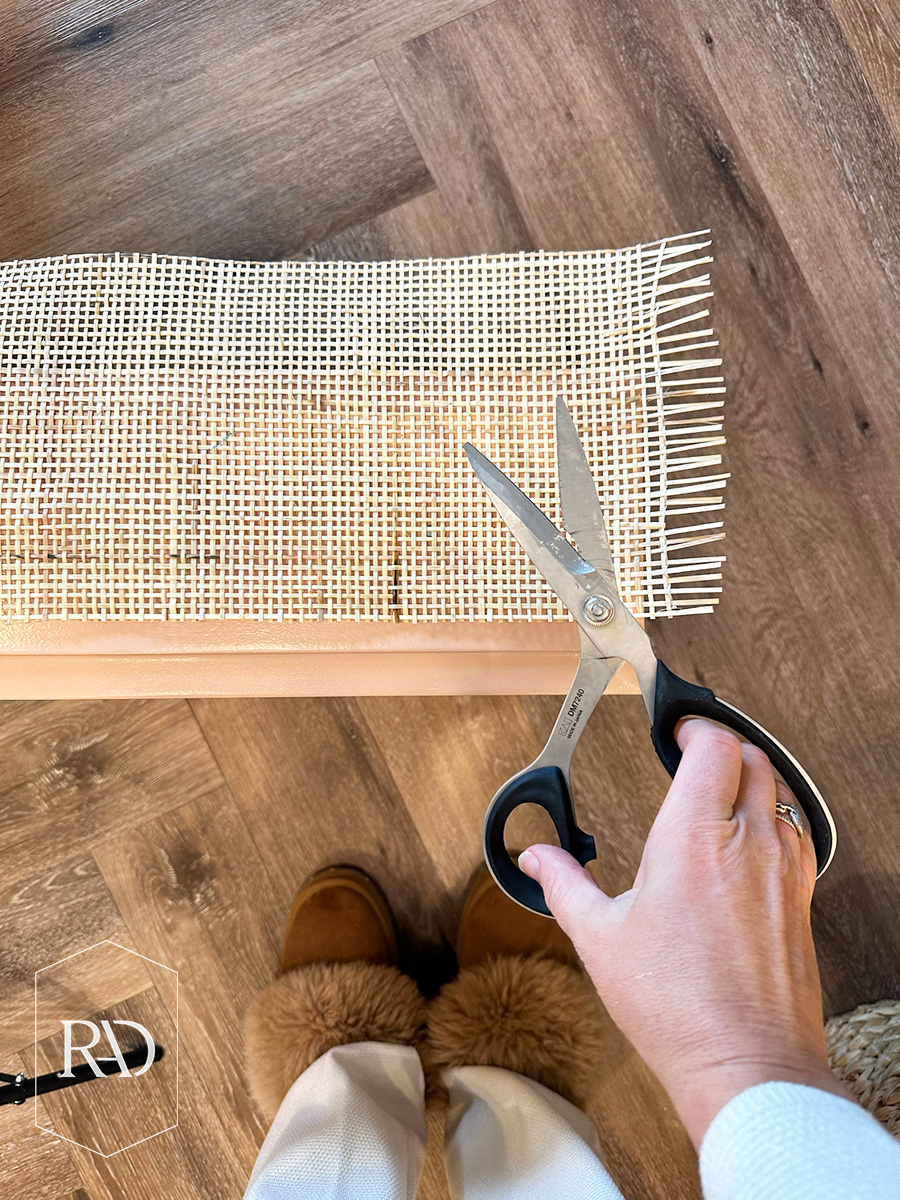
I used my staple gun to staple it into place on the dresser drawers. And then I took thin trim and framed it out to finish it off.
Step 4: Finish the top.
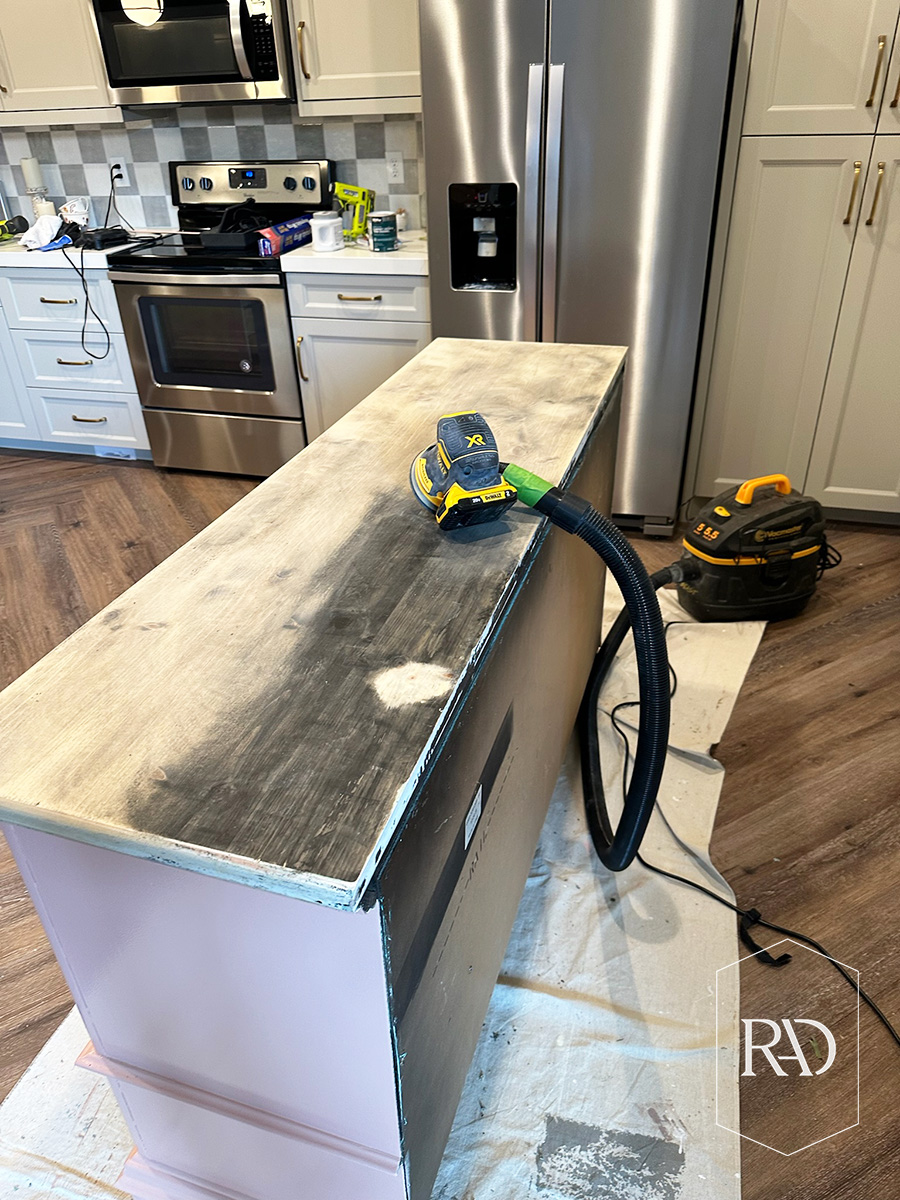
For the top of the dresser, I wanted it to be the natural wood finish of the dresser, which meant I needed to get rid of 3 layers of paint. So I used a chemical stripper. It’s relatively easy to use, but make sure to wear a mask and do this in a highly ventilated area.
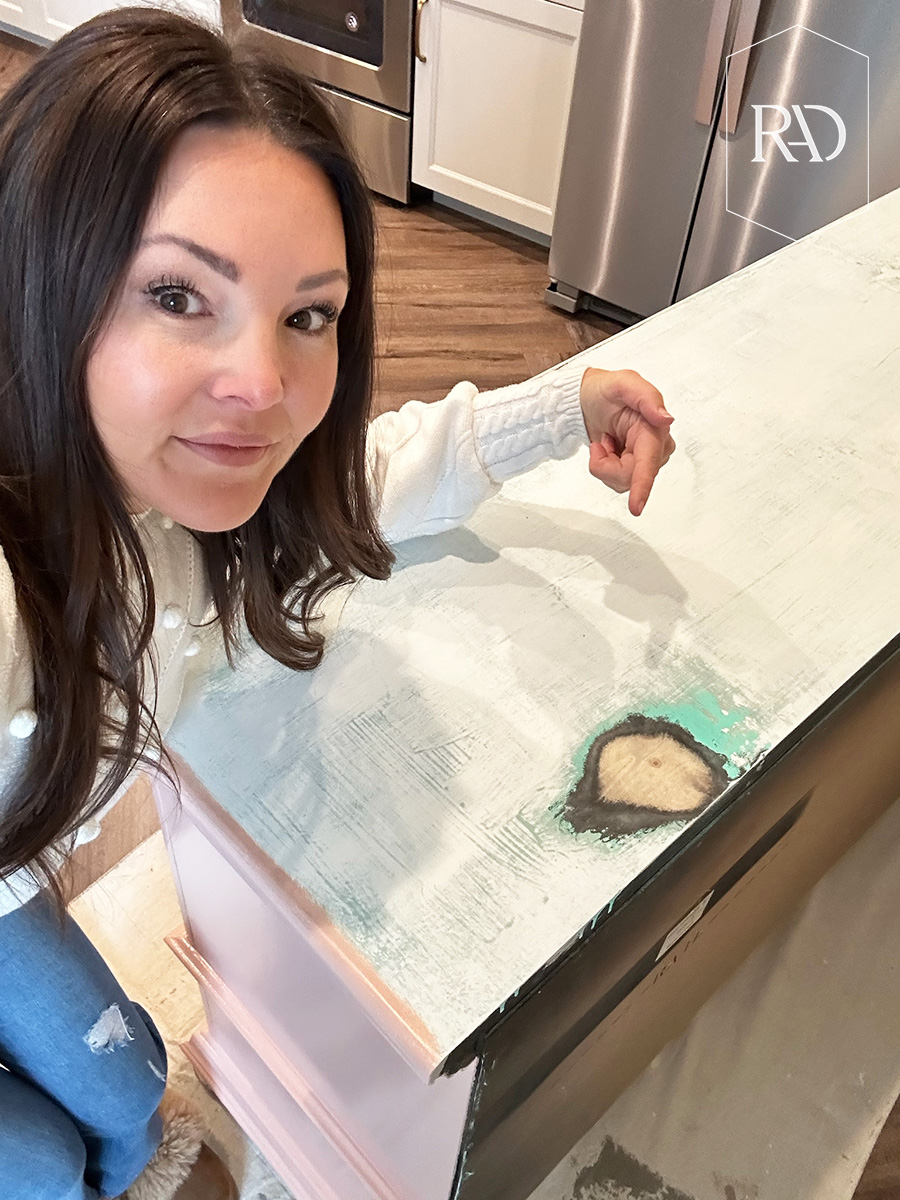
Spread the stripper evenly across the surface. You will see the paint start to crackle. Wrap the surface in plastic and let it sit for 20 minutes. Then after 20 minutes, you’ll be able to easily scrape the paint away. And trust me, it’s so satisfying to do.
To get the last layer of stain off, I had to sand it down using 80 grit, then 150, then 220. Use a tack cloth to get rid of the sanding dust. After, I just stained the top using my custom stain formula.
Like I said, the paint I used doesn’t require a top coat, so once the stain is dry, essentially, you’re done! I just added black knobs to finish it off.
Watch me flip this vintage dresser in the reel below!
I always think furniture flips are such satisfying projects because the before and afters can be so drastically different even though it’s the exact same piece. This DIY vintage dresser flip with cane detail was the perfect piece for my niece’s colorful tween bedroom transformation. And I love the way it turned out!

 Add to favorites or read later