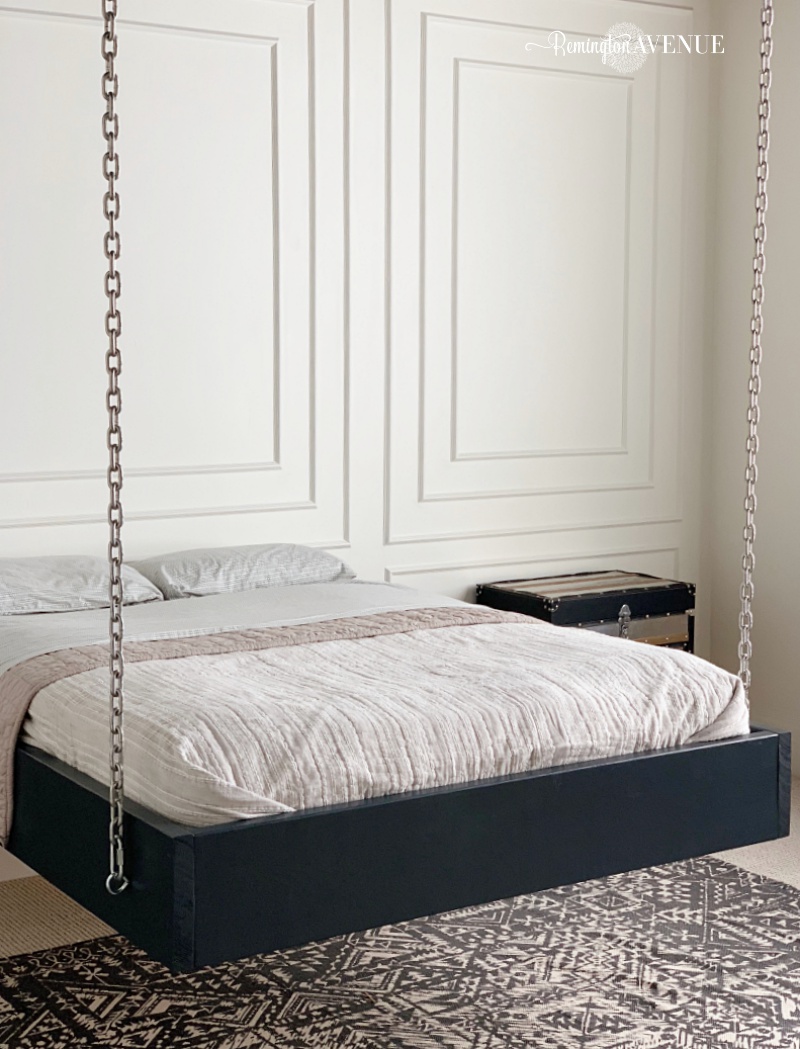
How to build a suspended bed
Do you love suspended beds? Me too. I like all hanging beds regardless if they are hanging from ropes or chains. Great news- suspended beds are super duper easy to build! Not only is it an affordable build, but it can save you loads of room in a small space. You can hang these beds closer to the ceiling to create more play room below, or suspend them low to the ground like I did. Read on as I share how to build a suspended bed. This tutorial is for a full sized bed, but can be adjusted to all other bed sizes.
*affiliate links used throughout.
If you haven’t been following along, this is week 3 of the One Room Challenge. I have taken on my sons bedroom, which was basically a blank canvas. If you’d like to see my design board and what his room looked like before, click HERE. I also shared a full tutorial on how to install modern wall molding for week 2. Click HERE for the wall molding tutorial. Also, be sure to check out all the other participants who have taken on this fun 6 week challenge. Click HERE to see all the fun spaces getting overhauled.
![]()
Materials needed for a full sized suspended bed
You can find all of these materials at your local hardware store. BUT if you wanna save yourself some time, just go ahead and click & order all the supplies online. Its free shipping and I’ve linked it all for you below! The cost of this full size bed should total less then $200 and leave you with extra supplies.
- (7) 1 in. x 4 in. x 10 ft. Whitewood Common Board ($52)
- (2) 2 in. x 2 in. x 8ft. furring strip board $4.34
- (2) 2 in. x 10 in. x 8ft. better prime douglas fur $20.36
- (1) 2in. x 10in. x 12ft. Better prime douglas fur $15.27
- (4) 18-Gauge Galvanized Angle $3.32
- (16) #8 2-1/2 in. Phillips Bugle-Head Coarse Thread Gold Screws (1 lb.-Pack) (BOX) $6.87
- (8) #10 3-1/2 in. Star Flat-Head Wood Screws (1 lb.-Pack) (BOX) $6.98
- (16) #6 x 1 in. Philips Square Drive Flat-Head Full Thread Zinc Coated (BOX) $2.17
- (4) 3/8 in. Zinc-Plated quick Link $13
- (2) 3/8 in. x 4-7/8 in. Stainless Steel Screw Eye $6.56
- (18 feet) 5/16 in. x 1 ft. galvanized Chain (cut into 2- 9ft lengths) $53.86 (how much chain you need will depend on your ceiling height and how high you hang your bed)
- (8) 1/4 in. x 4 in. Zinc-Plated Hex Lag Screw $12.80
- washers for bolts

How to build a suspended bed tutorial
Now that you’ve got all your shopping out of the way, all you need is a couple hours to get this bed built. Make sure to sand all the side and end guard rails before starting construction. I will be painting my bed, but if you plan to stain it, that may take a bit more time.
Step one: Cut wood to size. You can have your local hardware store make the cuts for you, or do them at home. You will need a table saw or a skill saw to complete these cuts.
- Side Guard Rails (2) 2in. x 10in. x 8ft – both cut to 77.5 inches
- End Rails (1) 2in. x 10in. x 12 ft – cut into 2 -54.5 inch boards
- Bed Slat Supports (2) 2×2 – Length must be 74.5 inches.
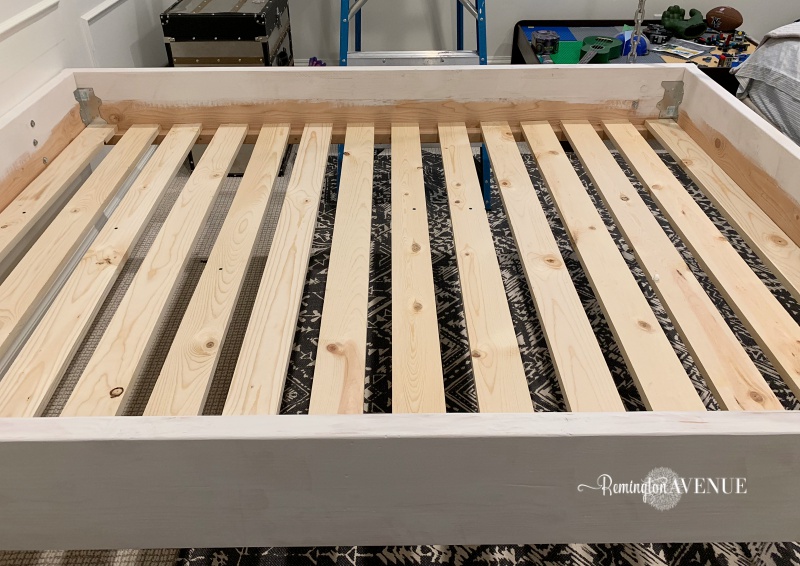
- Bed Slats 1X4 Whitewood common board. Need 14 slats at 54 1/4 inches. You’ll get (2) slats from each 10ft board you purchase.
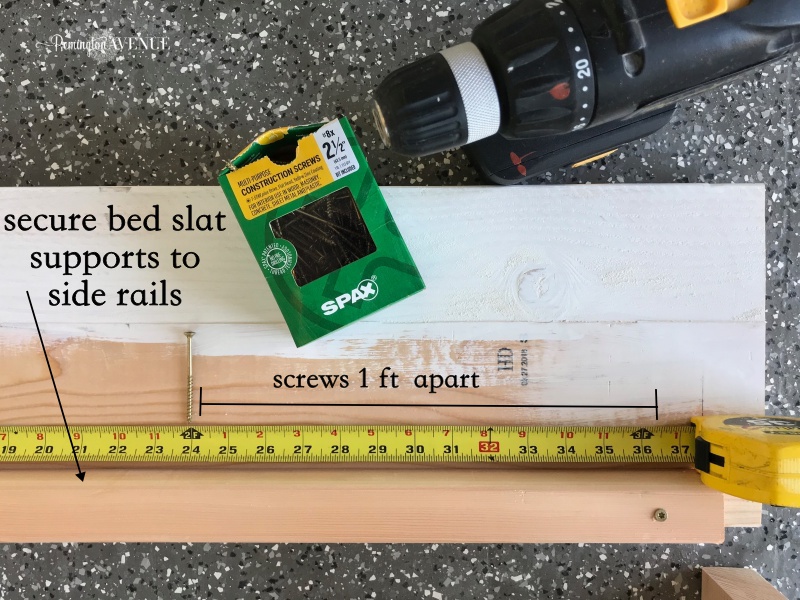
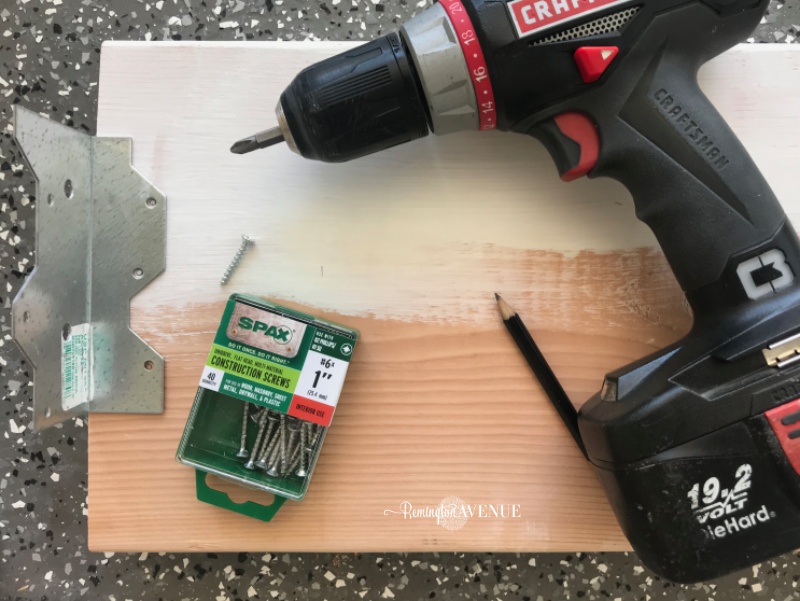
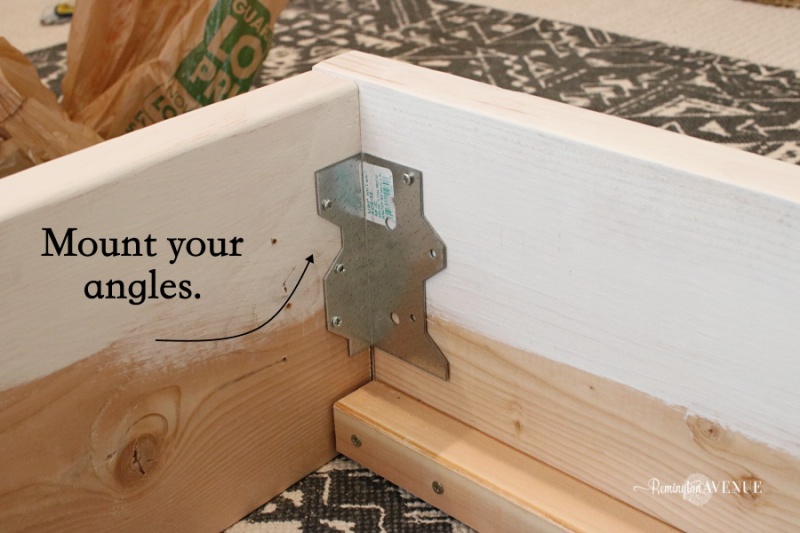
Step two: Add support. Attach the 2×2 bed slat supports to each side rail using the 2 1/2 inch screws. Add one screw approx. every foot. Mount the galvanized angles using 1 inch screws to each inside corner on the end rails ONLY! We will secure them to the side rails once inside the bedroom. These will help keep the bed frame stable.
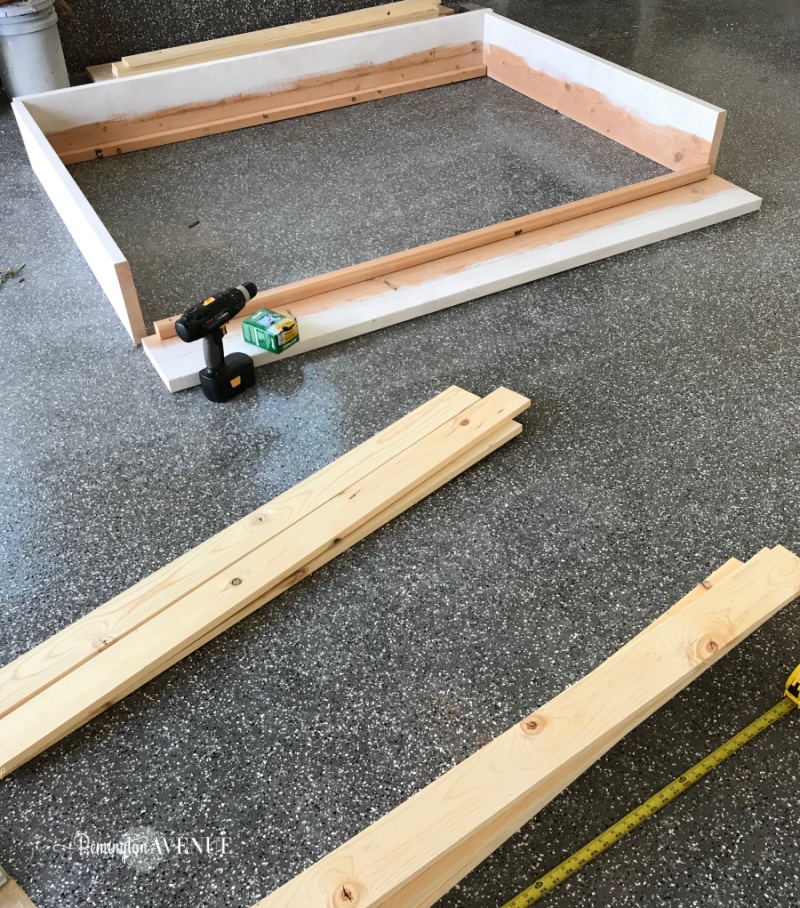
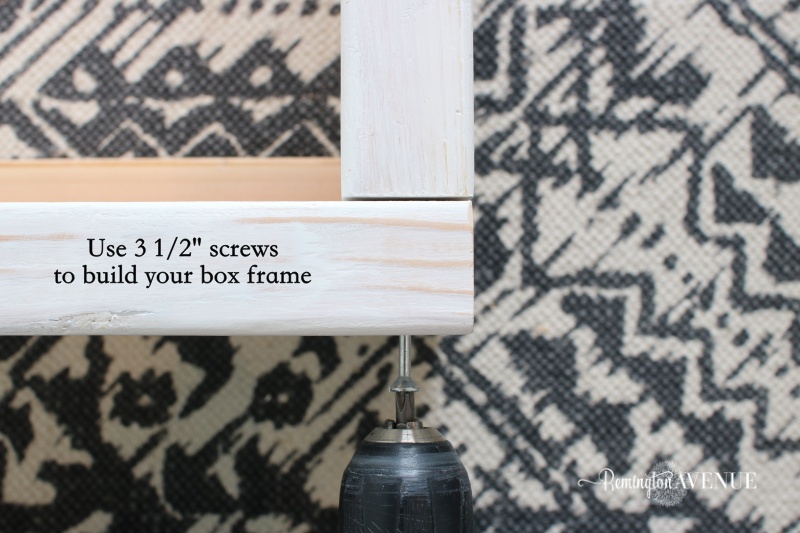
Step three: Assemble the bed frame. The end rails will be secured inside the side rails.Use the 3 1/2 inch screws (2 in each corner on the guard rail sides). I would build the bed inside the space it will hang. This will avoid beating up walls and corners during transition. All your doing is building a simple box.
Finish mounting your angles to the side rails to ensure extra stability.
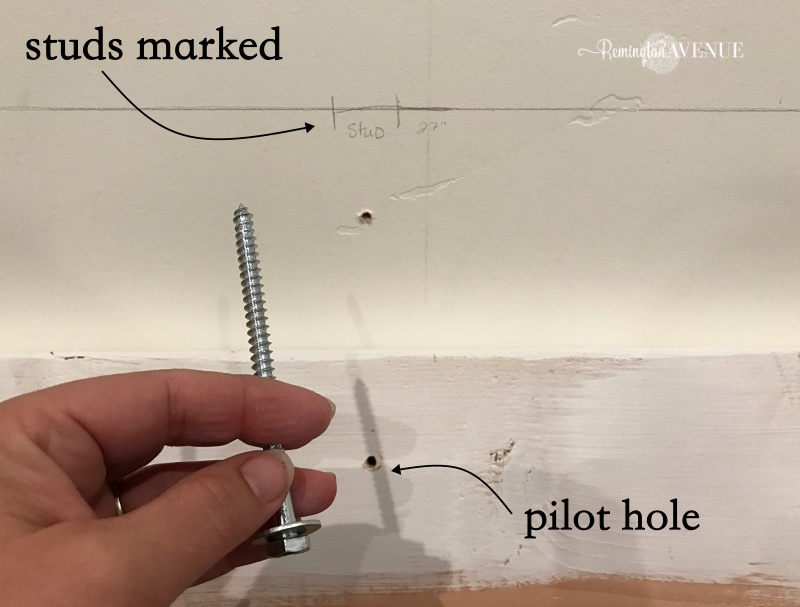
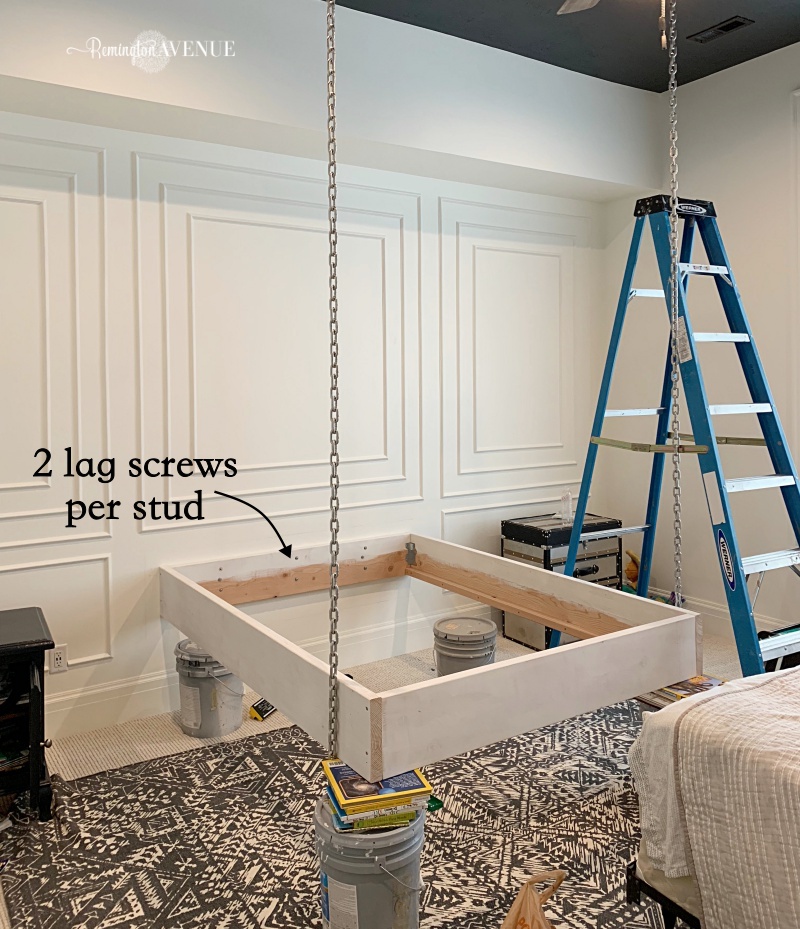
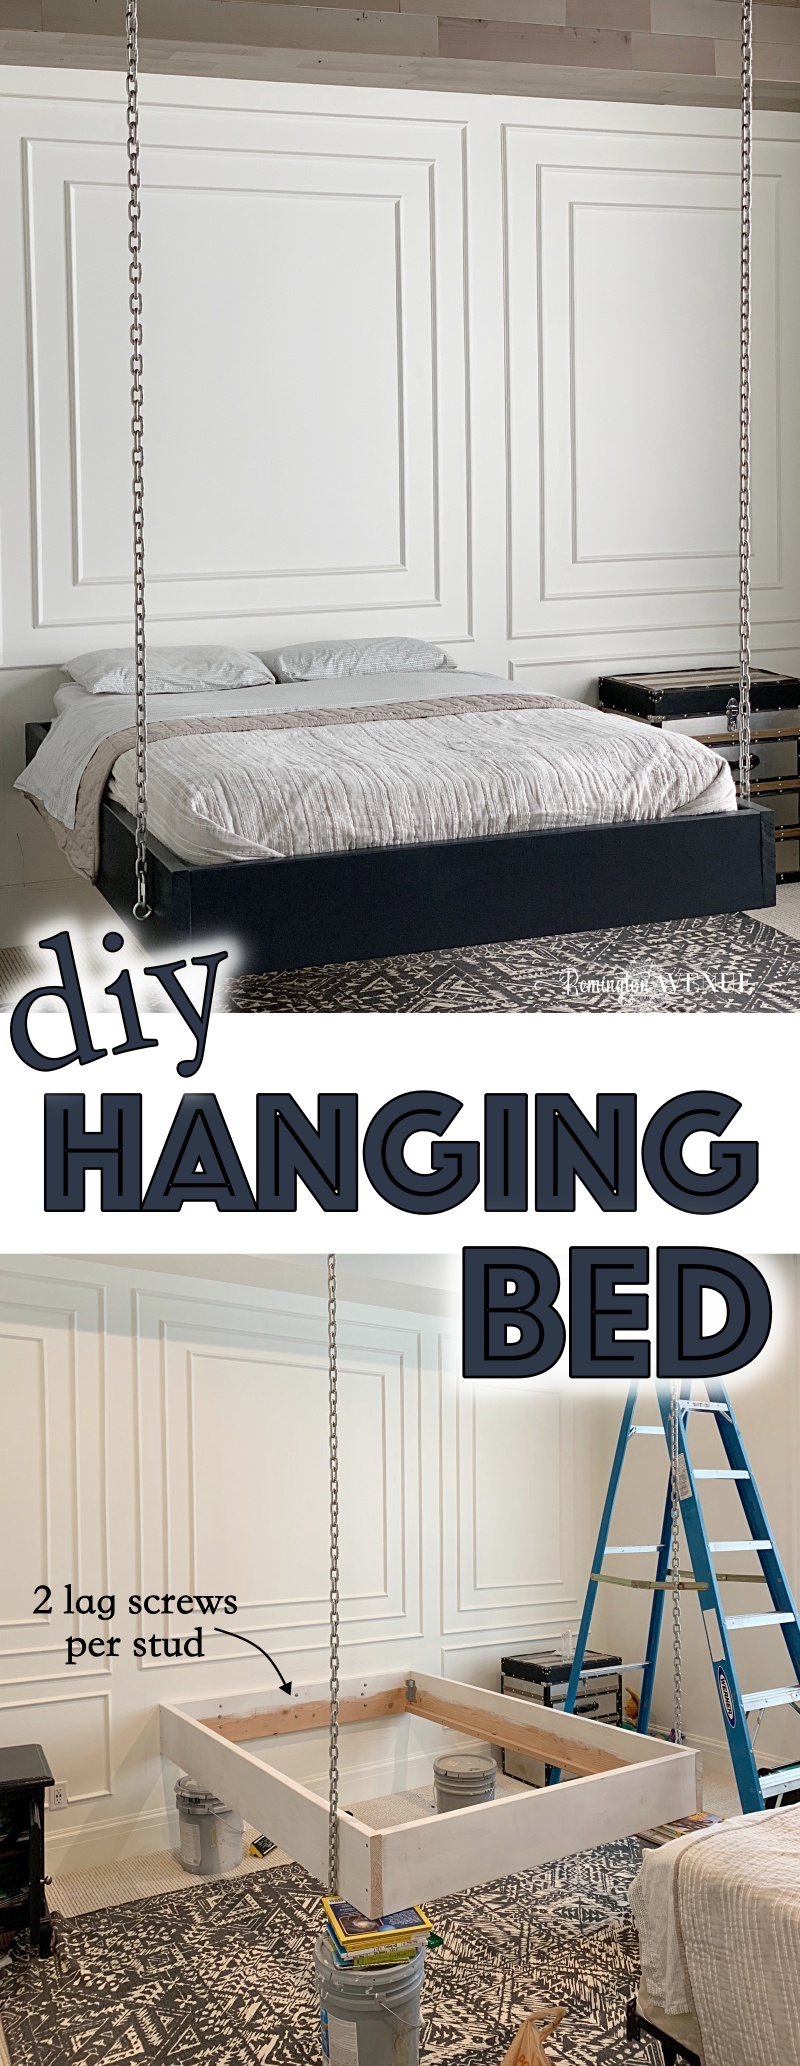
Step four: Secure and hang bed frame. The bottom of the guard rails will be exactly 17.5 inches from the floor. (I hung it high enough for my son to have a little hide out underneath if he wanted). Mark the stud locations on the wall. I know finding the studs can be tricky, but I used THIS STUD FINDER because it even shows the width of the stud on the wall! How awesome is that! Level and mount the constructed frame to the wall. Use a drill bit smaller than the lag screw (bolt) for your pilot hole.
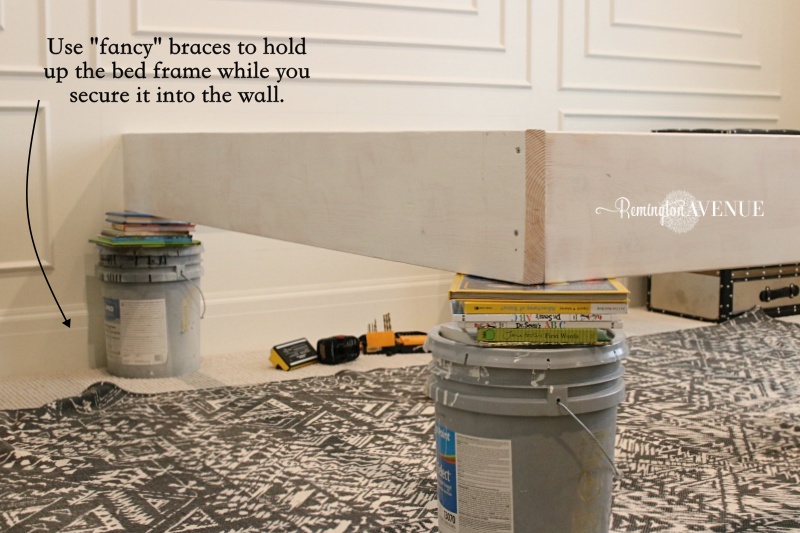
Secure 2 lag screws and washers to each stud that the frame touches. *This will only be on the end rail touching the wall. Tip: Use something to hold up the now floating bed. I set the frame up on 4- 5 gallon paint buckets. I simply stacked some books on top until I reached the desired height. Super high tech over here lol. This simply kept the bed frame off the ground and level while I hung my chains and secured the headboard into the wall studs.
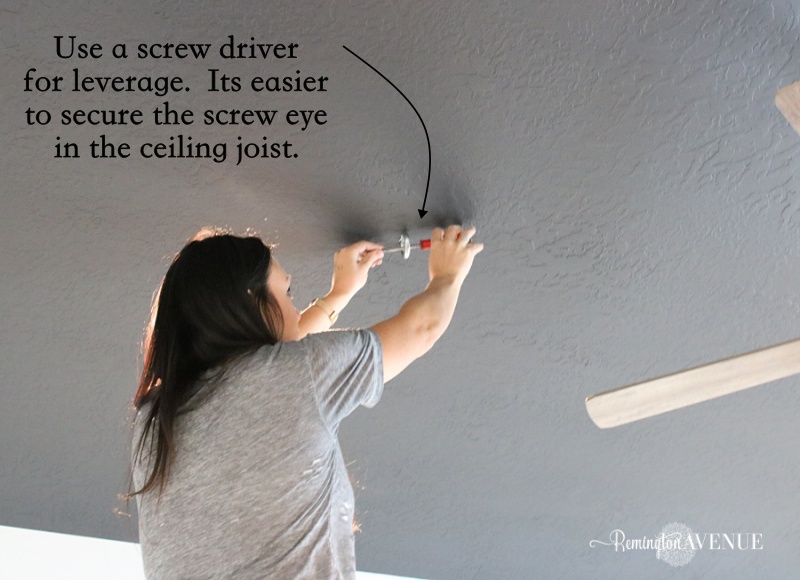
Drill a pilot hole into the ceiling joist as close to directly over the corner of the frame as possible. My screw eye is secured in the ceiling 7″ from the end of the bed. Some of this will depend on the location of your ceiling joints! Using a screwdriver for leverage, I secured my screw eye in the ceiling. Repeat this step above the other corner. Connect the quick links to the chain and then attach both chains to the screw eyes in the cieiling.
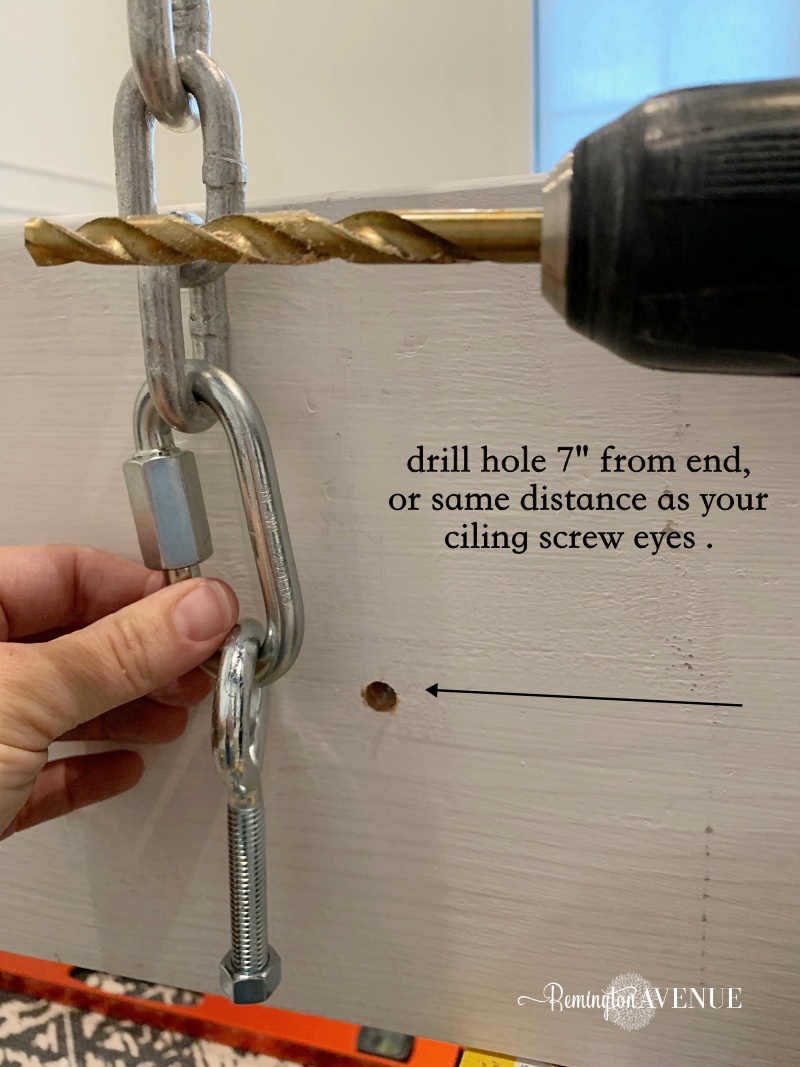
Attach the screw eyes into the side rails at the same distance from the end of the bed as the ceiling screw eyes (mine 7″). Drill a pilot hole and then thread the screw eye in place.
Step Five: Secure your bed slats into place. Some my say you don’t need to screw the bed slats in place, but I did. It just felt safer to me.
Step Six: Test out your handy work!
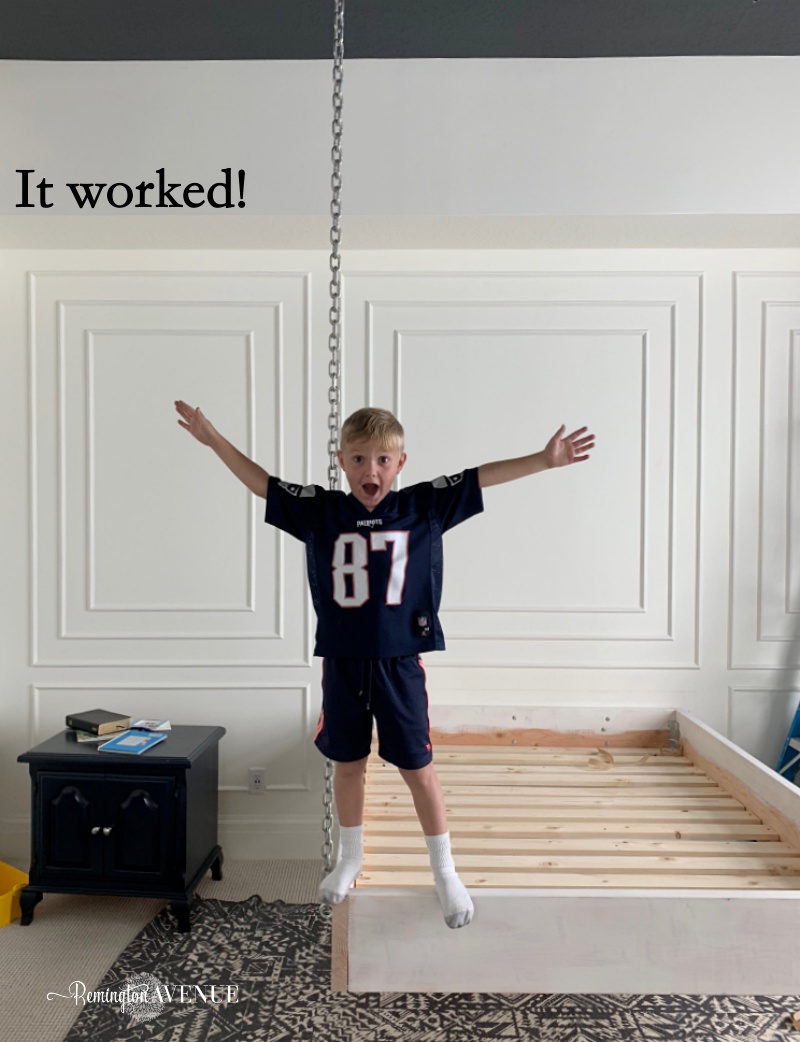
I told you it was easy! As long as you find the wall studs and ceiling joists the rest is cake. As always, I take pride in my diy projects not looking “diy”. One reason I opted to paint the bed frame instead of stain was to keep my diy integrity intact. These boards are full of imperfection. I filled the holes and knots with wood filler, sanded the side and end rails, and primed them completely before putting the frame together. I painted the frame after the bed was hung only because it’s getting cold outside! I painted the bed Cheating Heart by Benjamin Moore – the same as the ceiling color.
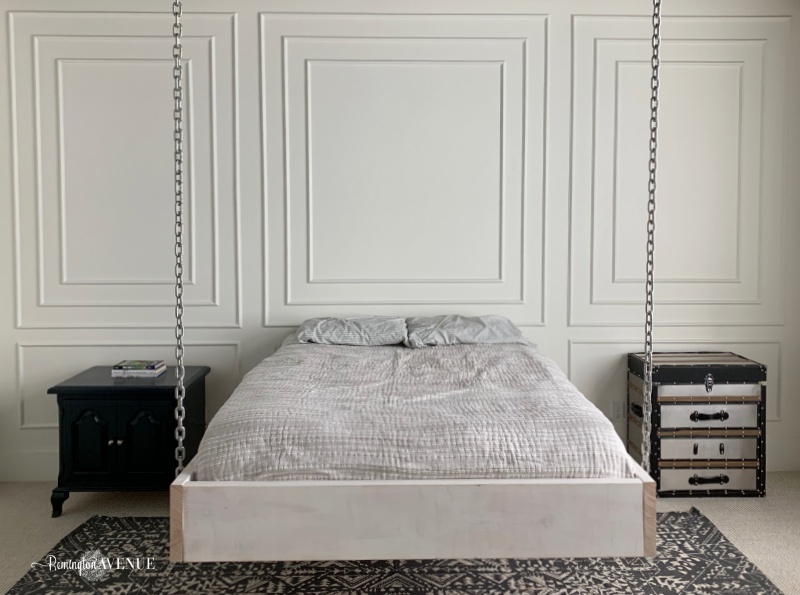
I hope you love our new suspended bed and are ready to build your own! Please pin the image below to help share my ideas with others. As always, thanks for dropping in and don’t forget to subscribe below to see how this whole space comes together!

 Add to favorites or read later
This is amazing! So inspiring. I am now re-thinking our bedroom for where I can create a hanging bed 😉 AND that moulding!! What a lucky boy.
Jenny thank you! This has been such a fun room to design and build out.
Your room is still one of my favs! Don’t know how it could get much better
This is awesome! I want one! I might have to make one outdoors under a pergola or something. Thanks for the plans- it really looks great!
You bet and that would be a perfect spot for one!
Holy cow, this is an incredible project!!!
We’re building a bed for our ORC master bedroom, too, but not suspended! This is gonna be amazing!
How funny, I’ll have to check it out!
Love love love the wall treatment – and the floating bed is so cool! Excited to see this room come together 🙂
Thank you Nicole. Im so glad you are seeing the vision
You are the BOMB Mysha! So inspiring! I know – I say that all the time. But I have actually started feeling confident doing things in my home because of your stuff… Thanks!
That is the best compliment…that you are now doing your own projects!
You’re doing a beautiful job! That bed is beyond.
http://www.lifestyleduchess.com/blog/
This is going to be insane?! So excited to see the final reveal!
Thanks Autumn, me too!
This is fabulous. How fun for your son! My ORC space is our porch and we have a swinging bed on it!!
marcie you porch looks like its going to amazing!