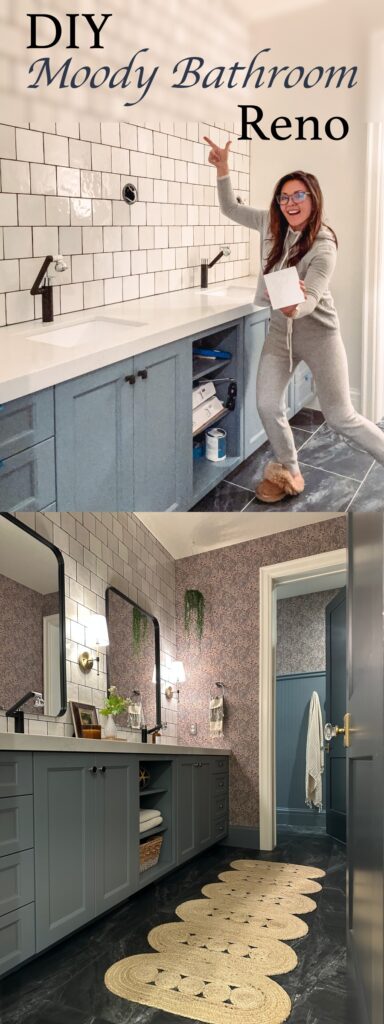
Moody DIY Bathroom Renovation
My moody DIY bathroom renovation is finally complete! If you’ve been following along on Instagram and the blog, you know that this renovation has actually been a series of projects that have all led up to this final reveal. I tiled a wall, hung wallpaper, colored grout, and more! So, I wanted to lay out the process and order of how I did things.
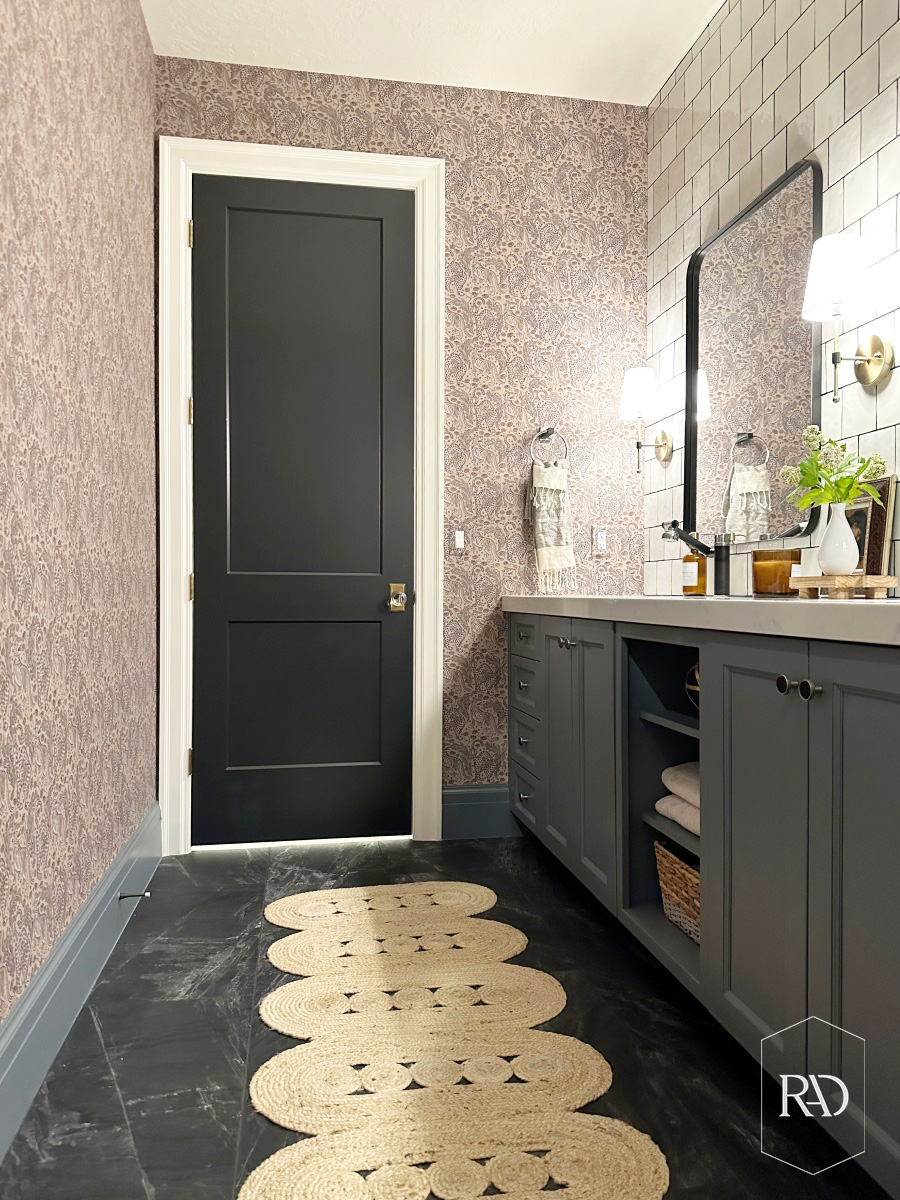

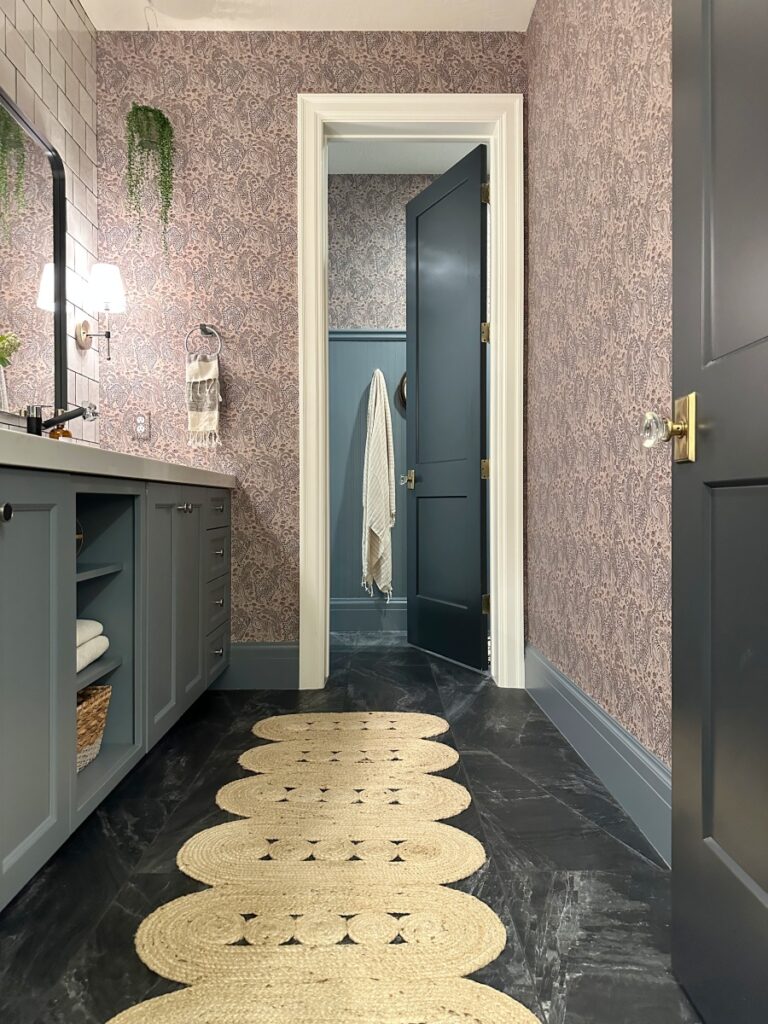
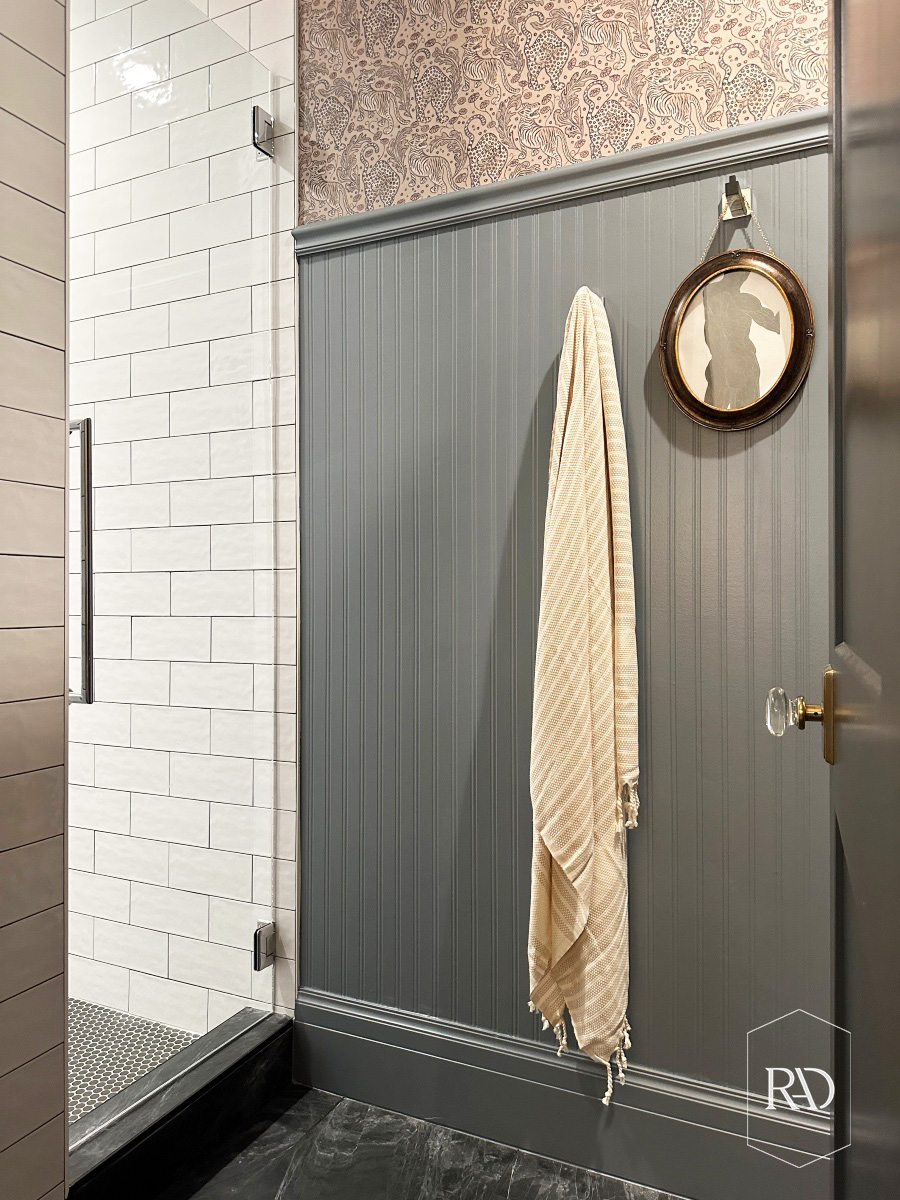
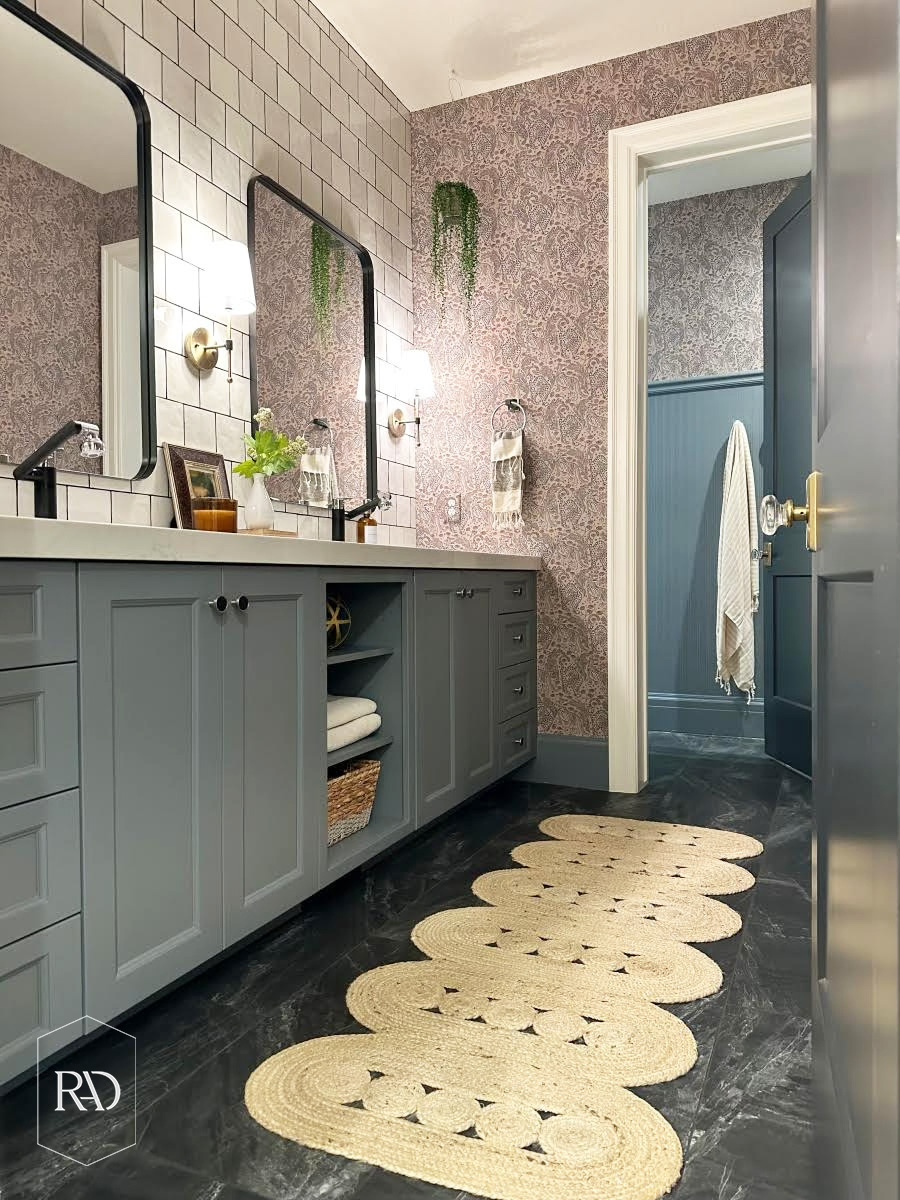
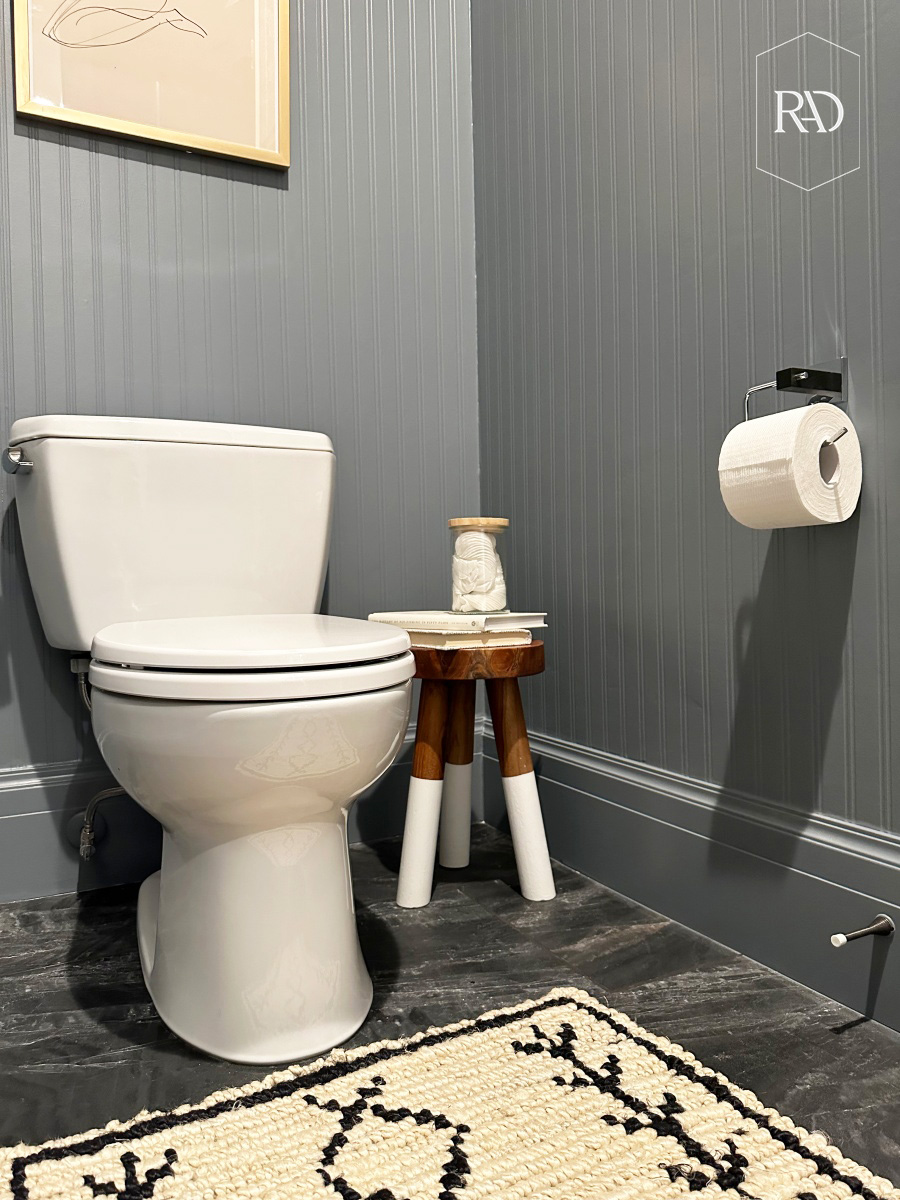
First, let me give you an idea of what I didn’t change. And that’s pretty much just the vanity. The vanity is actually a custom design by me and it’s in the color Wolf Gray by Benjamin Moore. This is the same color as my laundry room cabinets. I also painted the beadboard wallpaper and all the baseboards to match for a seamless look. But I left the door casing white for a punch of contrast. It also helps balance the white tile backsplash. I left the door dark and left the door handles as is. You can find the info on my interior doors, including the paint color HERE. Now, onto the moody DIY bathroom renovation process.
Moody DIY Bathroom Renovation
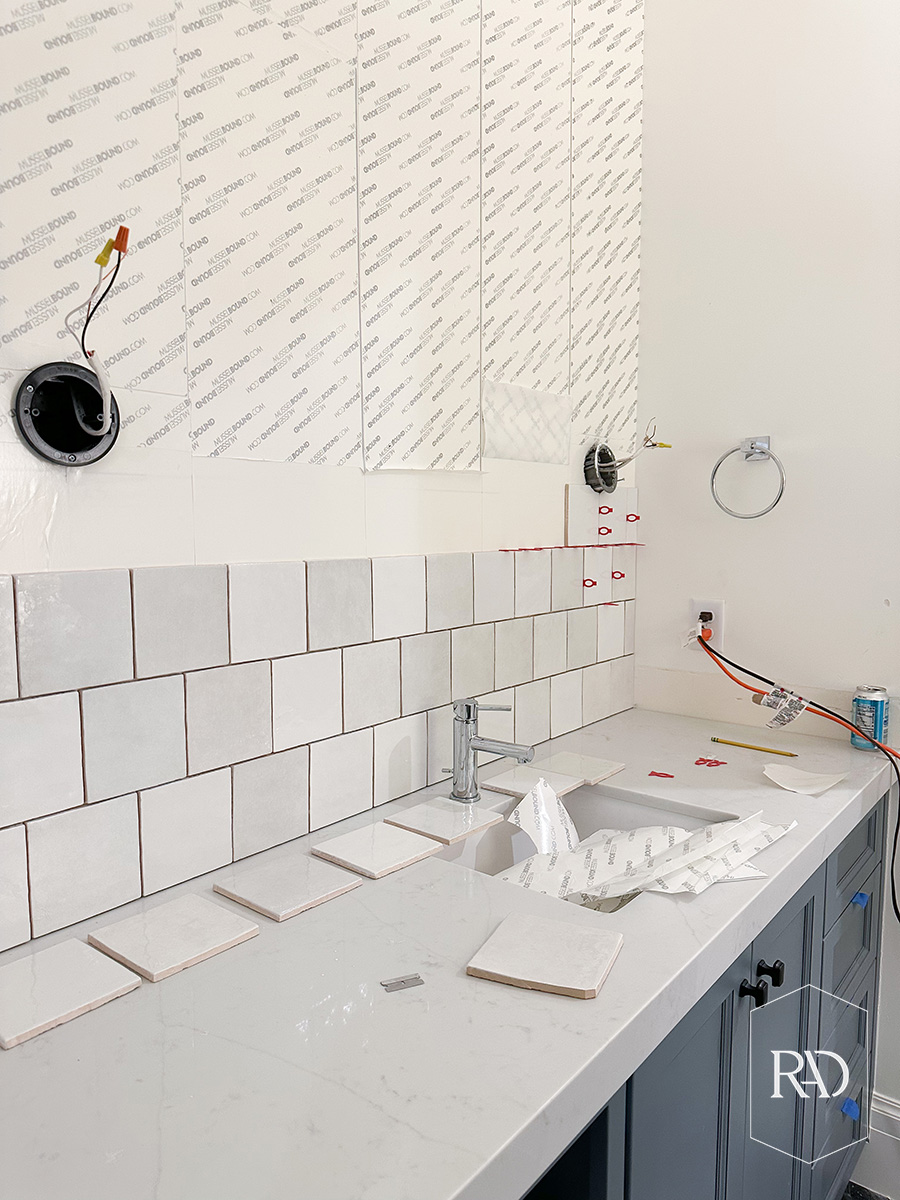
Tile Wall Bathroom Backsplash
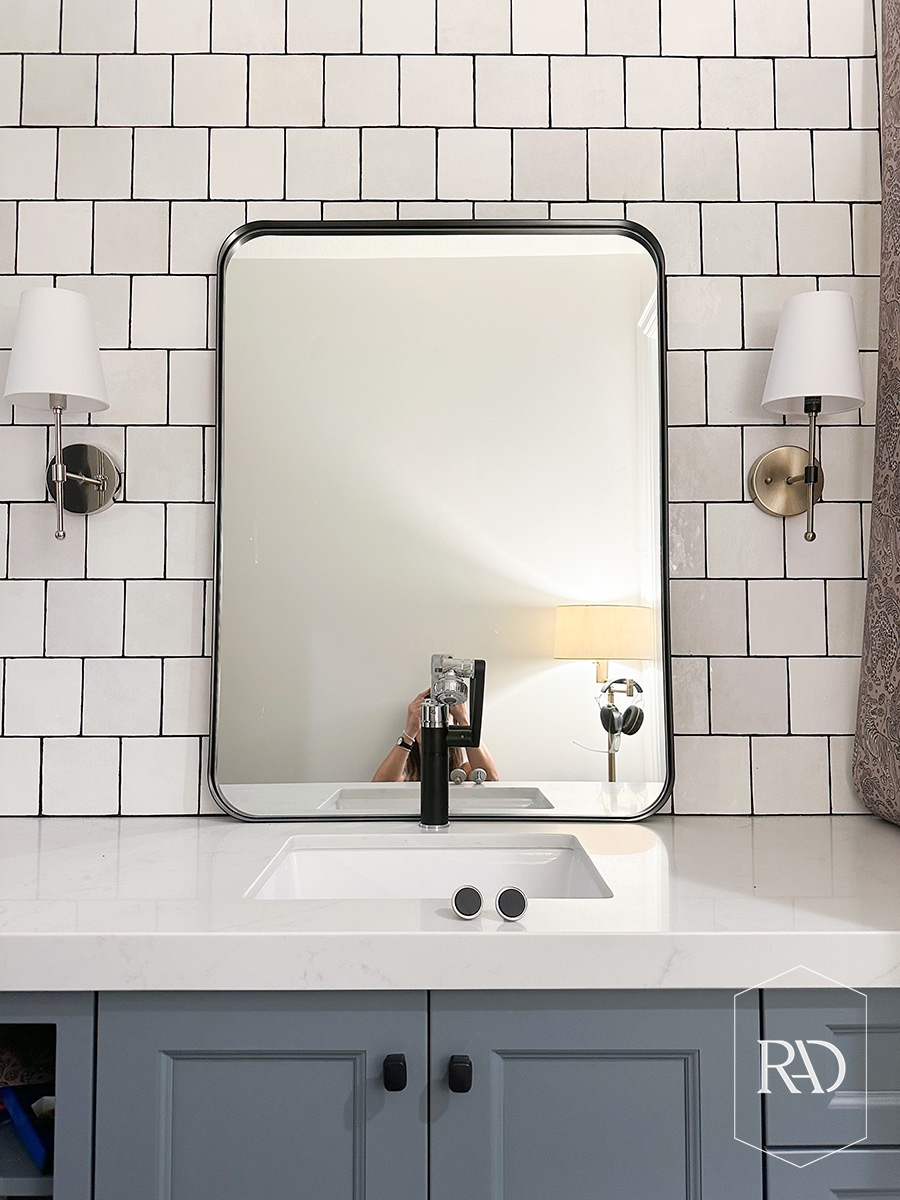
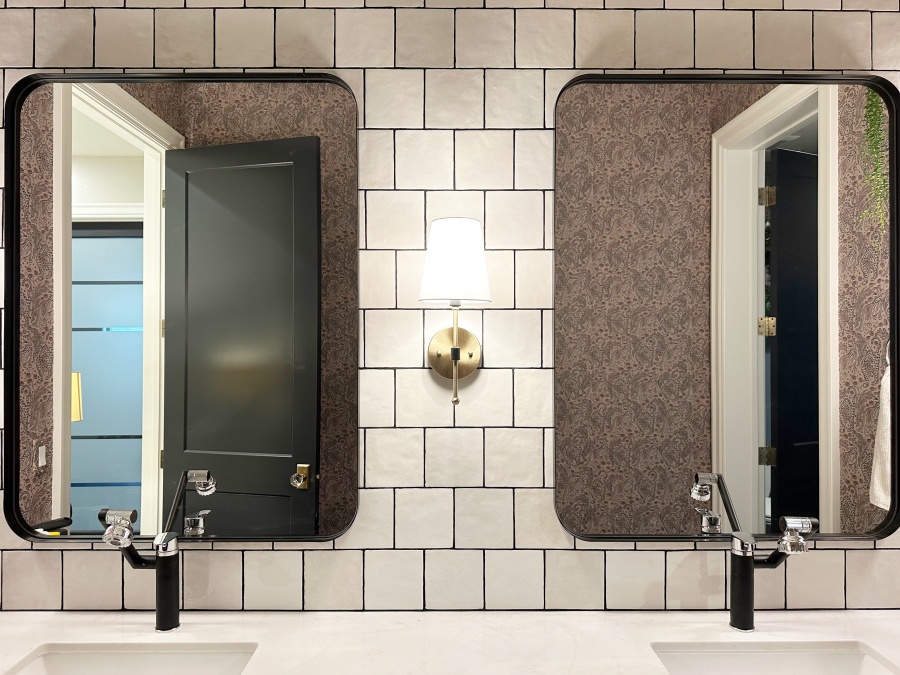
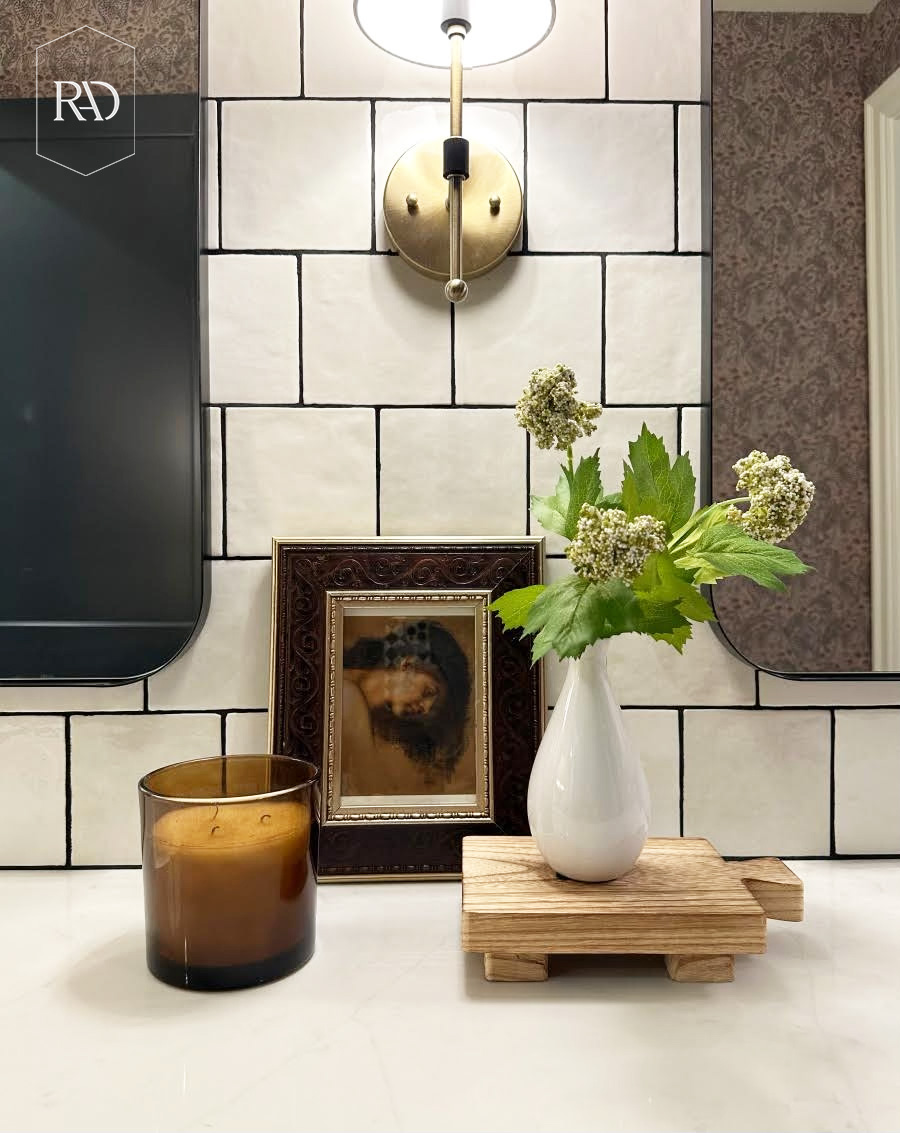
Let’s start at the beginning. This renovation began with me tiling the whole wall behind the sinks. I had left over boxes of Bedrosian Clay tile from my diy checkered kitchen backsplash, and it ended up being a perfect amount for this space. I installed this tile backsplash using Musselbound adhesive. For the complete tile transformation as well as tips and tricks to tiling a wall using Musselbound, read THIS blog post.
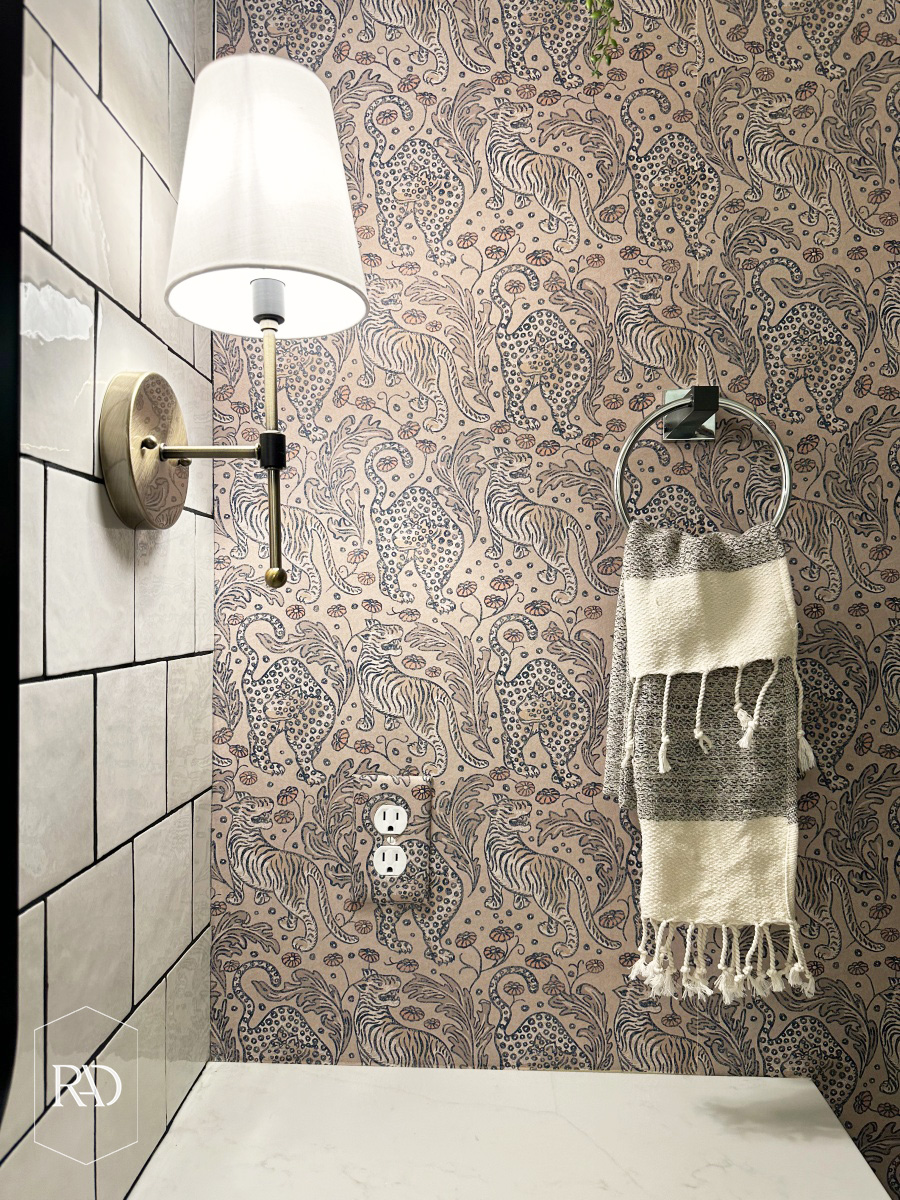
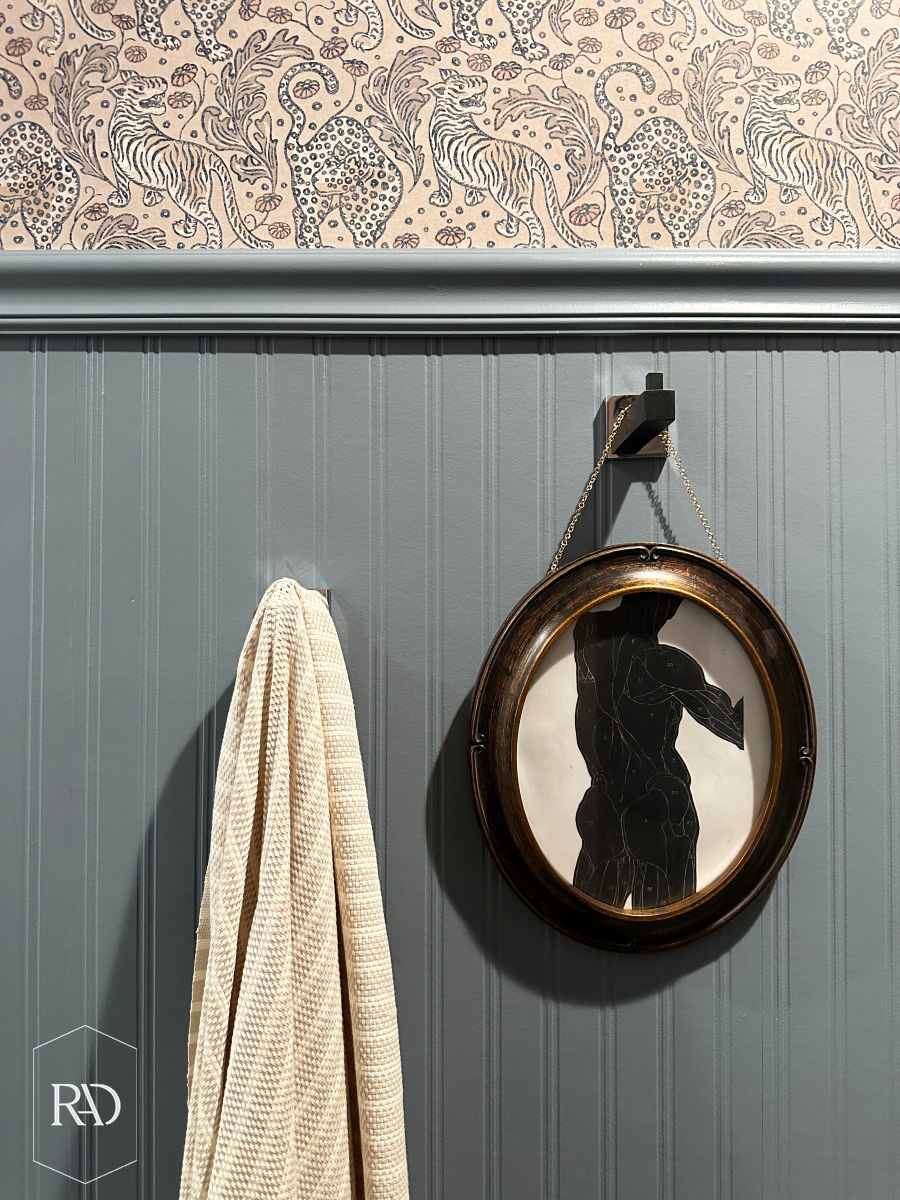
Tiger Wallpaper
The tiger wallpaper came next. This bathroom felt sterile before, but this wallpaper adds so much warmth and depth. To add even more attention to detail, I even wallpapered over the outlet covers, so they would blend seamlessly with the wall. The wallpaper is “Year of the Tiger” by Rebel Walls in the color sand. It also comes in more colorways!

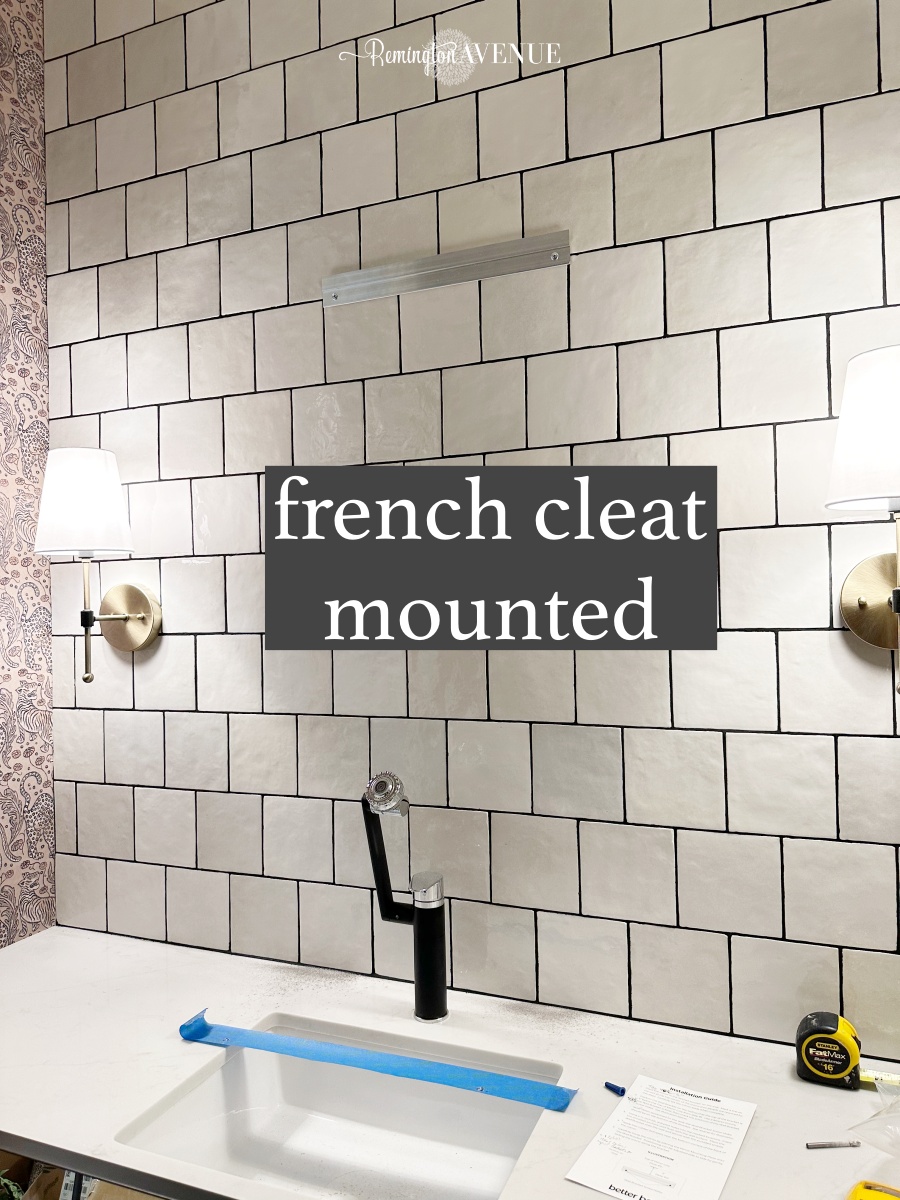
How To Hang A Mirror On A Tile Wall
This moody DIY bathroom renovation project allowed me to try something I have never done before. I got to hang a mirror on a tile wall. And guess what? I did it and it went perfectly! This can be a little intimidating the first time you drill into tile because you want to be careful not to crack it. So slow is the way to go. I give a full tutorial on how I hung both of the mirrors using french cleats in THIS post. Plus, I give you a second way to hang them if you don’t want to drill into the tile.

Hanging The Beadboard Wallpaper And The Trim
Home hack: beadboard wallpaper. I saved about $100 and I didn’t have to remove my baseboards or scribe any edges. I will say it’s definitely not as durable as real beadboard paneling. It dents. Because this bathroom is very seldom used, it’s fine for this space. But I wouldn’t recommend it for a high traffic area or a kids’ space. I think it would be fantastic behind any shelving system for an extra decorative touch or as a ceiling application. It paints great and the air bubbles disappear after drying.

Replacing the Faucets + Mixed Metals
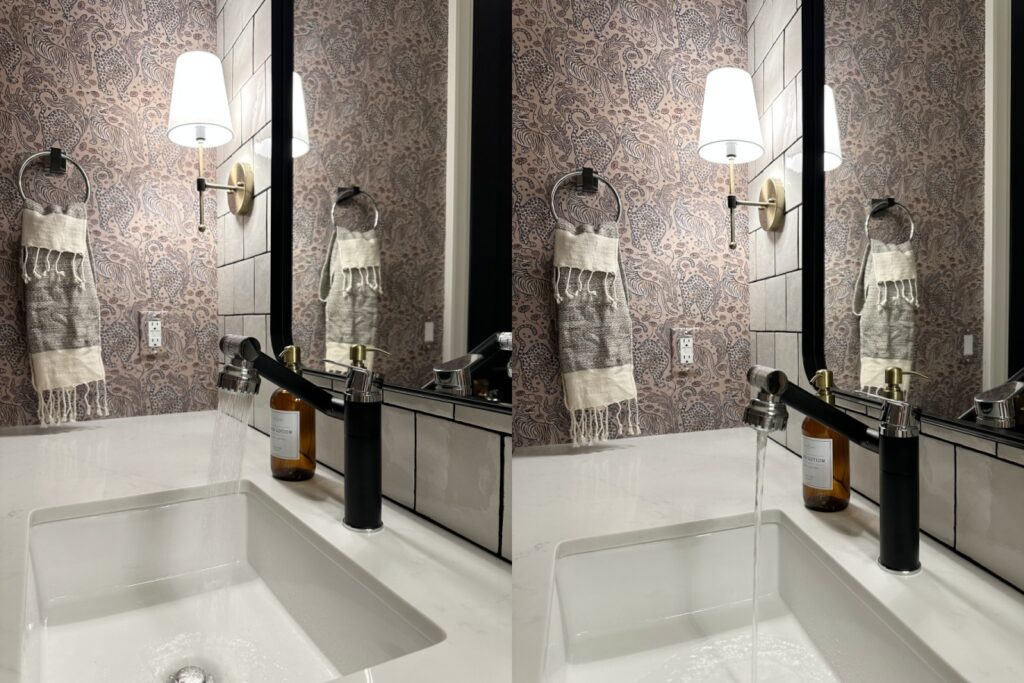
I swapped out the original builder-grade faucets with two-tone ones to give a more custom feel. You’ll notice that I used a lot of mixed metals in this space. I think the brass & black two toned sconces really bring out and play off the warm wallpaper and two toned faucet. These faucets are really cool, you can turn the knob for different water streams and move the nozzle up and down. I even painted the existing hardware to continue the mixed metal look throughout.
How To Change The Color Of Your Grout
This was another project I took on for the first time. I used Grout Refresh to change my grout color from white to black. This really brought the whole space together and made it feel so much more luxurious. For a full tutorial on using Grout Refresh to change the color of your grout, read THIS blog post.

Styling
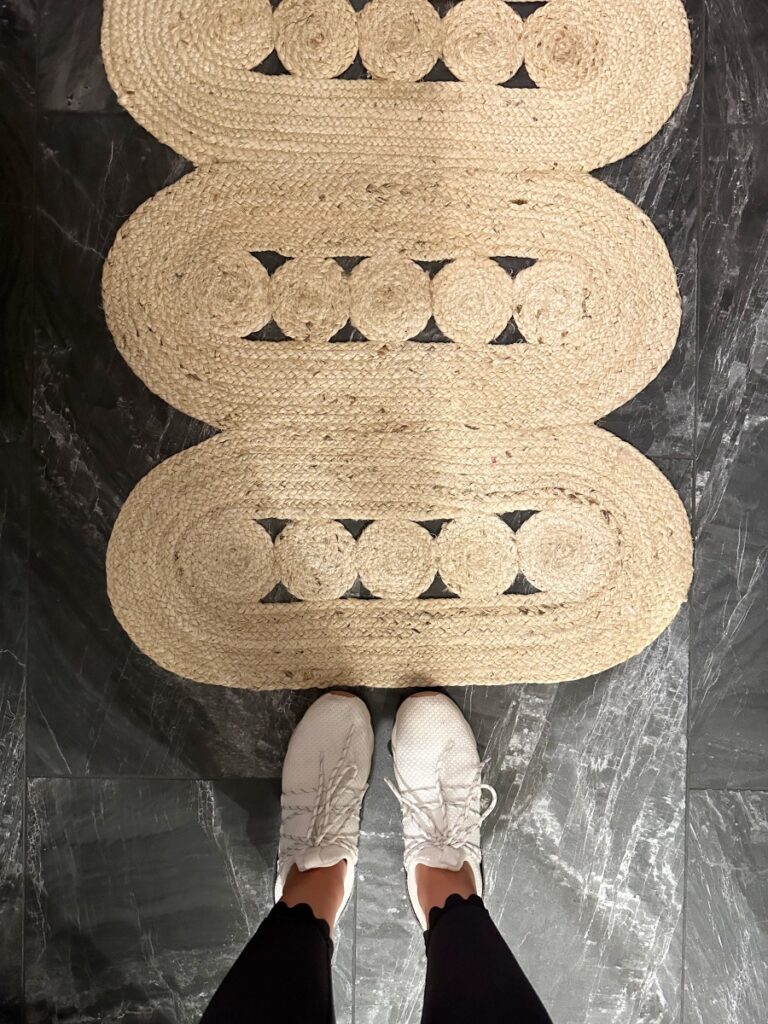
When it came to styling the bathroom, I chose small pieces, that added more warmth. For example the little wooden stool by the toilet, the small frame hanging from the towel hook, and the wooden pedestal on the counter.

This moody DIY bathroom renovation took this hardly used space from sterile to warm and ready to be used. Though this is a basement guest bathroom that doesn’t get too much traffic, I am so happy with how it turned out and how everything pulled together. Shop my bathroom below by clicking on any image.

 Add to favorites or read later
I’m still not a fan of wallpaper.
I love everything you do!! So happy I found you!