ORC-Week 4: Master Bathroom tile {Designer Style on a budget}
Wahoo it’s week 4 of the One Room Challenge (ORC) and I’ll be sharing my master bathroom tile selections! So what do you do when designer style meets a budget? This is a question I ask myself on nearly every project I undertake. Everyone has a budget, big or small, and the goal is to find the BEST products that FIT squarely in that box… AND make it appear as if there never was a budget BOX!
![]()
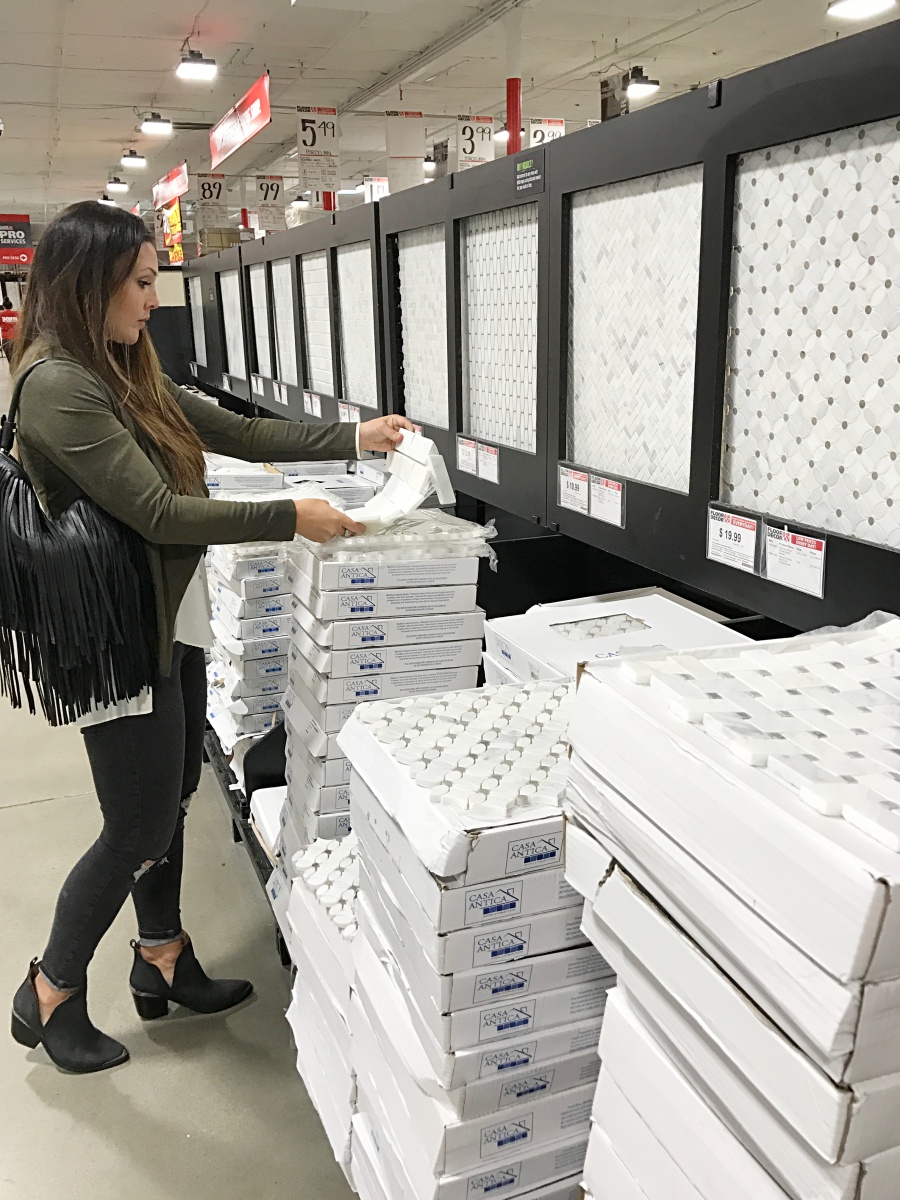
When shopping for tile for my master bathroom I stumbled upon a store that fits right in with my “designer style on a budget” philosophy! Let’s just say Floor & Decor just got added to my go-to source for tile! If you’ve been following along this 6 week master bathroom transformation, you might recall this inspiration photo from Pinterest. Real marble stone from floor to ceiling is just about as luxurious as it gets!

I love the horizontal rectangular marble tiles combined with the white and black basket weave mosaic. Classic! I set out to capture this same look and luxurious feeling in my own master bathroom. Wouldn’t you know I got lost in the marble section. I really was amazed at the selection Floor & Decor offered! There were 5 rows of unique marble mosaics. But here’s what really sold me…EVERYTHING is in stock! What? You mean I don’t have to wait 6 weeks till my order is shipped in just to find out that one of the boxes got damaged or they sent the wrong color? Did I mention the ORC is a 6 week challenge? It’s like the tile Gods were looking down on me and decided to cut me a break! Insert heel clicks and high fives all around!
Get the Look

Although the real marble prices were actually very reasonable, I had to remind myself why my budget wouldn’t allow for the real thing. If you haven’t heard, we bought a piece of land for my birthday last month, and we plan to commence building in one year! That means updating the master bathroom with a designers eye, but staying on a fixer upper budget is ever so important! But don’t worry marble mosaics…I’ll be back for ya on the next house!
After reality hit me in the face, I sought out to find a porcelain clone of my rectangular marble friend from the shower photo above. Bingo…3 options! I found a Carrara polished porcelain in a 12″x24″, a Carrara matte porcelain in the same size, and a classic Carrara ceramic tile in 8″x24″. I ended up selecting the Carrara ceramic tile for 2 reasons: there was no yellow or gold tones in the vanes and I loved the 8″x24″ size option. Insert happy dance! Now that my must-have tile was nailed down, I was on the hunt for my shower floor. When selecting master bathroom tile, the options are endless…Hexagons, circles, and squares…choices choices!
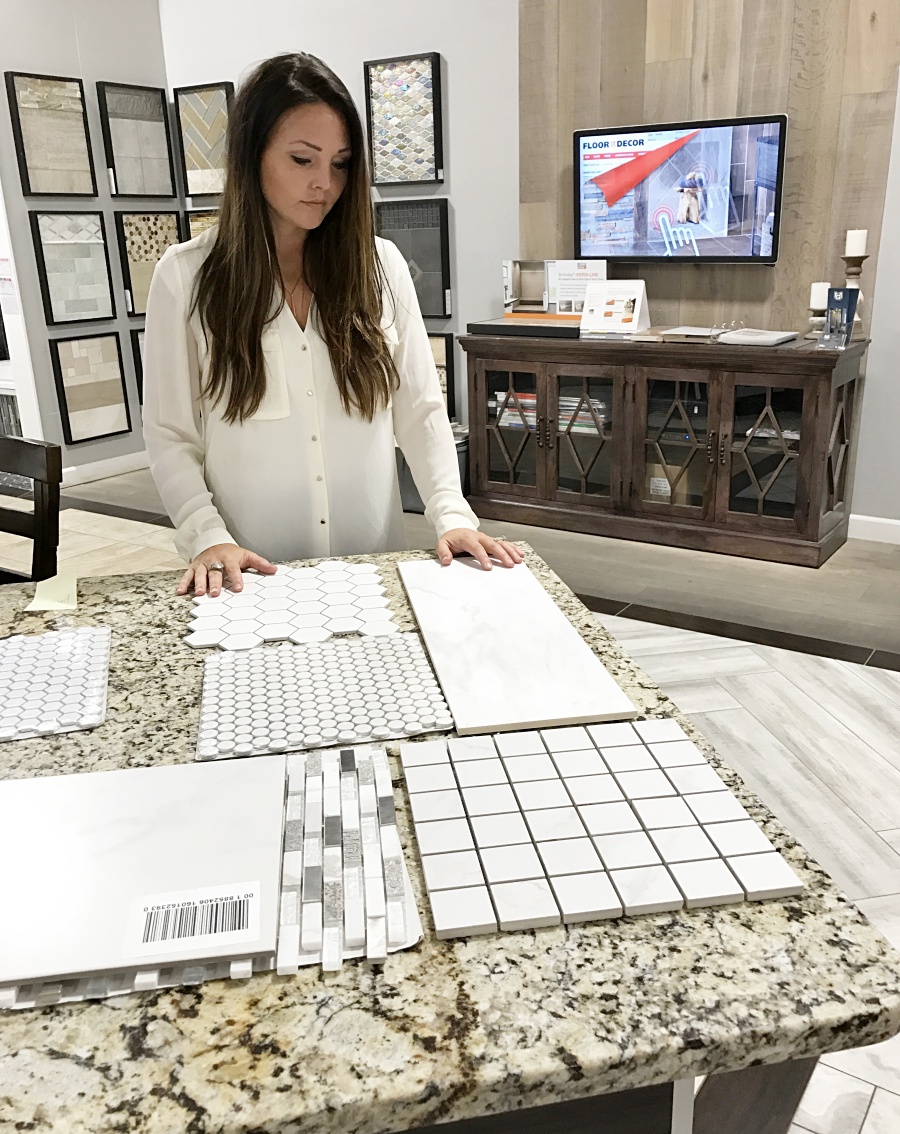
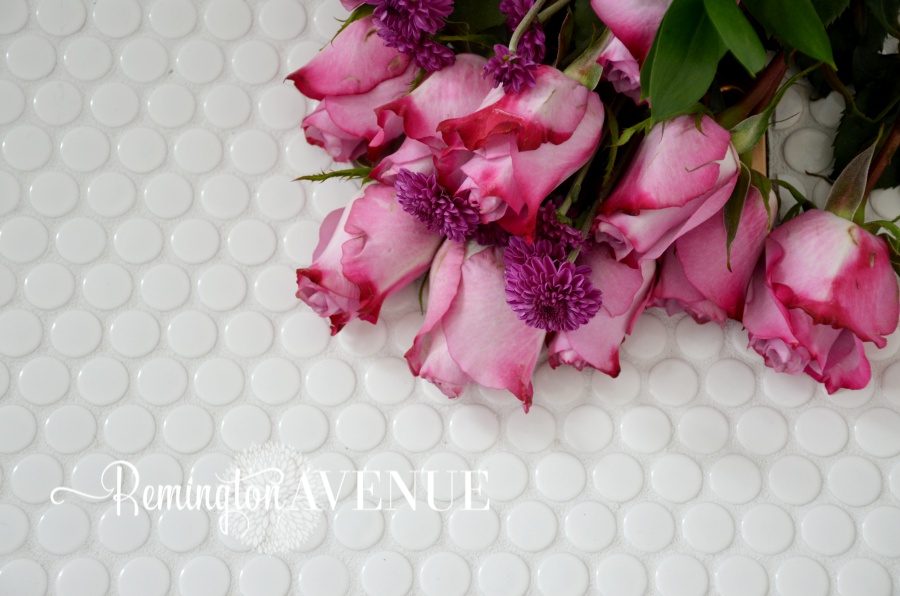
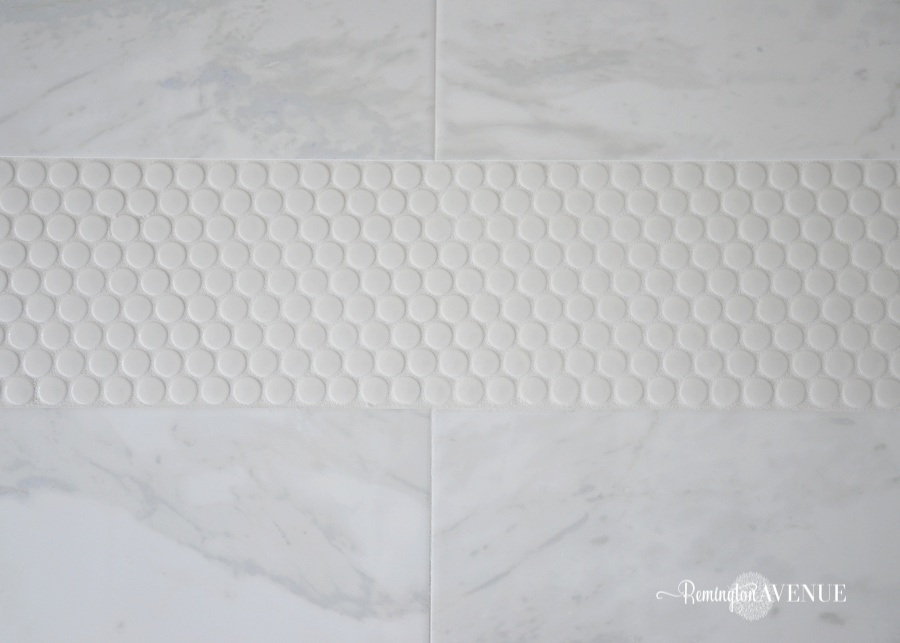
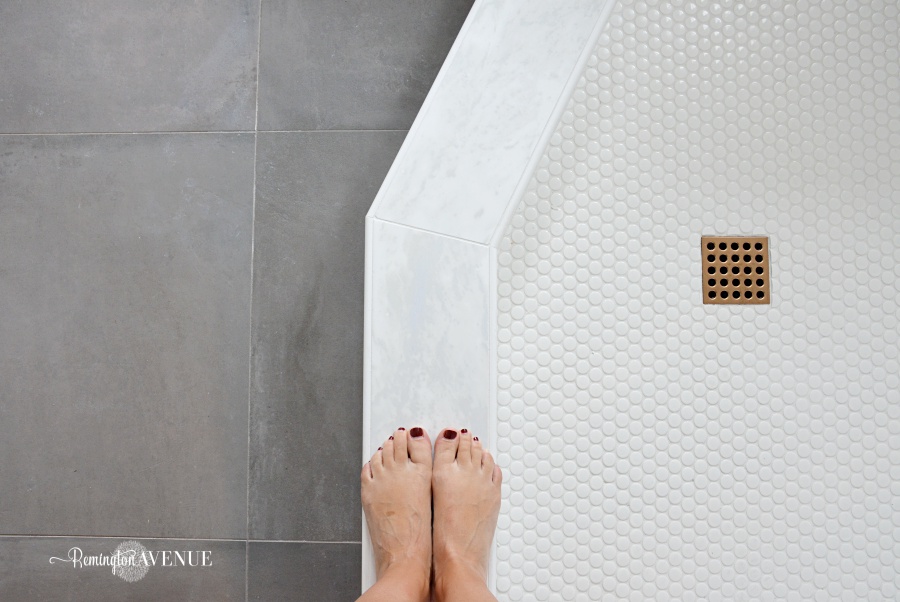
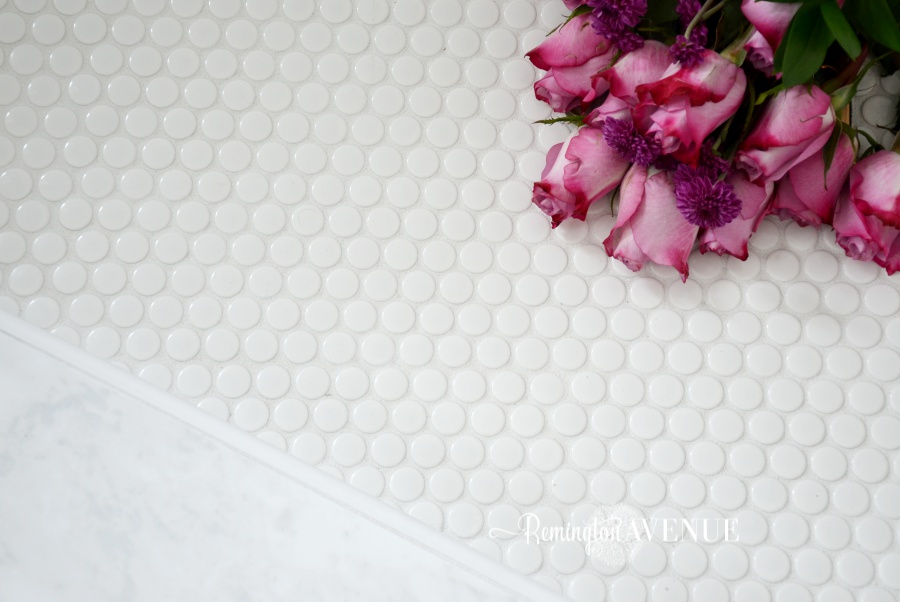
“I got my mind on my money and my money on my mind”…or so the song goes! Speaking of money, penny tiles come in just about every color. I love the classic look of white penny tile with gray grout, but for this application I’m keeping it clean with some white on white!
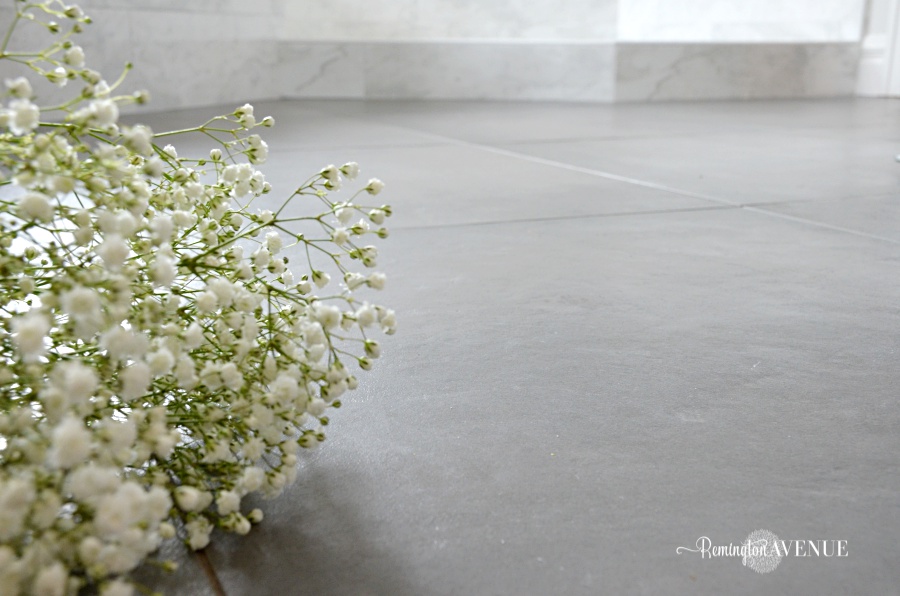
Originally I was thinking of a concrete looking rectangular tile for my master bathroom floor. However, I’m really loving the extra large size tiles that are so popular right now. I found this terra-cotta Cenere square tile in a 24″x 24″ size. It is the perfect contrast to my white marble-looking shower and my white vanity.
Done and Done! Did I mention that Floor & Decor has everything in stock? Yup, I drove home with my new master bathroom in tow!

Fast forward through week 1-design plan, week 2 of demo & prep (tile over tile), and week 3 of actual tiling, and we have our Designers master bathroom on a fixer upper budget! Remember what it looked like before?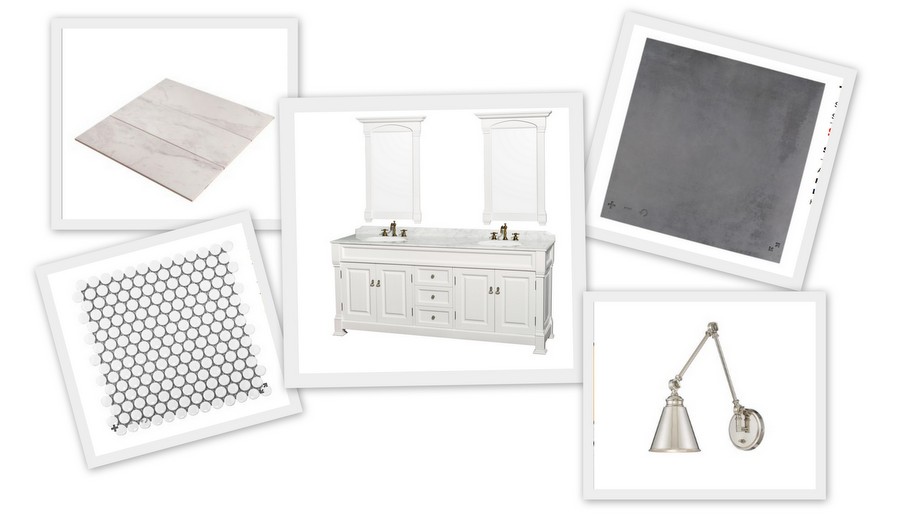

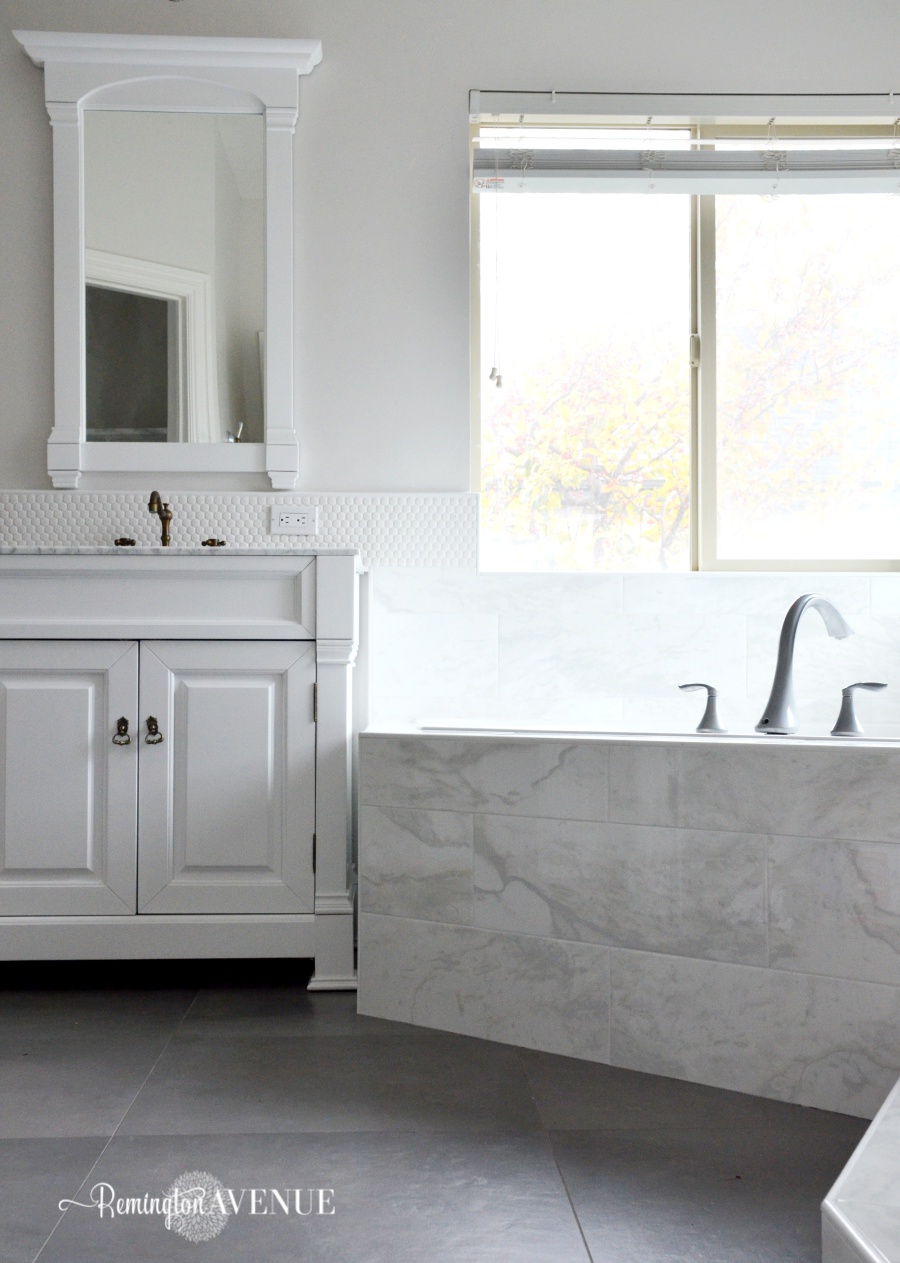
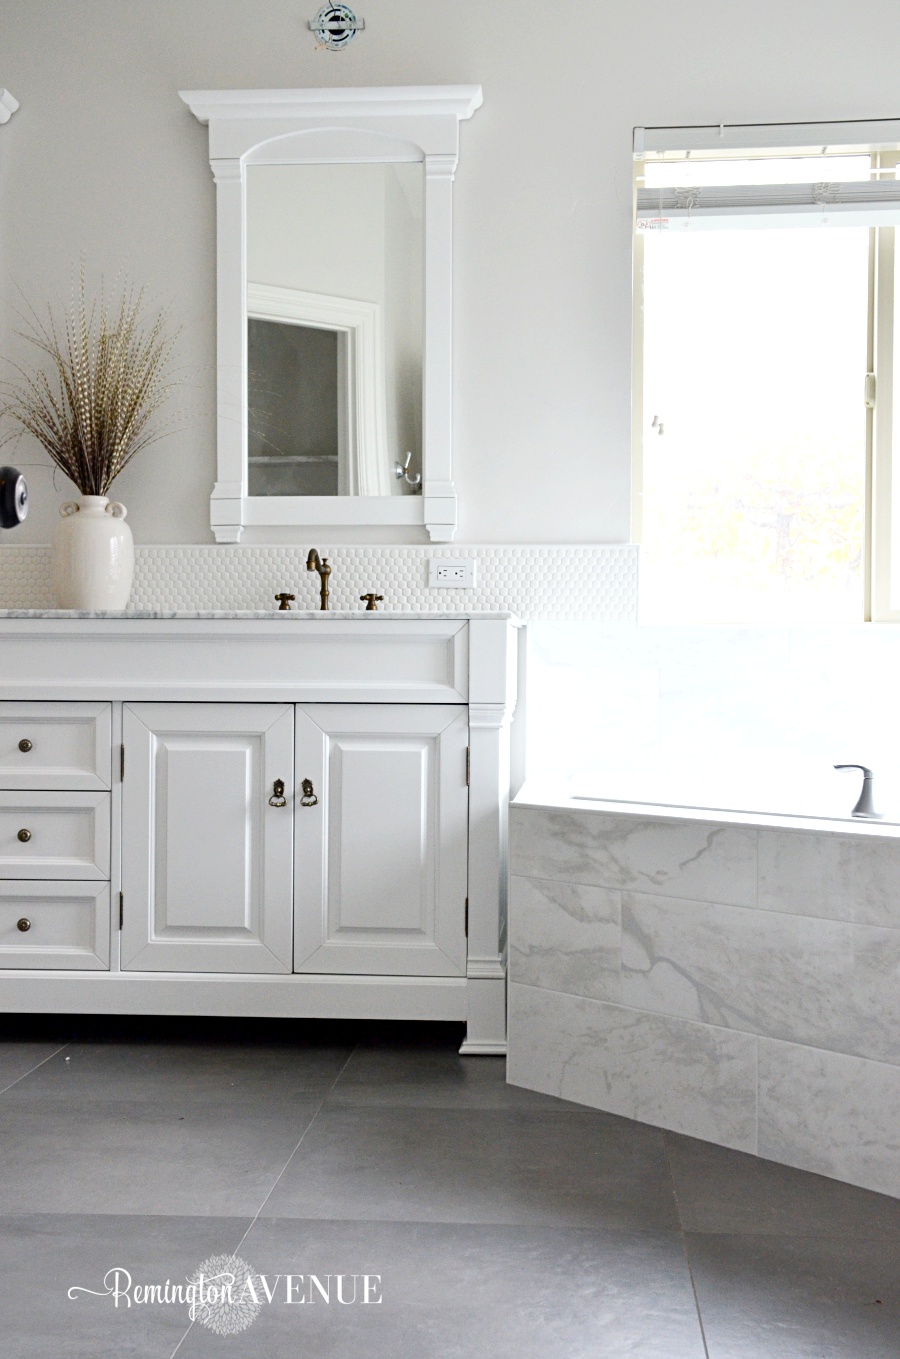
Holy moly can we say bye bye yellow! The shower doors are not installed yet(I’m crossing my fingers they’ll get done on time), but you can see we extended the shower wall tile all the way up to he ceiling. That alone made a dramatic difference, making the ceiling seem way taller and the whole space feel bigger. We also ditched the wire shower organizer and had 2 corner shelves built right in. Clutter is no friend of mine!
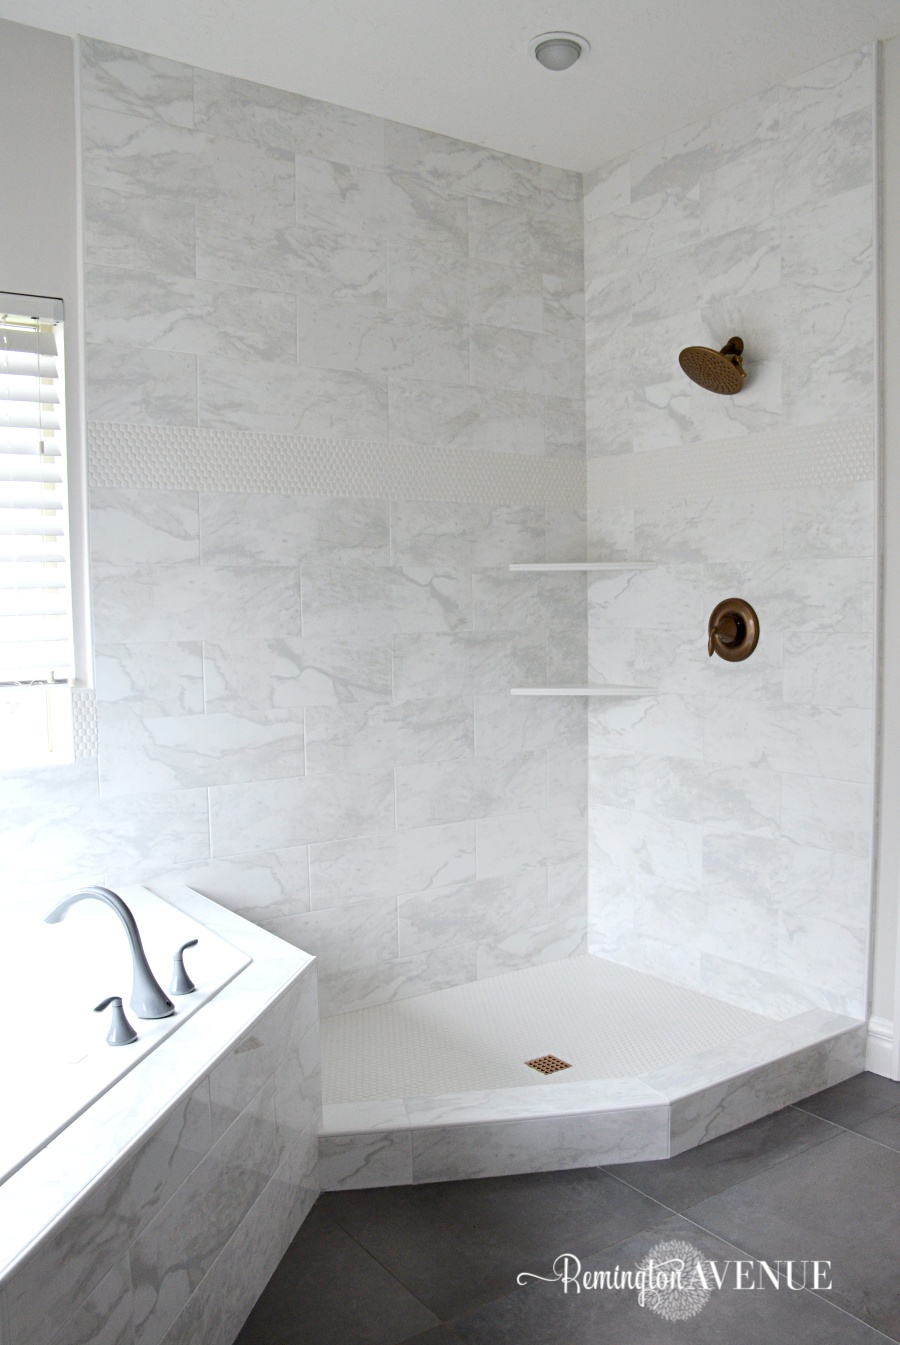
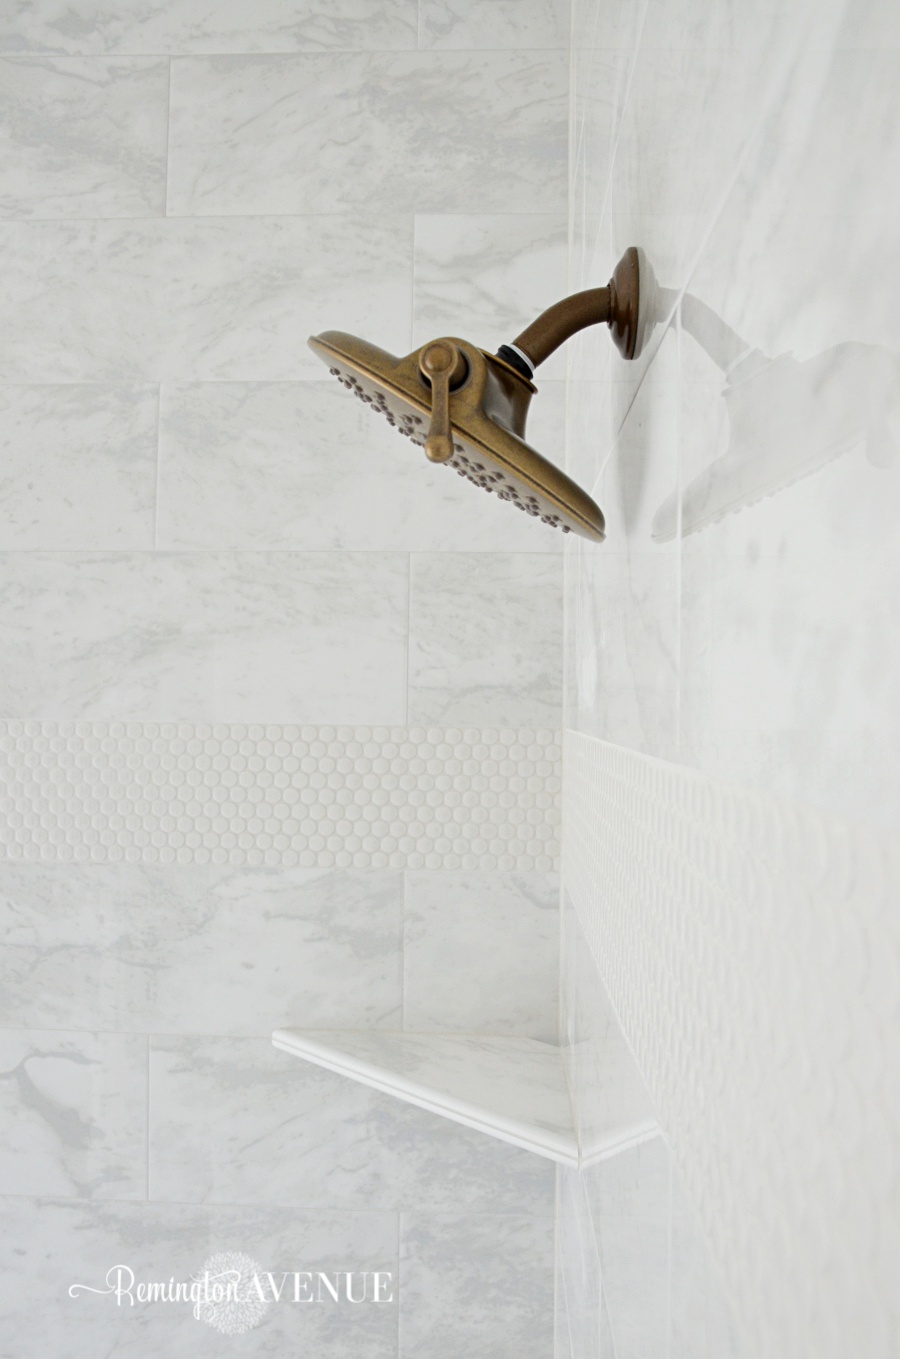
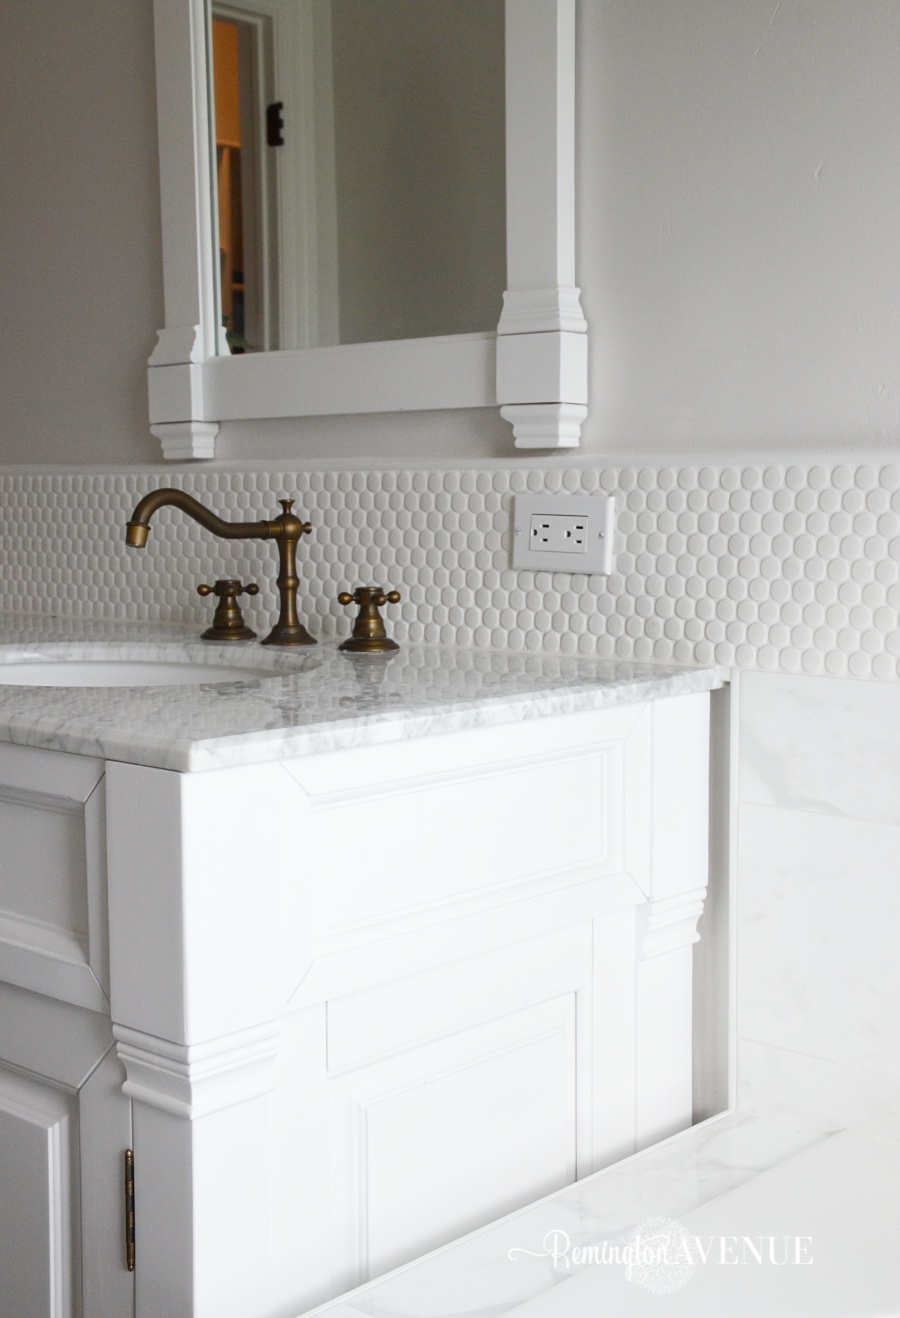
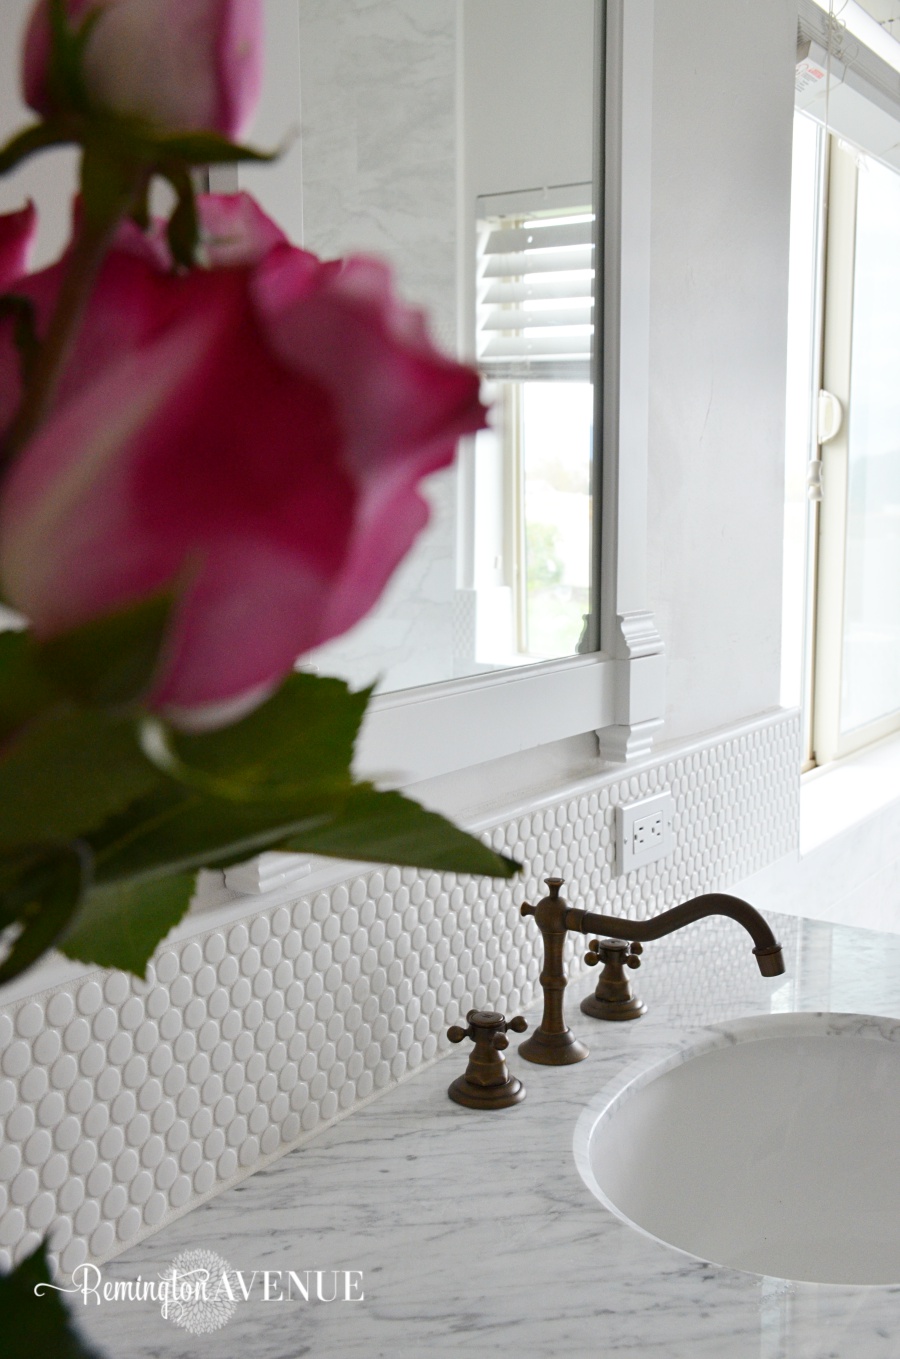
I added a decorative band about 2/3 the way up the shower wall in white penny tile. I know this wasn’t in the inspiration photo, but I like the added character. We used the penny tile on the top of the tub surround and continued it through to the vanity backsplash. Adding this strip to the shower helps keep the eye moving all the way through the space.
We upgraded our shower head to this rain shower fixture. You can see how I painted the rest of the bathroom hardware to match in my last post (HERE).
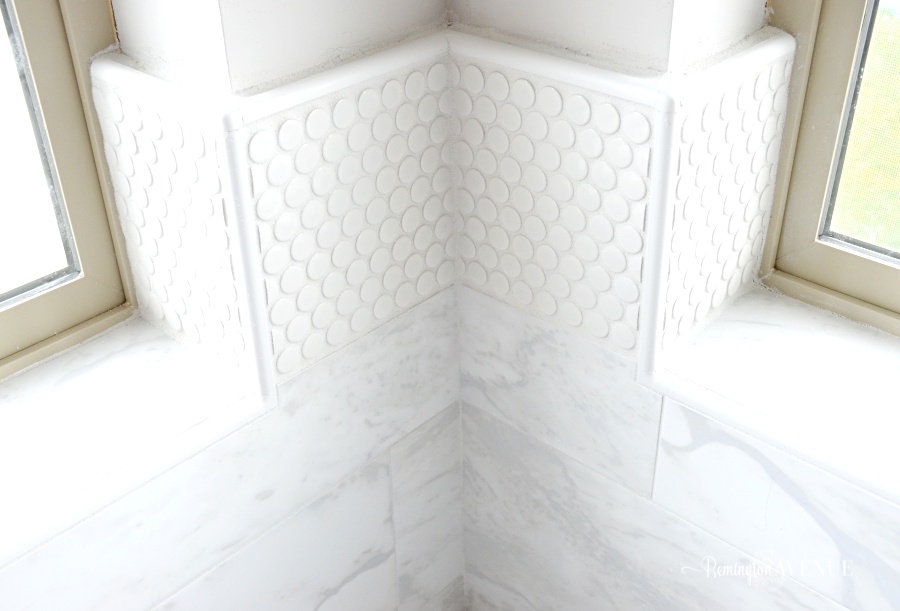
You can see here where the penny tile transitions from the tub surround to the vanity backsplash. Do you remember this problem area from my first post?
Sometimes its the little areas like these that make a big difference. It keeping the eye moving from the shower, behind the tub, and over to the other side of the vanity. My tile guy Jim asked if he could just use the rectangular marble tile in the windows, but I said no. It’s an easier install for him, but like I said, It’s all in the details. Of course he was happy to oblige. (Again, if you’re local to Utah and looking for a reliable Tile professional, leave me a message in the comments or email me. I would love to give you his contact info!)
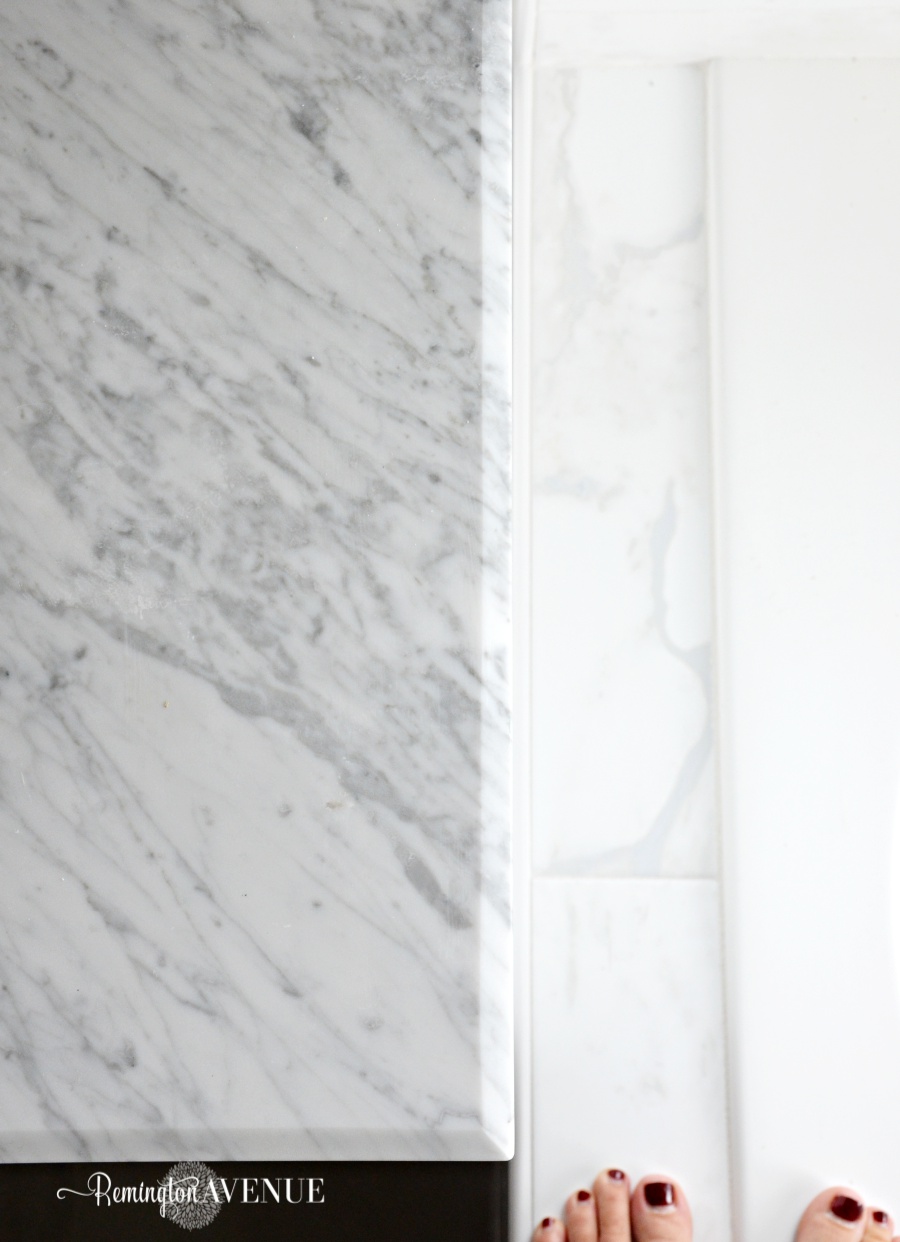
Honestly, I’m just as happy with the ceramic marble tile I selected for my master bathroom as I would have been with the real thing. Aside from cost, Here are some other advantages for using porcelain/ceramic tiles over marble. Because marble is a soft stone, its very absorbent. For example, if you dye your hair in a marble shower, the dye can stain your shower floor. Marble is also easily etched by acidic materials, such as lemon and certain cleaning products. It’s always good to test lotions and other bath supplies on samples to see if there’s a reaction. Because marble contains minerals, there’s always the risk that its iron content will turn to rust in a bathroom. A beautiful installation can be ruined when the iron buried deep in the marble discolors from humidity and moisture. Basically none of this applies to porcelain or ceramic tile. I’m cool with low maintanence!
These warnings; however, did not stop me from choosing a real marble counter top. Having some basic knowledge will help keep it looking beautiful. Here is a shot of the real marble counter top next to the porcelain tile.
Don’t forget to tune in next Thursday to see all I’ve accomplished for the One Room Challenge. I’ll be adding the “jewelry” to my master bathroom and sharing my lighting choices. In the mean time don’t forget to check out all the other talented designers participating in the ORC (HERE). I certainly enjoyed selecting the tile for my bright white master bathroom makeover. Did I accomplish the designer style on a budget? I think I did, but hey…who am I to judge?
A big thank you to my sponsor for making this designer master bathroom makeover possible!
All opinions are my own.
![]()

 Add to favorites or read later
Oh my word!! Your tile is amazing!!! Will you come do mine?!? Absolutely fantastic, Mysha- your decisions are impeccable!
Haha, Im takin a break after this lol! Thanks Ket…Love your office
Hi Mysha! Fellow ORC-er here stopping by from the linkup! 🙂 Your photo caught my attention because we recently installed white penny tile with white grout in both, our master and guest bathrooms – and I’m obsessed with the look!
We’re transforming our living room for the ORC – well, we’ve spent the past 15 months renovating an abandoned 1930 bungalow but for sanity’s sake I figured that if I can just finish one room then I’ll consider it quite an accomplishment, ha!
I seriously can’t believe just how much you’ve gotten done in four weeks! The entire room is unrecognizable, and I am dying over that gorgeous marble!
XO, Oksana | FOXYOXIE.com
Thank you so much Oksana, Ill be sure to check out your progress as well! Sounds amazing
Mysha oh my goodness this is truly stunning!!! I love your choices and that penny tile was the perfect fit! Great job friend~
Thank you so much annie! So glad you liked the penny tile
Freaking out right now this is so amazing!!!!??????????
Thank you Summer!!
Oh my gosh Mysha! You must be so happy!! It looks sooo good!!!!
Thank you ashley! Im pretty stoked
Mysha!! This is so fabulous that I almost have no words!! The tile looks amazing and you did such a Great job as usual!!! Can’t wait to see the full reveal soon:)
Thank you so much bree
Ahhhhh it looks SO GOOD!!! ????
So fabulous! What a HUGE difference!!!
Thank you so much Tana
Mysha!! I want this bathroom now!! I’m in love and I hope to get my new vanity someday soon…you’re really inspiring me to get moving!! Amazing job and your tile selection is perfection!! xo
This looks amazing! I’m looooving your final tile selections! I’m tackling my bath for ORC so I’m loving all of your inspiration-floor to ceiling white-it’s gorgeous-great work!
Thank you Kristin! I’ll be sure to check yours out too
Oh my gosh, this transformation is incredible, Mysha!! ???
Thanks so much Brynne
Stunning, love everything about this bathroom!
Thank you Maggie! Loving your transformation as well
Mysha!!!! So gorgeous my friend! I can’t believe what a difference there already is. You are so good!!! xoxo
Thank you so much Jennifer
What a transformation! I’m pinning these great resources and your beautiful marble and tile bathroom!
Your so sweet thank you melanie
Mysha!! Wow, it’s incredible! I love your choices and it’s so white and fresh! My bathroom currently looks like your Before pic and this is really inspiring me! Great progress !!
Thank You Yuni! I think we all share similar bathrooms lol!
Wow!! This is such a gorgeous transformation!
Thank you so much emily
Everything is very open with a very clear explanation of the challenges.
It was truly informative. Your website is useful. Many thanks for sharing!
Keep on woгking, great job!
So you extended the tile further up the wall than the original tile went, right? How did you compensate for the difference in wall thickness between one layer of tile vs two where you added the new tile over the old?
Yes I Did. We added a layer of tile board behind the extending tiles so it all came out the same thickness. Does that answer your question?