DIY Dresser Makeover
This DIY Dresser Makeover is a really special project for the nursery, as I have always done a DIY for each of my kids’ rooms! It’s really important to me to have personal touches and memories throughout the space. This time is no different.
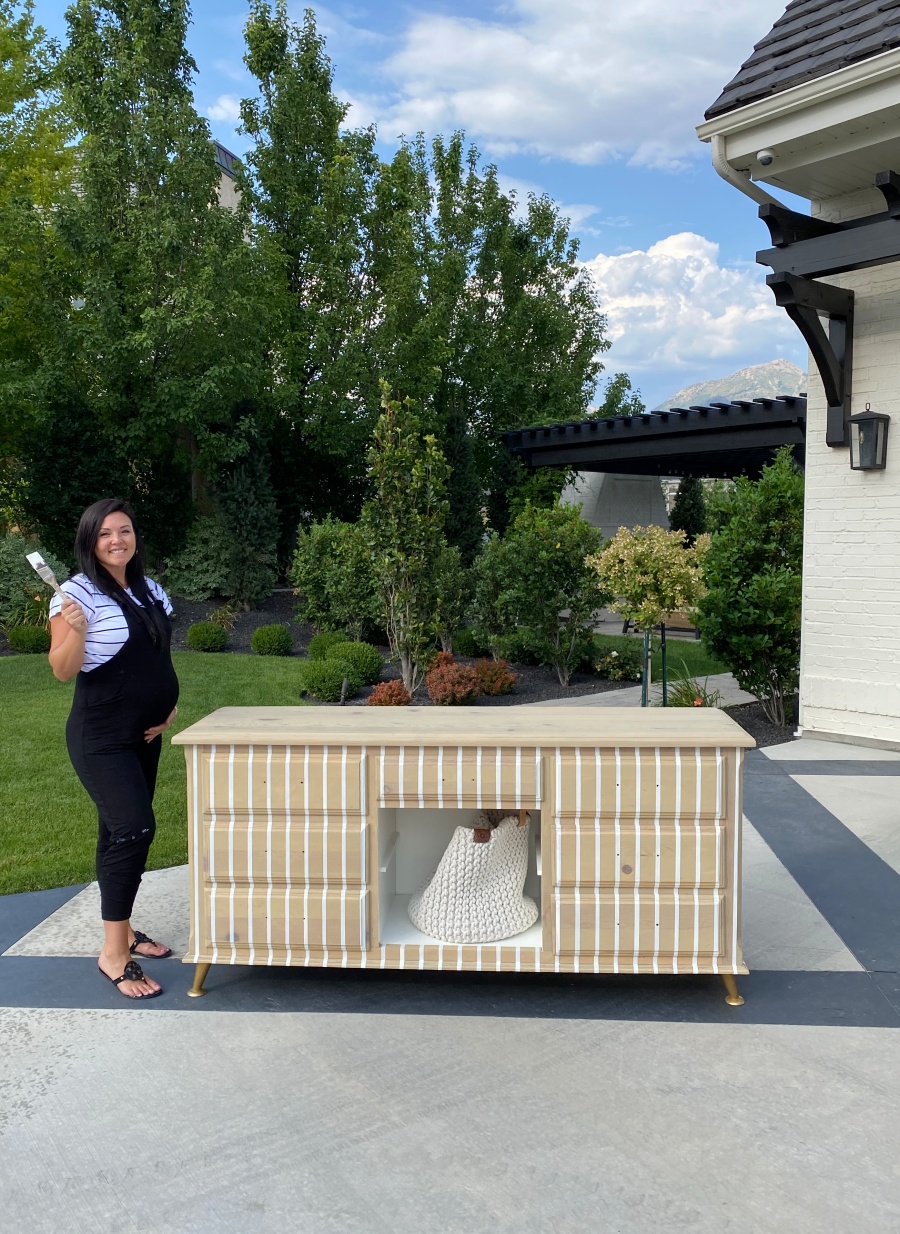
And yes, I am 32 weeks pregnant redoing a dresser but it’s tradition! It’s a piece of creative heart for each of my children!
Plus, as a creative, I need an outlet and I enjoy seeing the process. Figuring it all out on the way, keeps me going!
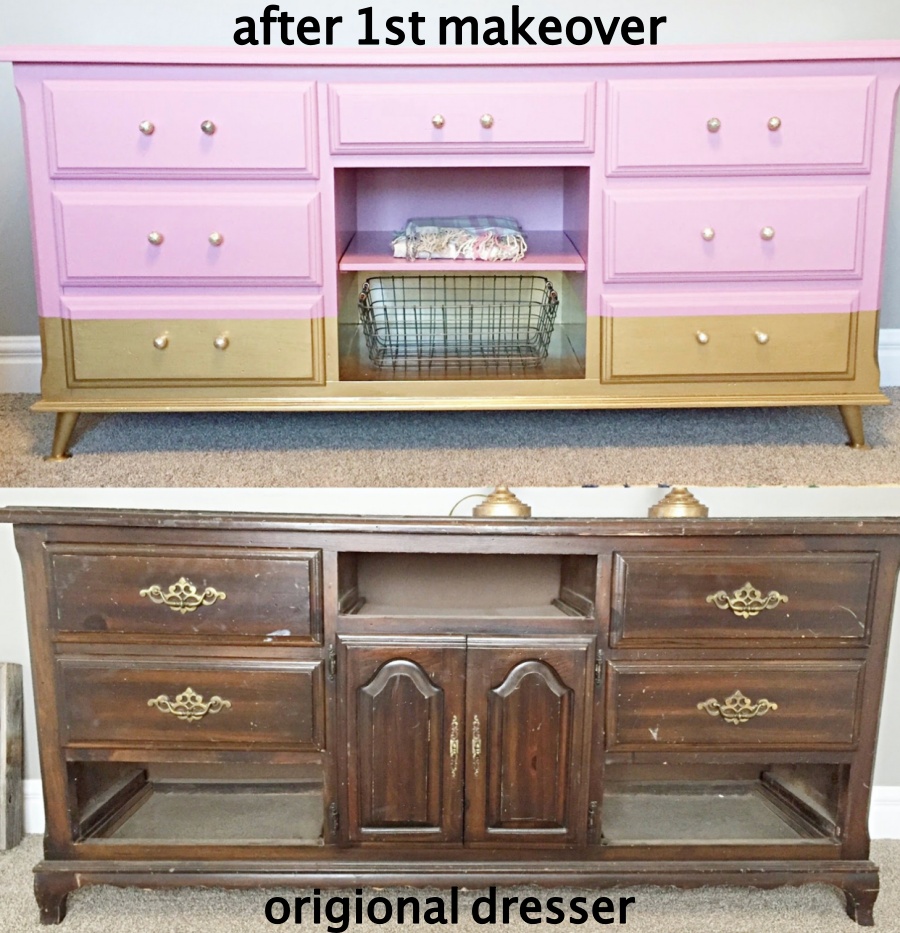
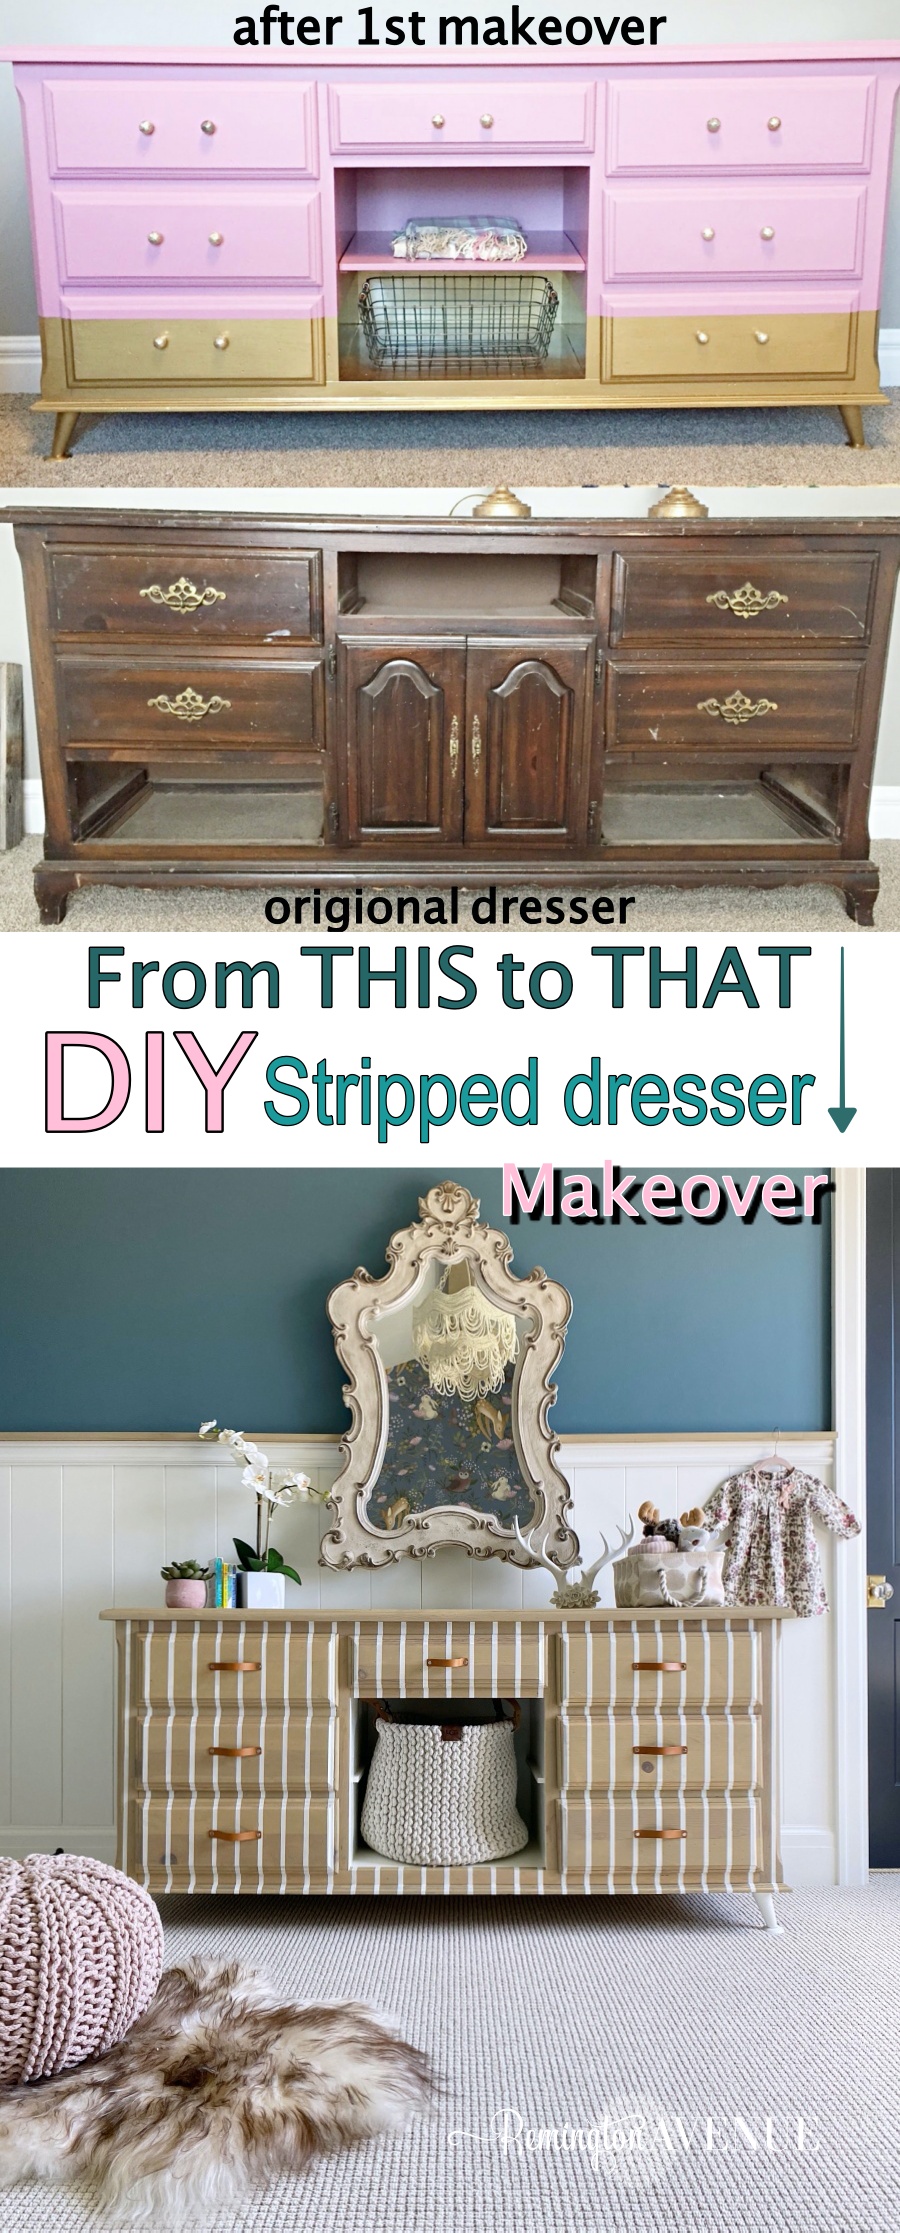
This dresser was in Chris’ home growing up (I know! Makes me so sentimental)! I had redone it for Lou’s room but the color blocking doesn’t actually work for me in the new nursery. So let’s get to work!
Products I used to Redo this dresser

Phase 1:
The first step in this DIY Dresser Makeover is stripping the paint, which I have shared before here!
So, first pour your stripper into a metal container. This is important, because paint stripper will eat away at any plastic so if you are using a separate container than the can, use metal.
Then take an inexpensive paint brush and brush on the paint stripper with the grain, let it activate and scrape off. The satisfaction is beyond for this part of the DIY Dresser Makeover!
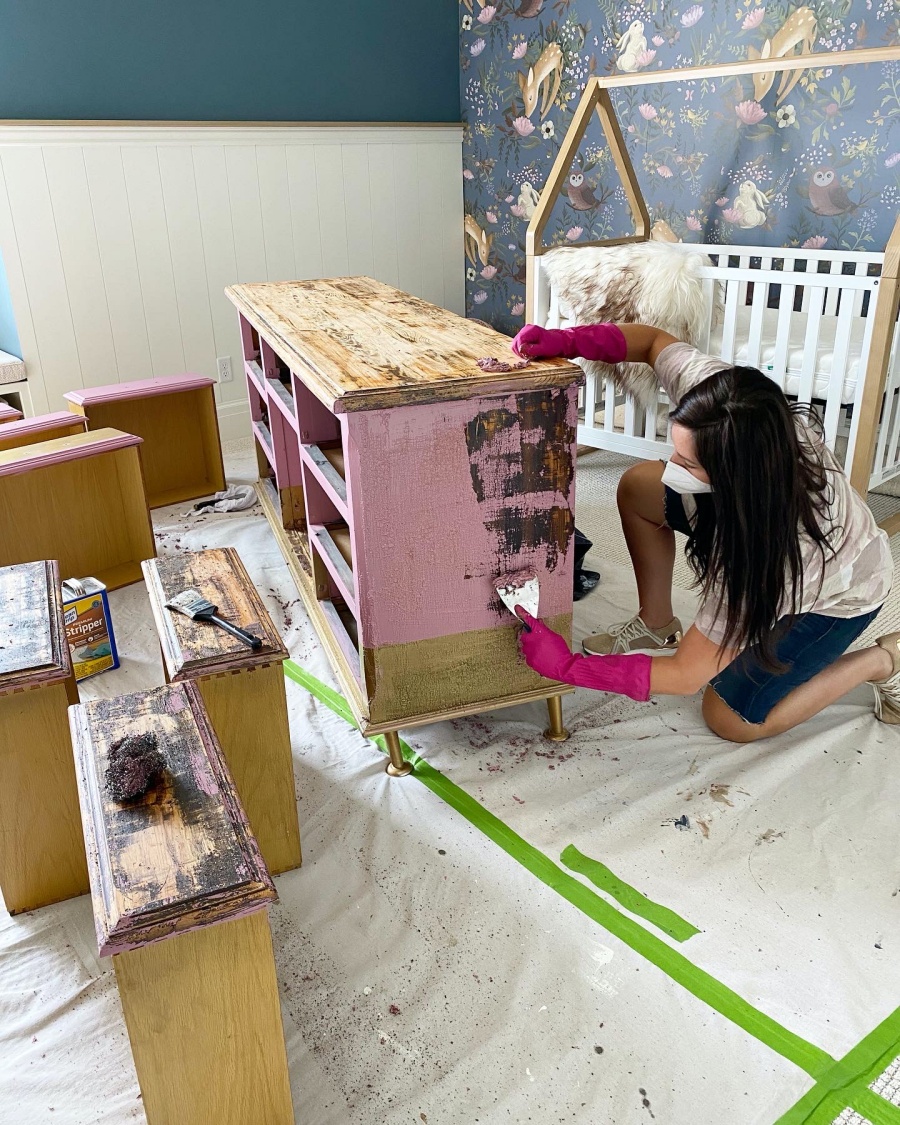
***you should use gloves and a mask for this part, and work in ventilated areas***
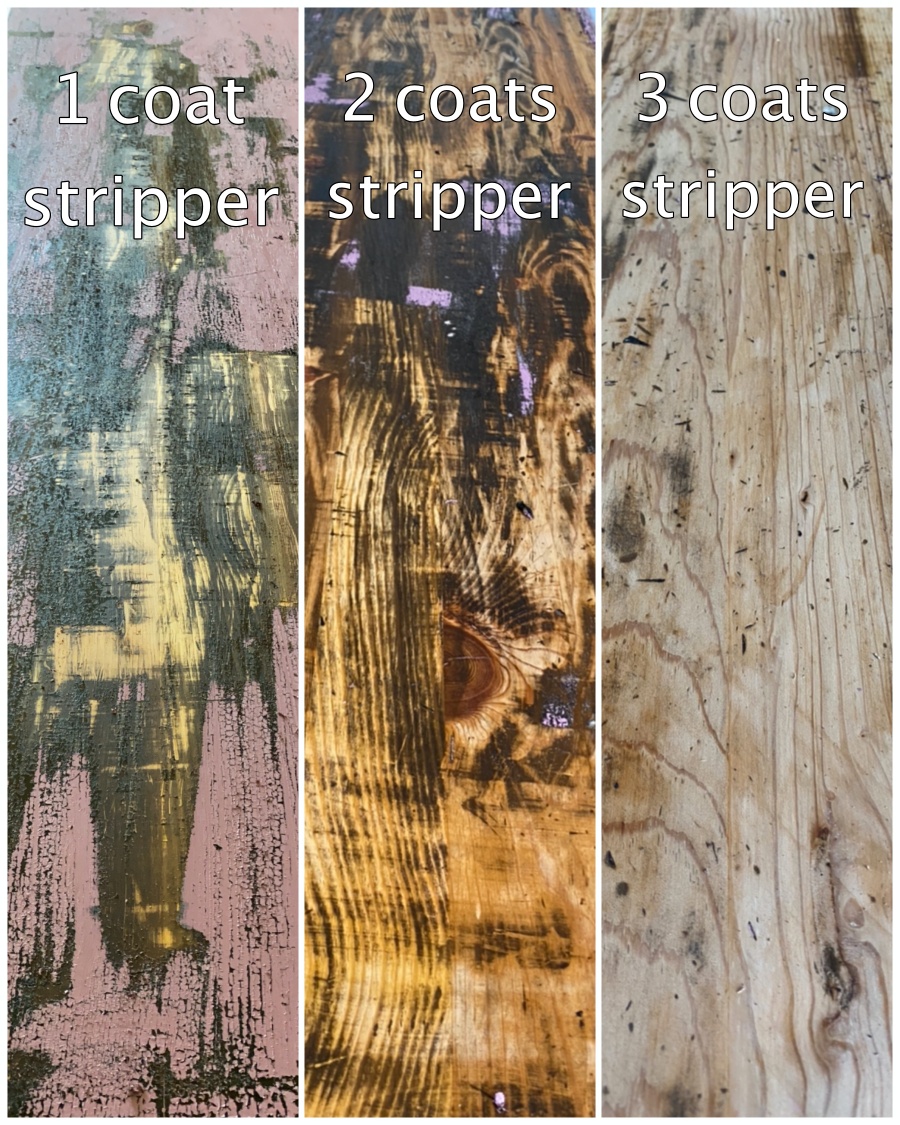
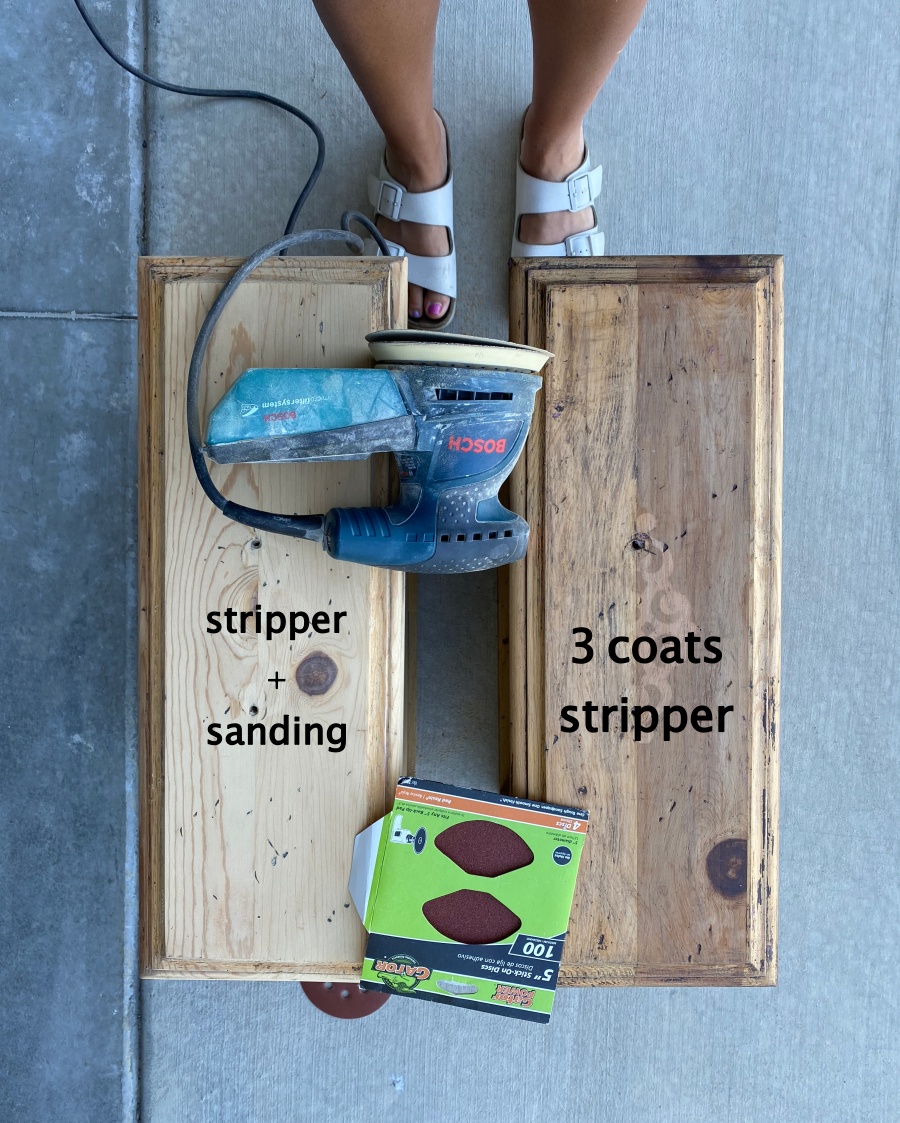
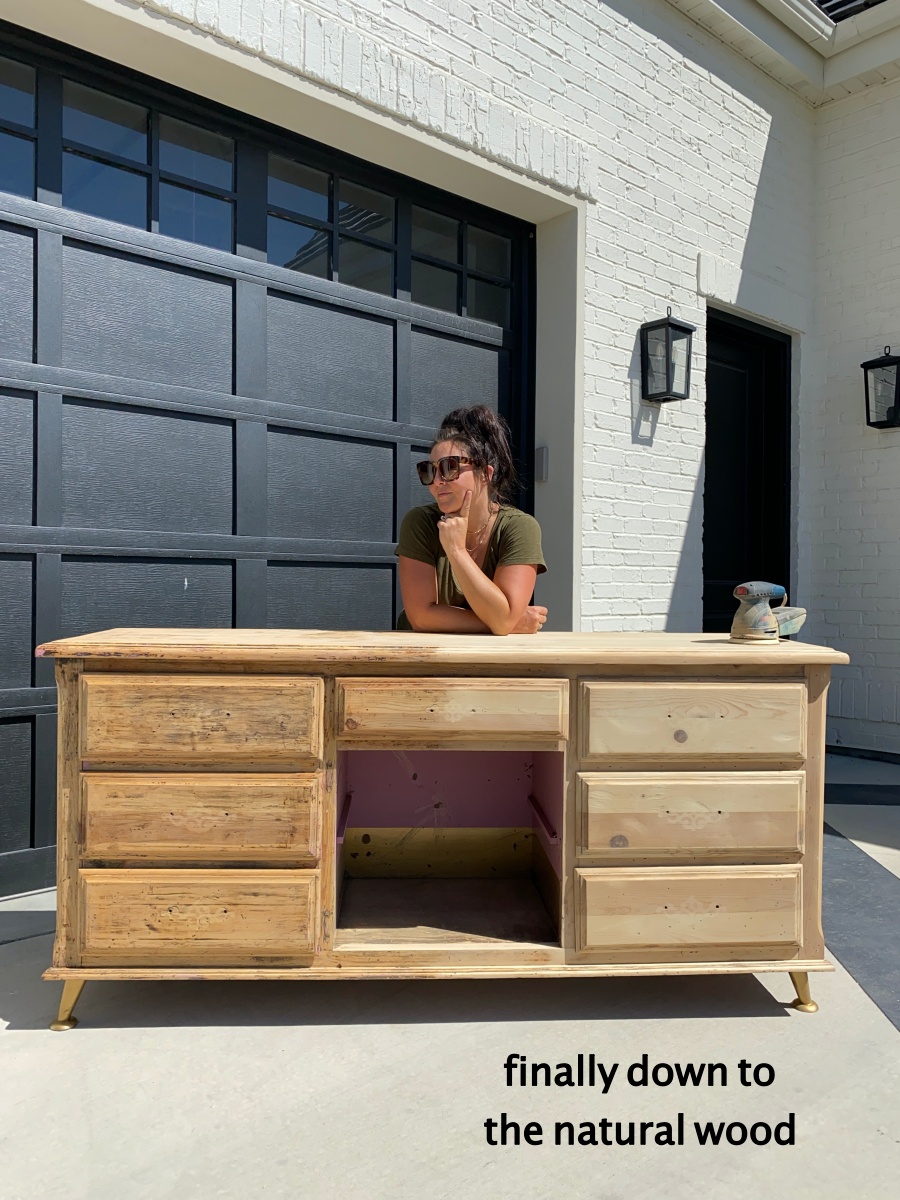
And now we wait – you can see just how quickly it starts to take action on the paint! It bubbles up and I have timed it perfectly for 15 mins. From there just scrape, scrape, scrape. For this piece I am hoping to get down to the natural wood, so this will take a couple coats of the stripper. This DIY is so therapeutic you guys!
Continue the process of painting on the stripper in layers, waiting and scraping until you get to the natural wood.
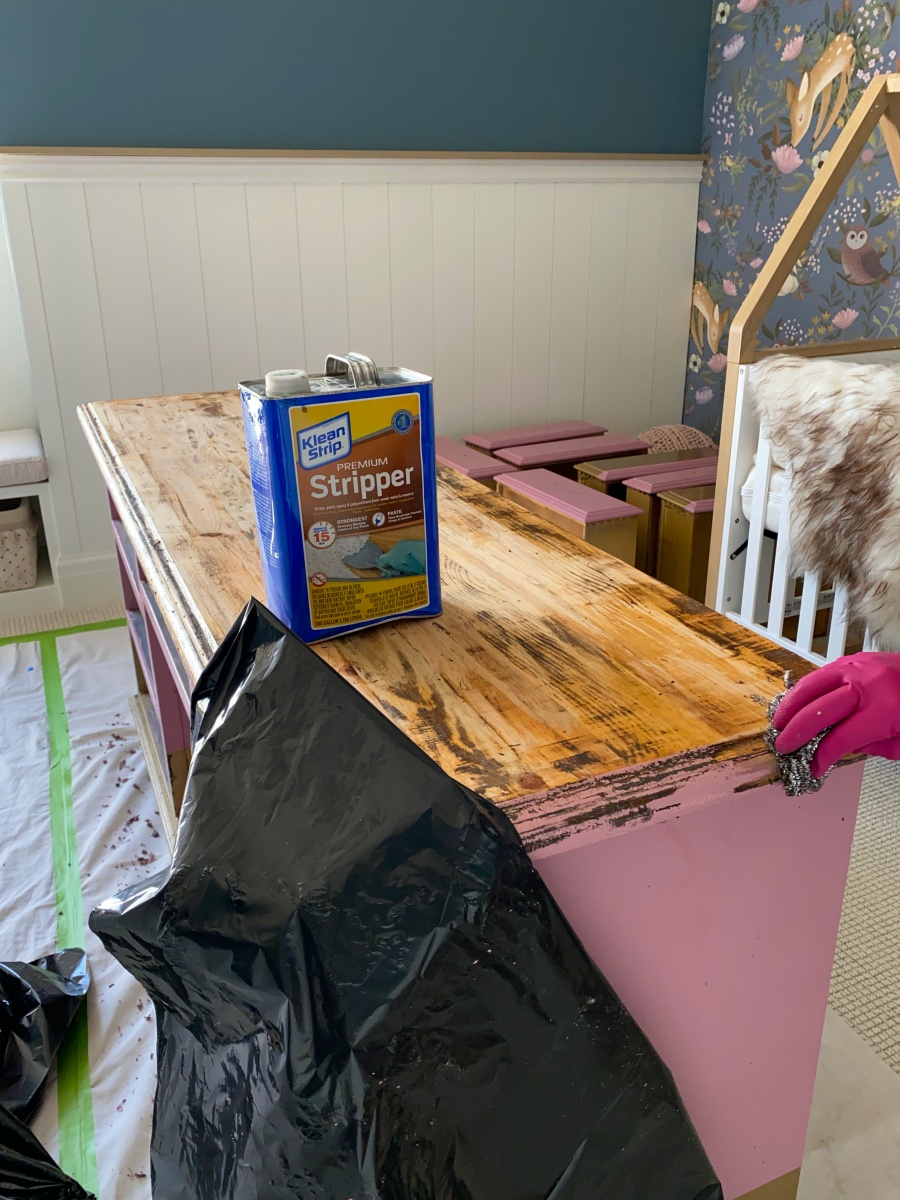
Now, for the nooks and crannies! This particular dresser has some moldings with some crevices – so for this part I am going to liberally paint on the stripper and cover with a plastic garbage bag. This stops the chemical vapors from evaporating into the air and concentrates the product. I will go through afterwards with steel wool and scrub off the paint instead of scraping.
For the drawers, I will use the same process and the plastic garbage bag works wonders! The tip was actually given to me from a reader, and THIS is why I love our community!
In order to do the front of the dresser, I am flipping the dresser on it’s back so the stripper doesn’t run off and working in sections. Wipe clean with a cloth!

Phase 2: Time to sand!
Pro Tip! Sandpaper: the higher the number, finer the grit. If you are trying to get STUFF off, you will use a lower grit like 100 and then the finer grit will give you that super smooth fine finish, like a 220.
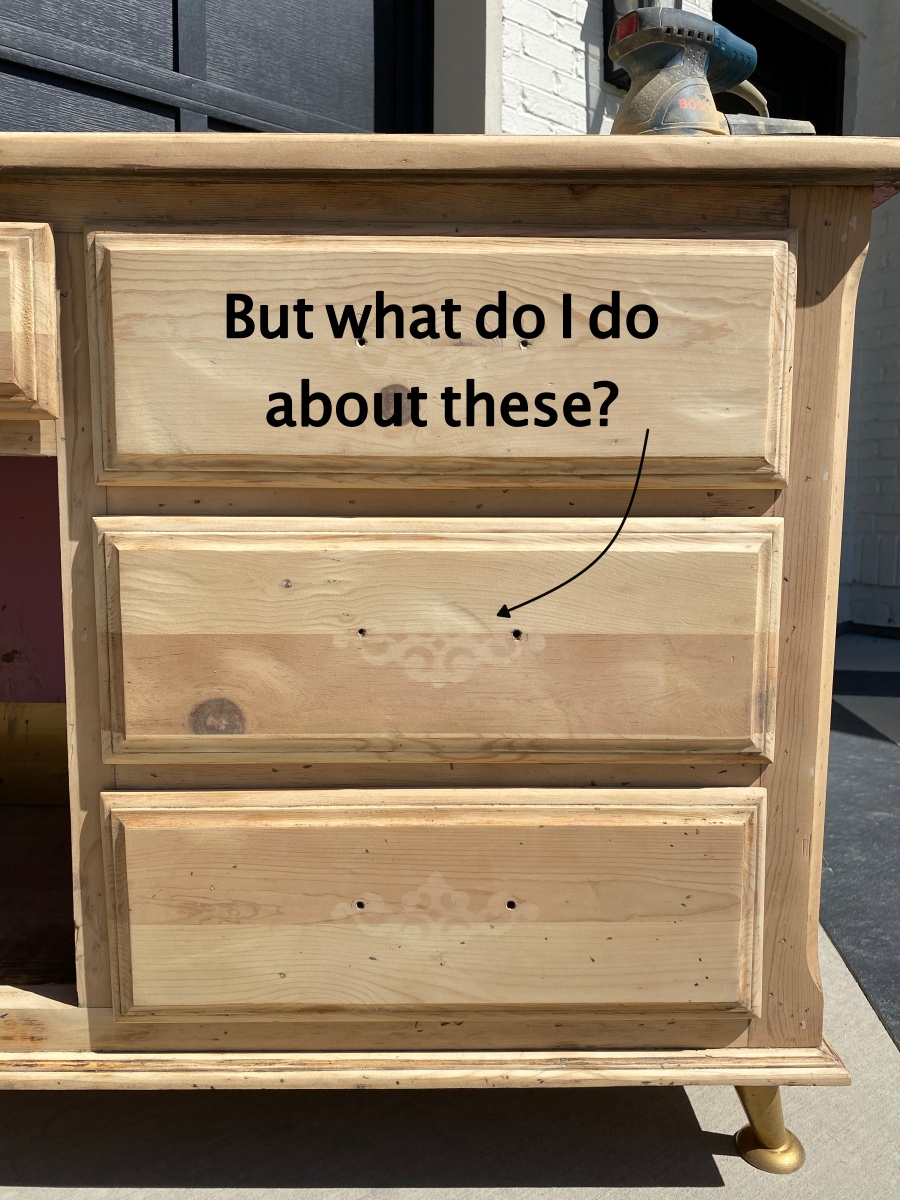
The sanding is looking amazing at this point, but there are some discolored nicks in the wood – so I am taking my stripper back in and using a toothbrush, brushing through those and then I will sand again, now with the 220.
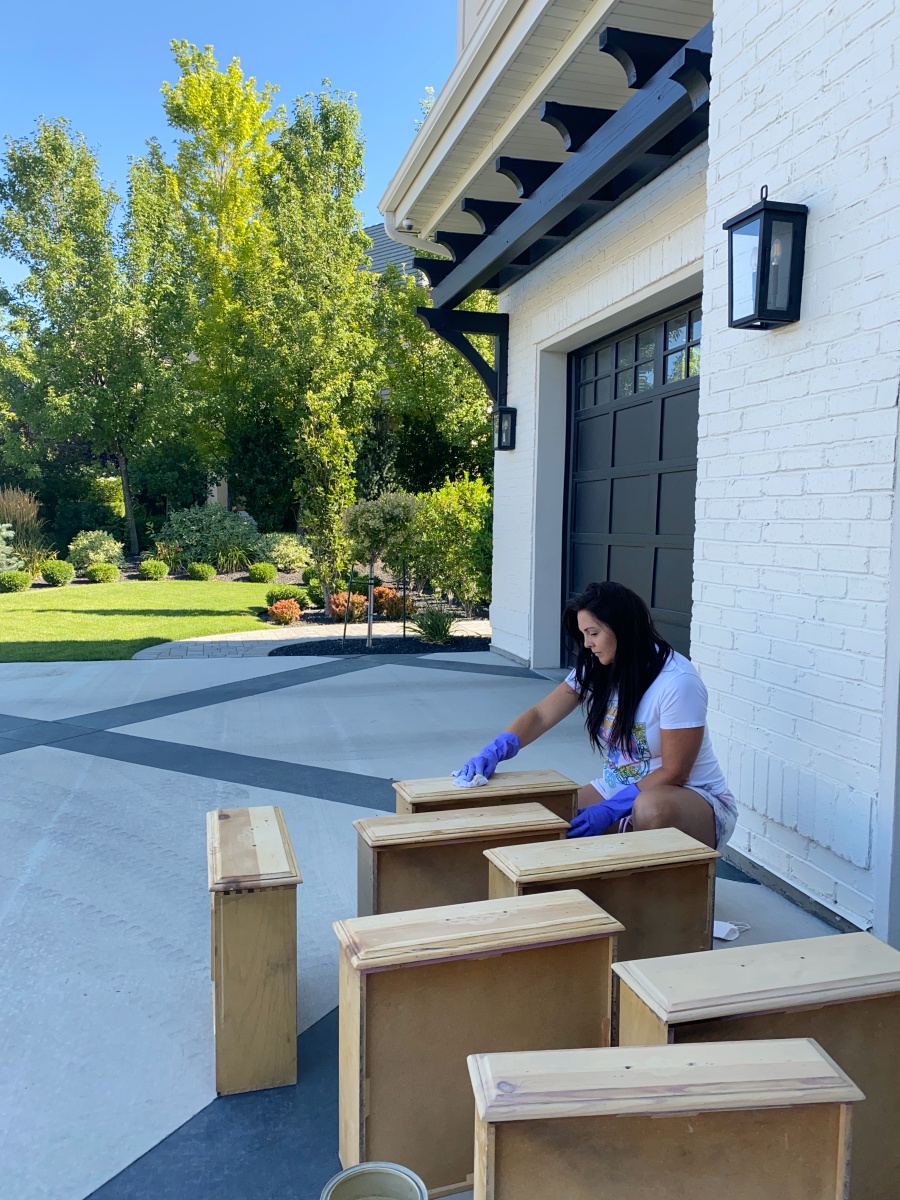
After sanding down, I see that the hardware has had years of exposure and has darkened around each of the drawer pulls. By trial and error, I am going to leave them in direct sunlight in hopes the color evens out a bit.
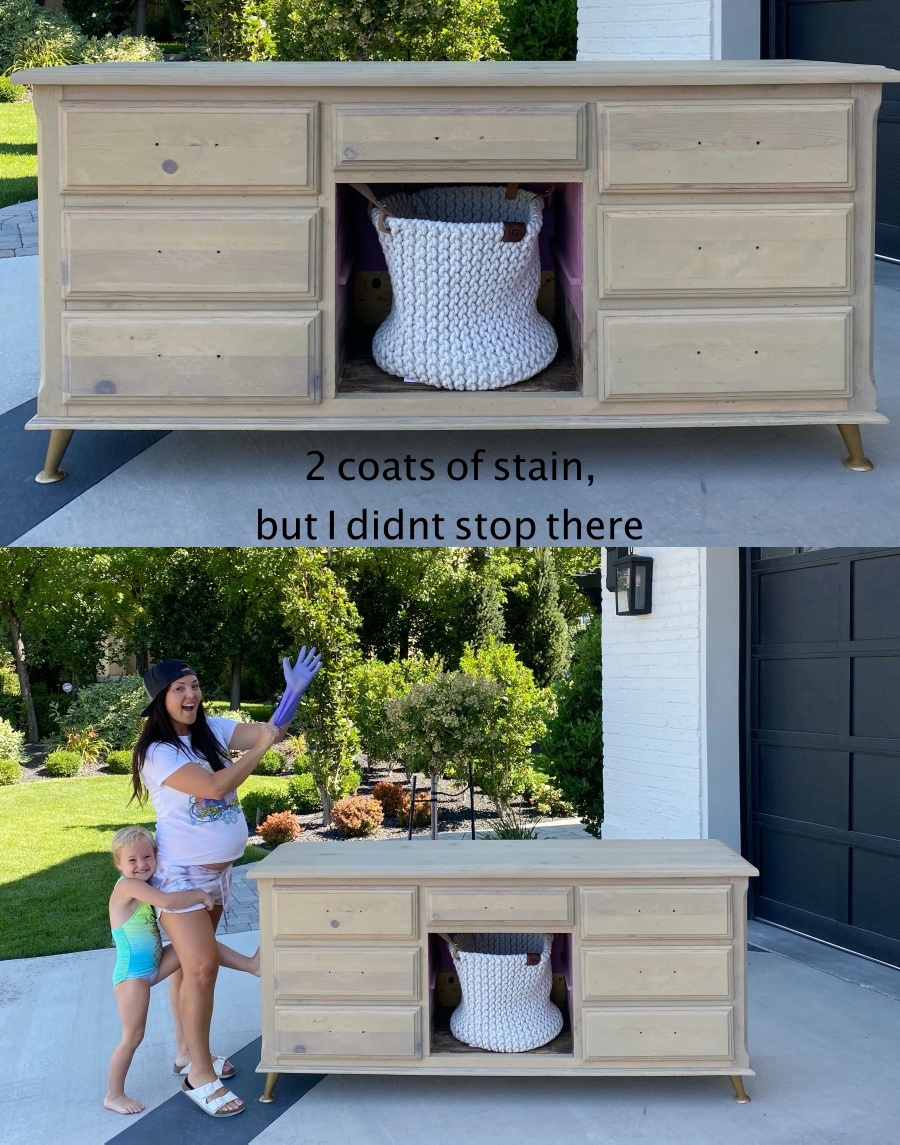
Phase 3: So while my drawer fronts get a little tan, I started on the dresser with a pre-stain. It’s a wood conditioner and it prevents blotchy-ness, and helps the wood soak up the stain more evenly. Wipe on evenly with a rag, and let cure / condition for 5 to 15 mins and then wipe off any access with a clean cloth.
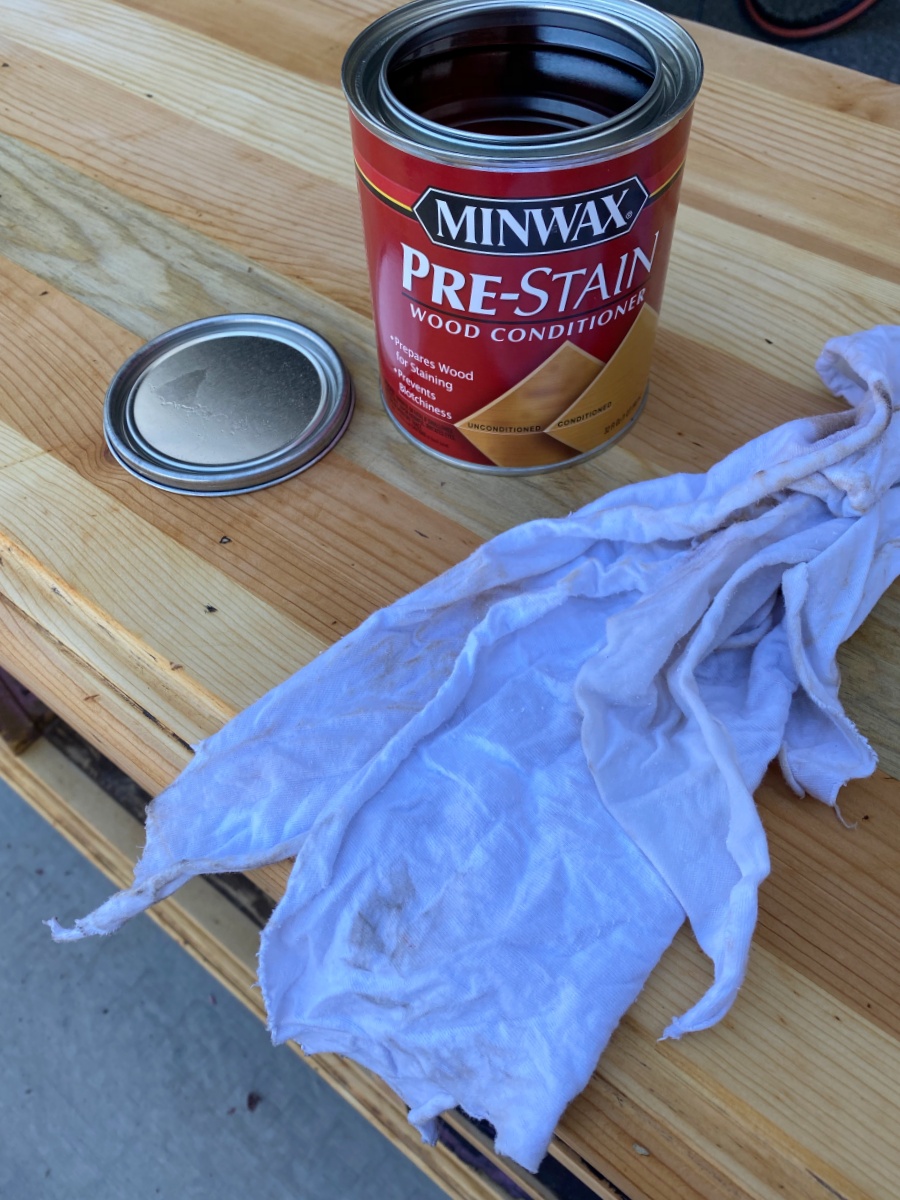
***Pro tip! Use old t-shirts to apply stain!
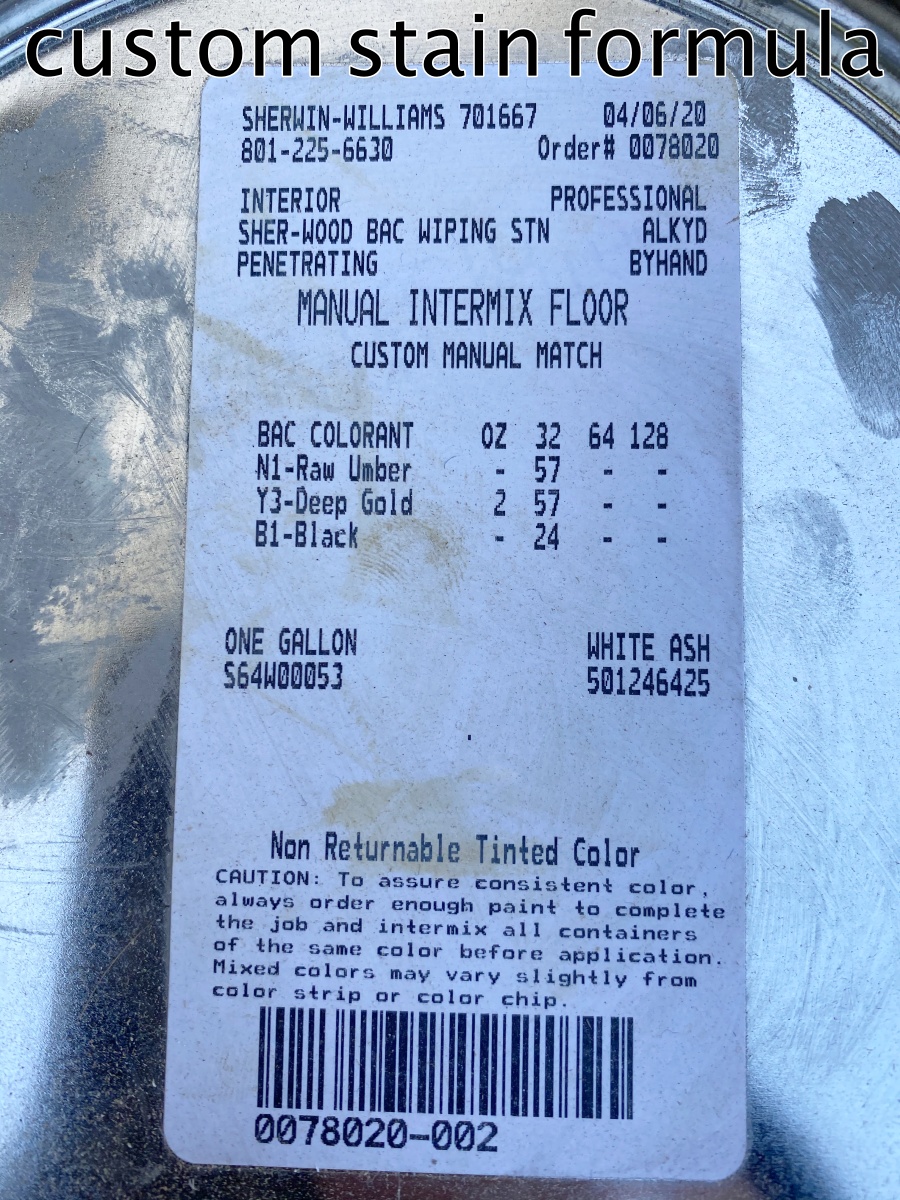
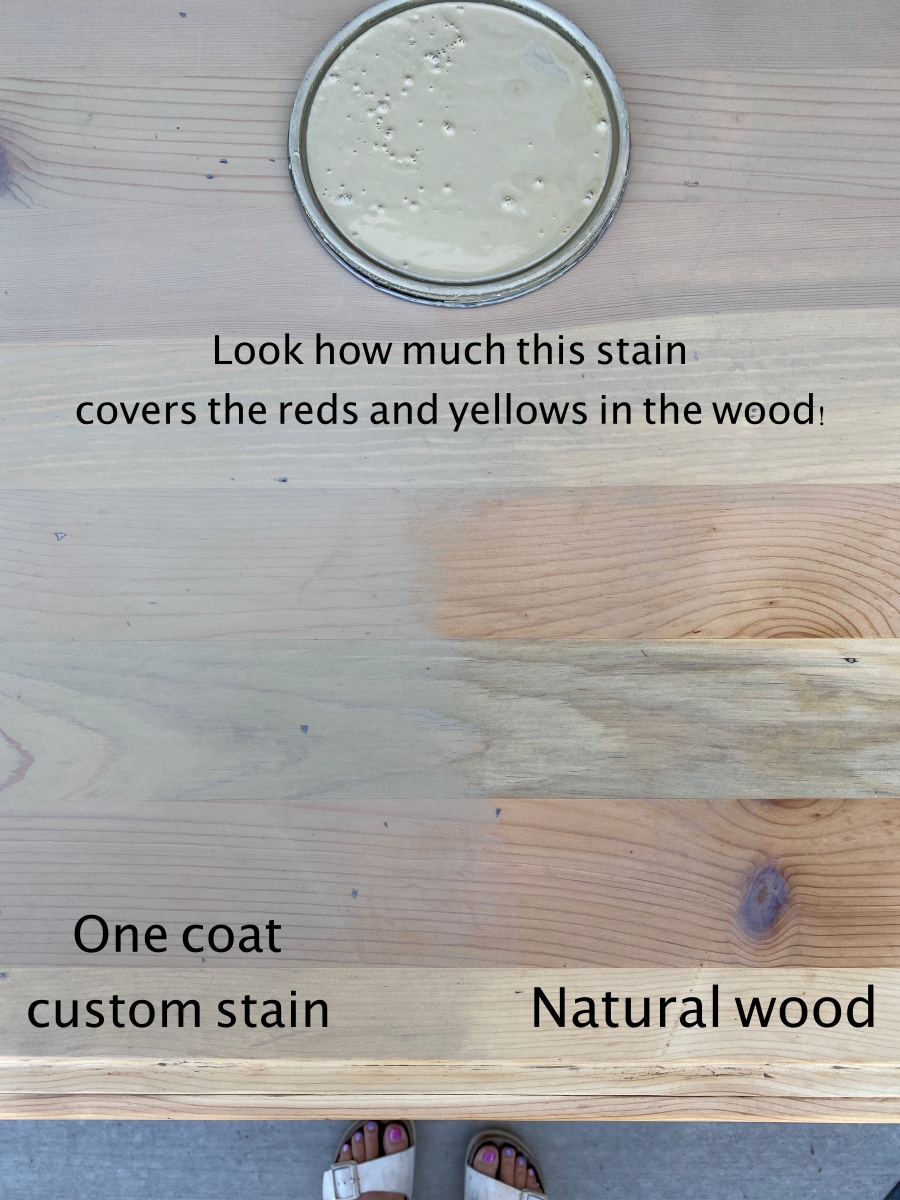
This dresser is cherry wood, so I’m going to use the same stain I used on my DIY alderwood beams. This particular stain will take some of the red out of the wood so it neutralizes the piece. There is green in this stain, so it will neutralize the red – because this is the opposite color on the color wheel – a little color lesson for you!
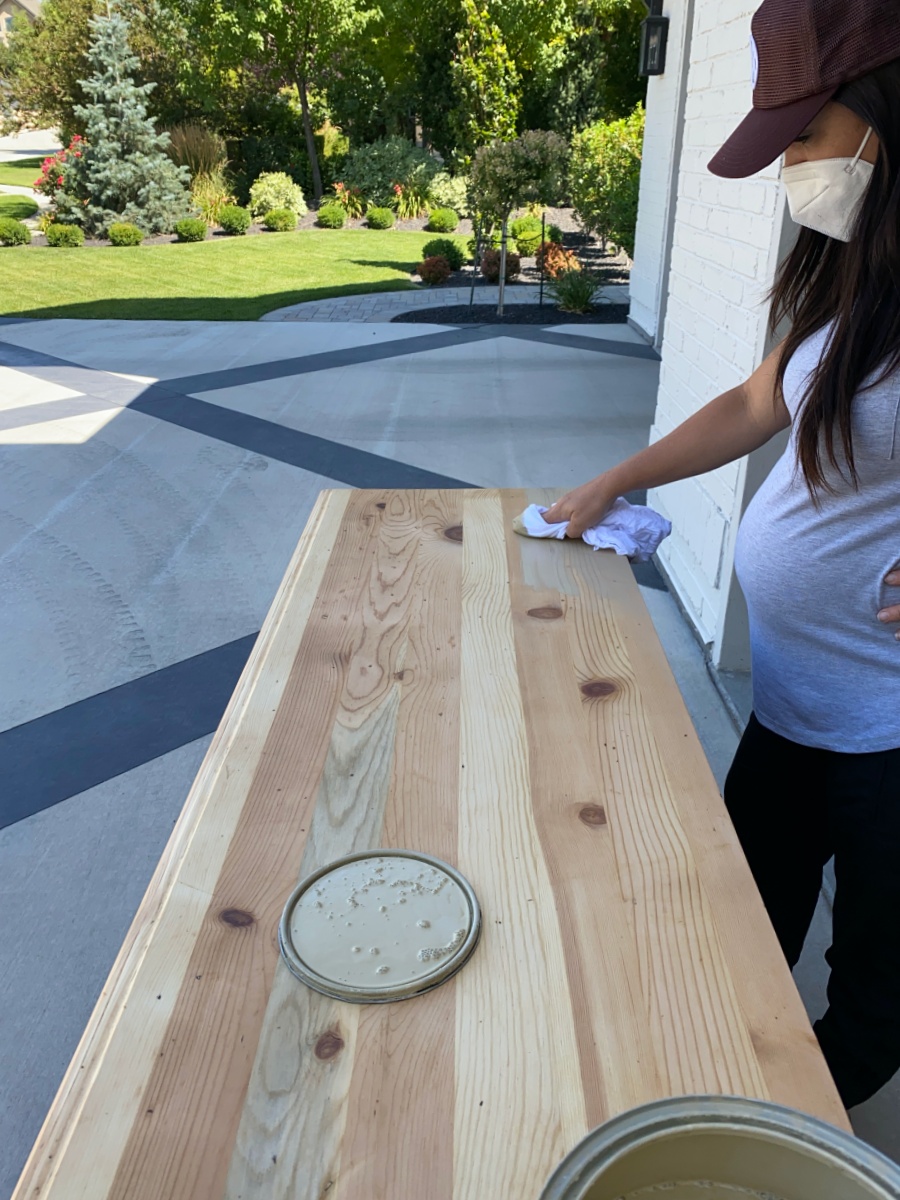
My process is to add the stain liberally and then go back in with a clean cloth so it avoids streaks. And ALWAYS stain in the direction of the grain.
After this dries, go back in with the same process and add another coat.
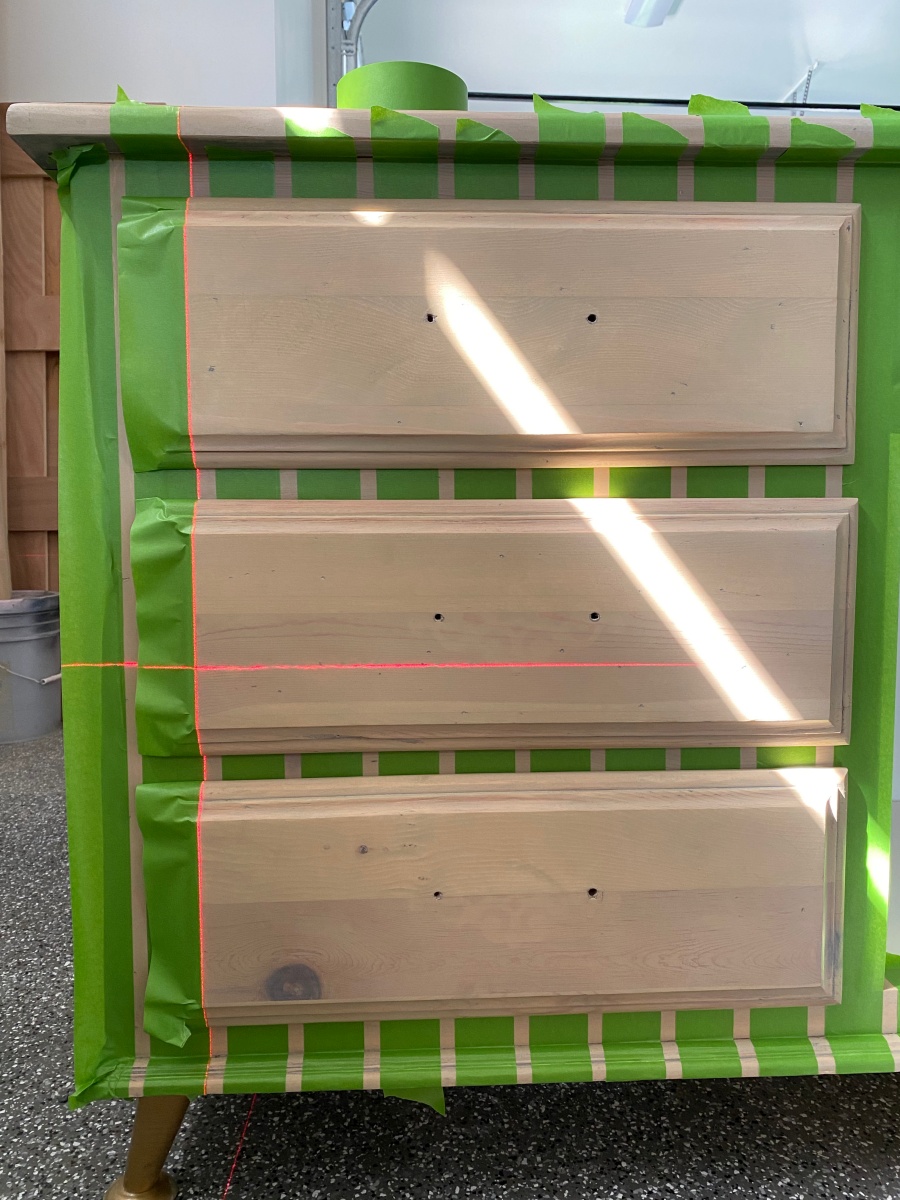
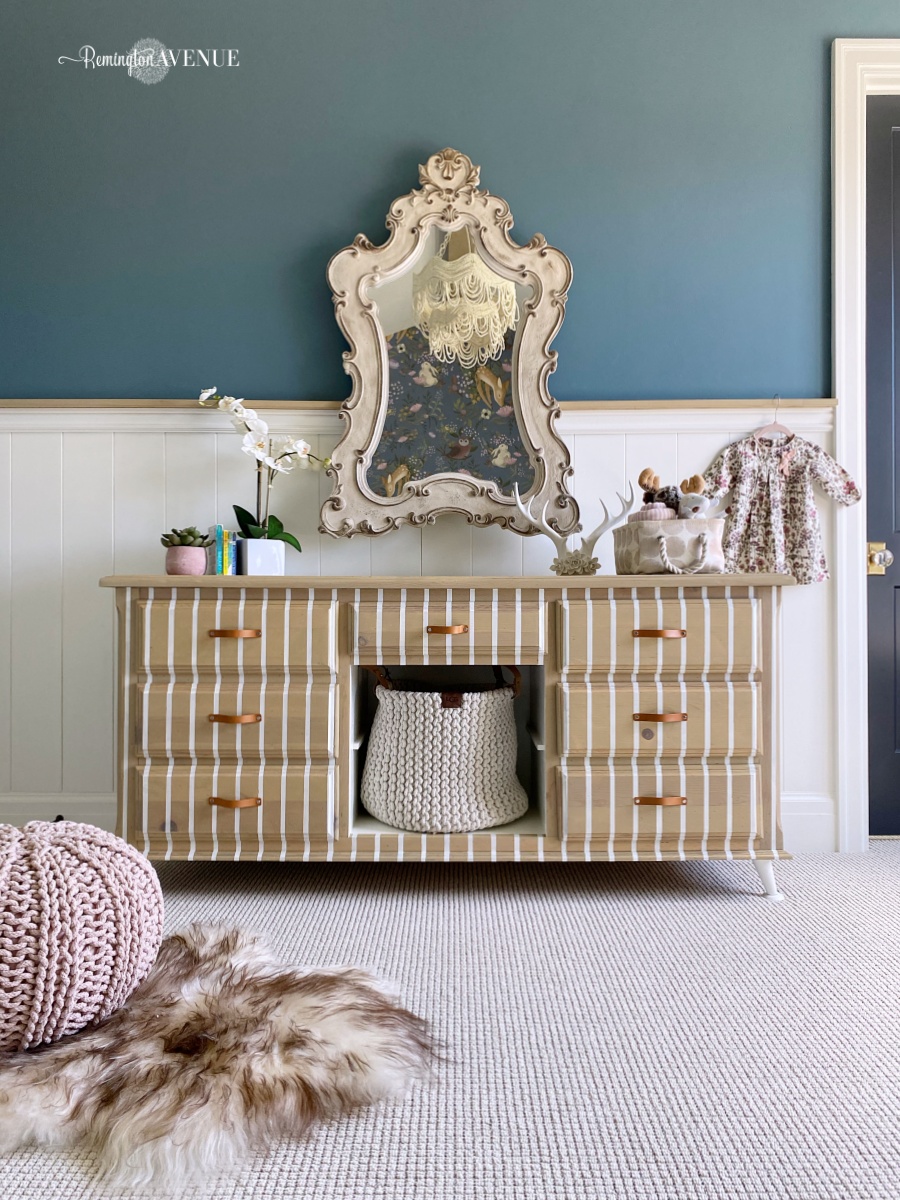
Phase 4: Let’s get creative! I have some ideas for this dresser and it’s time to execute! I used FrogTape and this laser level to create stripes on the front and sides of dresser.
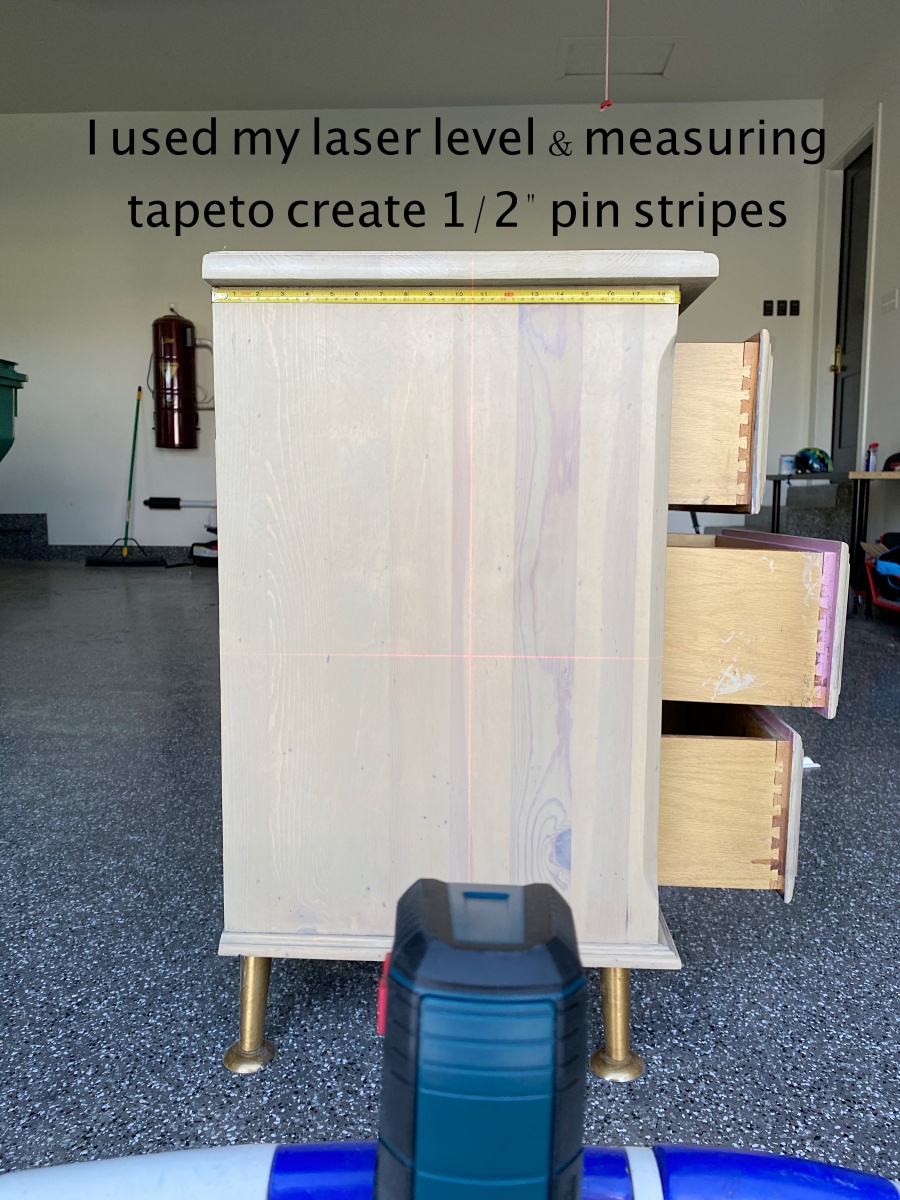
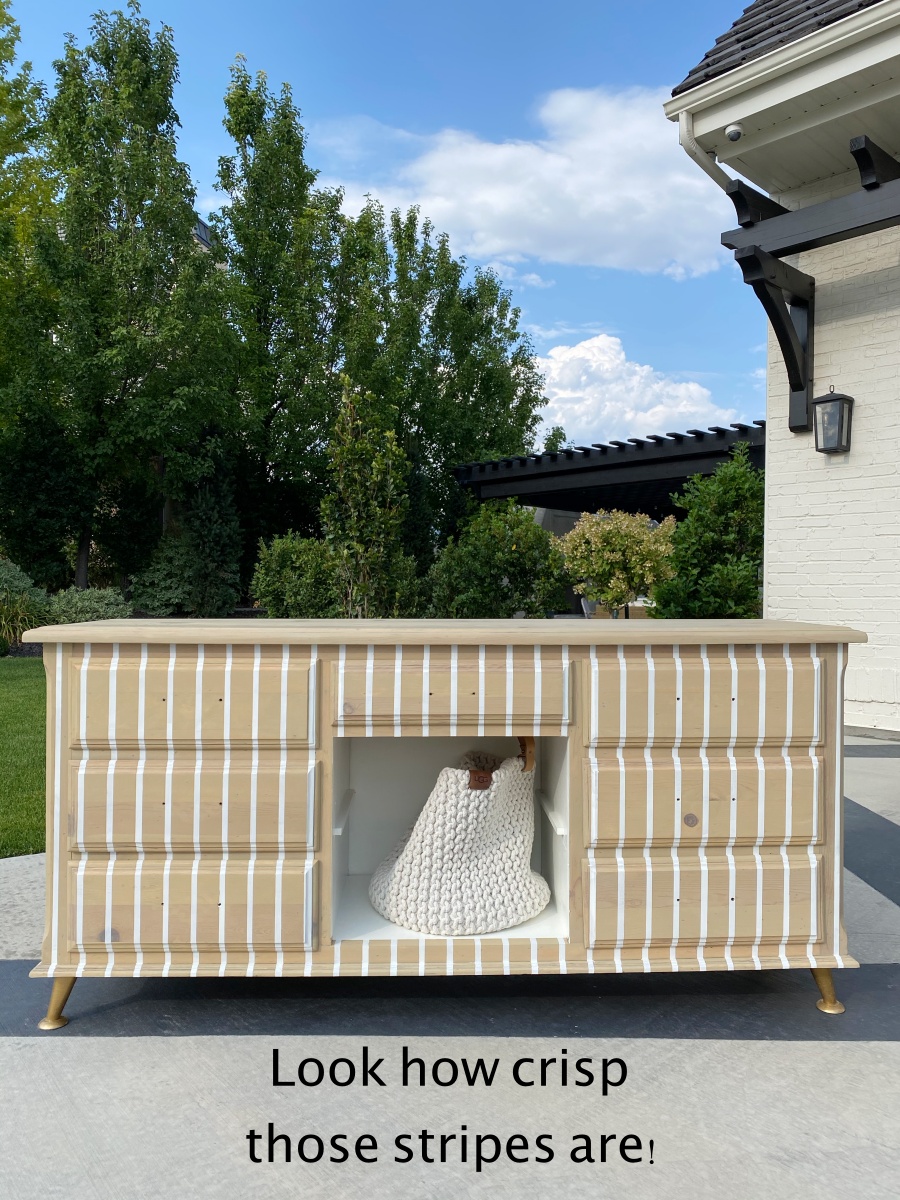
I LOVE FrogTape – it is incredible for projects like this DIY Dresser Makeover. It adheres to the dresser but I will be able to pull off cleanly! It creates super crisp lines – it’s incredible.
So I use my laser to line up clean lines on the surface and then I tape, going along and pressing with my finger to make sure I get the pieces right up on the dresser.
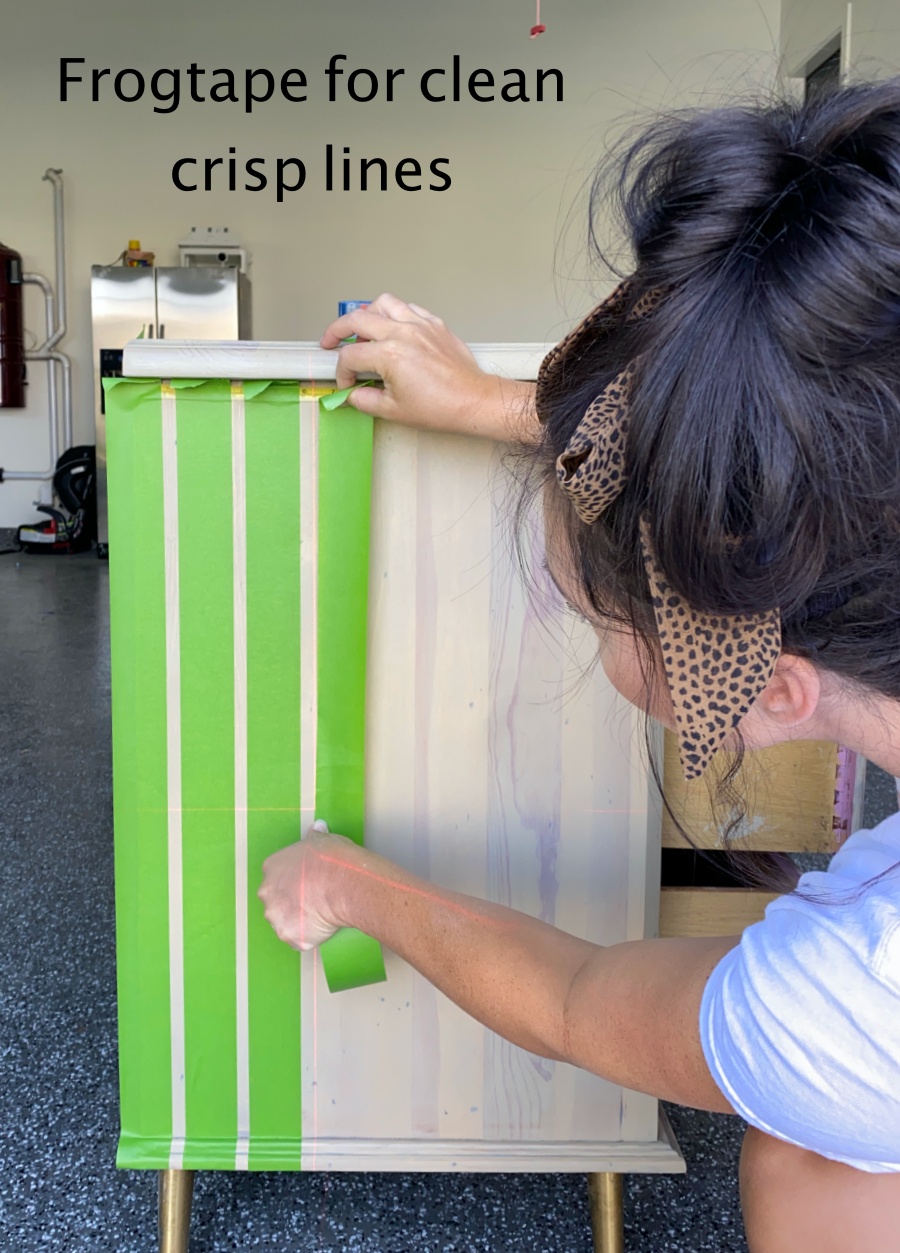
This part of this DIY is not for the faint of heart, guys. It takes some time! But it’s all worth it! Make sure you have some good tunes to keep you sane!
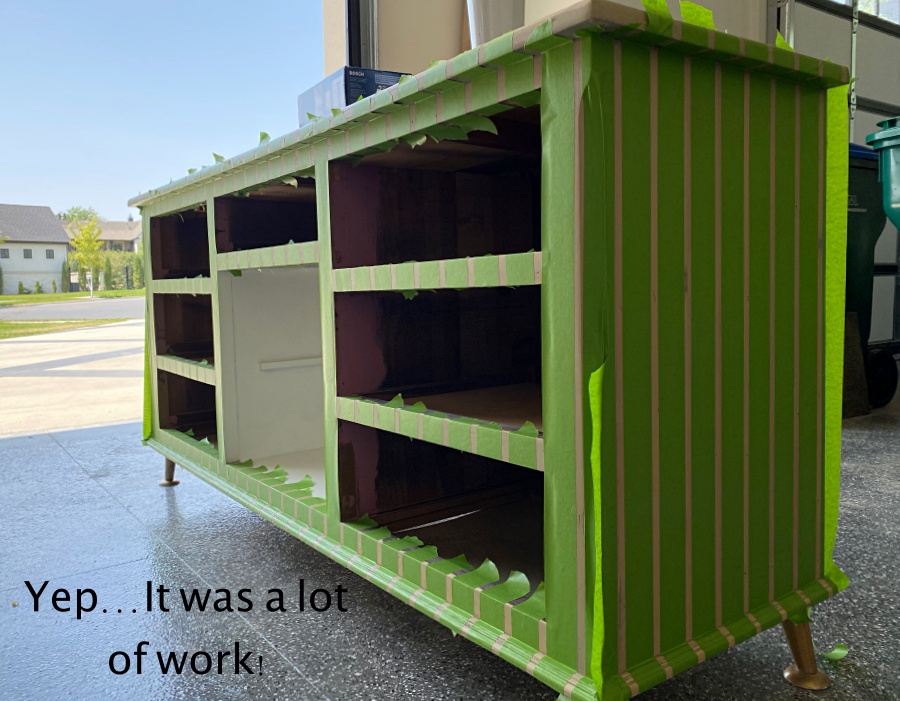
Move along the dresser, lining up your laser and taping as you go. This is what ‘custom’ is all about! You will need to tape the dresser first and THEN add your drawers in to make sure you get that clean, crisp stripe underneath the drawer.
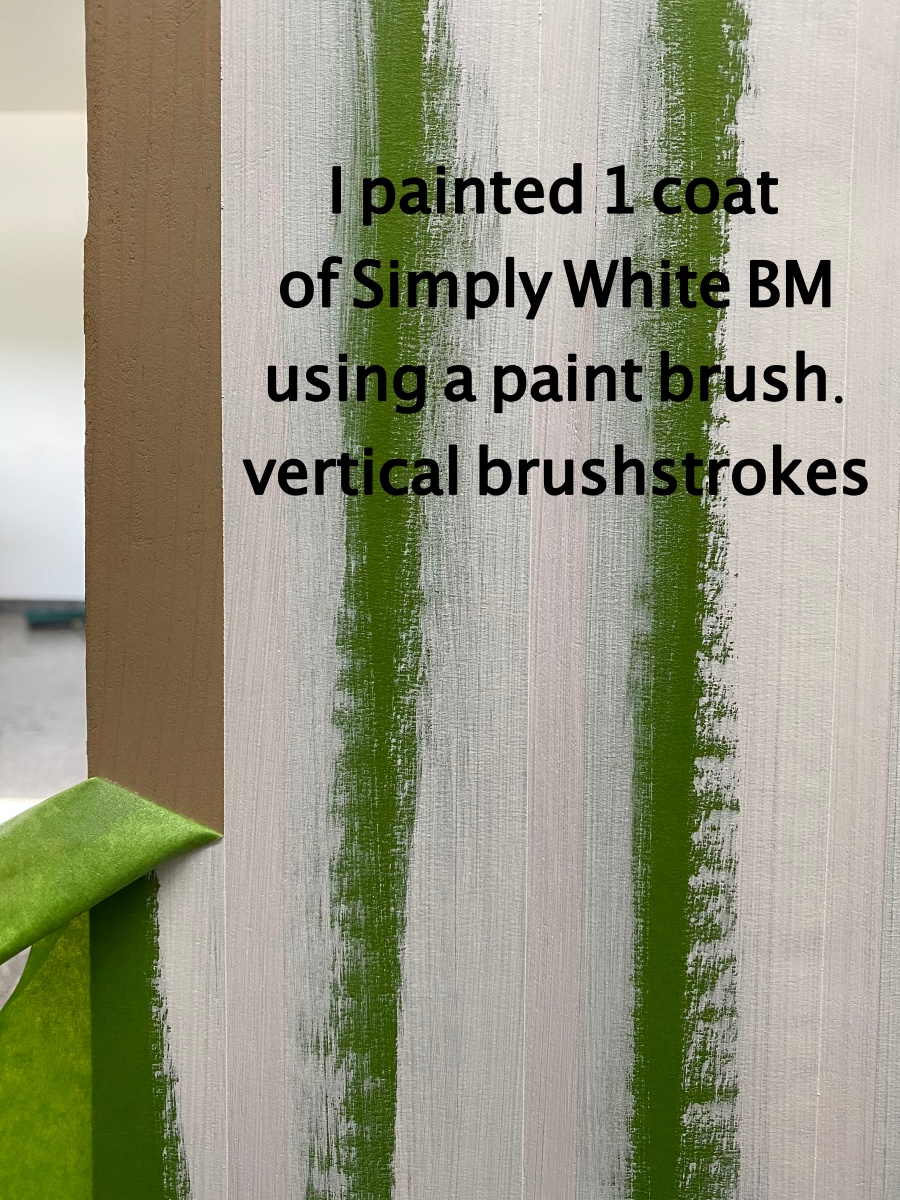
From here, after ALL of that taping, this DIY Dresser Makeover is painting! I chose to paint white onto the wood between the FrogTape pieces. There is NOTHING more satisfying than stripping off those tape pieces. I am telling you, FrogTape is the very best.
To seal the dresser for our DIY Nursery Dresser Makeover, we are going to use a water based acrylic finish – this will give a matte finish and not add any color to the dresser. Always stir before applying, never shake.
And just like stain, apply with the grain, and don’t go over too many times or it will gunk up. You can add a couple layers but let dry completely between each one.
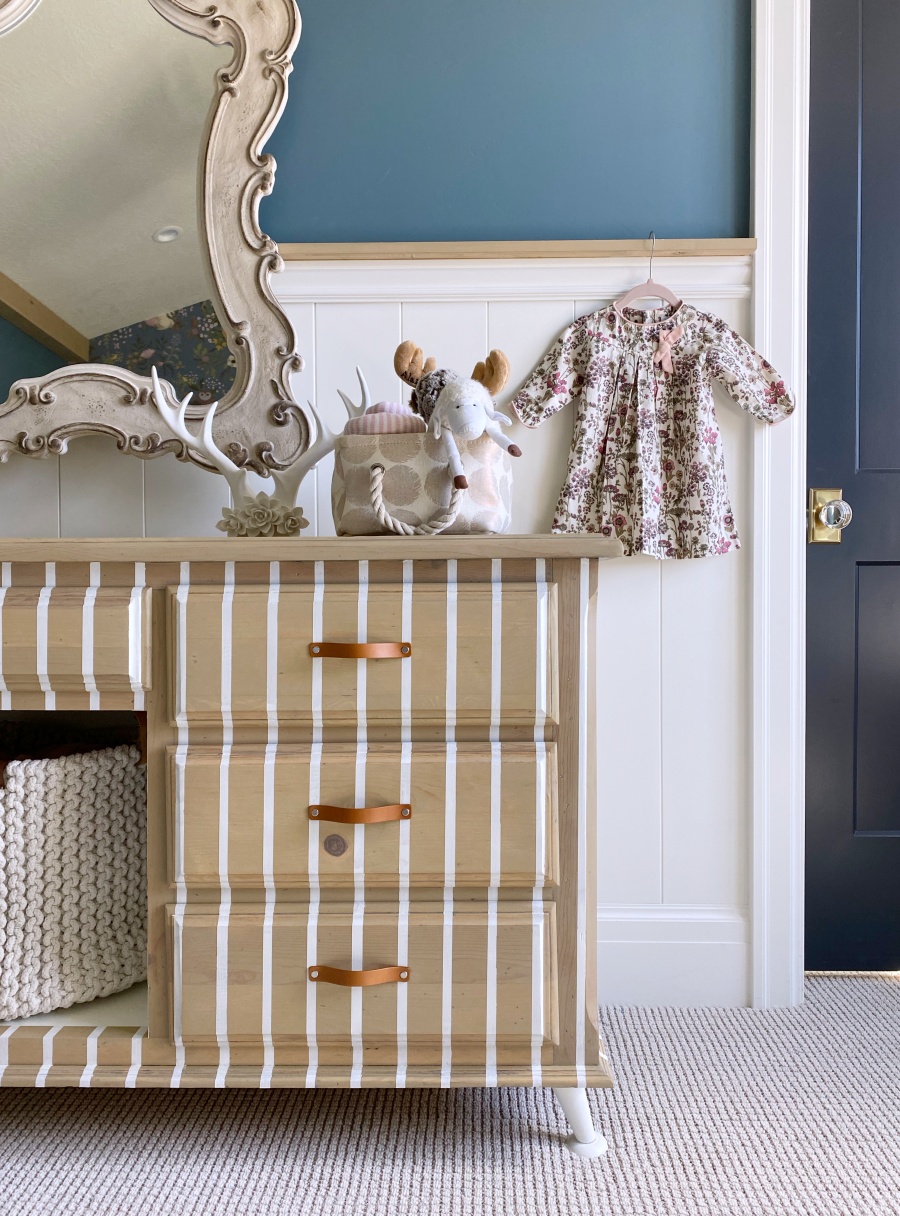
I added a leather and metal drawer pull that I just love – it adds warmth, texture and pulls the entire piece together. Don’t tell me if you don’t love it…it was a lot of work, just pretend. LOL
For everyone that was just as invested in this DIY Dresser Makeover as I was, THANK YOU! You kept me going!

I hope that these processes help you and inspire you! I love figuring out things with you. Sharing my successes and failures along the way keeps us together! Everyone can create a beautiful home on any budget, so I try and encourage you to get out there and try to find beauty in the DIYs.
Thanks for following along, Friends!

 Add to favorites or read later
Did the sun work on the handle stains?
yes it helped them fade. between that and the stain/handles they are non existent !
Absolutely amazing 🖤
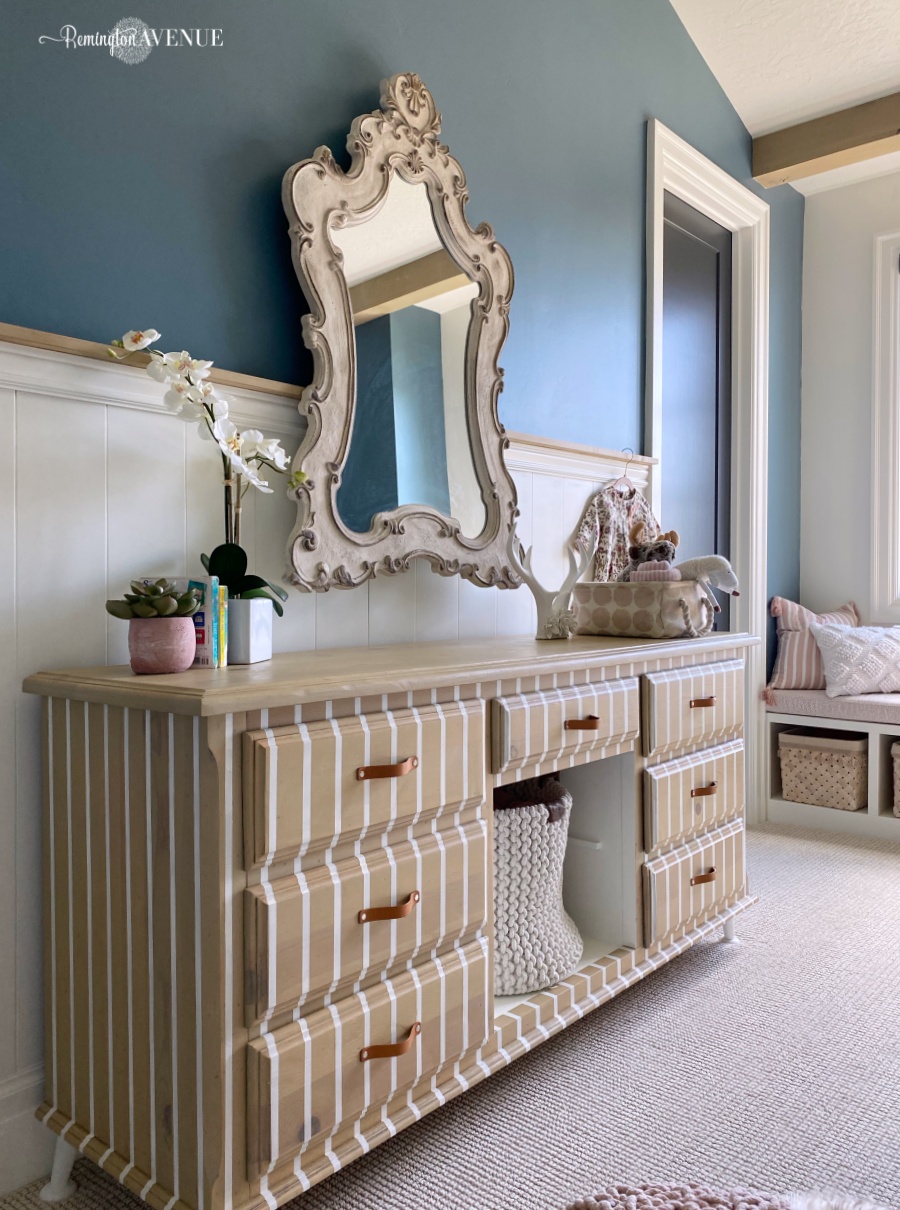
I wasn’t caring for the stripes very much even though it was very labor intensive. I wasn’t crazy about the hardware choice either. However, after seeing the mirror hung I was sold. It really pulled things together visually for me. I’m very interested to know how you hung it. I must admit I don’t always follow your choices but the finished results are always. Hit for me. Maybe this explains why I get stuck in the middle of my own projects & doubt my decisions. I’m going to rethink my processes! Your house certainly is a dream & Im impressed how much has been DIY and your skill level is definitely envious!
Hi Penny,
Thank you for the message. I’m glad to know that even though you may not see the vision during the process, you always like the end result! I hung the mirror using a block that projects out of the wall the same distance as the wainscot ledge.