DIY Box-beams: Pitched ceiling
I can’t believe I wallpapered a bathroom and built these DIY box-beams in one week! I honestly was super intimidated by this project mostly because of the pitched ceiling. The angled ceiling definitely added difficulty, but still TOTALY DOABLE! Faux beams are an incredible “bang for your buck” project. Read on for my DIY Box- beams: Pitched ceiling Tutorial.

This space will become the nursery for our fourth child, due in September. I love the high pitched ceiling, but I knew it needed a little bit of architectual interest to really bring it to life. Faux beams were the perfect solution- less expensive than solid beams yet still gorgeous and sturdy.

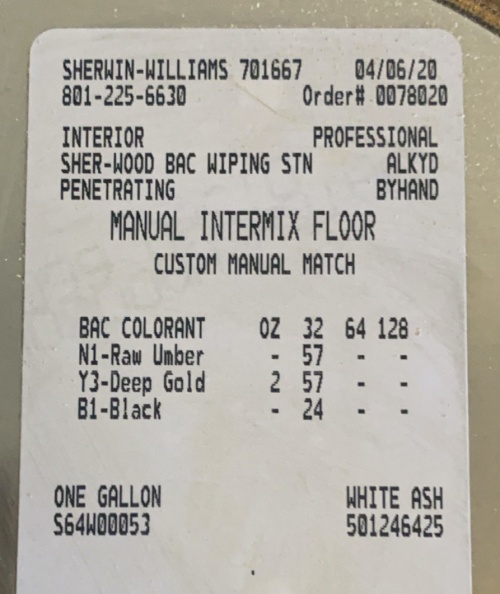
Here’s my takeaway from this diy project. Faux beams are basically the cost of whatever wood variety your choose. I went with superior alder wood to match the other existing beams in my home (see my master bedroom and my home office). I used the exact same custom stain color specifically designed to reduce the reddish/orangish tones found in alder wood and to match the white oak floors throughout my home. Here is the custom stain formula. Note: This is specifically for Alder wood. It tends to look green on pine for example.
Another note about Alder wood- it comes in 10ft lengths max. For this reason, we had to do mitered joints to create beams long enough to span the length of the room.
DIY faux beams would be easier to install on a flat ceiling. Read this tutorial if you are planning to build box beams and install them on a flat ceiling.
Constructing the center box beam on our pitched ceiling was actual the easiest of the 3. We only had to accommodate for irregularities in the ceiling here. The two box beams on the side walls were much harder to avoid gaps between the walls, ceiling, and beams because of irregulars that exist in both the ceiling and the wall. When you are dealing with beams this long (approx. 17ft) It is hard to avoid some areas that gap. This is where caulk becomes your best friend. See tutorial below.
DIY Box-Beams: Pitched Ceiling Tutorial
Tools & Supplies:
Stain color of your choice
(2) 1x8x10 Alder board or wood of your choosing (center beam is largest)
(8) 1x6x10 Alder boards cut to predetermined lengths.
*The cost of our Alder beams was $740. If you want to drop the price of this project significantly, choose pine common boards. You also may be able to find pine boards in longer lengths if you want to avoid mitered seams.
Finish Nail Gun and 2.5″ nails
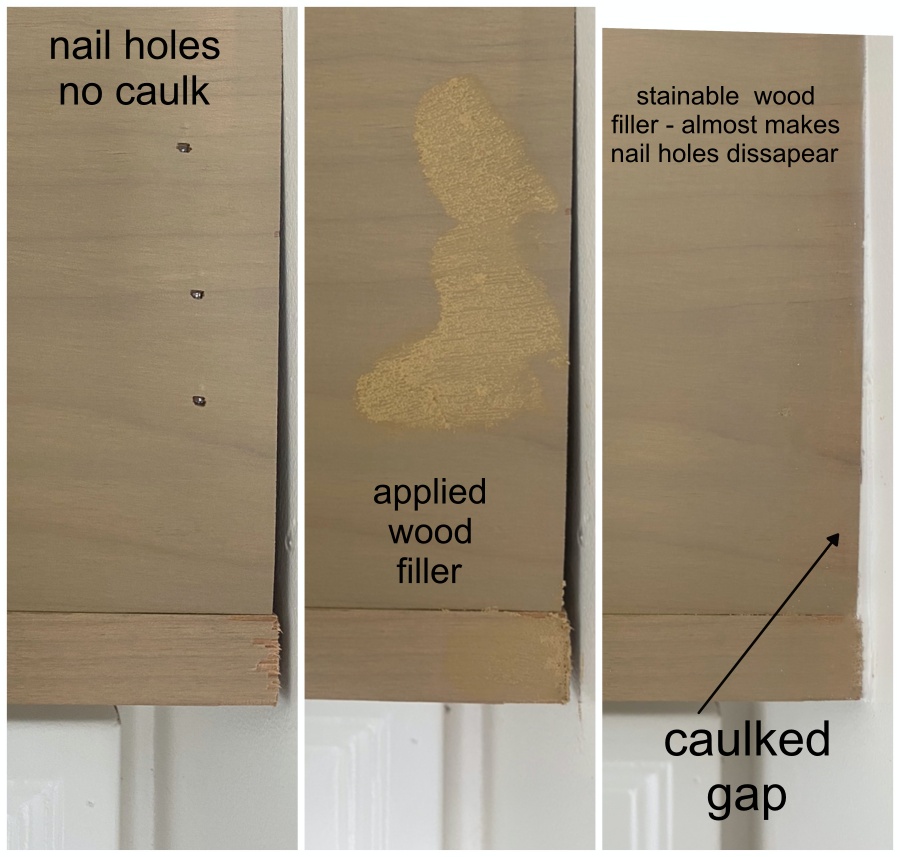
wood filler
caulk
*miter saw and table saw if working with beveled edges and mitered seams.


Tutorial:
I used a 1×8 board for the bottom of the center beam and 1×6 for the sides. Each side beam was constructed using all 1×6 boards only.
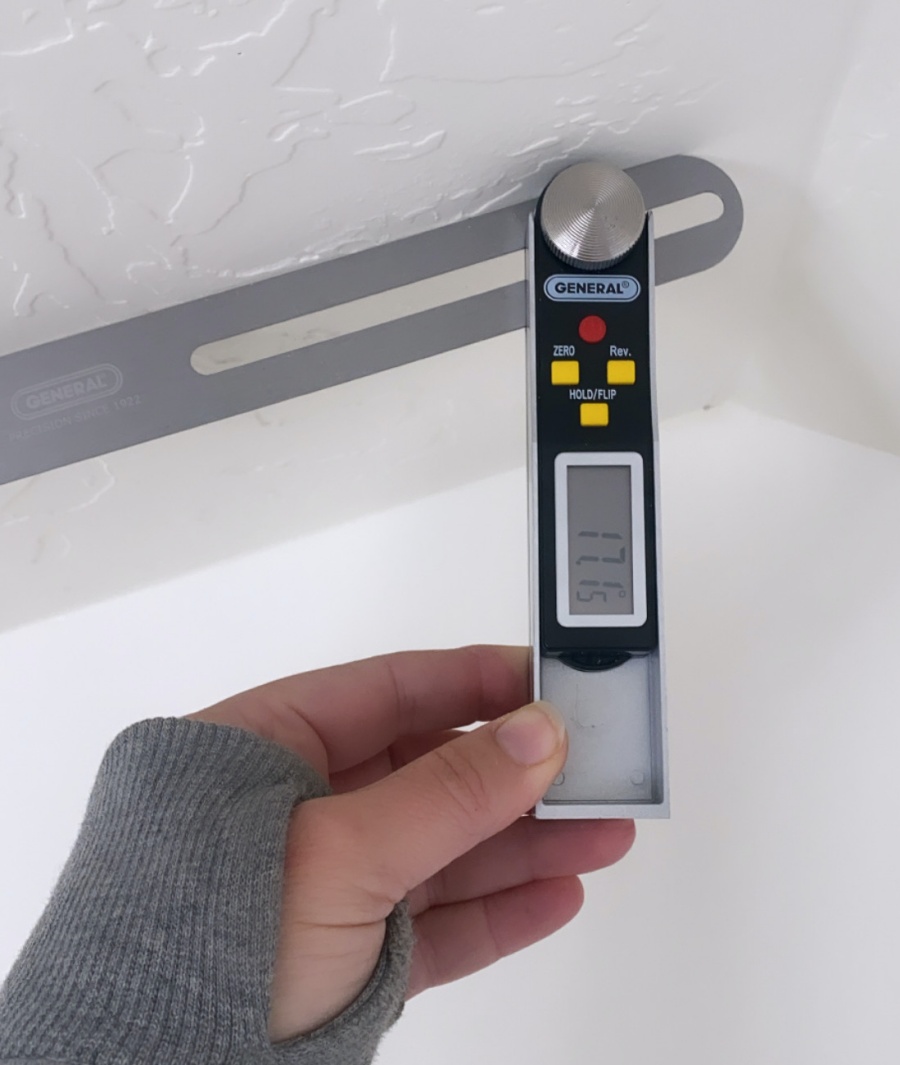
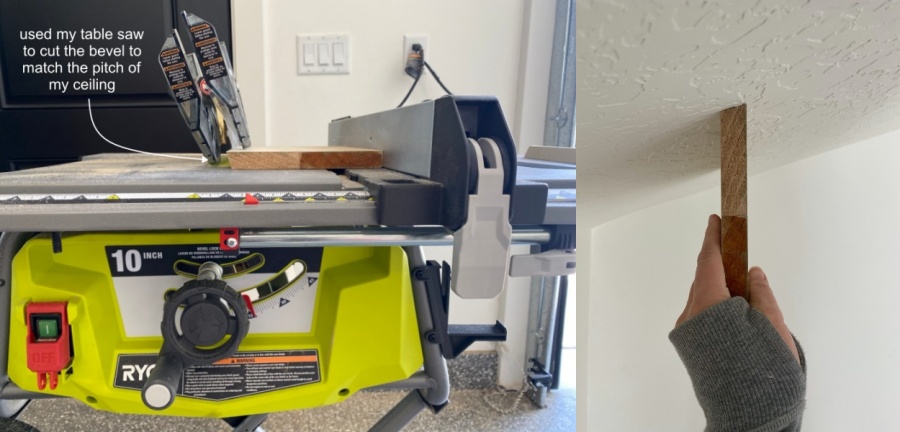
Find the angle of your pitched ceiling using a bevel gauge(like this). Once you have your angle, match the angle on your table saw bevel and rip the sides to mirror that angle.
Determine where your seams will be and miter the ends of the boards according to your room measurements. Once all cuts are done, stain your boards. I only stained the sides of the boards that would be visible once they were hung.
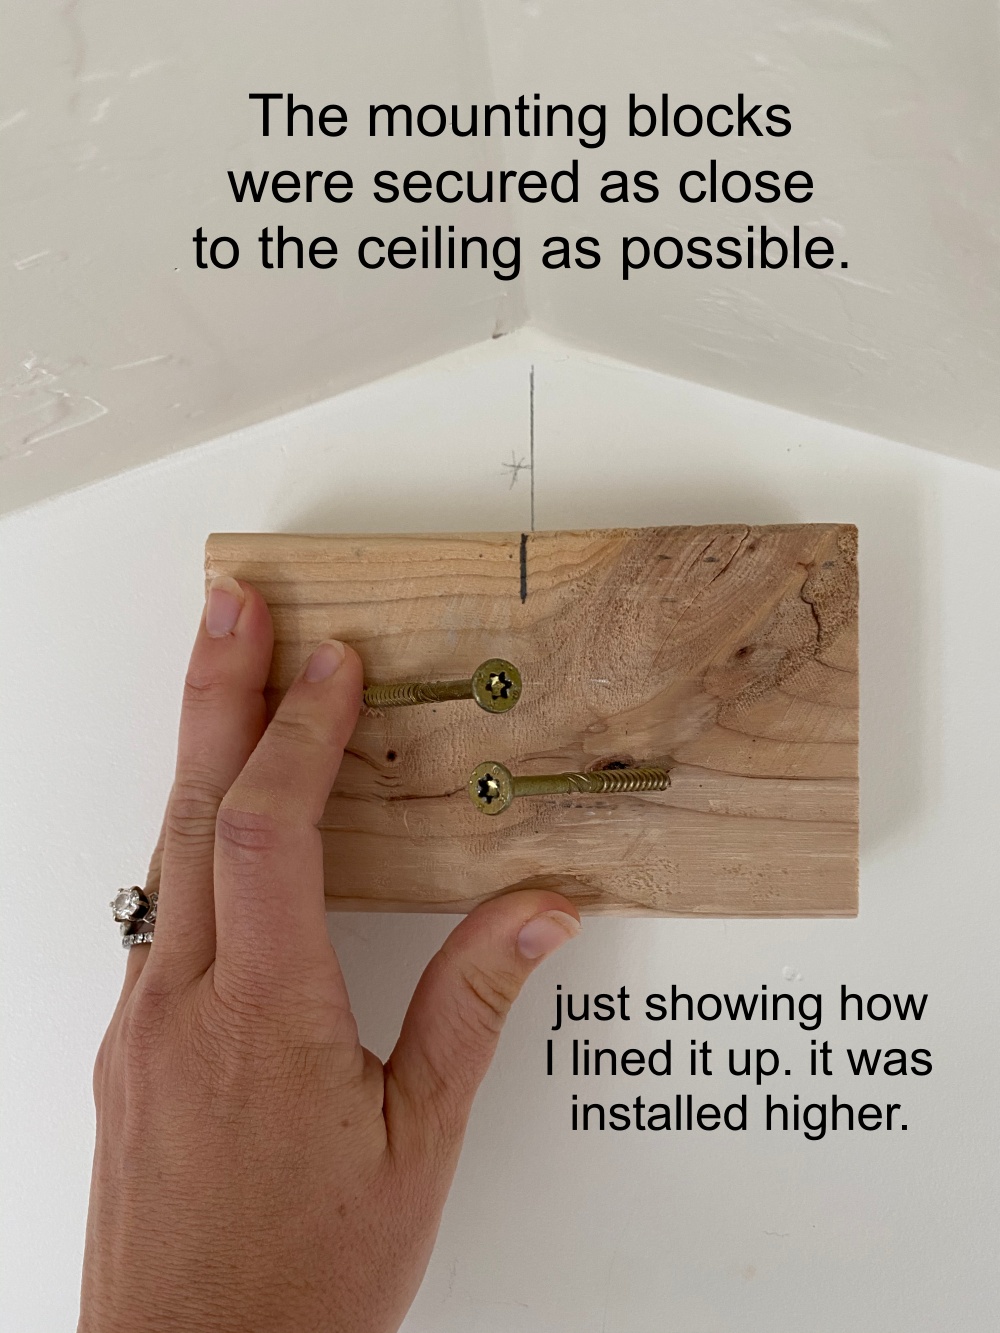
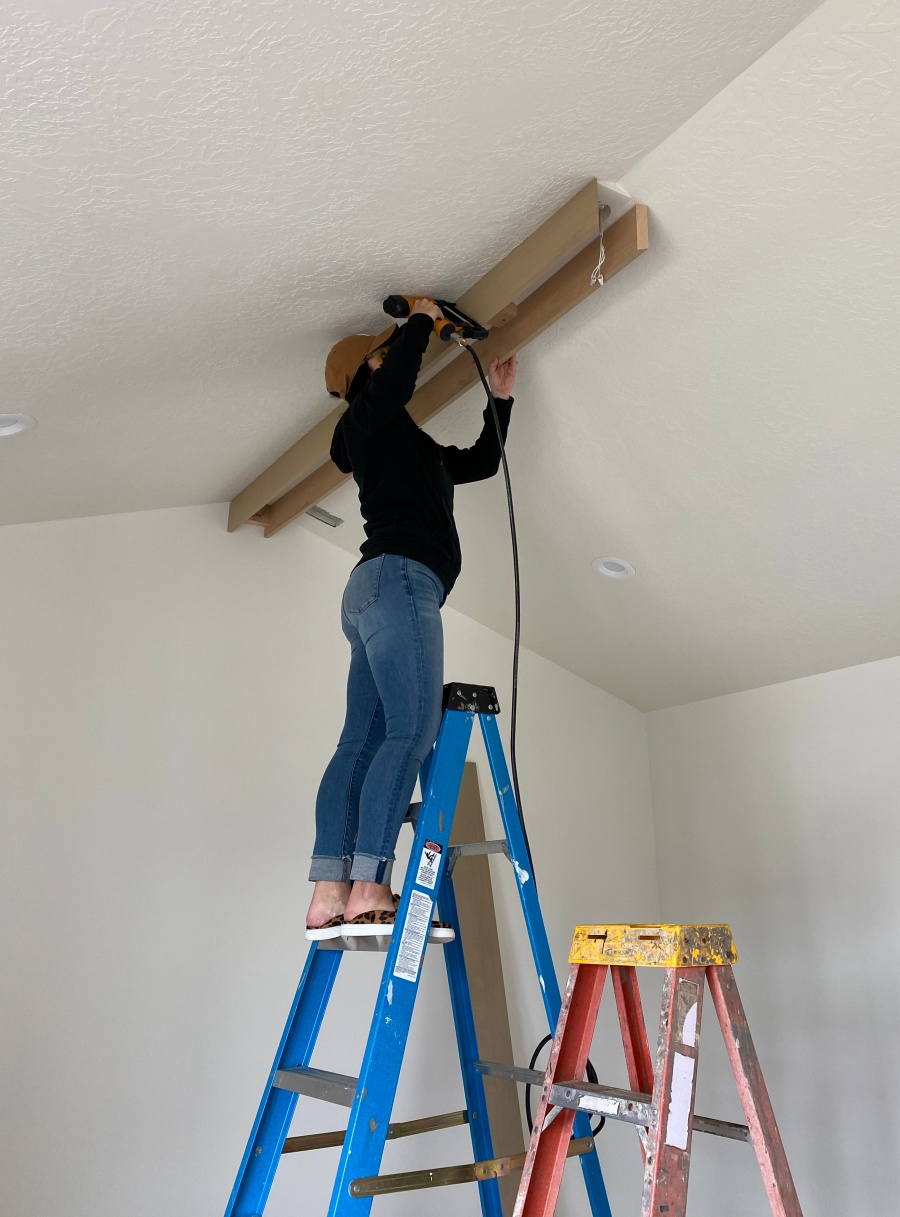
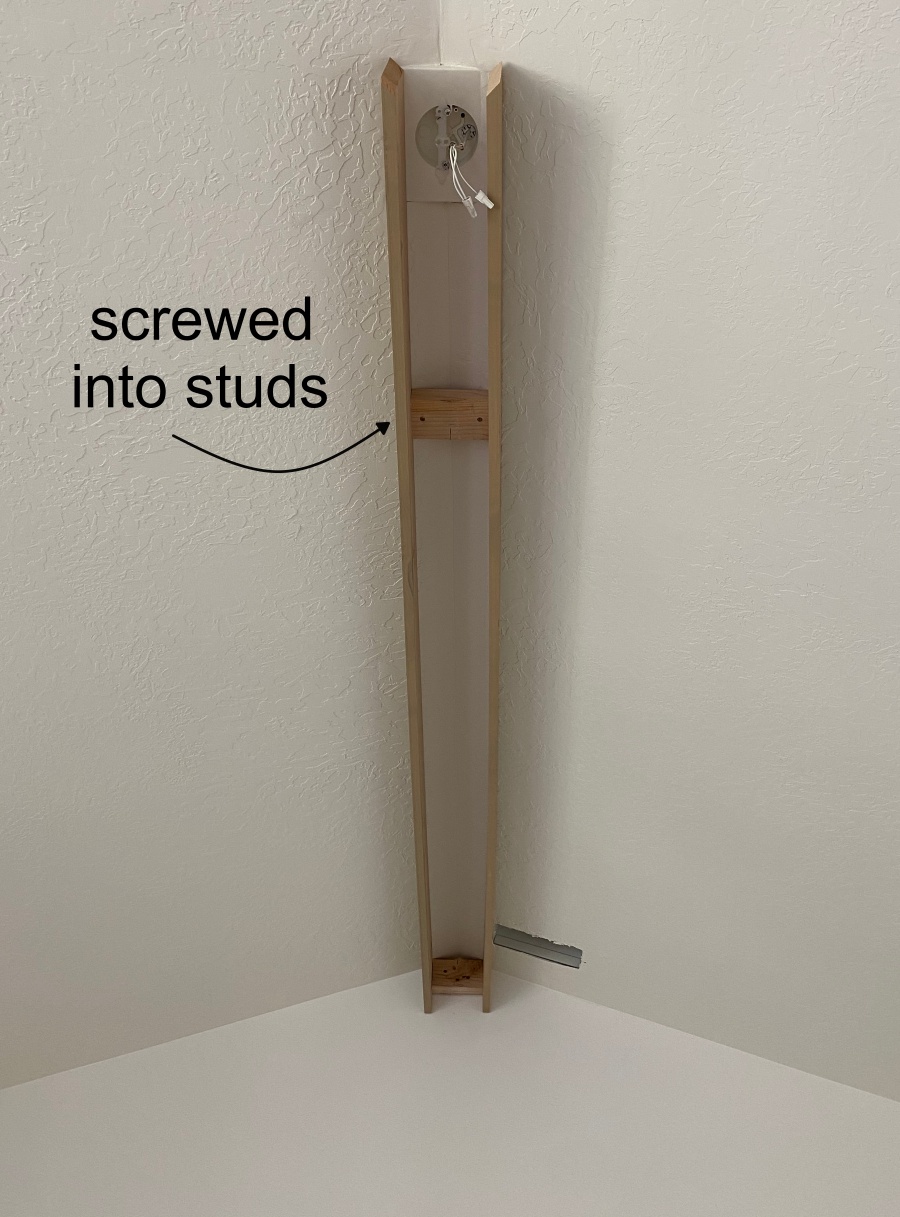
Hang support blocks. I used a basic 2×4 with long coarse screws to anchor my beams. We installed a support block on each wall and on the ceiling, screwing into studs. Use your stud finder to determine where these blocks should be secured.
We started with the center beam first, attaching one side of the beam (1×6) to the support blocks using my finish nail gun and compressor. Mine is linked HERE, but you can get a cordless version HERE. You really only need about 2 nails into each support block. Use the same technique to secure both sides of the beam in place.
Once both sides are installed, you can secure the bottom of the beam to the sides. Use the finish nailer to nail from the bottom of the beam into the sides. Center beam done!
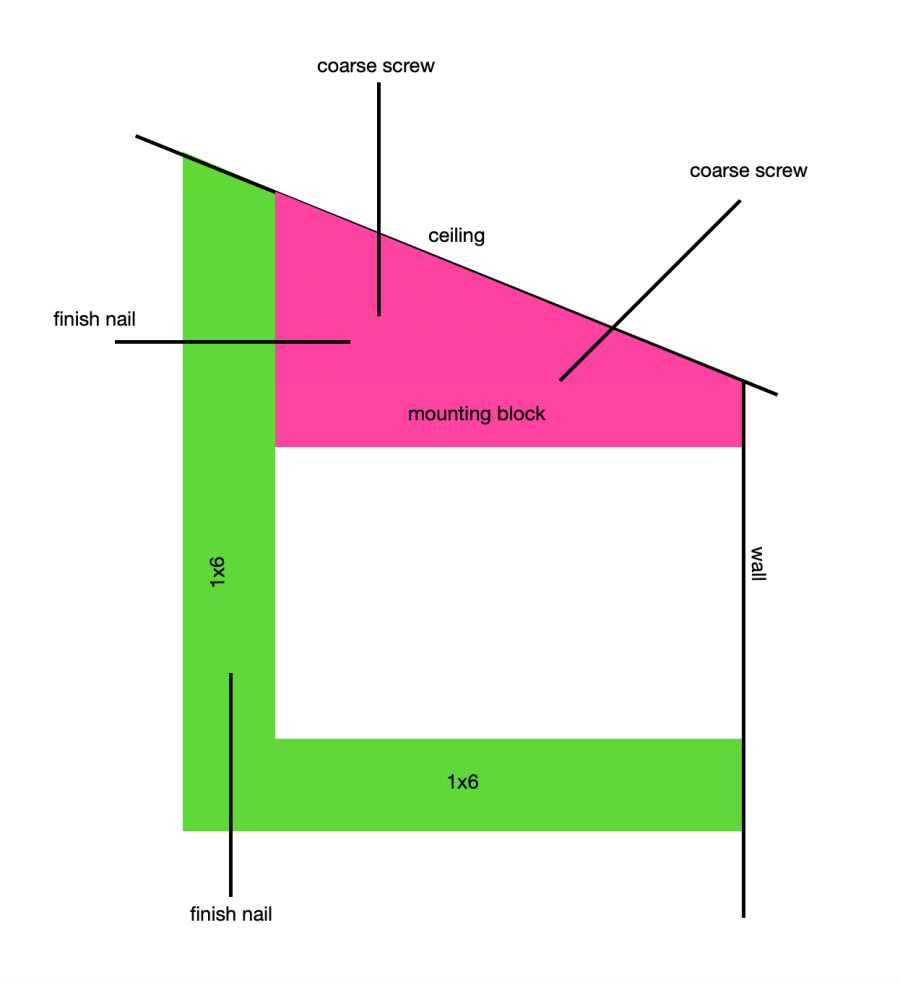
For each side beam, we only constructed one side and a bottom, creating an L. The other side was secured to the wall (see diagram above). The support blocks were secured into studs along the way and the L beam secured into the blocks. You will have some gaps between to top of the beam and the angled ceiling mostly due to the ceiling being un level. It’s unavoidable, but you can disguise it with caulk.
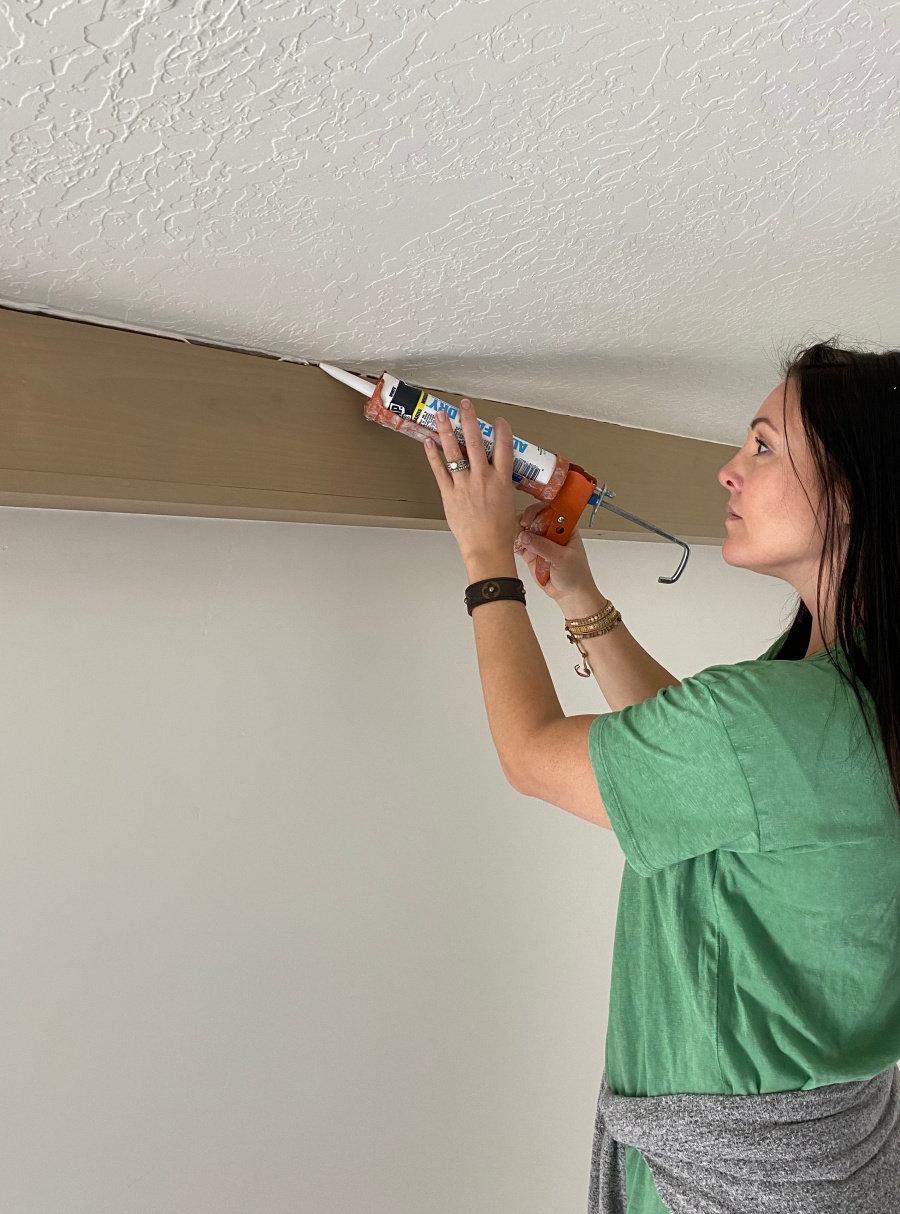
Caulk the sides where the beams meet the walls and ceilings and use stainable wood filler to fill all of the nail holes. These last steps will make the beams appear seamless.
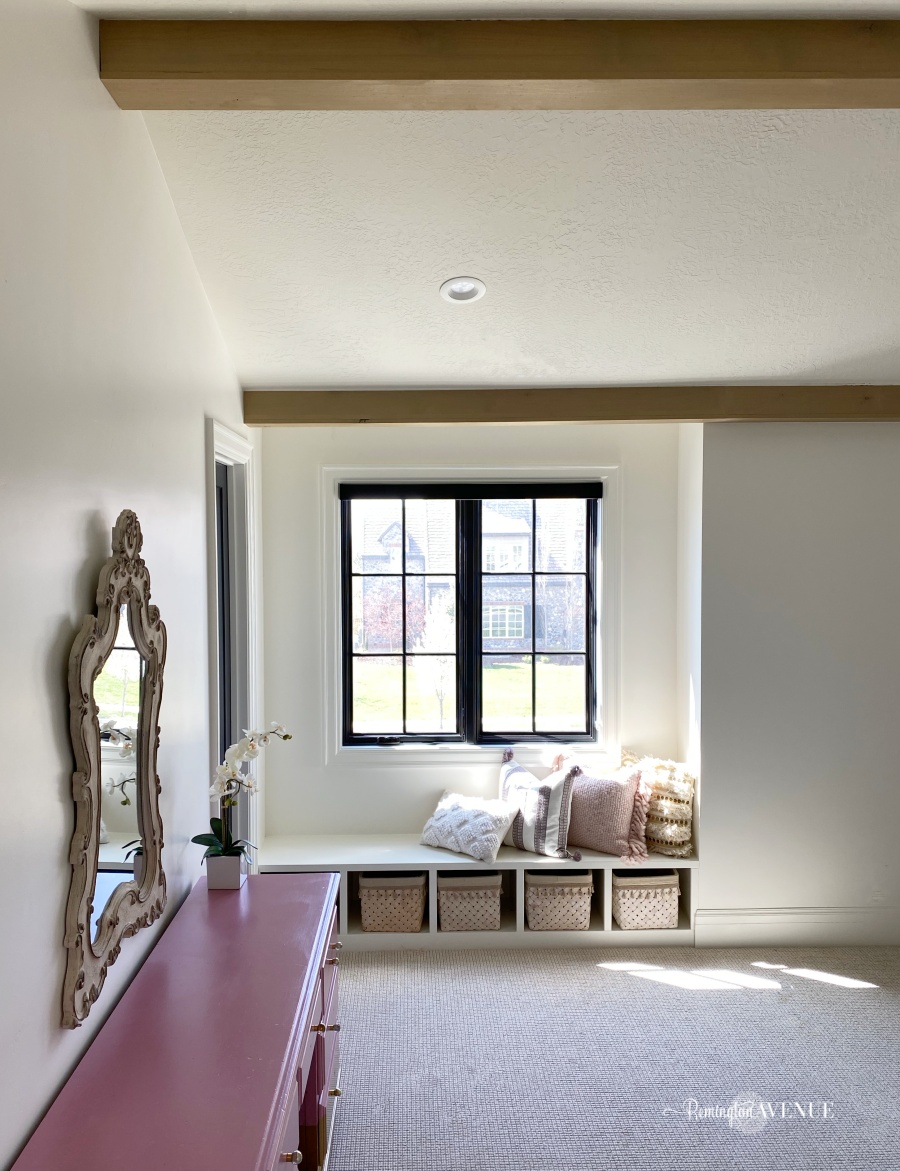
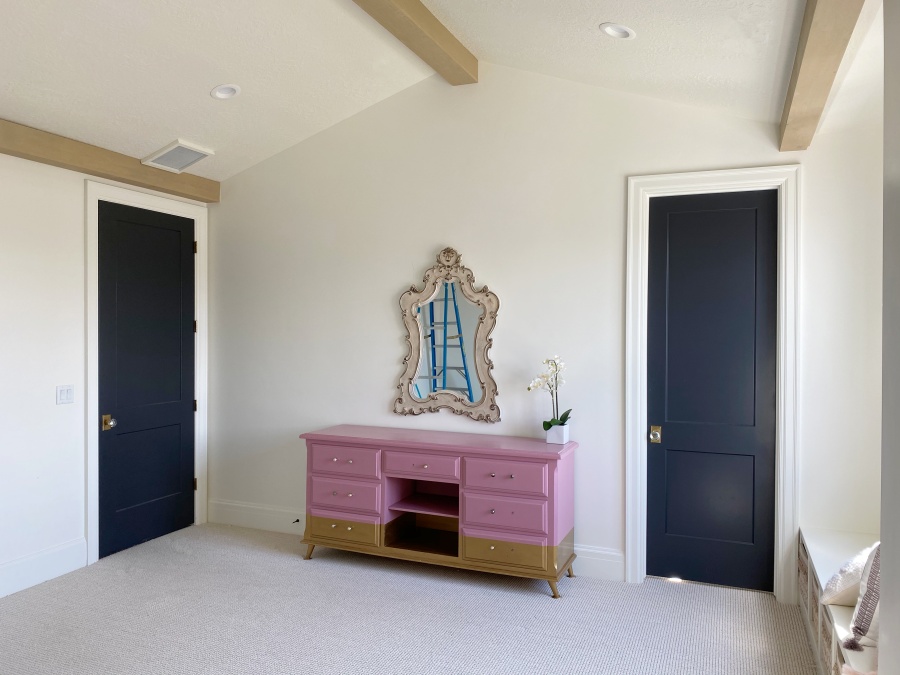
What was before just a pitched ceiling is now an architectural feature of the space. I can’t wait to put together a design plan for this nursery and share it all with you! If you enjoyed my DIY box-beams: pitched ceiling tutorial, check out my other thrift diy projects HERE.


 Add to favorites or read later
We are building a shed style roof on a new construction mother-in-law cottage in the backyard. It will be a one-directional shed roof with a wall height of 9 ft at the back of the structure and the front of the structure wall height of 12 ft. We are considering faux beams for this open-concept design, and now I am sold on the beams! You did a marvelous job of installation, and the directions are perfect for us. Thanks so much for sharing your DIY with everyone. We are so excited to add these beautiful beams to our project.
Enjoy decorating this new baby room. Joy to you all with the birth of this new baby.