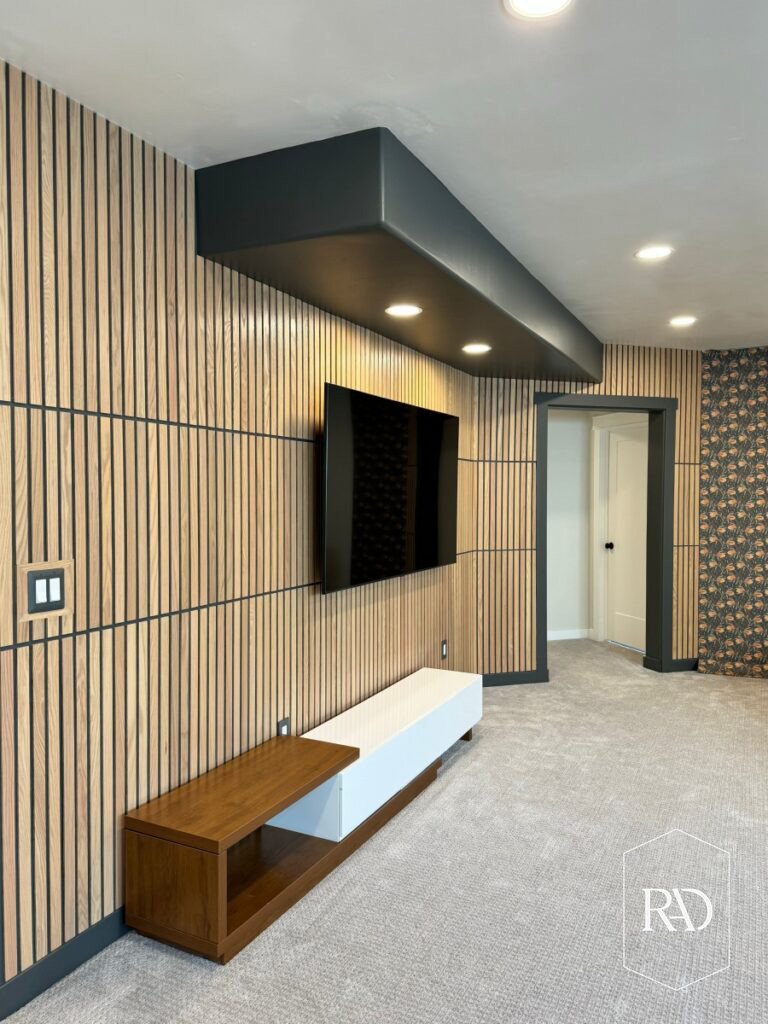
White Oak Slat Feature Wall
Last week, I told you about my sister Alyse’s cozy family room basement design that I am working on. And if you’ve been following along you know it was off to a rocky start. With challenges being thrown our way left and right, it felt like this project would be never ending. However, I am happy to say that with the completion of this white oak slat feature wall, we’ve turned a corner for the better.

I am so happy with how this white oak slat feature wall turned out! And it was so quick, easy, and efficient to install. There’s even an installation video on the Weaber Lumber website, if you need more guidance. So let’s get into it!

White Oak Slat Feature Wall
Supplies: tap on text for direct link!
Weaber Lumber Solid Oak Pre-cut Slats – 1/4” x 1-1/2” x 36”
Measuring Tape
paintable outlet cover double switch
Paint color: Hematite in eggshell by Behr
Step 1: Measure your wall.
You’re going to need to measure the height and width of your wall. Then multiple the height times the width and divide by 144. Add 5% to 10% for cutting and waste. This is going to help you determine how many boxes of slats you need to order. Here are some of the stats about the boards from the Weaber Lumber website for reference:
Actual size of the boards– 1/4” X 1-1/2” X 36”
37 Slats per carton
1qty Spacer to provide the option for 1/2″, 3/4″ & 1-1/2″ spacing
One box covers 20.625 SQFT based on 3/4” spacing
Step 2: Prep the wall.
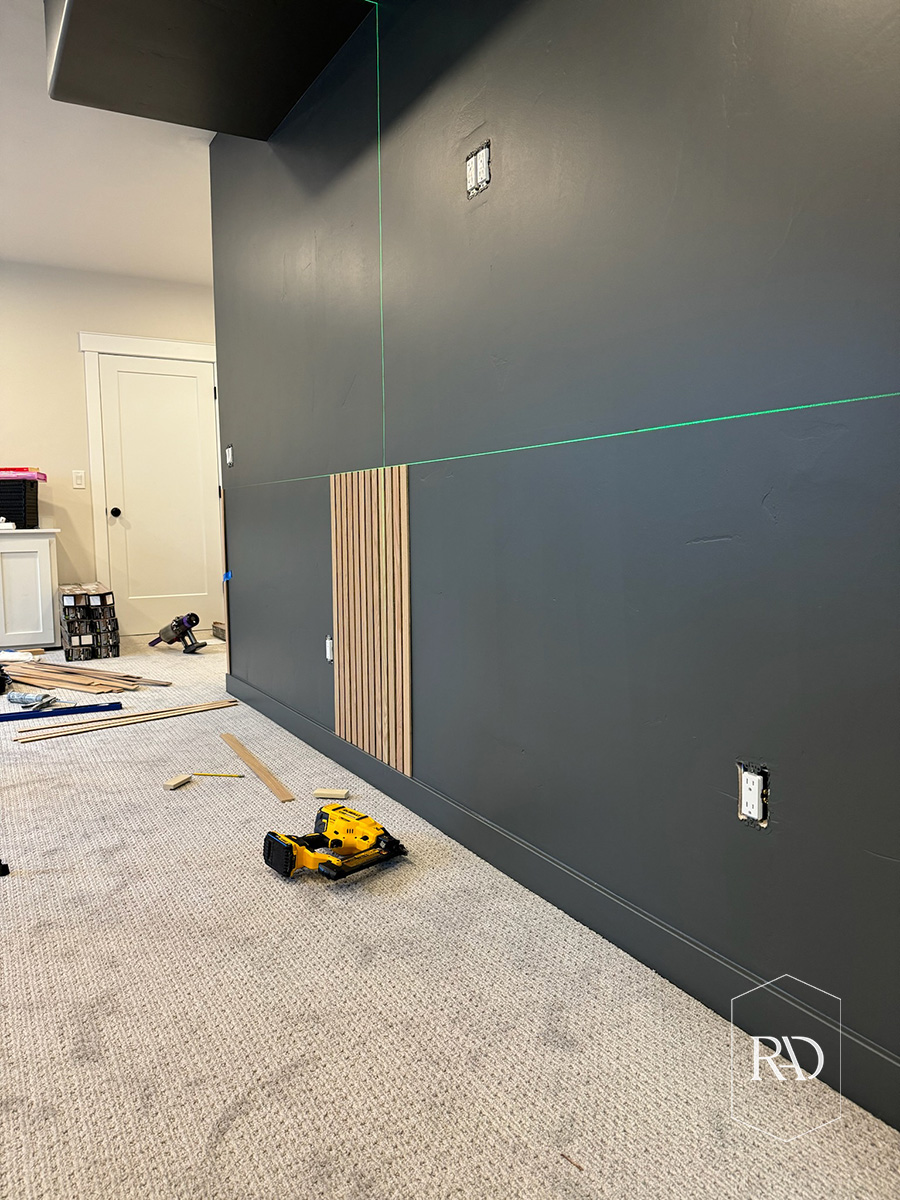
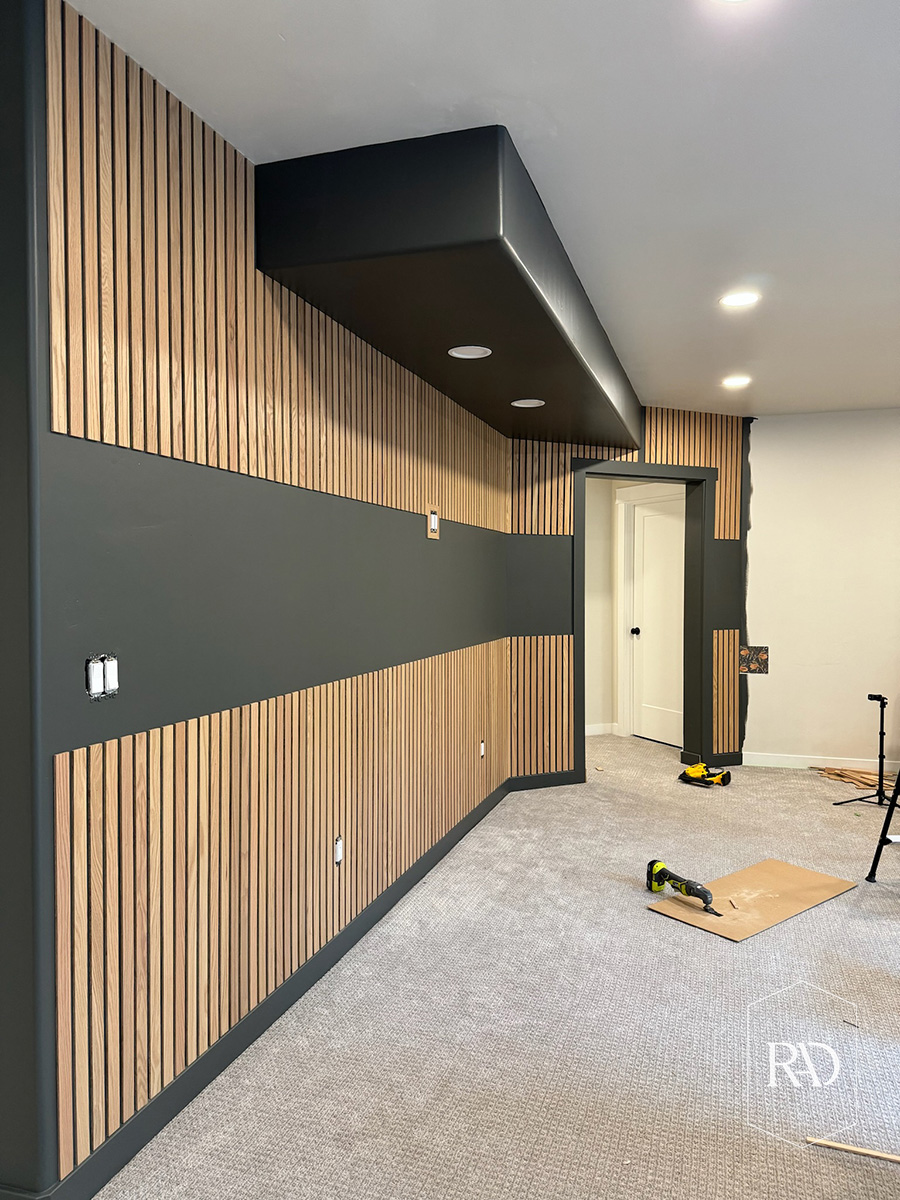
You need a clean, dry, flat wall to start. This includes painting it your color of choice. Remember, you will see the color between the slats. So choose something that goes with the overall design of the room. We chose a dark gray to match the wallpaper we chose. The color is Hematite by Behr in eggshell.
Step 3: Determine your slat wall pattern.
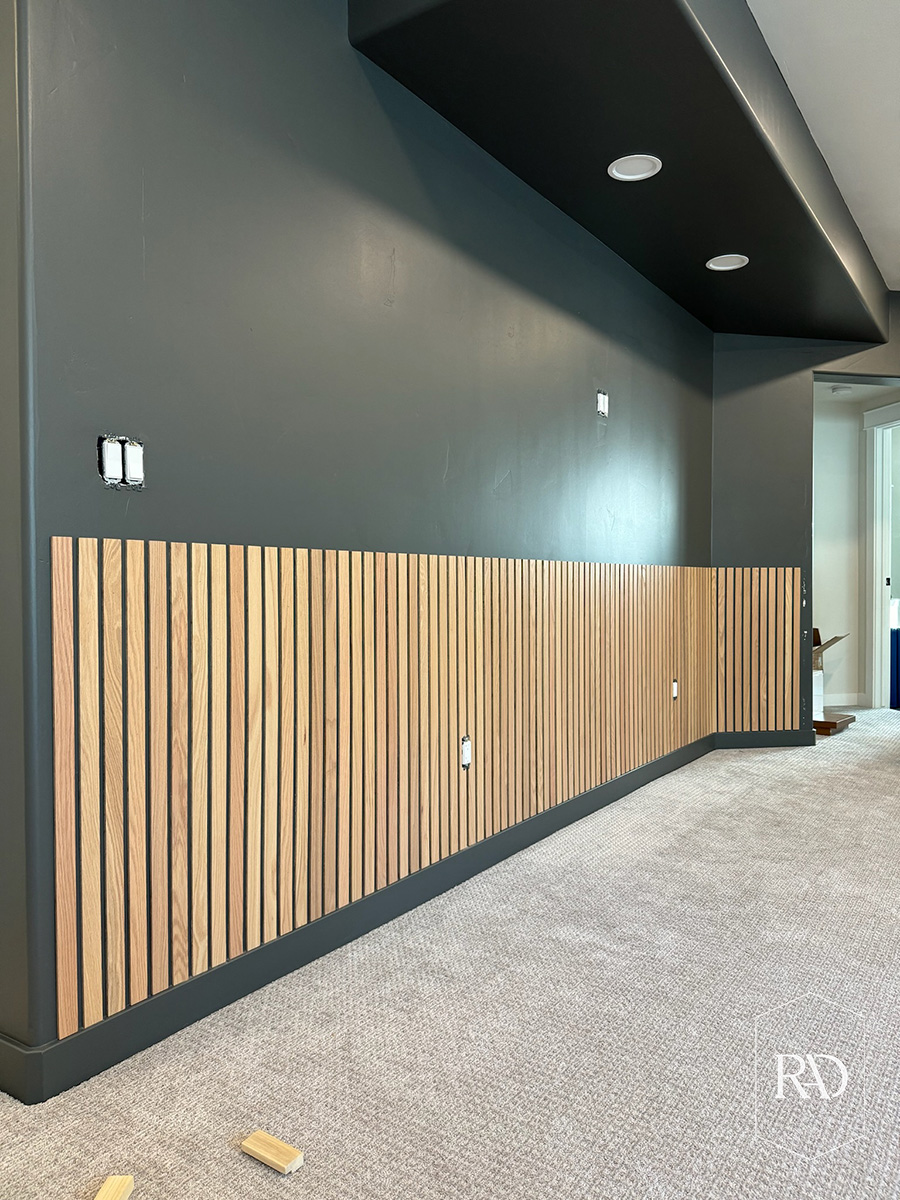
Get creative here. Since this is my sisters house, she wanted 3 rows of vertical slats. I think the middle row could look cool staggered too!
Step 4: Find the center of the wall.
You’re going to find the center of the wall and start there. I measured 36” from the baseboard to determine the height of my laser level. The laser level is extremely helpful to have for this project because it’ll ensure the tops of every slat are a straight line going across the wall.
Step 5: Secure your slat wall.
To make this slat wall go faster, we worked as a team. Alyse applied the adhesive to the back of the slats and I used the nail gun to secure them to the wall. I used the spacers that came in the boxes to ensure that the spacing between each of the slats was uniform. My spacer is 1/2″. I found if I staggered the nails at angles that I didn’t actually need the adhesive, so we ended up using the adhesive only for the bottom row.
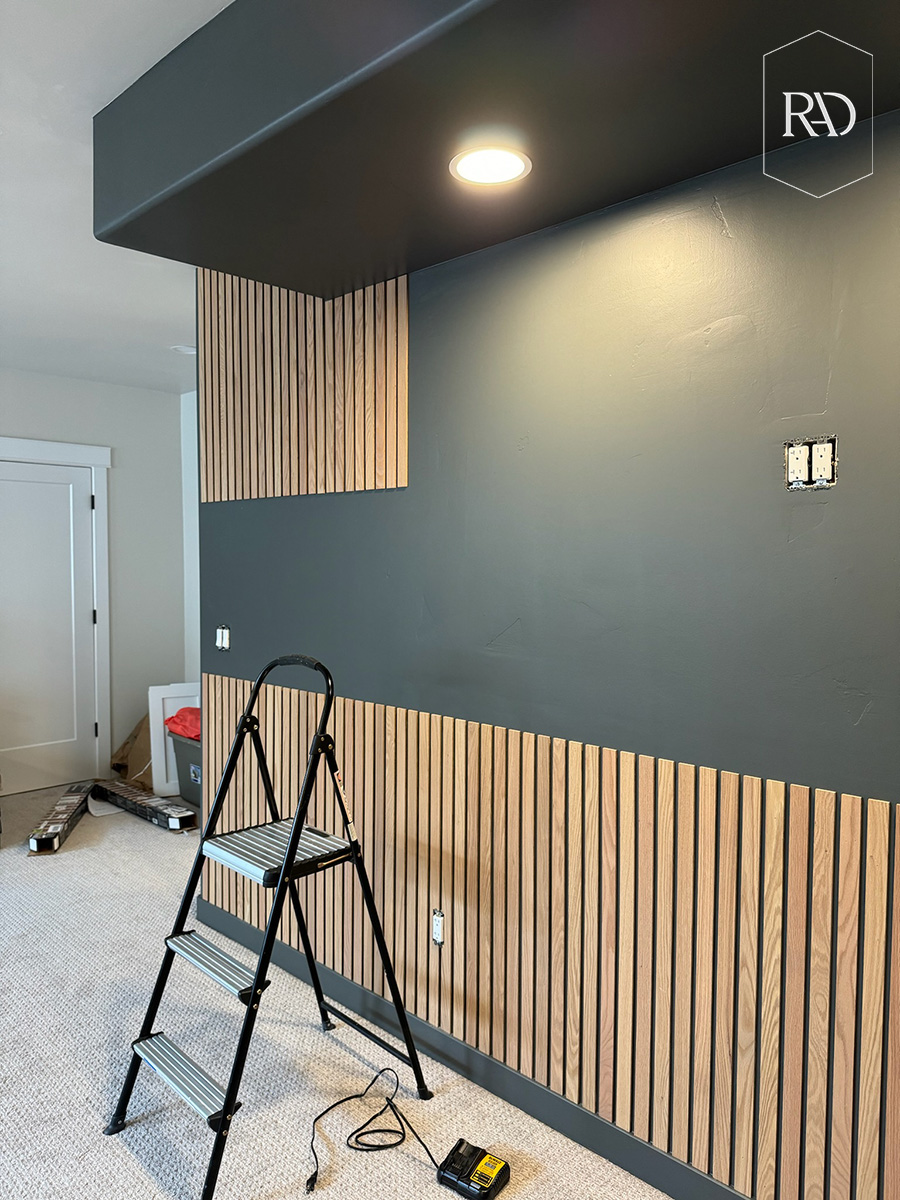
Once the top slats were done, I started with the top slats. Unfortunately once I got to the soffit, I noticed it was very uneven. So with the top row I was having to adjust every slat height by ⅛” to a ¼” which caused for very slow going compared to the bottom row. But this is just a reminder to use a laser level to make sure things stay even across the whole wall. Because if I had just followed the ceiling line, it would’ve been all sorts of wonky.
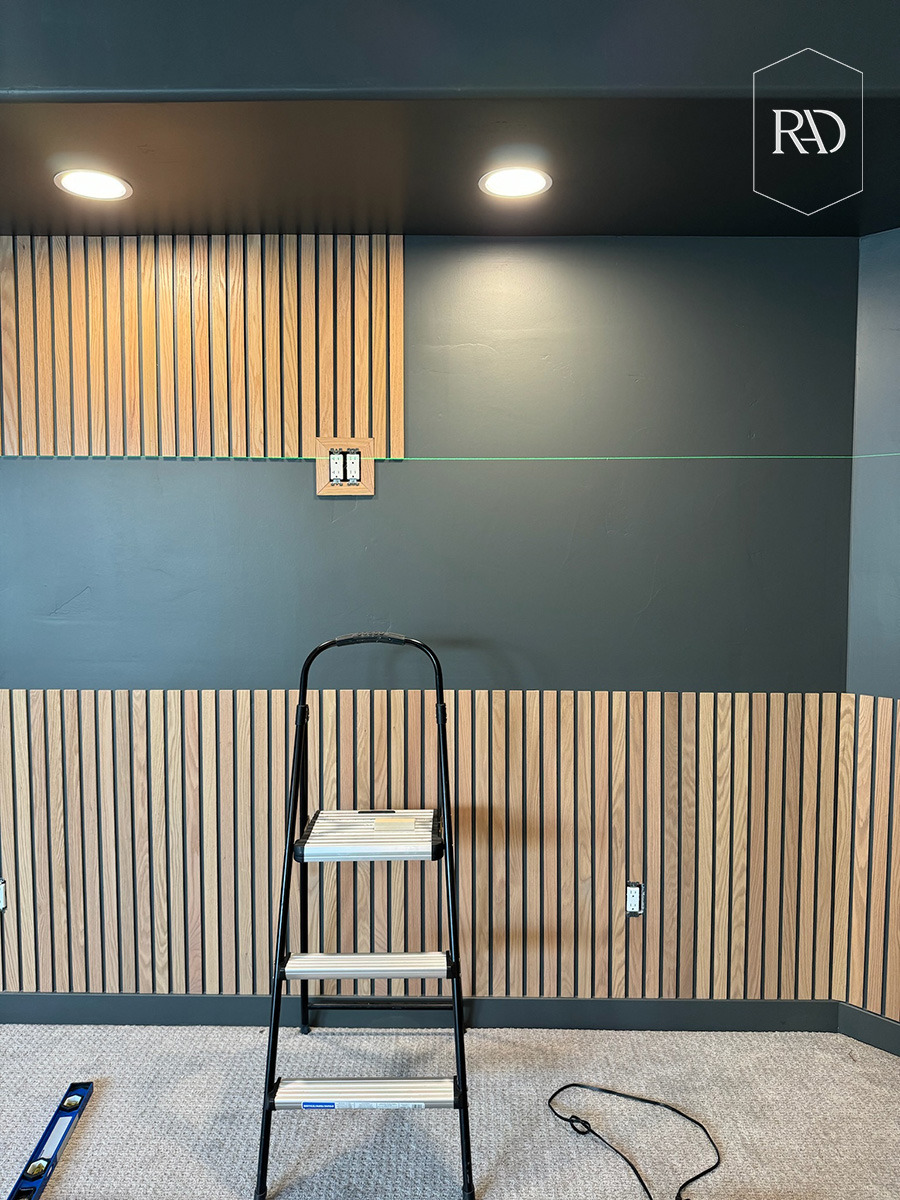
There are two ways to handle outlets, which you’ll see, I used both. For the bottom row, I simply cut around the outlet. I just measured my cuts and I actually used the slats as an extender for the outlet. And then I placed the outlet cover over top for a nice, clean finish. For the top row, I framed out my outlet. I think either looks good, so it’s really up to personal preference!
Step 6: Cover the nail holes.
You can easily use a wood filler wax stick to do this. And it makes covering all of the nail holes go fairly quickly. Just make sure it matches the wood color.

Now stand back and admire that you just completed a full white oak slat feature wall in just a couple of easy steps. I have to say, if you are just doing a flat wall with no soffits and not going around any corners like I did…this would be a much easier and less complicated diy! If you’re liking the looks of this project so far, stay tuned for my sister’s full cozy basement reveal!


 Add to favorites or read later
Luv it! Had similar idea in mind and then saw you brought it to life!!