Master Bedroom Makeover with Double Layered Vertical Batten Tutorial
Everybody has a budget and whether it’s big or small, I’ve always believed you can create a great space within yours! And my latest project at my sister in law’s house is proof that even budget friendly choices can have a big impact in a space. The budget for this project was $1500, including all new furnishings, paint, lighting, everything. Read through my sister in law’s finished master bedroom makeover to see if we stayed within budget!

I will say, whenever I start a new project, I get a lot of questions about my design process. So, before I get into the master bedroom makeover, I wanted to share how I always go about designing a space. To start, I always ask myself these 3 questions: What functions does a room need to meet? Are there any problems? What furniture is staying? Now let me answer them in relation to my sister in law’s room!
What functions does the room need to meet?
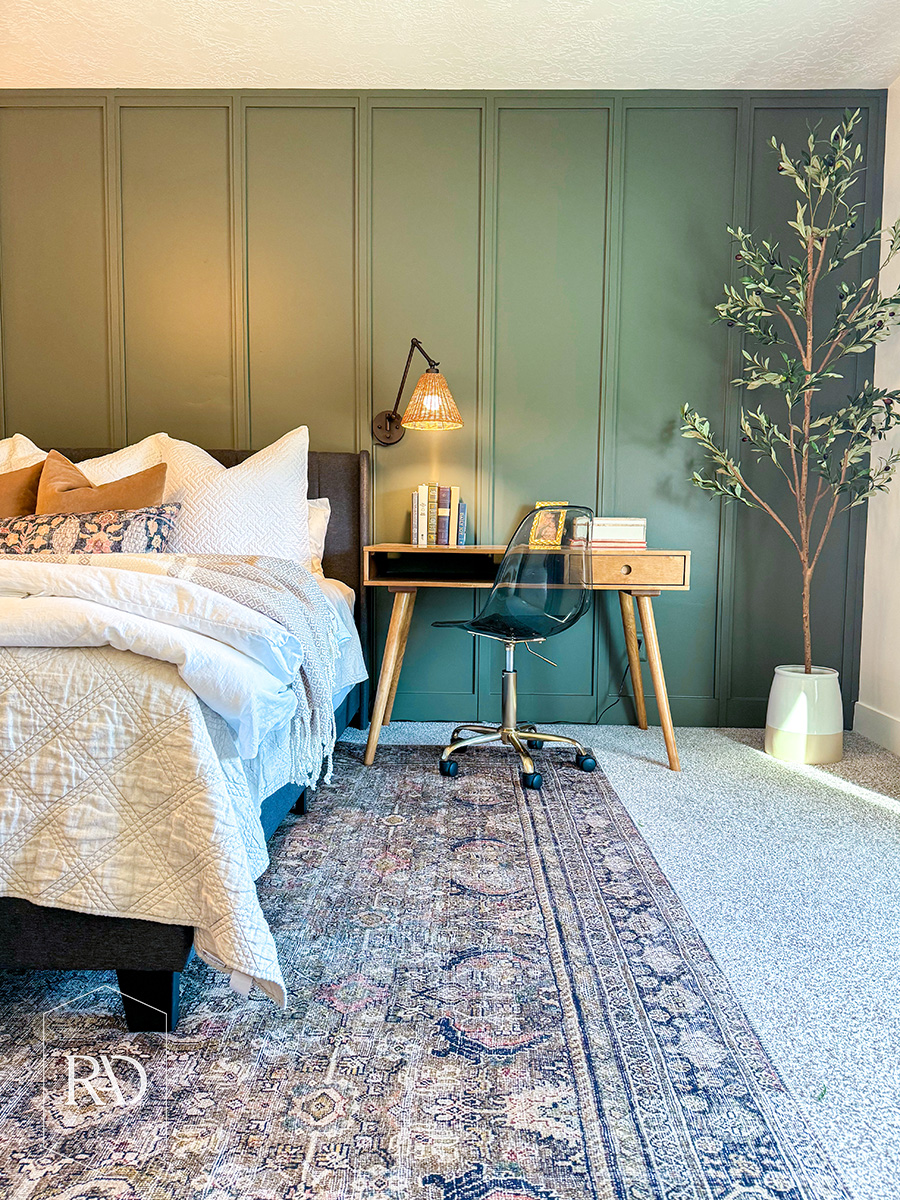
When it comes to my sister in law’s room, it’s multipurpose. It needs to function as both a master bedroom and a home office for her husband.
Are there any problems?
The biggest problem in this room is the window treatment situation, ie. the sheets hung up as curtains. Because this space is multifunctional, the lighting needs to be adjustable. Her husband needs light during the day to work, but they also need major light blocking at night because the street light stays on all night outside the window. And as you could probably guess, the sheet situation is not working.

What furniture is staying?
The only furniture staying in this room are the desk and the mattress. Luckily, these are two big ticket items that don’t have to be accounted for in our budget.
The Master Bedroom Makeover Design
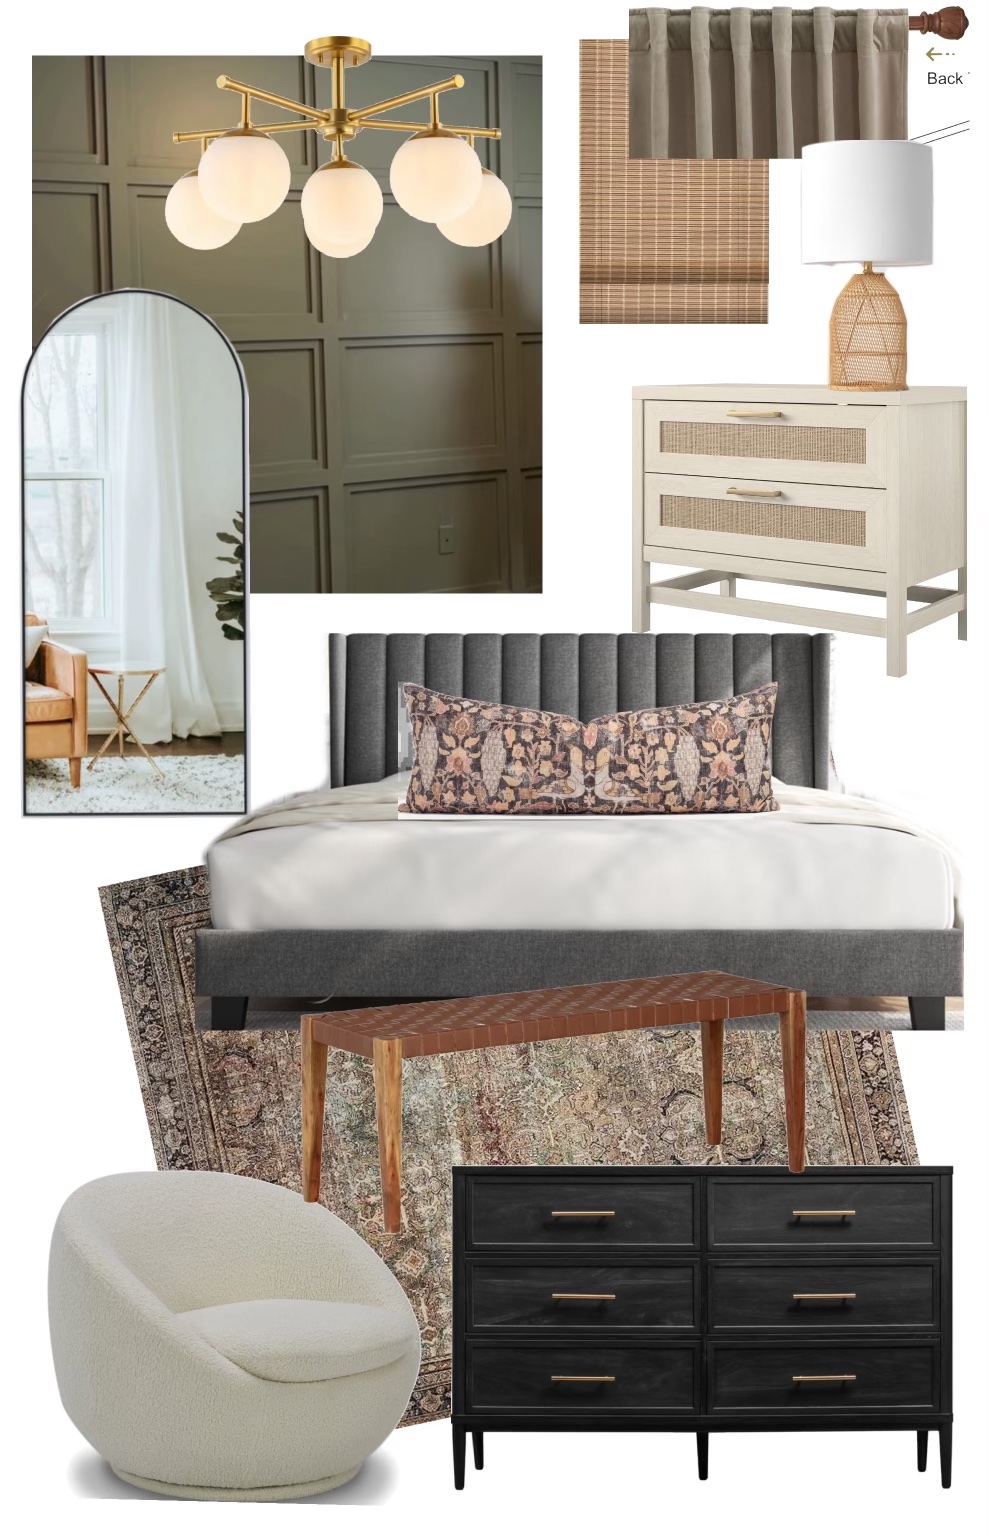
Tap below to shop!

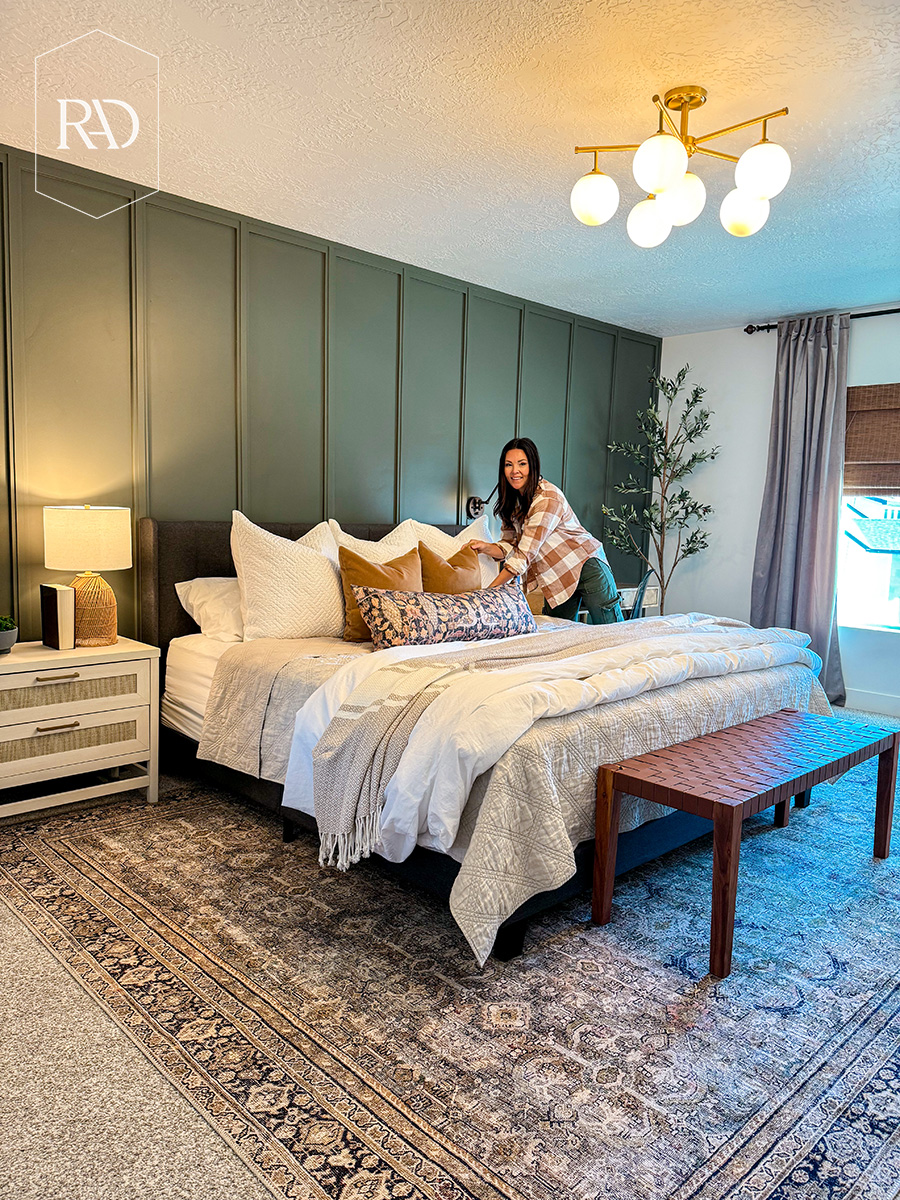
My sister in law and her husband both love blues and greens, so I pulled the color inspiration from the rug, which has a beautiful earth tone green in it. All of the colors in the rug really pull everything together. It’s such a classic design that can be used in so many spaces. And I actually have the runner version in my house in the garage entry!
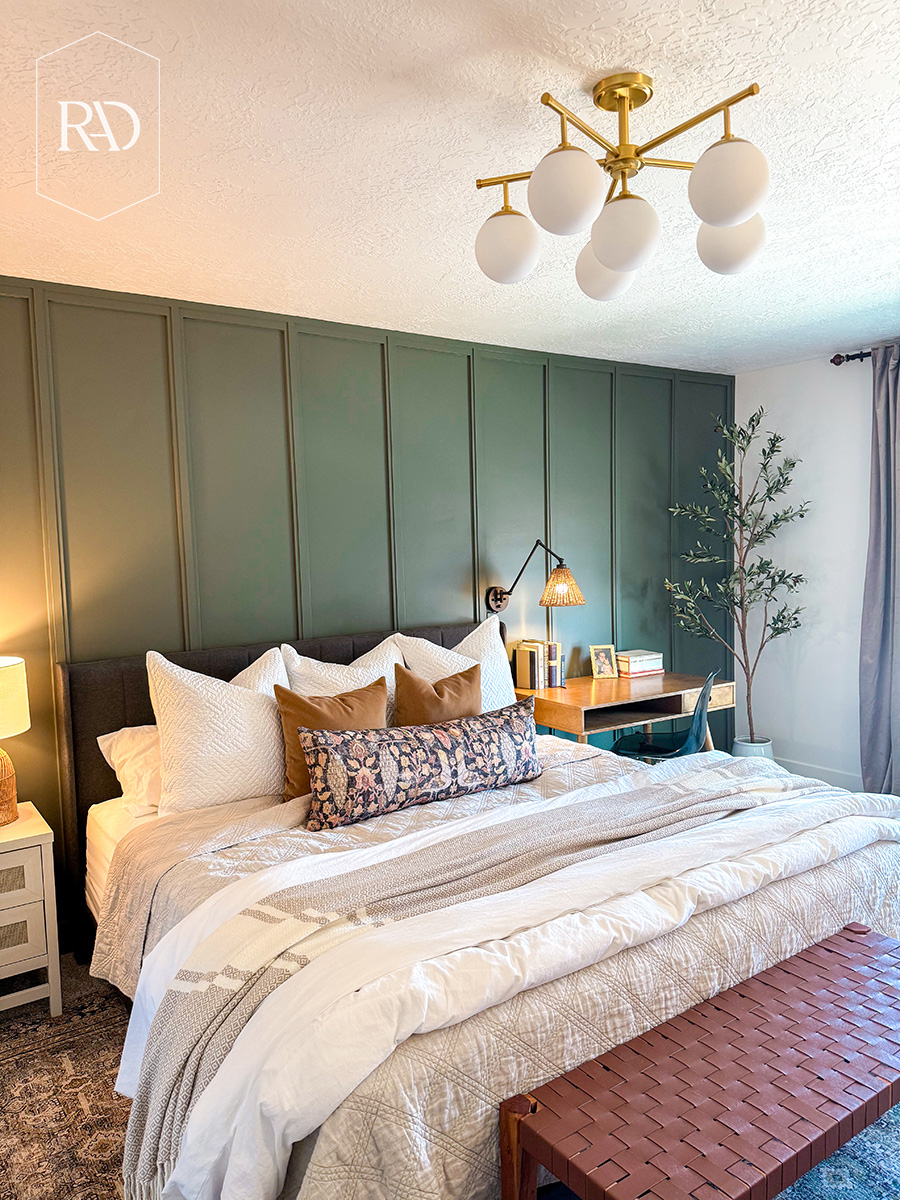
I knew I wanted to DIY a feature wall behind the bed, rather than just paint it. I wanted to add dimension and this vertical batten did just that.

Double Layered Vertical Batten Tutorial
My inspiration for this wall was a layered trim design and I wanted to bring that to life in my own way. If you want to take your design up a notch start thinking in layers. Molding layers, texture layers, pattern layers, color layers, etc. In this case I’m adding dimension to my trim by adding molding. Watch me build this feature wall in this Instagram Reel!
Step 1:
Frame out the feature wall. I ran trim up both sides of the wall and along the ceiling.
Tip: When running two boards together at a joint, do a mitered seam. To do this, cut the ends of both boards at a 45 degree angle. Don’t forget to wood glue the joints because that’s going to keep it from coming apart later. This method is going to hide your steam so much better than a butt joint.

Step 2:
Once I did all of my measurements, I double checked that my math was correct and temporarily hung my vertical slats using painter’s tape. I also made a spacer, which I highly recommend doing. It made hanging the vertical slats so much easier. For reference, my spacer was 16 9/16”.
Step 3:
When I was sure that my math was correct and the spacing was even, I went in with my spacer and my nail gun. I used my spacer to keep the space between each vertical slat even and make sure the trim piece was straight. And then I used my nail gun to secure it into place.
Step 4:
Add dimension. I did this by adding molding on top of my vertical trim pieces. For this part all I did was take PVC trim, cut it with my molding shears, and attach it with quick grab construction adhesive. No nail holes needed! In fact, this actually covers the nail holes in the bottom pieces of trim so you don’t have to go through and fill all of them.
Step 5:
Caulk and paint. Fill in the seams of the bottom pieces of trim against the wall with caulk so there’s no gapping. And then paint your wall! I used BM Dark Olive in eggshell, color matched at Home Depot.
Cost of this DIY feature wall: $265 including supplies and paint
After the feature wall was done, it was time to start bringing in the furniture. I decided upon this dark gray king size upholstered bed that will hide any kids fingerprints. And let me tell you, based on the great reviews and the love from you guys, I had high hopes for this bed despite it being only $230. And it looks so good! It was easy to assemble and it also has legs so it’s not sitting flat on the ground, which I love.
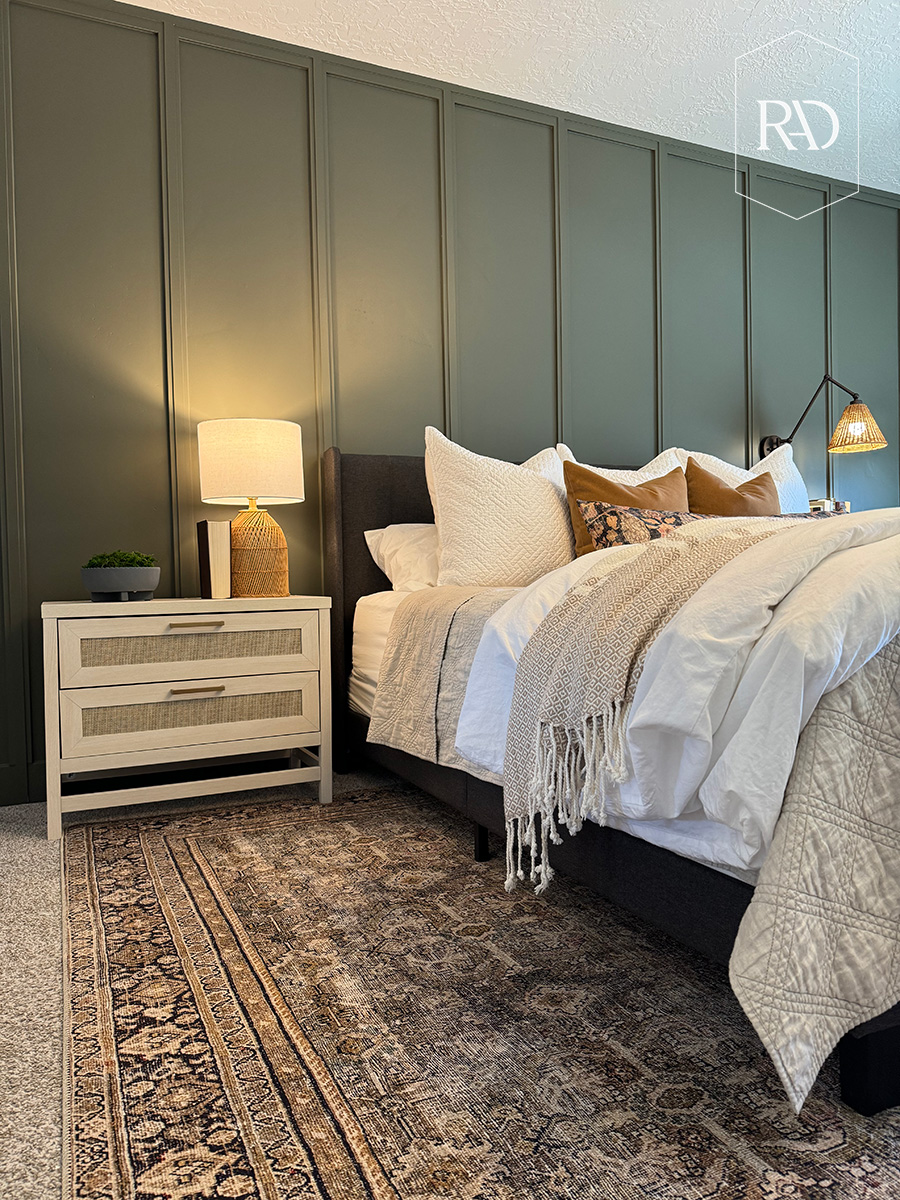
There were no nightstands in the bedroom before, so on one side I brought in a two drawer nightstand to provide extra storage. And for the other side, I used the desk to pull double duty not only as a workspace, but as a nightstand as well.
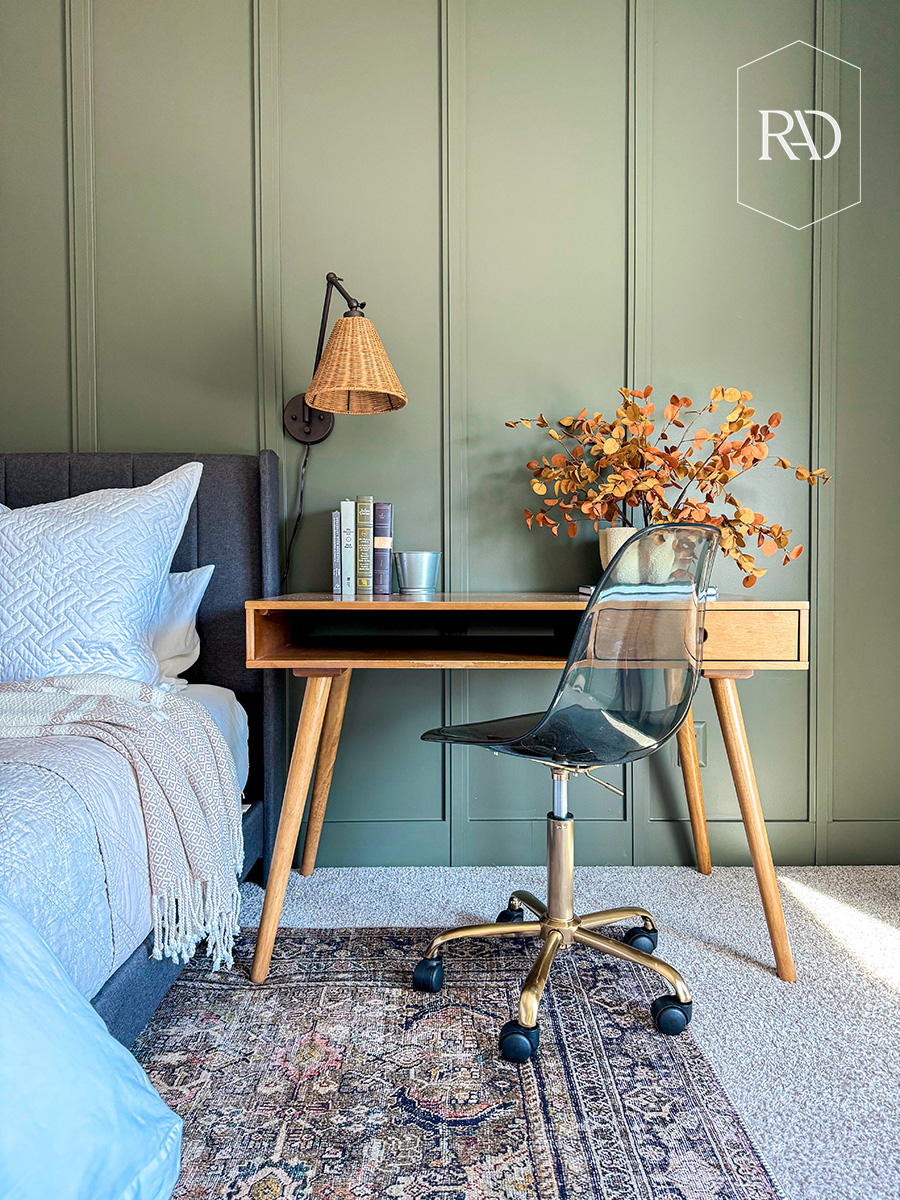
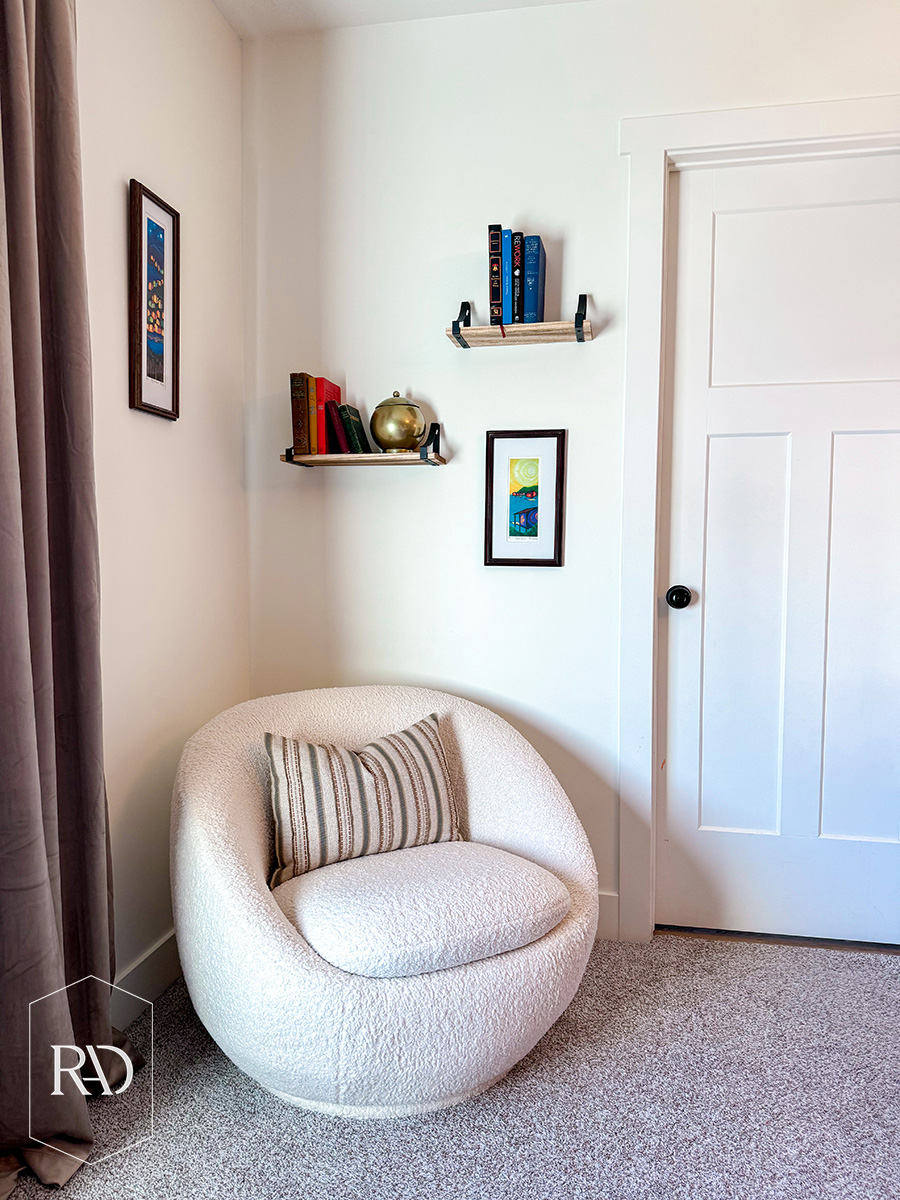
I added two moments of extra seating with this super fun swivel chair and this beautiful bench at the end of the bed.
Now to address the problem area, the window. The combination of the woven blackout shades and the velvety drapes works perfectly to fix the lighting problems in this space. The drapes come in so many colors and sizes and you can get them with the blackout backing too if needed.
Tip: Hang the last drapery loop after the rod hooks so they always stay in place.

As for lighting, I replaced the standard ceiling light fixture with a gold fixture. I added a table lamp to the nightstand and a wall mounted sconce above the desk that can be swiveled to shine where it’s needed.
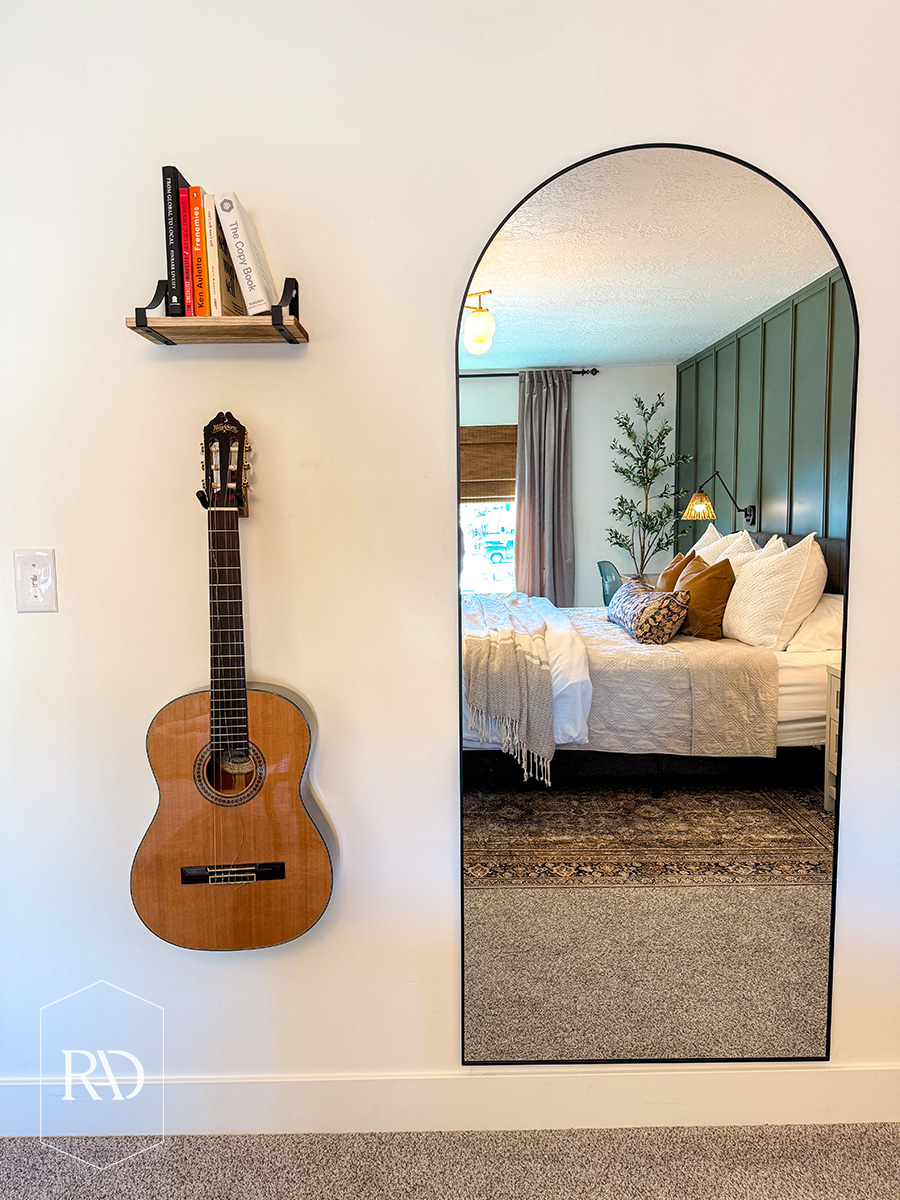
To round out the furniture, I added two black dressers to give the illusion of one long one. The black color of the dressers adds depth. And you can see that none of the major furniture pieces are matchy matchy. This is on purpose! We’ve got several different tones of neutrals happening. This makes it feel like more of a collected feel over time, which is how most of us come to collect furniture.


And that completes my sister in laws master bedroom makeover! Although I am still debating whether or not to paint the whole room olive green. Now I know I said the budget for this project was $1500, but we did come in $500 over. Bringing the grand total to $2000. However, I think it was totally worth it for a completely redesigned master bedroom. Not to mention we did replace all of the furniture besides the desk and the mattress! I could have delivered most of this room for $1500, but I wanted her to have the finished look so I gifted her the rest. Perks of being related to a DIY-er haha!
If you’re looking for more ways to update your space on a budget, be sure to check out my blog post on 5 Budget Friendly Tips for Transforming a Bedroom.

 Add to favorites or read later
Beautiful! Where is the source for the rug and the bedspread?
Love it all! I like the way you used a wall sconce on one side and a lamp on the other – tied in with the wicker – super cute! The wall – swoon!