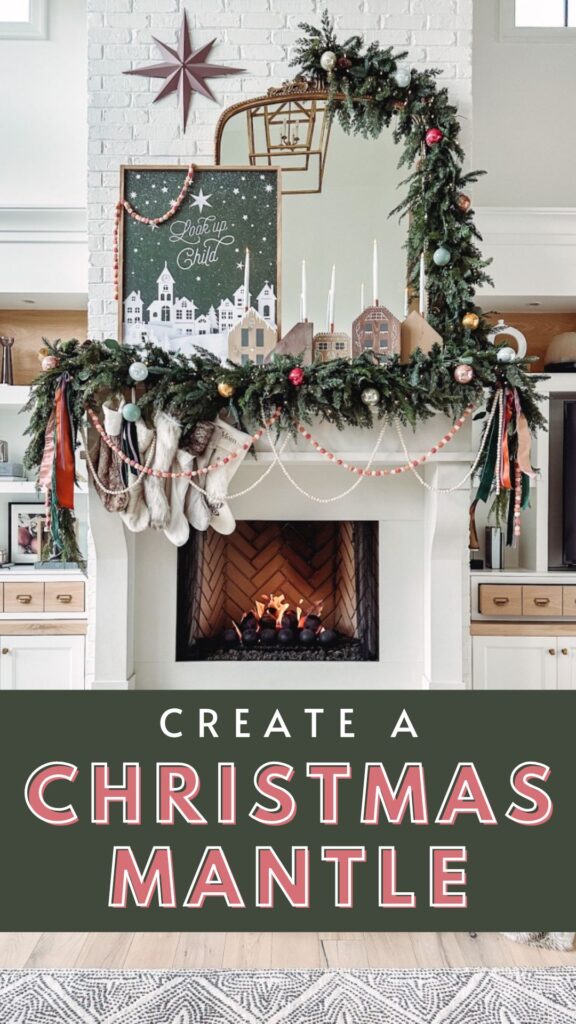
How to Create a Balanced Christmas Mantle
Creating my Christmas mantle is one of my favorite decorating activities of the year. I love all the details and layers that go into it and it’s something I can’t wait to share. But creating a balanced Christmas mantle can be tricky if you aren’t sure where to start. So I’ve put together this step-by-step tutorial based on my mantle last year for how to create a balanced Christmas mantle.
Building a balanced Christmas mantle is something that can take a little bit of time. You might place an object and it doesn’t look right, it’s not the right size, or something just feels off. You don’t want it to feel off balance or like it’s missing something. It really takes stepping back and looking at the overall scene from a distance to gather the whole picture. Follow these basic steps below to achieve the balanced Christmas mantle look that you’re going for.
How to Create a Balanced Christmas Mantle
Step 1:
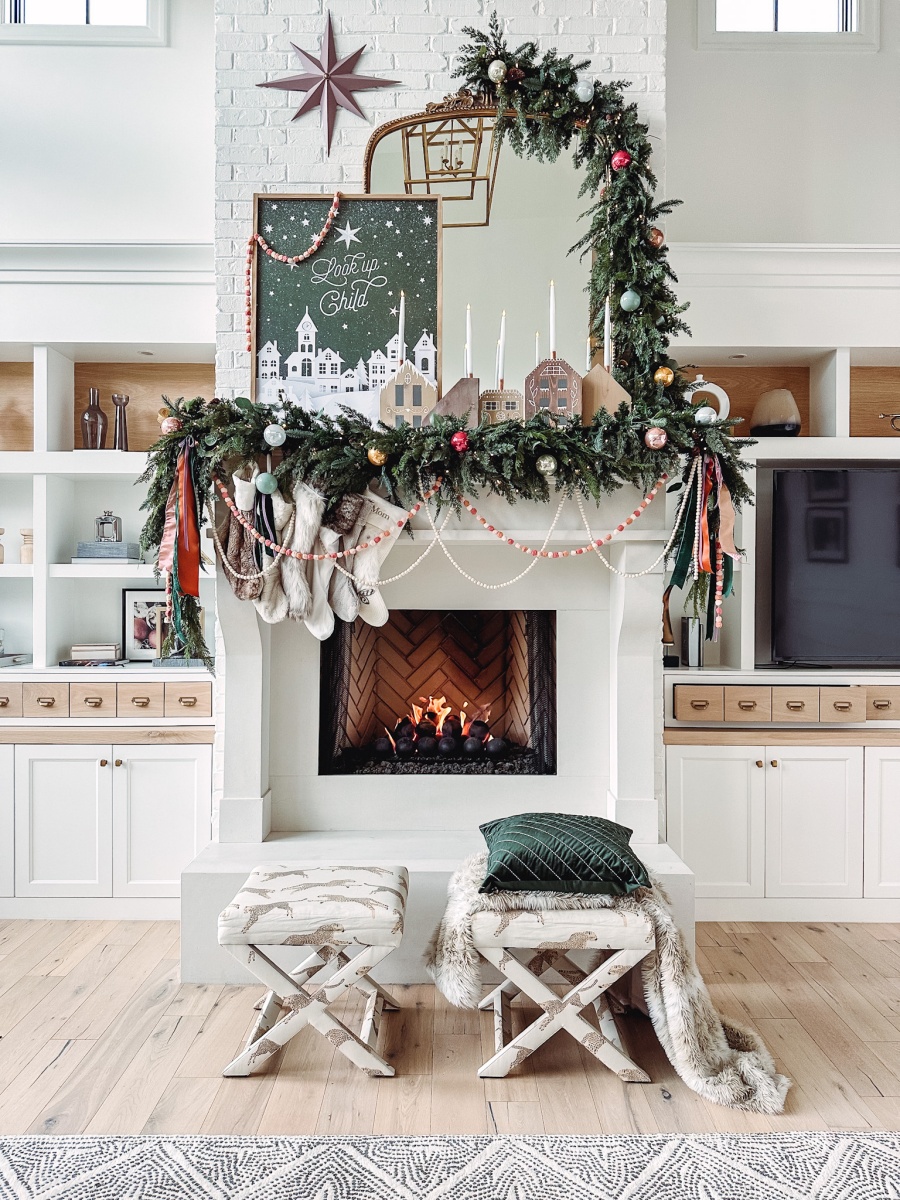
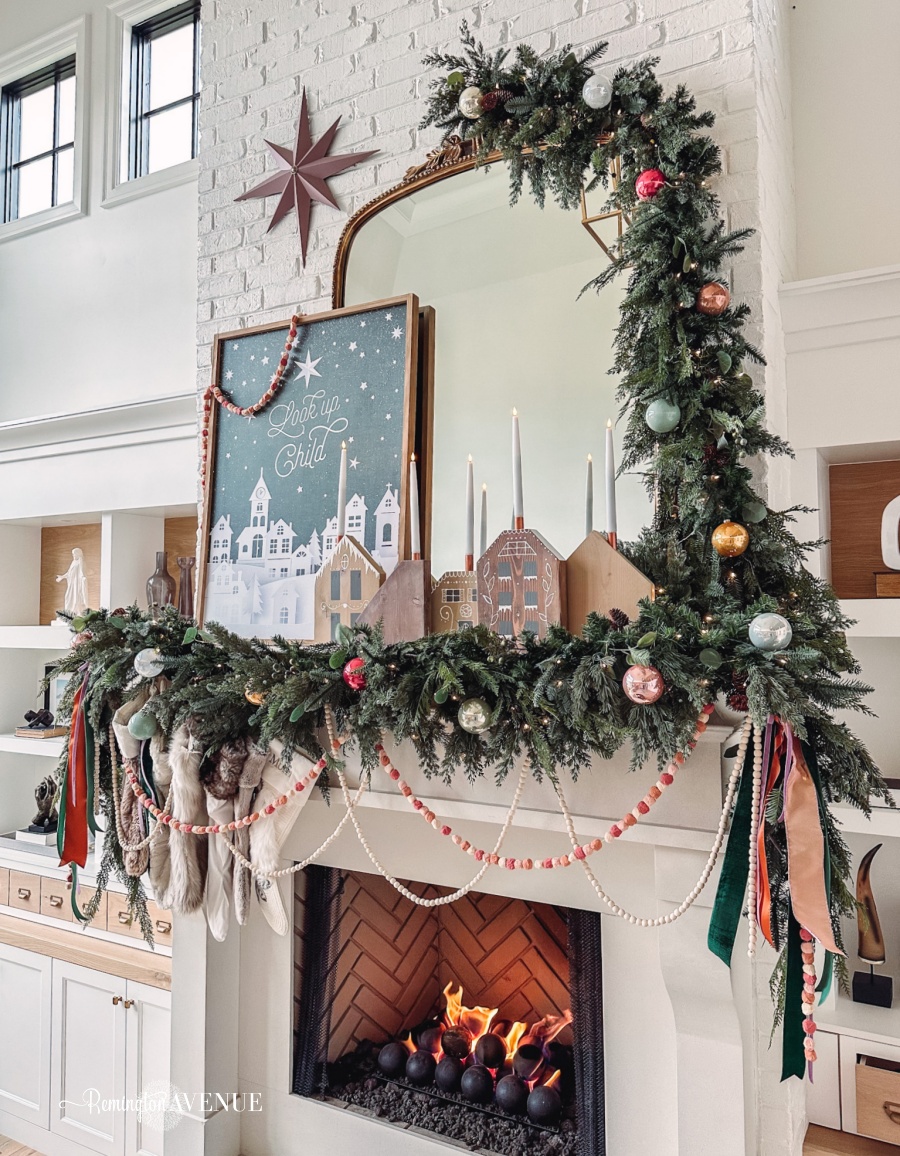
Start by twisting together two different types of garland. I used a faux cedar & a pre lit mixed variety. This helps create a fuller look. For my mantle I used a garland secured to the top of the mirror coming down and one across the front of the mantle.
Step 2:
Using a command hook and strap, secure the garland to the top of the mirror. I then used 3 of the giant command hooks and straps to secure the garland going across the mantle. These straps make it super easy because you can just place the garland, wrap the strap around it, and hook it into place.
Fluff the garland so it looks like it’s spilling over the front of the mantle. This will allow you to use the top of the mantle to decorate.
Step 3:
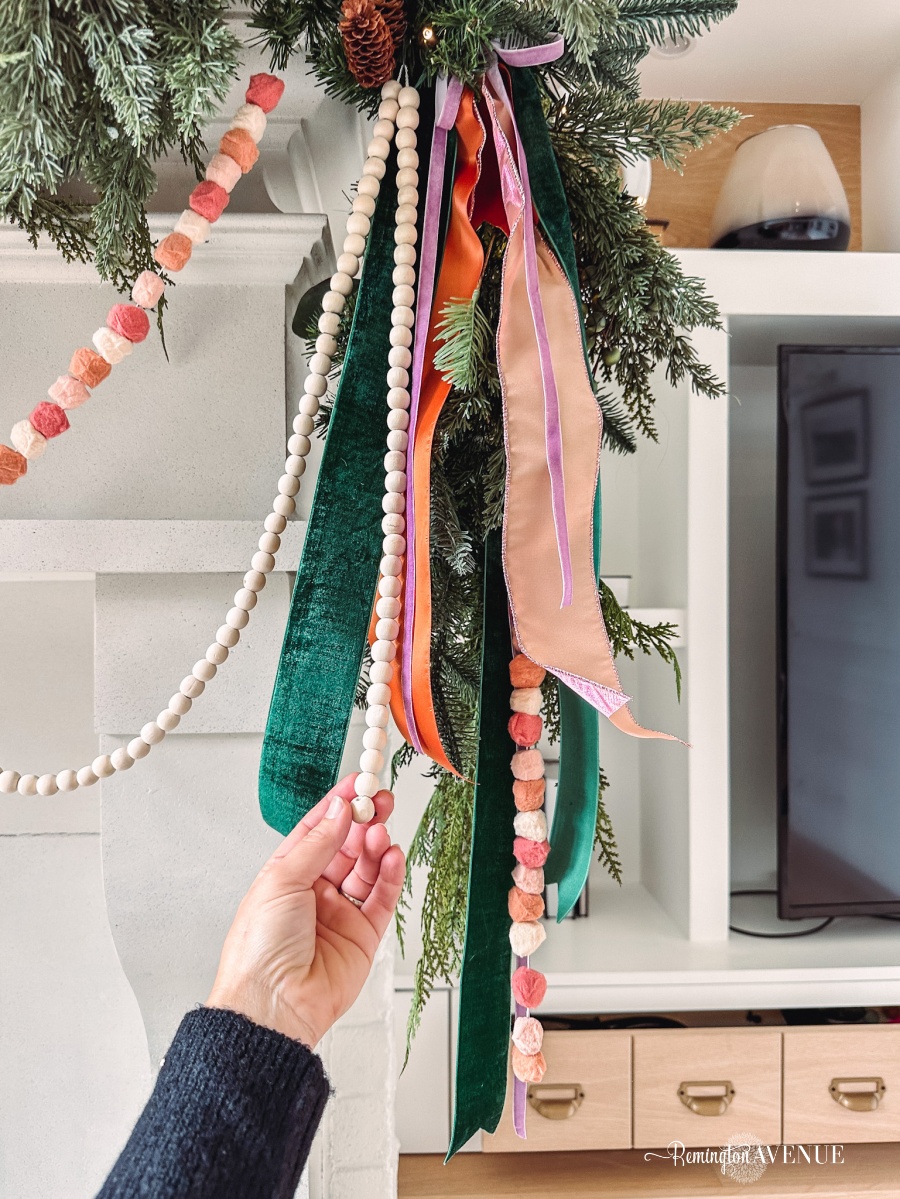
Next you’ll choose 3-5 varieties of ribbon. Floral wire is your friend here. Cut your ribbons to different lengths and pinch in the middle. Twist them together with floral wire and then use the floral wire to secure them into the garland.
Step 4:
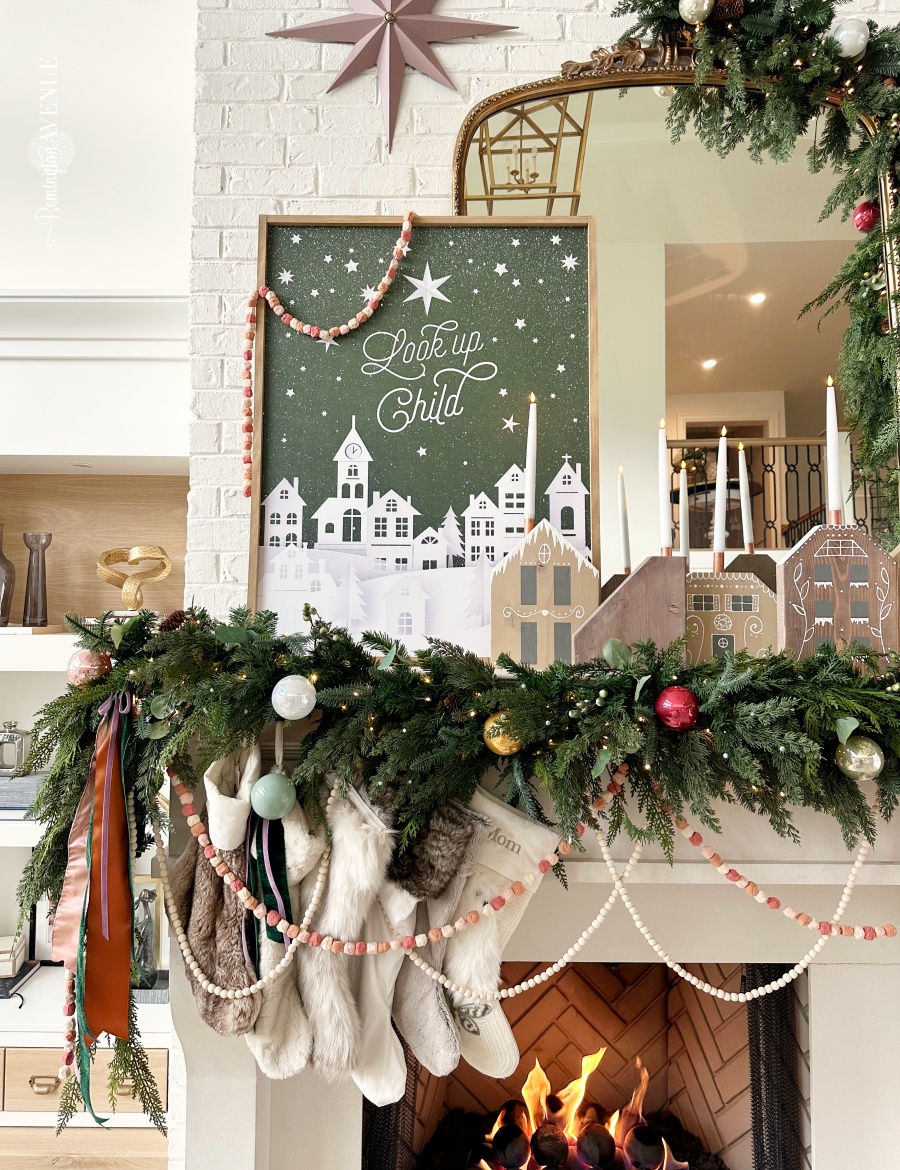
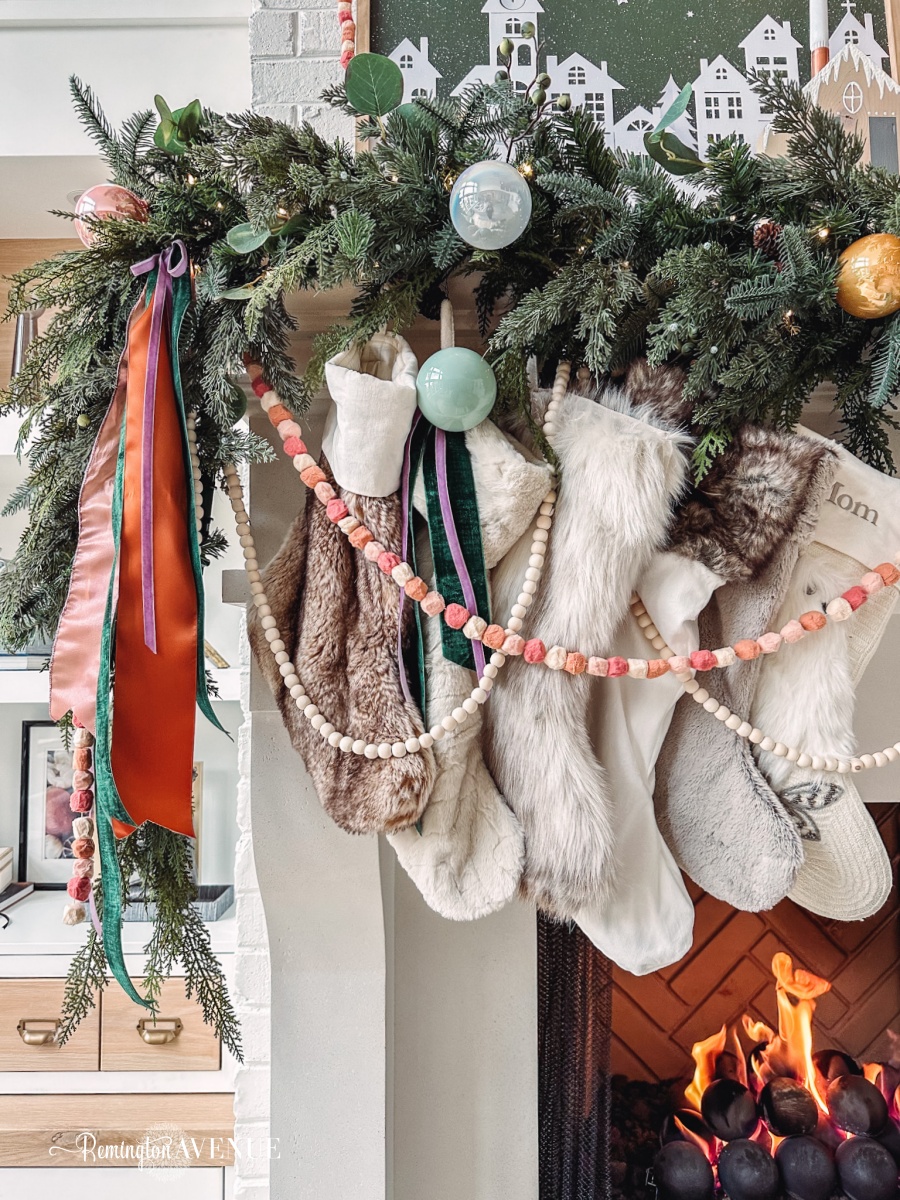
Add a pom pom or bead garland or both! I used one of each. Using the floral wire, secure the pom pom garland to both ends of the mantle and then find the middle and secure it. I then took the beaded garland and tied it up in opposite loops of the pom pom garland.
Step 5:
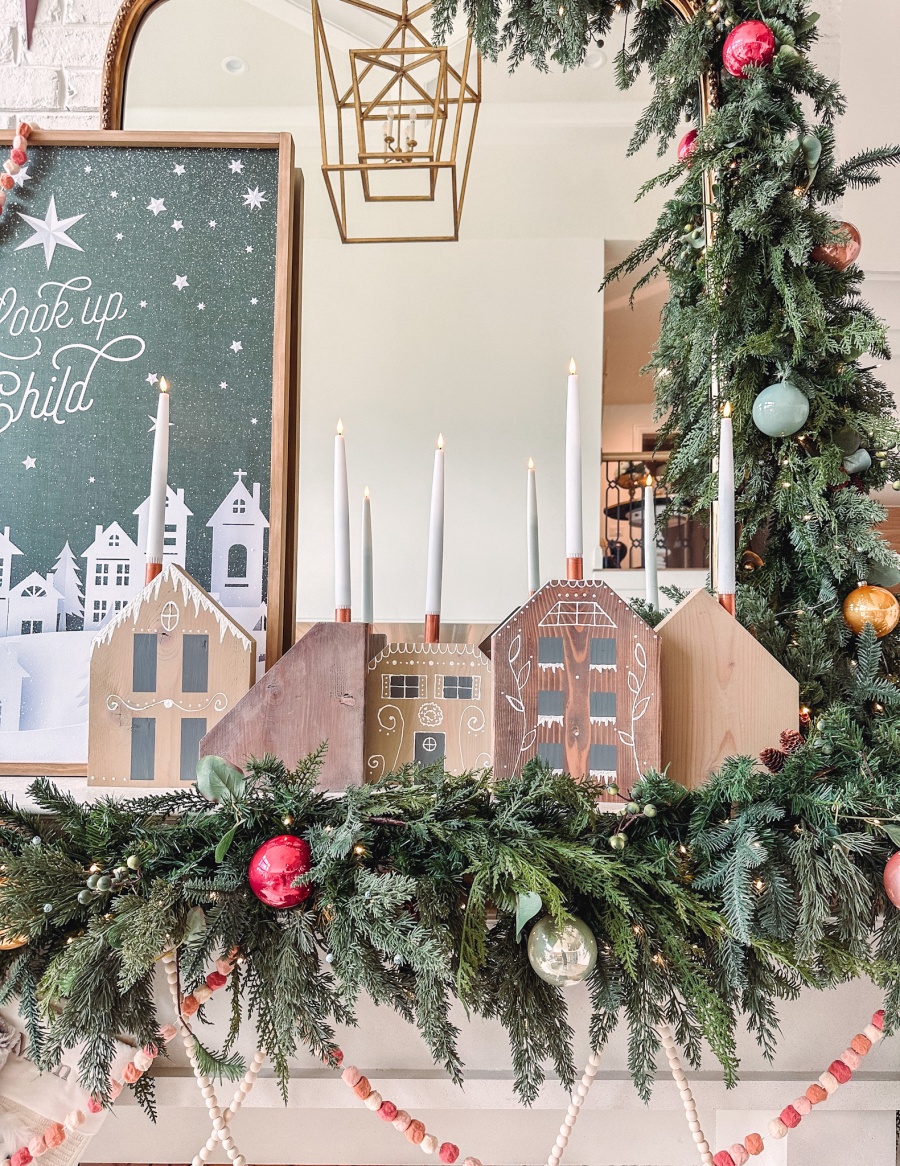
Add your art. Every year I design a custom holiday sign with @tealbarnsigns and it lives on my Christmas mantle for the season. Last year’s sign was this “Look Up Child” design. It comes in a variety of colors and sizes. You can even choose the stain color for the frame. This year’s design is so beautifully done in an oil painting style look that says “I Want a Christmas that Whispers Jesus”. Shop this year’s design HERE and use code MYSHA15 for 15% off site wide on any of my Christmas signs or other signs for gifts.
Step 6:
Add any other Christmas mantle decor. Last year I created these DIY house candle holders and put flameless LED candles in them. They really helped balance out the sign and added warmth with the wood.
Step 7:
Finish the garland. I did this by attaching colorful ornaments throughout using floral wire. And then I added all of our stockings, again using floral wire.
Keep in mind that all color and decor choices are totally up to you and the look you’re going for in your home. Last year I was going for a Nostalgic Elegant Christmas look and that’s how I determined the colors I wanted to use. This post is to just give you a guide on how to create a balanced Christmas mantle. That way it doesn’t feel too busy or too heavy on one side. Just follow these easy steps and you can create your balanced Christmas mantle with any color scheme you’d like! And don’t forget to shop this year’s Christmas sign design with Teal Barn Signs!
Shop last year’s nostalgic elegant Christmas mantle with the images below!


 Add to favorites or read later