How to paint a porch or patio rug
Why not paint your porch or patio? Check out the painted rug I created for $10! It all started with an idea of using a tile stencil to add some interest to my plain old concrete. Once thing led to another and I ended up ditching the stencil and creating this lattice design using only FrogTape and paint.
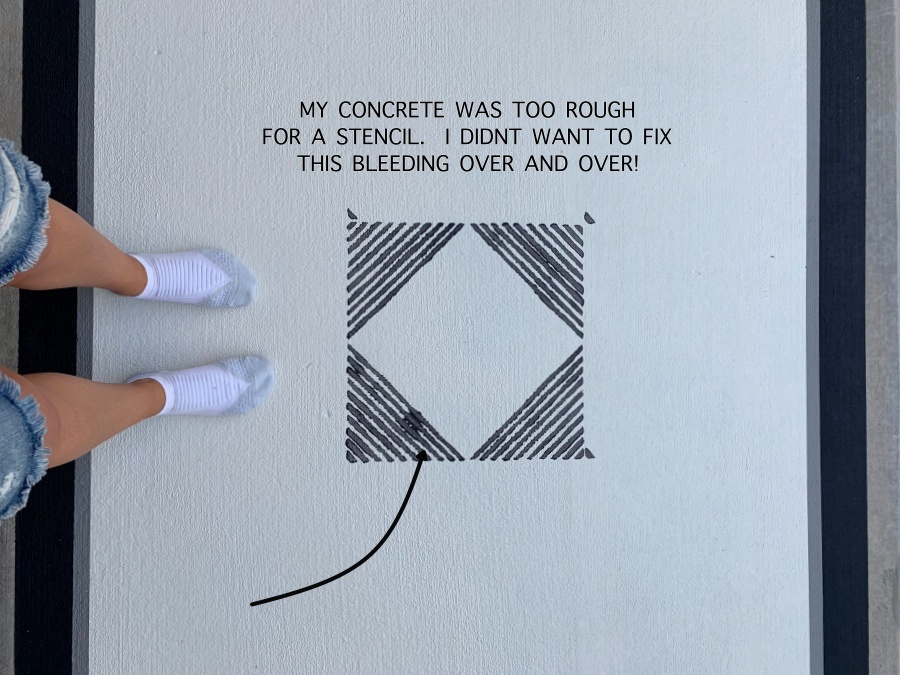
If you’ve been following my blog for awhile, you know I’ve used a stencil a time or two! I even painted & stenciled my old ugly tile to achieve a cement tile look, tutorial here. This time the stencil plan didn’t work out so well, so on to plan B. Lattice patio rug…and I like it even better than plan A.
Here is the BEFORE!
*This post is sponsored by FrogTape, but all options are my own. I actually reached out to Frogtape, midway through my project because I was so pleased with the results.
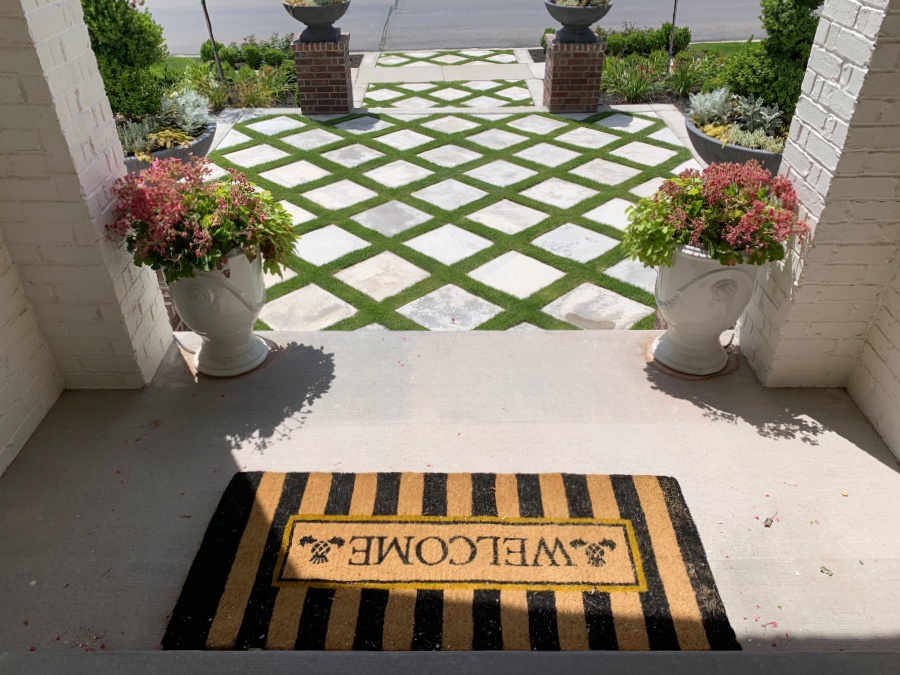
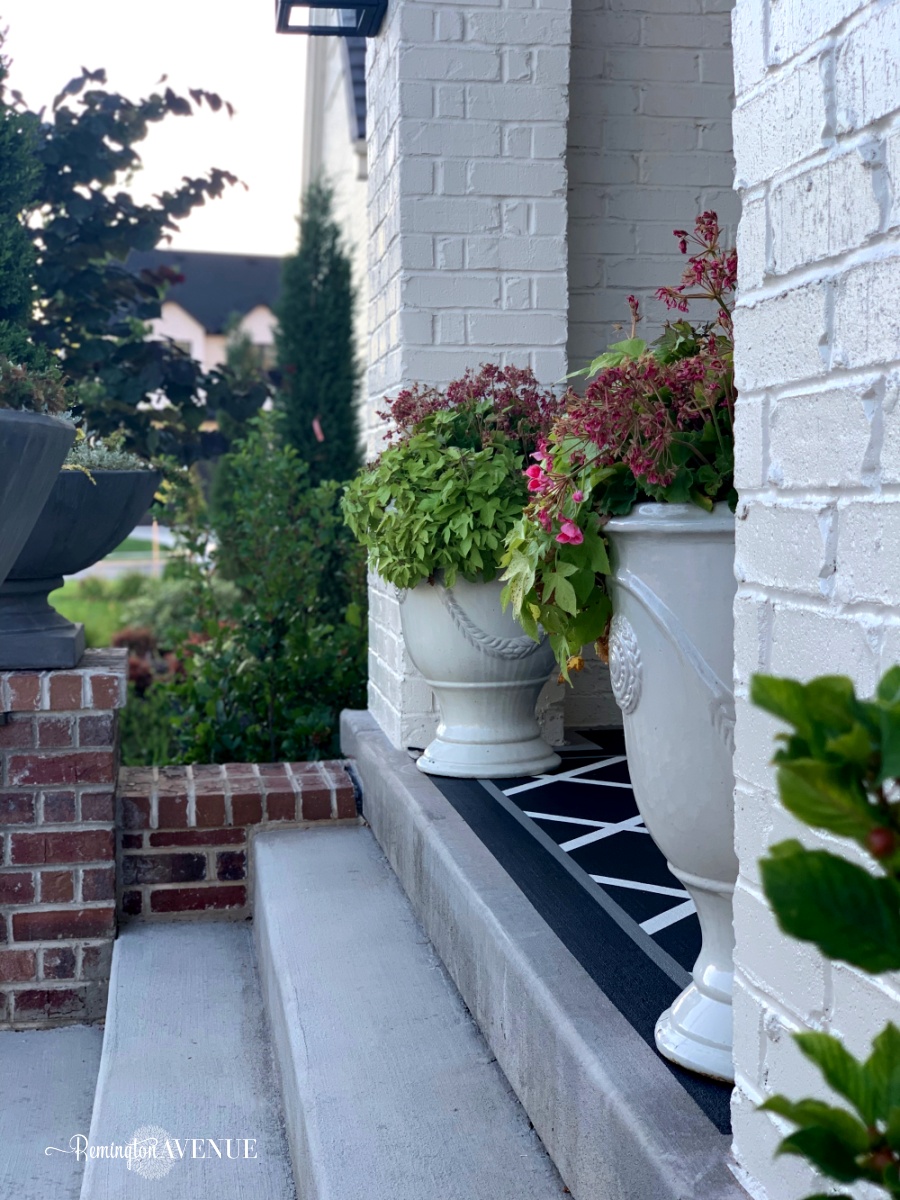
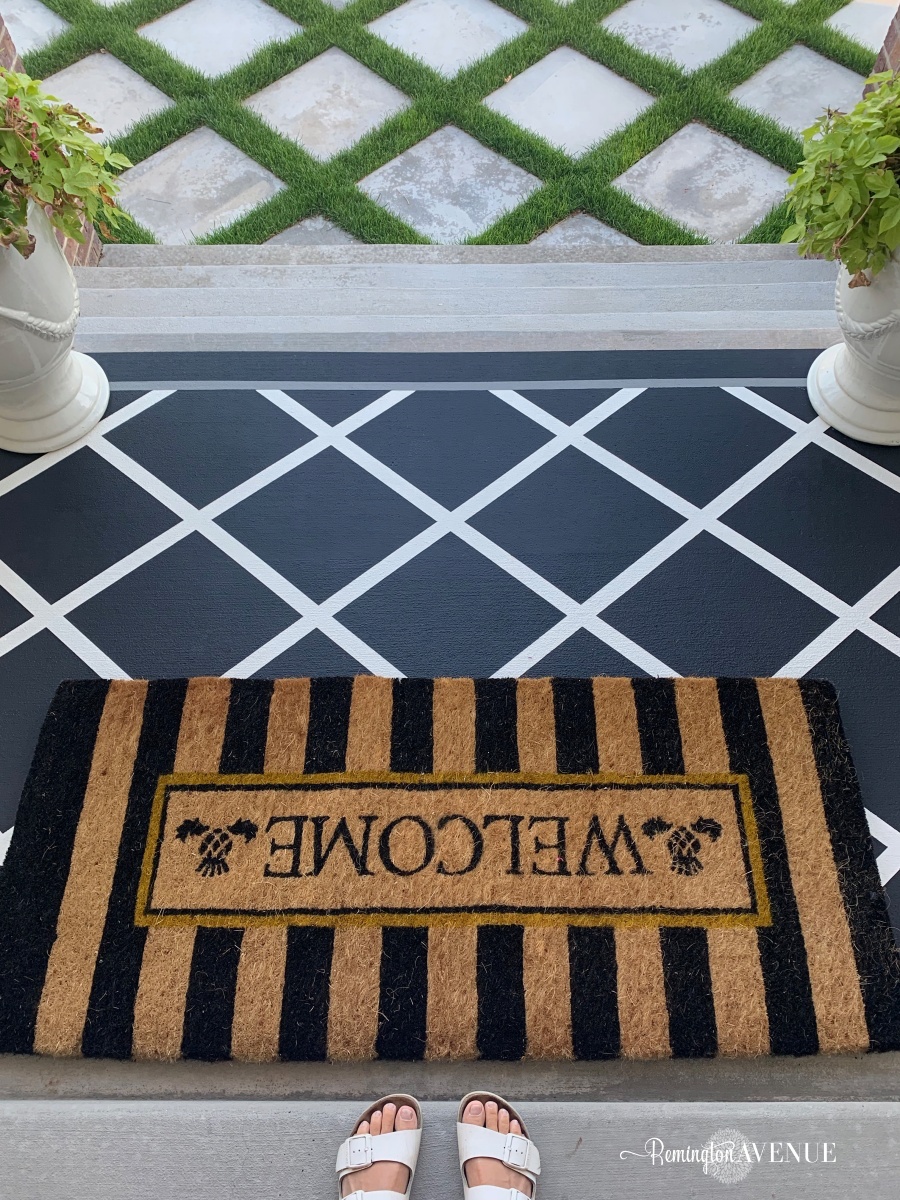
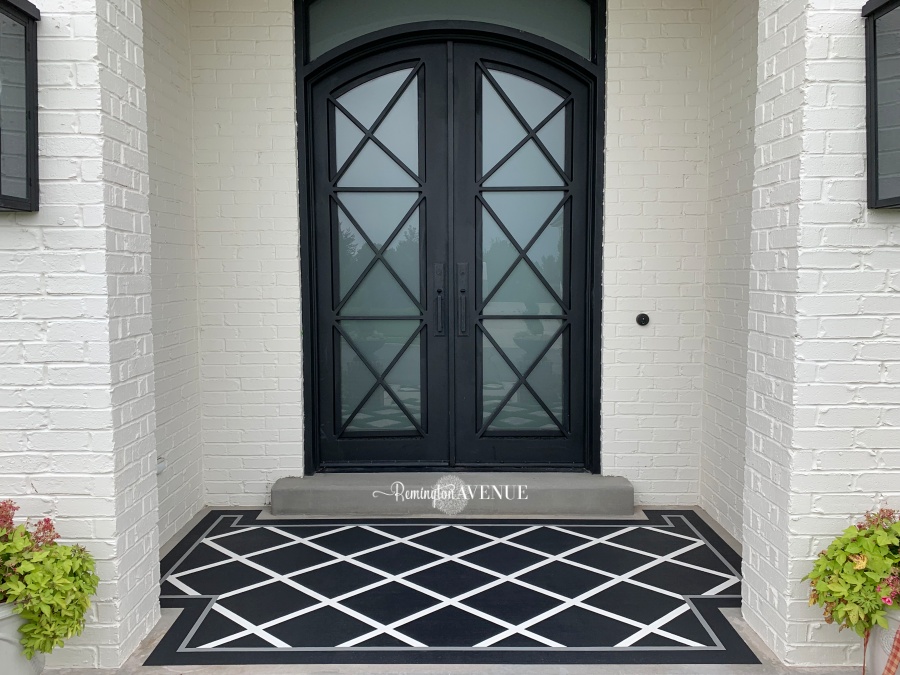
HERE IS THE AFTER!!
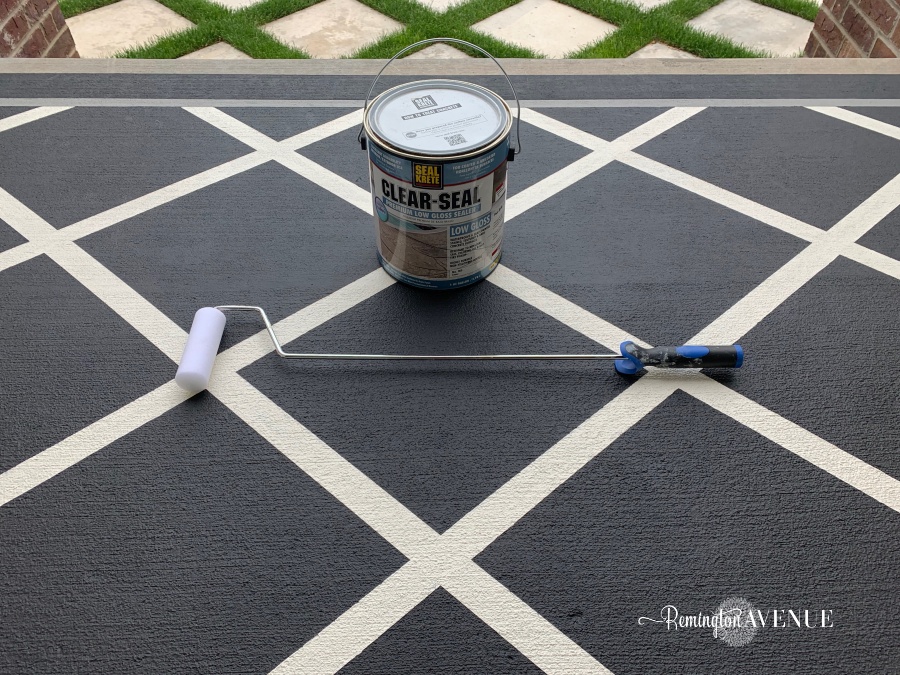
You can’t just use any old paint for a concrete porch. If you don’t use the proper paint, you’ll end up with a peely porch and a whole lotta waisted time. I used the same epoxy paint that I used on my painted driveway project, TUTORIAL HERE, and my painted tile project HERE. It has held up beautifully time and again. Fortunately, I still had extra paint from my driveway project so no money spent there.
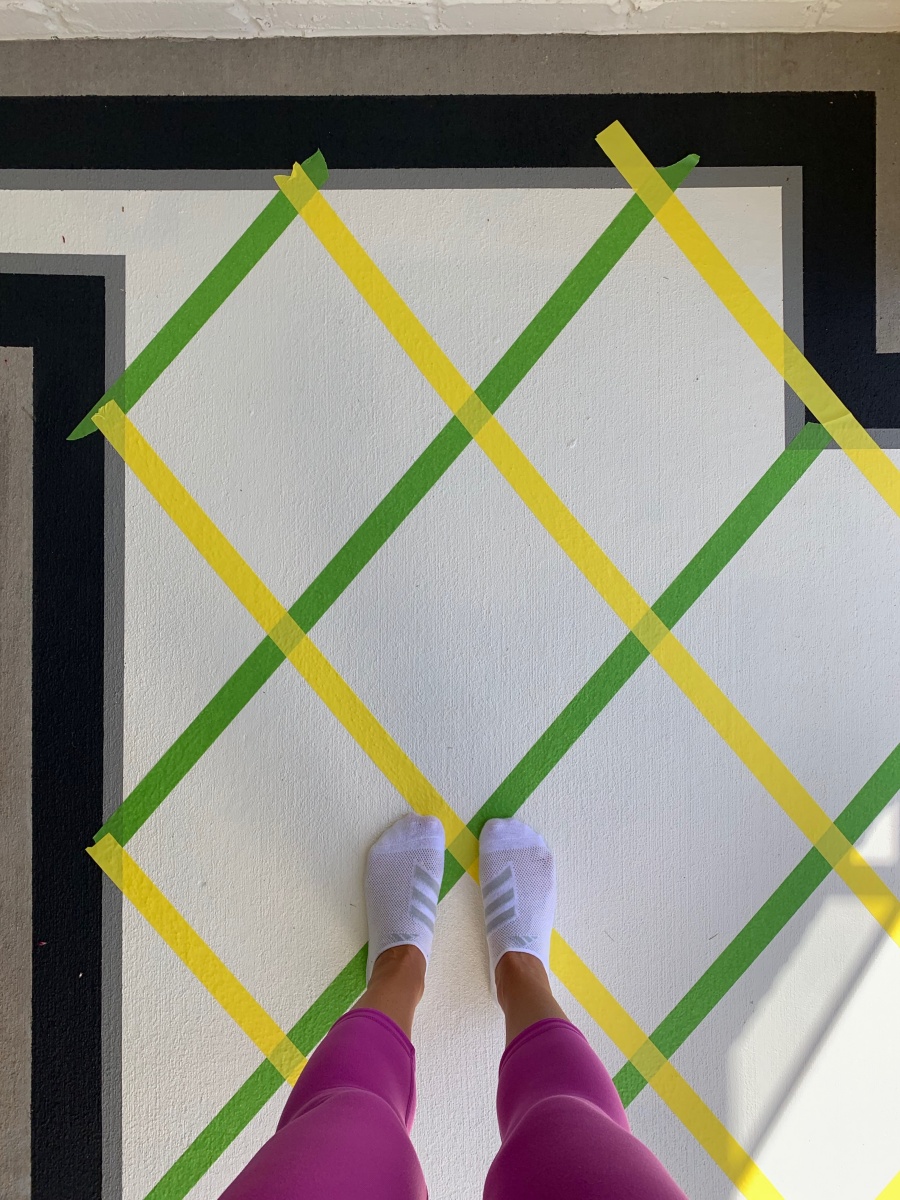
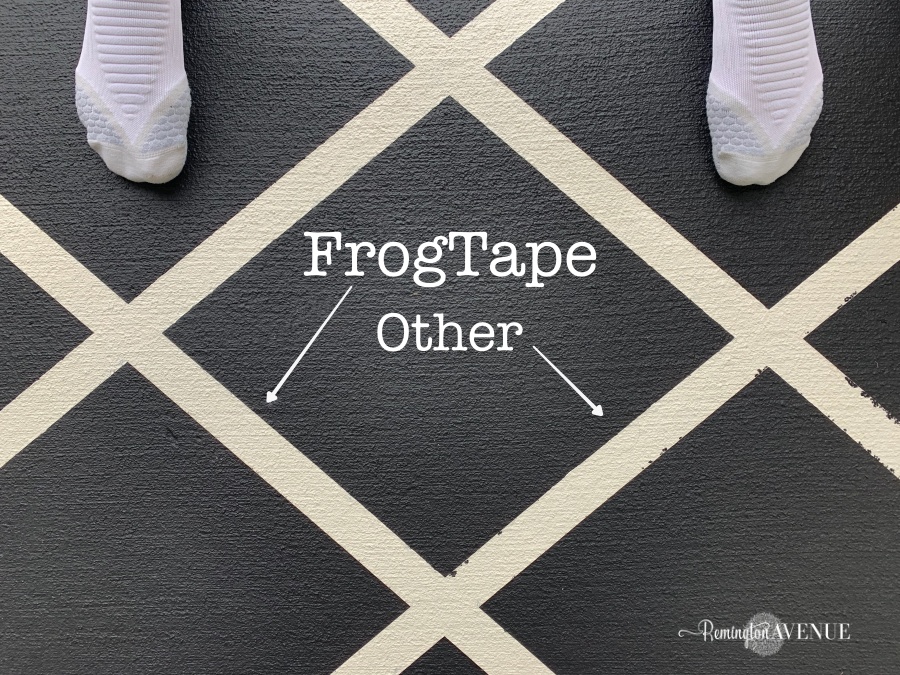
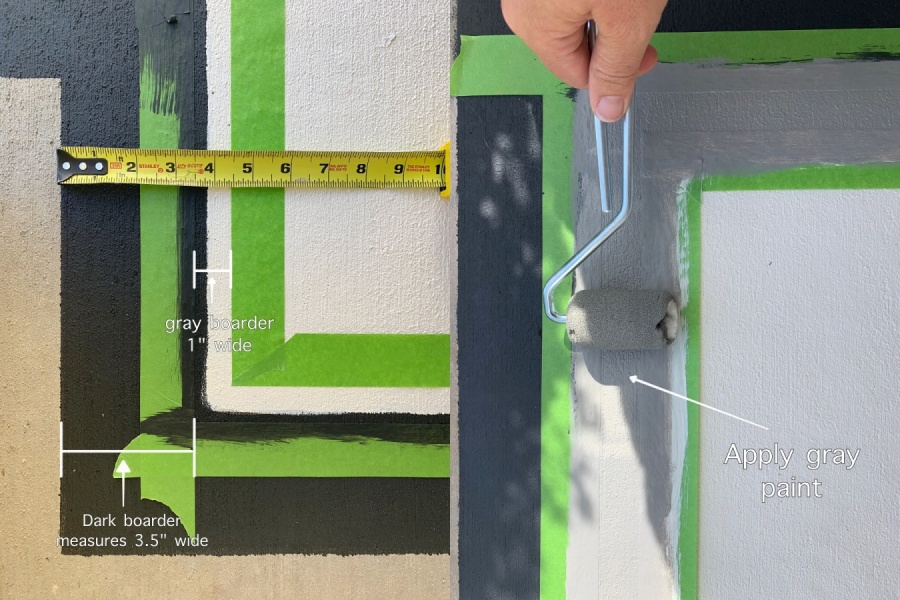
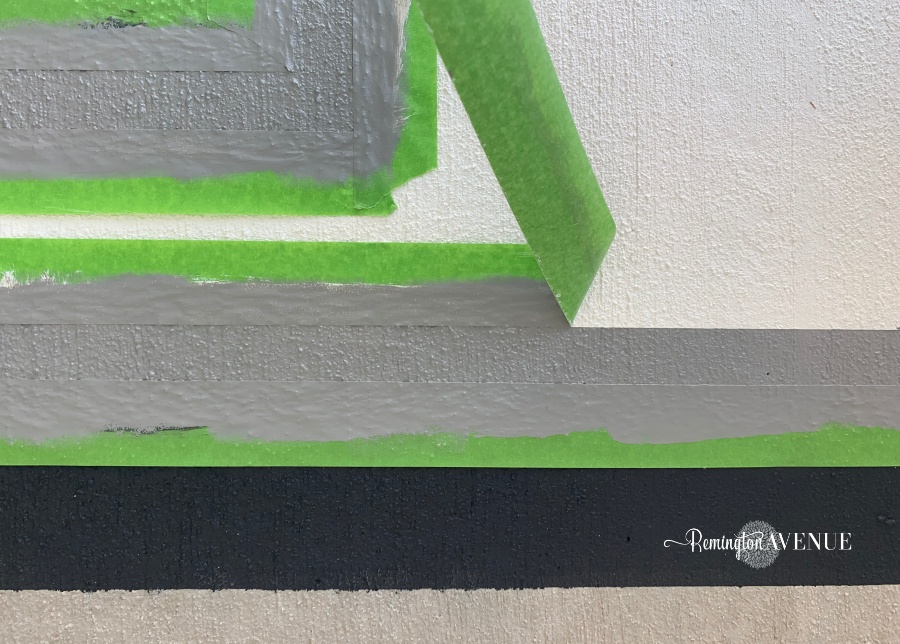
The only $10 I spent was on some frogTape and a competing brands tape for a little tester. I thought it might be helpful to know if the FrogTape was really that different than the other painters tapes out there. Well, I found out very quickly that it WAS – IS! I created the lattice design using both brands of tape- FrogTape is green, other brand is yellow. Here is the difference between the two! Crazy huh!?
How to paint your porch with a border rug design
Products you will need linked below


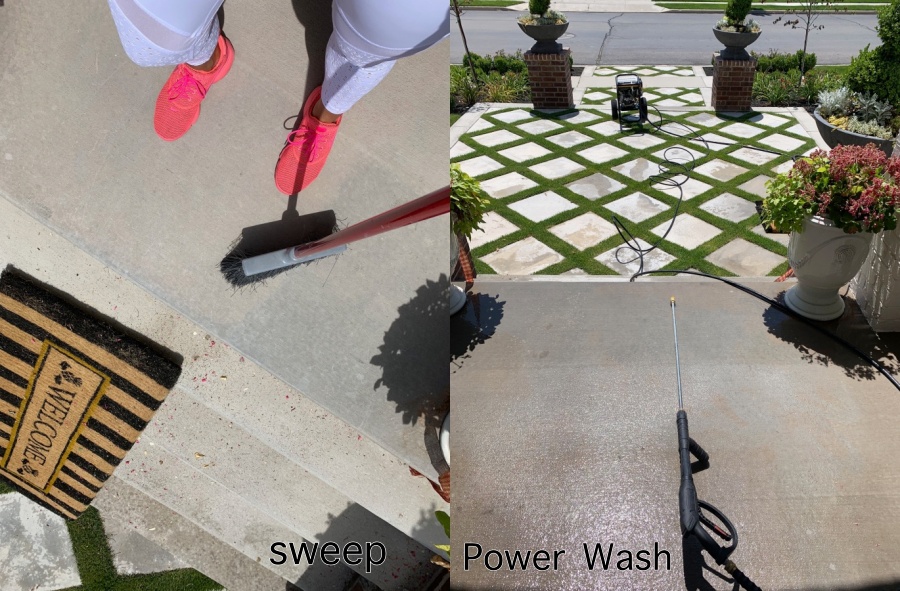
Prep – Sweep and power wash your concrete or wood patio before painting. Removing the debris from the surface will ensure that the paint adheres to the concrete with no peeling! Let it dry fully before applying any product.
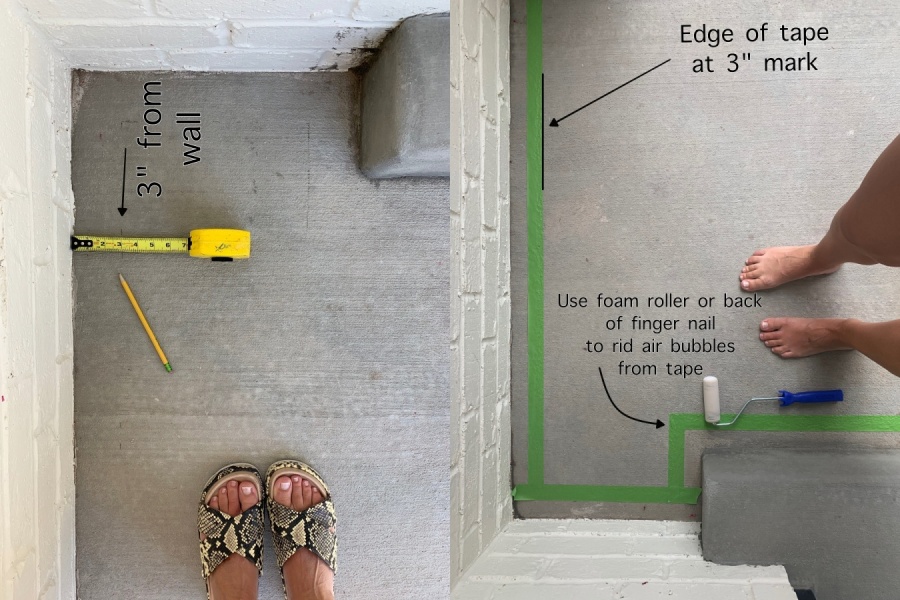
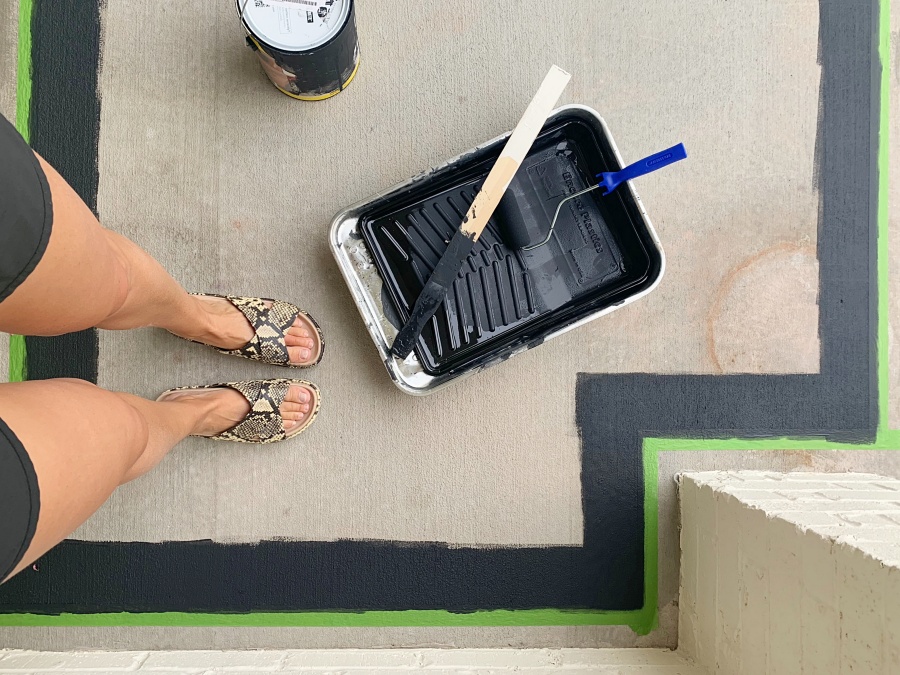
Border – Create your porch or patio rug border using frogTape. I measured 3 inches from my porch walls and laid out my rug border. Make sure to adhere the paint to the concrete using the back of your nail or a foam roller. This will get rid of air bubbles and help prevent the paint from bleeding. Paint the dark paint band about four inches thick all the way along the inside of the tape border. You won’t need any exact lines on the inside as it will get painted white.
Paint your base coat – Using the outdoor rated epoxy paint, I rolled on my first coat of white paint. I used a foam roller to apply all of my porch paint. You will need to apply 2-3 coats for full coverage. Let it dry fully over night before the next step.
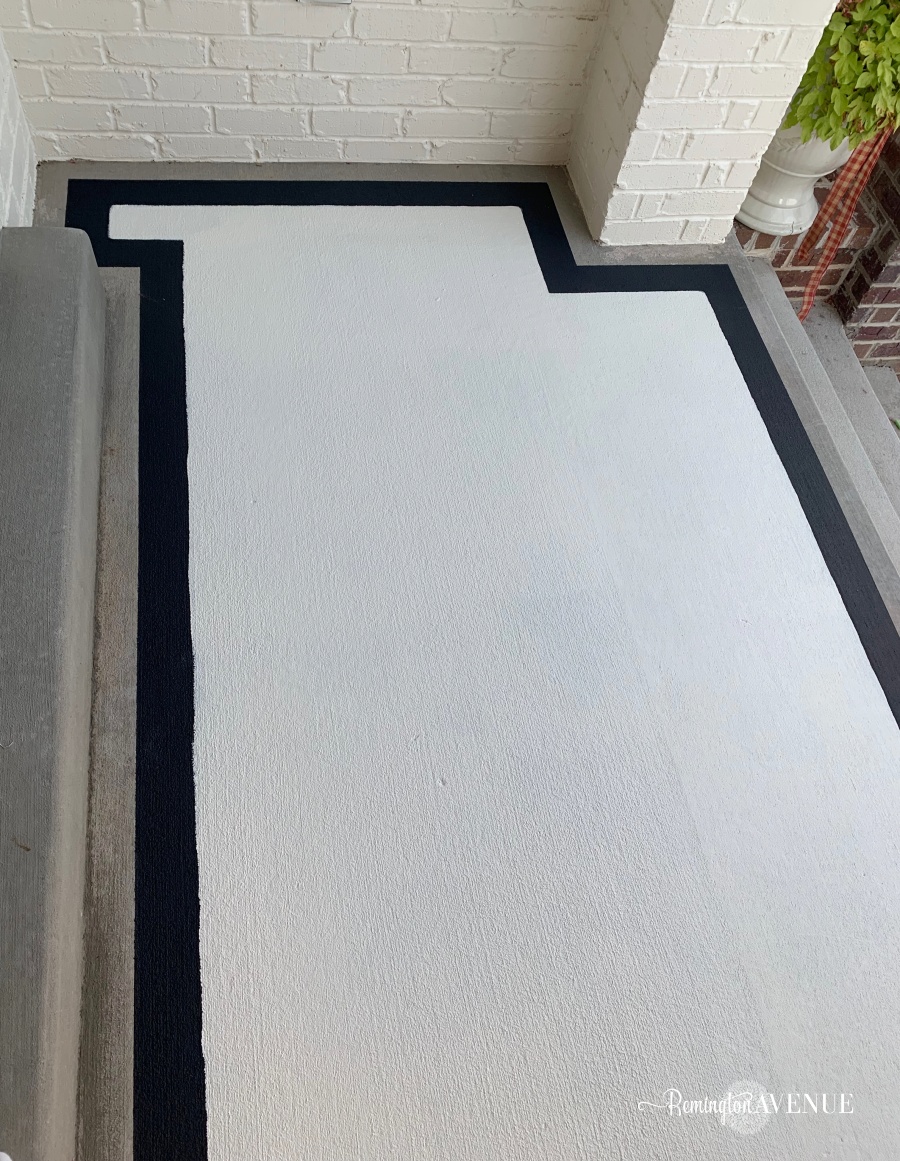
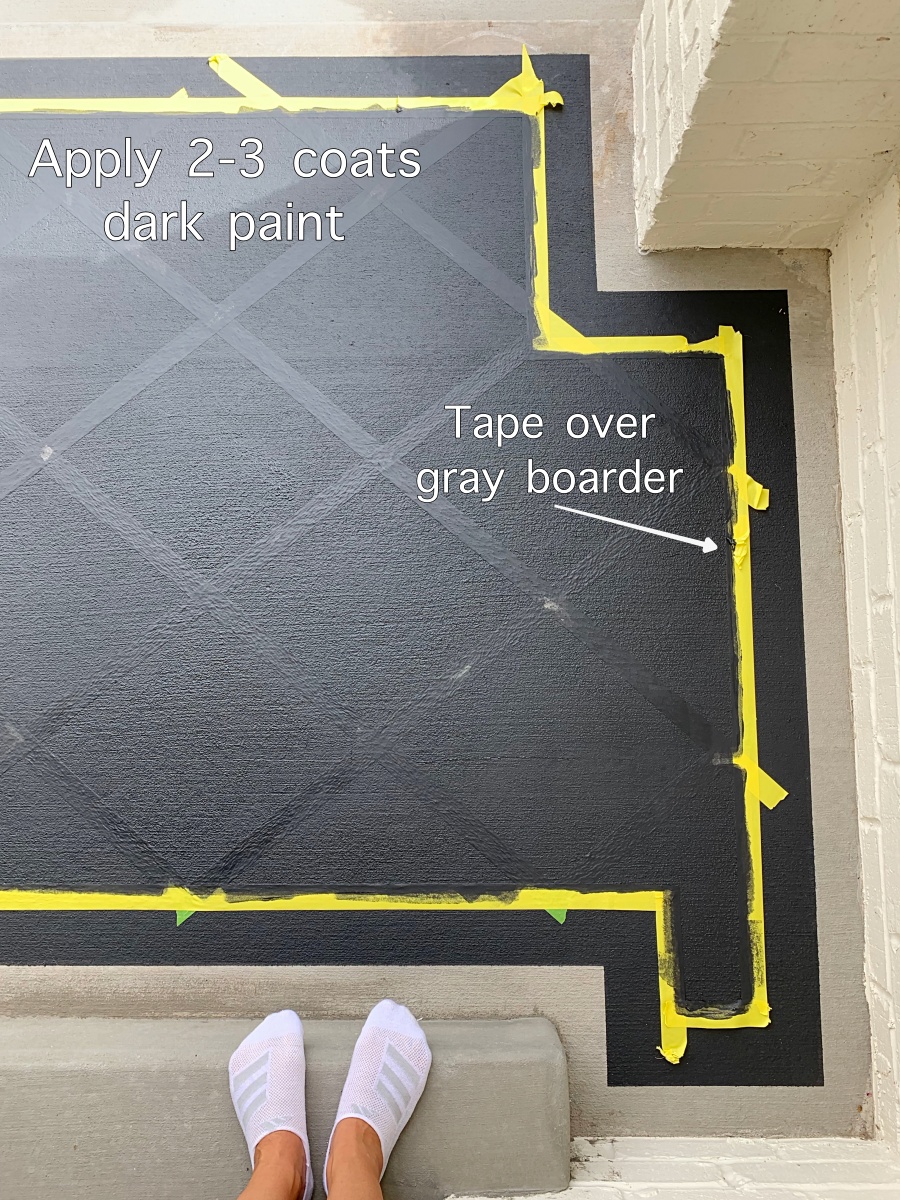
Second border – You’ll notice I added a secondary border 3.5″ inside the main dark border. The gray border is only 1″ thick and just adds a nice touch. Adhere the tape over the dark boarder with the inside of the tape at 3.5″. Then add a second strip of tape 1″ inside the other. Paint it gray. Note: You can use any colors you like, but for this tutorial I will explain how to create this exact look.
Remove all border tape – Remove all the border tape. Take you angled paint brush and fix any bleeding if needed. Let dry over night. Note: You could stop here if you’re just looking for a simple border mat.
How to add the lattice design to your painted rug
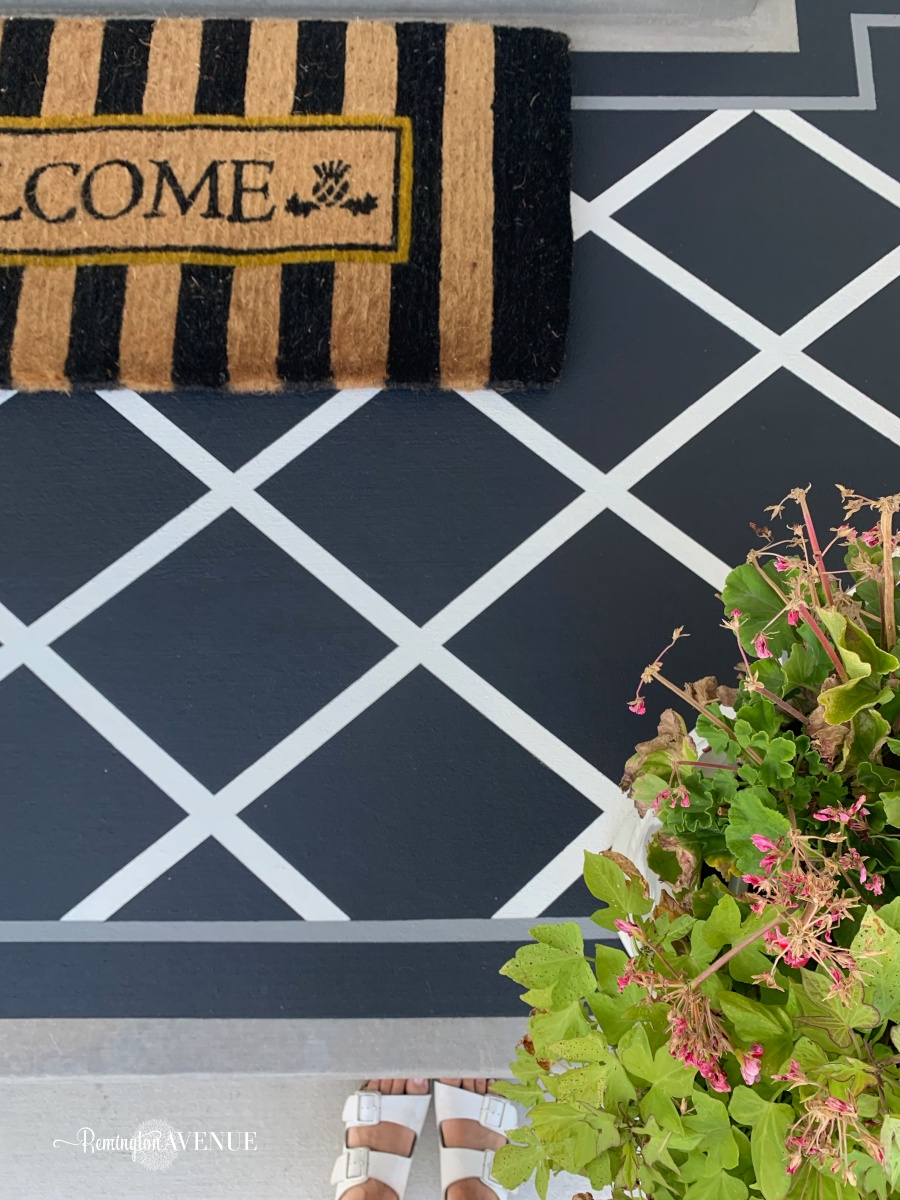
Tape out Lattice design for rug pattern– Using the tape, cover the gray border and adhere the tape using your nail or foam roller to rid air bubbles. Then take the same tape and run a full length of tape at a 45 degree angle starting at the center of the door and working it all the way to the outer border. Your first 2 strips of tape should create a triangle centered at the door like shown below.
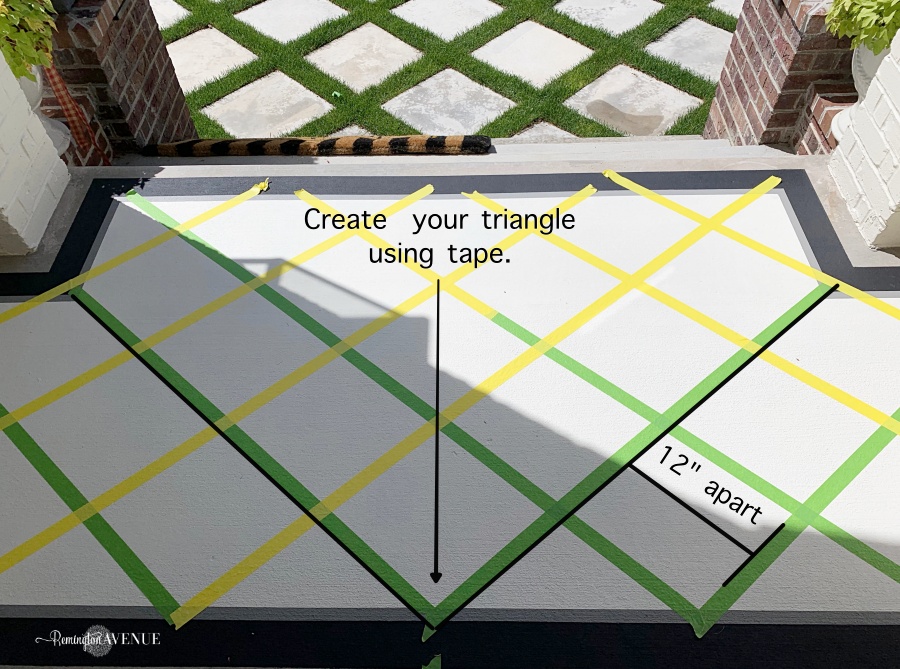
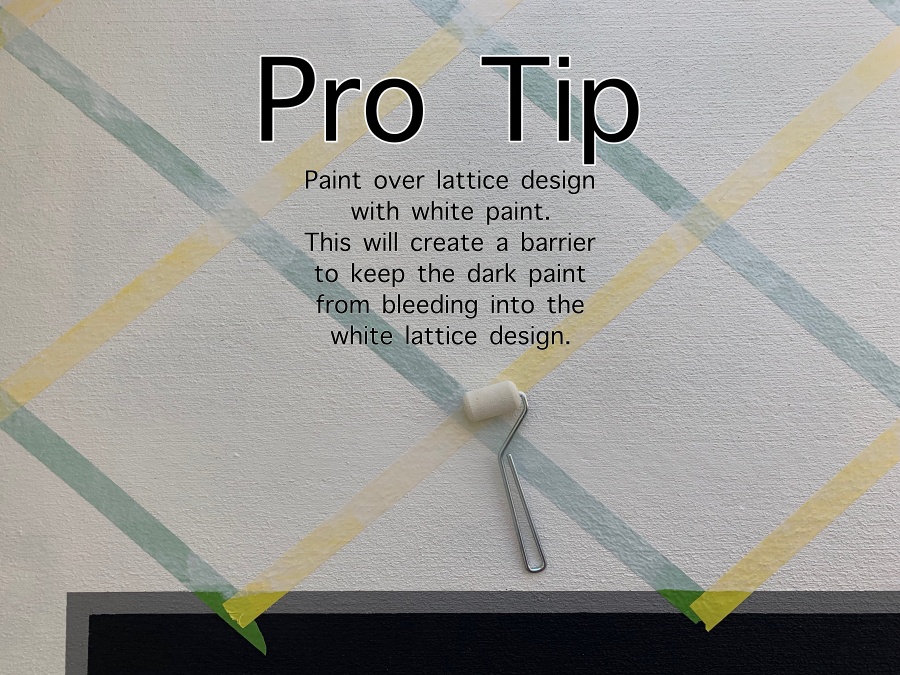
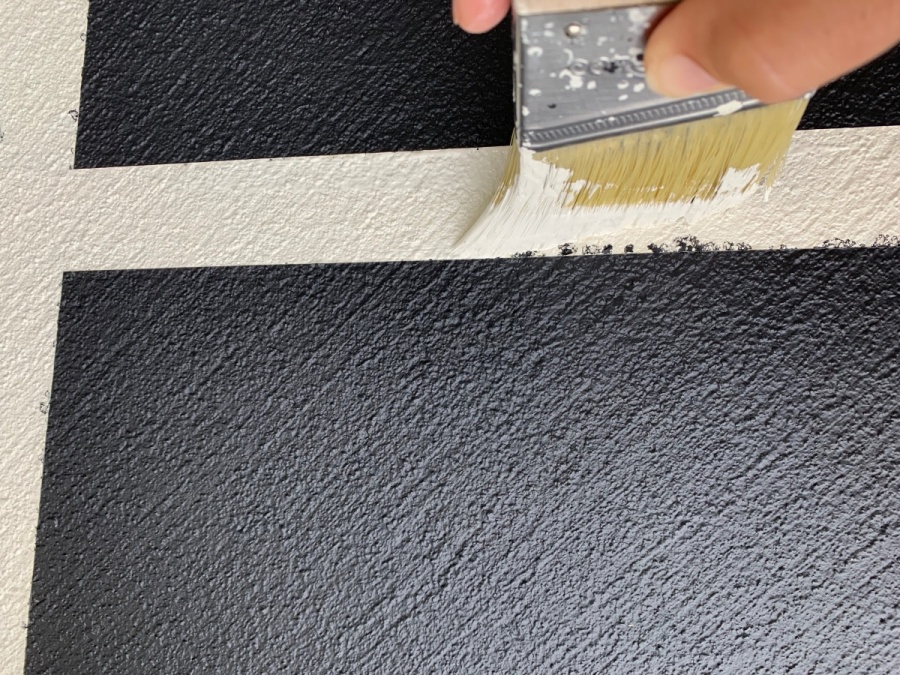
Then measure out 12″ from each strip of tape and lay out the entire lattice or diamond design accordingly. Once you have all the tape in place, go back over the edges with your finger nail or foam roller to rid of air bubbles. Follow up with a coat of white paint over each stripe of tape. This will create even more of a barrier preventing any paint from bleeding into the design.
Paint your top coat – Using a foam roller, apply the dark color over the entire inner area covering the lattice design. I applied 3 coats of the dark paint for maximum coverage. Remove tape carefully.
If you have any bleeding fix with an angled brush. I HAD TO GO BACK AND FIX THE BLEEDS FROM THE YELLOW TAPE LINES. Let dry overnight.
Apply your paint sealer – I applied 2 coats of the matte clear sealer with a foam roller. I only let it dry 1 hour between coats. Let dry overnight before placing anything on your porch.
Painted porch or patio rug
Here is the end result of all that work.

Like I mentioned above, my original plan of stenciling the pattern didn’t work so well. I have really rough areas on my porch that just wouldn’t take to a stencil. If you have a smooth porch or patio, this would be a fantastic solution. This particular tile stencil is called the Nola, but there are so many great designs to choose from. I still love the idea of using a tile stencil on a porch or patio. Click on the banner below to shop my favorite tile stencils.

Note: When you tape the border and design, don’t forget to apply the base color over each tape edge. This will keep the paint bleeding to a minimum. If you need more explanation on this painters tip CLICK HERE. I explain in detail how to get a super crisp straight line.
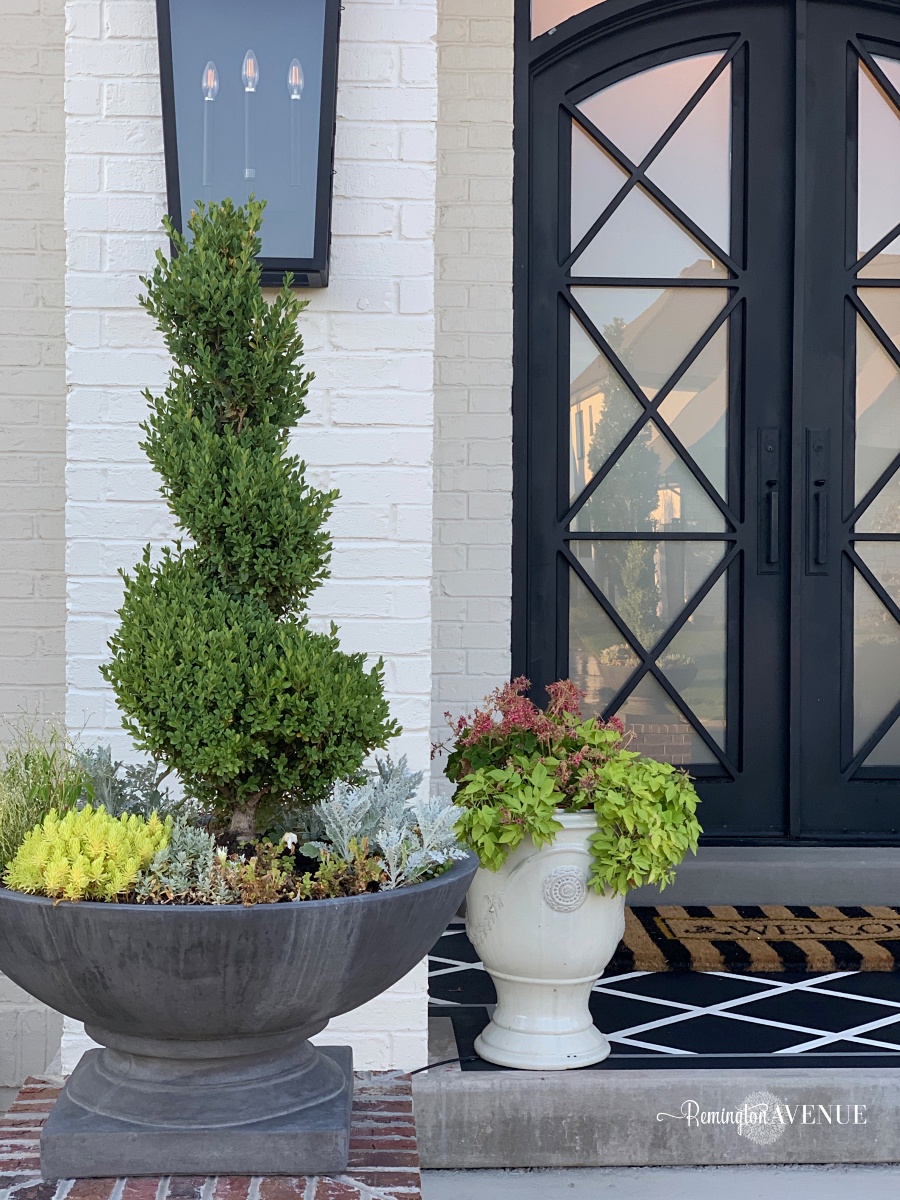
I absolutely love the added design to my porch. There are so many inexpensive ways to add curb appeal to your home using paint. Tag me in a photo or story on Instagram @remingtonavenue with your painted porch rug project so I can share!
If you’d like to see more of my outdoor spaces check out my French Country Patio reveal.
Check out another beautifully painted interior floor by my friend Deborah, Vintagesociety Co .

 Add to favorites or read later
I LOVE it!!! I’ve been waiting for this post and it’s beautiful!!
Thank you so much rosie!so glad you like it
YAAS!! I finally was able to see, read and fall in love with your painted patio rug!! I love your projects!!
C’est superbe Mysha!!!! I love it !!
Bravo!!!
Finally! It’s beautiful ?
Everything you do turns out beautiful!! I’m obsessed.
My patio has been stained, but it is wearing with time and I would love to paint over it! Is that possible with this kind of paint?
Yes it is, make sure to power wash and remove any chipping or flaking areas before painting over it.
Omg. I love this. You have so much talent.
Looks amazing, thanks for putting together this post
Wow! Looks great. Did you have them tint the epoxy black or does it come in black also? Thanks.
Yes it comes black. Buy the tentacle dark base and select color
Absolutely stunning. You are so talented! And I love your energy (very inspiring) 🙂
It looks really good! I want sure with the little sneak peaks throughout the process… thought it might be too busy, but it truly looks great! I do admire people with a vision. Nice work!
Thank you! I am so glad you like it.
I love your blog and site! Just wanted you to know there are several misspellings in your sponsored post. Boarder vs. Border and form instead of from…just thought you should know since it’s getting a lot of eyes on it!
Bravo!!! Thank you for sharing. I’d like to do something similar.
CC
Hi Caroline, be sure to tag me in stories or posts on Instagram! I’d love to share
It looks fabulous!!
Stunning job! it looks amazing!
My home is 25 years old I’d love to tackle on a painted porch project but would you have any tips on cement that has tiny cracks :/ would it still look as good painted? Thanks Mysha! <3
I would definitely fill the cracks with a concrete filler (found at hardware store). Then paint over it like any other patio!
This turned out amazing Mysha! I’m a frog tape fan all the way for our projects. Can’t wait to try this on my worn outdoor patio next spring.